To avoid these ads, REGISTER NOW!

Above 1200 Sq/FT The ASYLUM - Happy 40th Birthday to Me! (Est. 2005)

Wokspaces above 1200 squarefeet.
OP
S

shopnut

Well-known member
Joined
Feb 22, 2006
Messages
4,237
Location
Florida
akdiesel - Funny thing is, after the speakers blew I told myself I would just go without tunes until the next visit. That didn't last long. I have two speakers installed in the shop that get their feed from the apartment stereo, so I fired that up and I was rocking again. They don't sound nearly as good as the main shop system though, so I will be happy when it is back online.

Great to hear you made it safely, despite some bumps in the road (literally). I was starting to wonder about you because that's a long way in an unknown vehicle. My cycle buddies say there is a rough road leading to AK - I guess you found it!

Glad to hear you found a pump to your liking. Generally, they are built with quality materials since they live out in the elements all their lives. I say let your son decide what to do with it and make a project you two can enjoy working on together. He strikes me as one that shares your passion for a job well done. Only good can come from that.

Omphaloskeptic - Man, I hope everything doesn't turn as crazy as I am! It interesting you brought up the "buggy" topic. I had a colony of ants take up residence in a DVD player out there years ago. I've been better with controlling the bugs lately, but who knows??? It's worth a look.

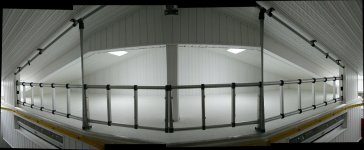
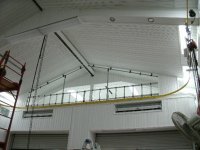
Actually, in my frenzy to make it to the stereo before something "popped", I did trip in the loft along the way. It could have ended badly (at least in my opinion). I need to remember that the cost of a stereo is not worth the price of another broken bone (monetarily or time-wise).

Very "cool" idea with a hidden fan. I do think it needs something, at least during these hot months. It doesn't help that I have it powered up the entire time I'm there, even when the data CD is paused while I sleep. It acted up at about 4:00pm and the shop interior was probably at its peak temp.

Years ago, I bought parts to build an enclosure for the stereo receiver, complete with cooling fan and filter to keep the nasty dust out. The parts are still lying on the shelf, but maybe I need to finally blow the dust off them. IIRC, the fan was a 12V computer fan, but I had the 110VAC adapter to go with it. I'll have to check if my receiver has the 110 outlet on the back since that is a slick way to control it. They used to be commonplace, but not so much anymore. I guess they figure the fancy remotes are capable of turning everything on together.

HOTFR8 - I'm still trying to figure out the cause, but overheated electronics is still number one on my list.

When I was young working in my Dad's shop, the old clock radio was king. It was all we needed to fill the silence. I wasn't real keen on the AM station Dad had it tuned to, but rock station came on when I was alone. I will say this about my current system, however - it is nice that no matter where I am in the shop, the volume seems to be the same level with speakers spread throughout the room. I guess I got kind of lucky with their position because I'm no expert on the audio stuff. The only problem is, replacement of failed equipment is can be costly and a bit time consuming if it's not down at ground level.

I've listened to this stereo system for the last seven years so I guess I can't complain too much. It really has been a small price to pay for the enjoyment it has given me. It is the fourth thing I turn on after checking in to the Asylum, right after the water heater, well pump, and apartment air conditioner. And it is one of the last things I turn off before I leave (I'm sure the neighbors hate me!). The computer serves as my digital music input as well sometimes, but it still requires amplification to make it carry throughout the shop.
 
To avoid these ads, REGISTER NOW!
OP
S

shopnut

Well-known member
Joined
Feb 22, 2006
Messages
4,237
Location
Florida
HOTFR8 - Our homeowner's insurance deductable is a lot higher than what the whole system costs, so no such luck with that. I’m really not sure it would even cover a failed piece of electronic equipment unless something like lightning fried it. (Does anyone know?) Usually, I just eat it on these types of situations because it’s hard to prove what caused it.
 
OP
S

shopnut

Well-known member
Joined
Feb 22, 2006
Messages
4,237
Location
Florida
MORE VINYL TRIMWORK…

The mounts for the loft railing were covered with vinyl.

This is the way they started out.

2113-Front-Loft-926.JPG 2114-Front-Loft-927.JPG

And here it is with trimming out the end caps. I didn’t bother covering the back side since they can’t be seen from below in the main shop.

2115-Front-Loft-930.JPG 2116-Front-Loft-931.JPG

I also covered up the columns where the rafter ties in and here is the finished product. The best thing about the work shown in this reply is it was all done with scrap material from previous jobs.

2117-Front-Loft-940.JPG 2118-Front-Loft-941.JPG

One last little detail - I labeled the removable floor wiring panel, just so I wouldn’t forget 5 years from now that easy access is available.

2119-Front-Loft-950.JPG
 
Last edited:

HOTFR8

Banned
Joined
Mar 2, 2007
Messages
24,498
Location
Castlemaine, Victoria. The Hot Rod Centre of Austr
I understand. Often the case and was just a suggestion. I had a car stereo fail some time ago and it was easier just to replace it. I asked about insurance and nothing came of it as it was about equal to what I had to pay for a new one. I still have a CD stacker but nothing to use it with now. The new system is MP3 compatable as most are now.
 
Last edited:
OP
S

shopnut

Well-known member
Joined
Feb 22, 2006
Messages
4,237
Location
Florida
HOTFR8 - I've spent a good bit of time lately converting all my various LP records, cassettes, and even some 8-track tapes to digital Mp3 format. On the wish list for my next receiver/amp is direct USB input so music can be played off of a USB drive containing my latest music. My TV has that function and it works pretty good.
 
OP
S

shopnut

Well-known member
Joined
Feb 22, 2006
Messages
4,237
Location
Florida
THE FRONT LOFT IS NEARLY DONE…

The loft is looking pretty complete up there, but there are just a few more details to take care of.

2120-Front-Loft-952.JPG

One detail was adding vinyl above the clerestory window.

2121-Front-Loft-954.JPG

Here’s a shot showing the finished railing mount.

2122-Front-Loft-946.JPG

The wall/corner above the other clerestory window also got completed.

2123-Front-Loft-955.JPG

I also installed all the vinyl down to the 10’ level where the silver tileboard will start.

2124-Front-Loft-959.JPG 2125-Front-Loft-962.JPG

All that’s left now is the aluminum angle that trims out the edge of the loft floor. I’m getting really close to calling this loft project complete!
 
Last edited:
OP
S

shopnut

Well-known member
Joined
Feb 22, 2006
Messages
4,237
Location
Florida
Vernmotor - I hope you brought your shades!

akdiesel - That's not good because the Chevelle has a tendency to blow some smoke.

I remember the first time I parked that car in the Asylum. I backed it in so the tailpipes were blowing at the wall adjacent to the laundry room. I was doing my normal revving of the engine (we all do that with our musclecars don't we?) and I get out of the car and walk around to the back only to see ********* spots on the wall where the car had spit all over it.

It will be nice having the whole bottom part of the wall covered with easy cleaning tileboard someday.
 
OP
S

shopnut

Well-known member
Joined
Feb 22, 2006
Messages
4,237
Location
Florida
THE CONTROL PANEL GETS SOME LABELS…

Back to work on the front control panel face. I was driving the truck out to the shop on the next trip and it was time to wrap up my preliminary work on it at the city garage.

I cut the holes in the black decal material for the window LEDs because I needed to see them for placing the silver labels.

2126-Front-Control-Panel-141.JPG

I then pulled out my trusty Brother P-touch PT-65 label maker loaded with silver tape and started printing. I tackled the light zone labels first. I originally planned to have the “LIGHT” labels in a vertical arrangement on the sides, but there was only one font type available when printing vertical and I didn’t like it. So the decision was made to use the same “LIGHT” label everywhere and rotating as needed. The next two pictures show it both ways.

2127-Front-Control-Panel-139.JPG 2128-Front-Control-Panel-142.JPG

I continued to carefully add the silver labels, including labels for doors, windows and special lights. The two unlabelled switches are intended for controlling the panel illumination lights and 12V valve solenoid power for the windows.

2129-Front-Control-Panel-154.JPG

Here it is test fitted in the door.

2130-Front-Control-Panel-161.JPG

Here it is on its first trip out to the Asylum propped up on my tailgate to give you a sense of scale.

2131-Front-Control-Panel-167.JPG

I hung the panel up in its approximate position between the roll-up doors. I’m really looking forward to cleaning up that rats nest of wires behind it.

2132-Front-Control-Panel-172.JPG
 
Last edited:

Wingnut65

Well-known member
Joined
Apr 21, 2010
Messages
3,170
Location
Tampa Bay, FL
White icing on the cake really looks awesome!

Congrats on getting it this far. And that panel looks great. But, do I hear a Chevelle in the background???
 

akdiesel

Well-known member
Joined
Aug 8, 2008
Messages
2,617
Location
Wasilla, AK
shopnut

The panel looks great and when you get the post finished it will be that much better from what we have seen. Kinda reminds me of the Star Wars Space Station control panel.

Need to get the tractor beam started to take care of all those bugs.
 

Attachments

  • 1024px-ObiWan-tractorbeam.jpg
    1024px-ObiWan-tractorbeam.jpg
    70.5 KB · Views: 49
OP
S

shopnut

Well-known member
Joined
Feb 22, 2006
Messages
4,237
Location
Florida
Wingnut65 - Thanks. I like to consider myself on the home stretch now, but there's still quite a bunch of little stuff to do (and some big ones) before I can rest.

I've learned to ignore the whimpering of the Chevelle. Pretty soon it's just going to give up on me.

Vernmotor - That poor car has been begging for attention for about 20 years now! I just kind of teased it when I drove it down from Wisconsin 8 years ago. It actually thought it was going to get some much needed care back then - WRONG! Soon, I hope.

akdiesel - Thanks. I'm surprised the place hasn't burned down yet with all the temporary wiring on the wall right there. The panel face is done, but now I need to build whatever it is going to mount to. I have a couple ideas in mind, but mostly I'm going to wing it and see what happens.

:) Hey, that was a good reminder to set the foggers for those pesky bugs.
 
OP
S

shopnut

Well-known member
Joined
Feb 22, 2006
Messages
4,237
Location
Florida
SWITCHING TO T8 LIGHTS IN THE SIDE BAY…

The lights in the side bay were the first ones installed and back then, I didn’t care what type they were. But after buying that pallet full of T8 fixtures, I decided it was worth the time to replace all the T12 fixtures for commonality in replacement bulbs.

Back in February, I mentioned this swap job to my boss at work and he said he would take the old ones off my hands. I told him I probably wouldn’t get to it until the summer. Well guess what - summer is here already. I wasn’t quite ready to do this job yet, but these two fixtures were easy to get to without moving too much junk below. Besides, it’s not good to keep the bossman waiting too long. He's been good to me so it was time to return the favor.

Here it is with one fixture removed.

2133-Side-Bay-Lights-01.JPG

Here’s a closer look at the recess in the ceiling. I noticed the pocket was a tad bit bigger for the old then what the new fixture needed, so I had to shim it a bit and that added another 30 minutes to the job.

2134-Side-Bay-Lights-02.JPG

Here it is with the new T8 fixtures fully operational. The instant-on feature of the electronic ballasts is nice, although I can’t say it bothered me much waiting 1/2 second for the magnetic ballast T12’s to fire up. I’m sure there will be a lower power consumption with the new 32W versus the old 40W bulbs.

2135-Side-Bay-Lights-04.JPG
 
Last edited:

polexican23

Banned
Joined
Jun 11, 2013
Messages
2,168
Location
burbs-Illinois
Shopnut,

any chance you still have that panel excel file available. The link on reply#757 is dead. or atleast dead to me. And I did a quick search but nothing was found in the 109 glorious pages of this epic build.

btw, if your shop has as much detail as your postings.....holy smokes!!!!
 
OP
S

shopnut

Well-known member
Joined
Feb 22, 2006
Messages
4,237
Location
Florida
polexican23 - It seems forum member mpire no longer has the file on his server. No worries, there's always an alternate way to do things. Go to Reply #7 in this thread:

Does anyone want a FREE template for CIRCUIT BREAKER LABELS?

Member AussieDan made a slightly different version for us and I believe his link was still working, as of June anyway (Thanks Dan!). It should be pretty easy for you to modify to match your own panel.

Thanks for all your kinds words. Yes, both the build AND the thread has absorbed a lot of my time over the years. But it keeps me out of trouble. :eek:

attachment.php


attachment.php
 

R1chy

Well-known member
Joined
Sep 3, 2007
Messages
232
Location
Fairfax, VA
As a side note, my grandpa told me to always write the breaker number on the back side of the outlet/switch cover. It's surprising how handy that is. Then again, my panel looks nothing like the nice template above :)

What a great idea, thanks for sharing it. R1chy
 
To avoid these ads, REGISTER NOW!
OP
S

shopnut

Well-known member
Joined
Feb 22, 2006
Messages
4,237
Location
Florida
As a side note, my grandpa told me to always write the breaker number on the back side of the outlet/switch cover. It's surprising how handy that is. Then again, my panel looks nothing like the nice template above :)

What a great idea, thanks for sharing it. R1chy

That IS a great idea for the identifying the circuits and I’m going to shamelessly take it and run with it. :thumbup:
A word of caution though - we recently painted the whole interior of our house and the outlet/switch covers all ended up in one box during the job. I might consider writing the breaker number in the outlet box itself somewhere so I don’t have to worry about wall plates getting jumbled around to the wrong location someday. (Of course, I may be the only person to worry about such things :eek:).
Thanks for the tip rieferman!

Since we’re on the circuit labeling subject, I remember another panel labeling tip that I saw in GJ thread (sorry, I don’t recall the thread owner to give them credit). Once the main panel face plate is removed (and the fancy label with it), you still need to keep it in sight to identify the breakers and then count down the row of them to match it up with your label on the face plate. This person had also labeled the hot wires going into every breaker. A short section (~1.5” long) of the yellow Romex jacket with Sharpie writing was slipped on the wire before it was connected to the breaker. Simple and effective! That would have come in handy for me several times when I was shuffling circuits around inside the panel to group them better. It’s probably just good practice too for when more than one wire gets disconnected at a time in there to keep them identified.
 

Omphaloskeptic

Well-known member
Joined
Oct 11, 2008
Messages
2,346
Location
Ultima Ratio, Wa.
Hmmm, why do I think the trusty Brother P-touch PT-65 label maker is going to be put to work spitting out labels for each circuit's hot wire? lol

Do they make 'clear' shrink-wrap tubing for encasing line labels?

Once Shopnut has the AFCP wired and powered, he has just GOT to post a picture of it with no lights on (except the panel lights, of course) in the 'Garages at Night' thread. He'll be the envy of all who visit that thread and especially all the 'Star Wars' fans! lol
 

Attachments

  • Star Wars Control Room.jpg
    Star Wars Control Room.jpg
    129.7 KB · Views: 82
OP
S

shopnut

Well-known member
Joined
Feb 22, 2006
Messages
4,237
Location
Florida
Omphaloskeptic - Yep, the label maker may get a little workout. Probably first on the AFCP - there will be plenty of wires to try and keep identified in there. Don't want to have a fan start blowing when a light was supposed to turn on, you know.

I have some of that clear heat-shrink for wiring projects, but it's a pretty small size. I'm sure they make bigger diameter stuff though. I'm not sure if this is what you were getting at, but heat shrink would be a great way to secure a label lengthwise on a wire that doesn't quite wrap all the way around to overlap on backside - they sometimes tend to peel up and fall off. It sure would beat the Scotch tape I've used in the past, and look a lot more professional too. Good idea :thumbup:

I've never posted in the Nighttime thread yet. One of these days I will get some good pictures to post over there. (and of the AFCP too)

polexican23 - Glad to hear you got it. Just ask if there is anything else we can help you with.
 
OP
S

shopnut

Well-known member
Joined
Feb 22, 2006
Messages
4,237
Location
Florida
NEW SPEAKERS FOR THE SHOP STEREO…

The new speakers arrived and I was anxious so install them. I bought the same exact ones so there would be no problem (as long as my receiver didn’t freak out again!). I’ve been happy with them and at $40 a pair (delivered) the price is reasonable.

2136-Stereo-05.JPG 2137-Stereo-07.JPG

The 2 in the side bay mount low where there is the aluminum tileboard and I had painted the original ones black to match better. Rather than painting the new ones, I decided to just swap the woofers and see if that fixed the old ones. Success! Luckily, the mfr hadn’t changed the design in all these years and it was a simple exchange.

2138-Stereo-08.JPG 2139-Stereo-09.JPG

Here is one of the side bay speakers installed in its recess. The speakers sound really crappy (no base) until they are mounted in a housing.

2140-Stereo-10.JPG

And here’s another one mounted in the main bay. I just installed the entire new speaker in these two spots.

2141-Stereo-11.JPG

So now that I found out it is just the woofer that is blown in the old ones, it makes me wonder if I could find replacements to fix up the blown ones and end up with 4 extra speakers to install in my city garage.
 
Last edited:

Wingnut65

Well-known member
Joined
Apr 21, 2010
Messages
3,170
Location
Tampa Bay, FL
Great idea, rieferman on labeling the circuits. Stolen!

Nice swap on the speakers, shopnut. It is always fun to have a small easy project to scratch off the list. I am about to inherit our house sound system for the garage, an old Onkyo stereo receiver with Bose mini-cube speakers. Might be a little better than the boom box I have now sitting on the bus!
 

akdiesel

Well-known member
Joined
Aug 8, 2008
Messages
2,617
Location
Wasilla, AK
shopnut
I took your breaker label form and modifying it for my Square D panel. Thanks.
As for you speaker situation, I get things from mcmelectronics.com and they have speakers that may work for you.
 
OP
S

shopnut

Well-known member
Joined
Feb 22, 2006
Messages
4,237
Location
Florida
Wingnut65 - Yeah, it's good to have tunes out in the shop again without having to rely on my backup systems. I figured out the DVD drive is starting to go in the old Motorola receiver so I just ordered a replacement. I never had a DVD drive play at a slow speed before (like playing an LP record on the wrong speed) - weird.

Those older Onkyo systems are great. We are still running one for our main surround sound system in the house, with 20 years on the clock. (Of course, now that I bragged on it, it will probably explode tomorrow!). It still does a good job of driving those old Infinity speakers. I have a Sony waiting to replace it, but the Onkyo won't give up the ghost. I'm running it until it dies.

akdiesel - You are welcome - I hope you get some use out of those labels. The MCM place looks to be a good source for many things, including Molex connectors and parts. Thanks for the tip - I haven't stumbled on them before.

So are you going to get a couple of camping trips in this summer yet with that new home on wheels?
 
OP
S

shopnut

Well-known member
Joined
Feb 22, 2006
Messages
4,237
Location
Florida
FINISHING THE FLOOR EDGE TRIM ON THE LOFT…

I completed the center portion awhile ago, but it was time to add the lip over at each end of the loft floor overhang. I have no idea how many trips it took up and down in the manlift, but the battery hung in there through completion of both ends. I used my band saw to cut all the aluminum angle and I probably should have just hauled it up there to save some trips. My inefficient method had me adding one piece of angle and spacer board at a time, with at least one trip (sometimes two) down to trim them to the perfect length. What a pain!

Here is what I started with.

2142-Front-Loft-966.JPG

Work in process with two sections in place (and about 10 round trips on the manlift!).

2143-Front-Loft-967.JPG

One side done.

2144-Front-Loft-968.JPG 2145-Front-Loft-970.JPG

A repeat on the other side.

2146-Front-Loft-976.JPG

I had to cut out the top half of the angle where it passes under the white vinyl. Looking back, I should have just removed the vinyl and trimmed it back to allow the angle to be uncut, but oh well - it's done now.

2147-Front-Loft-977.JPG
 
Last edited:

Omphaloskeptic

Well-known member
Joined
Oct 11, 2008
Messages
2,346
Location
Ultima Ratio, Wa.
Shopnut, that aluminum angle are the 'sprinkles' on the icing of the cake! Just think of how you would feel after that job if you didn't have use of the man lift; your 'bionic' ankle would probably be screaming at you. lol

Can't wait to see the finished AFCP. You caught my drift about the use of clear heat shrink tubing for encapsulating the labels. I've never seen it in clear, so if you are able to source it, please post your supplier's link. Thanks!

You are one brave audiophile to hook a new woofer to a system that might take a prompt jump volume excursion at any time! I would strongly urge you to put that cooling fan to work pronto; no sense in tempting fate when you know you still have a problem. I'm awfully curious to know if there is any fried bug remains anywhere within the chassis of the main unit. You might even find a descendent of Admiral Grace Hopper's famous moth....

http://chemistry.about.com/b/2012/0...ce-history-september-9-first-computer-bug.htm

Good Hunting!
 

akdiesel

Well-known member
Joined
Aug 8, 2008
Messages
2,617
Location
Wasilla, AK
shopnut

Oh the afterthought. Oh well it still looks good even around the windows.
We areplanning a trip to Valdez for the silver run. Use to go there every year and take back around 50 silver salmon. Cleaning is a chore but I love fresh cooked and smoked salmon.
If we get enough I may be able to send some down.
We have had a large run of reds also.
 

djsadias

Member
Joined
Sep 12, 2011
Messages
16
polexican23 - It seems forum member mpire no longer has the file on his server. No worries, there's always an alternate way to do things. Go to Reply #7 in this thread:

Does anyone want a FREE template for CIRCUIT BREAKER LABELS?

Member AussieDan made a slightly different version for us and I believe his link was still working, as of June anyway (Thanks Dan!). It should be pretty easy for you to modify to match your own panel.

Thanks for all your kinds words. Yes, both the build AND the thread has absorbed a lot of my time over the years. But it keeps me out of trouble. :eek:

attachment.php


attachment.php

I can't seem to be able to download this file. Do you have another link?
 
OP
S

shopnut

Well-known member
Joined
Feb 22, 2006
Messages
4,237
Location
Florida
Omphaloskeptic - I remember those days of agony after 100 trips up and down the ladder. You know, I don’t seem to limp to badly after a hard work session at the Asylum. I don’t know if it can be attributed to fewer trips up and down the ladder, or that my foot is getting back to 100%. Probably a combo of both.

I looking forward to getting the wall finished up so the AFCP has something to mount on, but there are a few tasks to finish up high yet. One last rafter still needs to be covered and then the library ladder rail needs some finishing touches.

That Skycraft Surplus store discussed earlier has the clear heat shrink and that’s where I bought my last stash. Unfortunately, the clear doesn’t appear on their website for you to mail-order it (maybe I just can’t see it :)). A Google search indicated Radio Shack has it online but I don’t recall seeing it in the store.

During the last work session, I kept a small desk fan blowing in the general direction of the stereo and I didn’t notice it getting hot whatsoever. Before, the receiver enclosure was always very warm to the touch - enough that it heated up the wall paneling around it. I also turned the system off overnight and I’m sure that helped to. I took a look at the back of my receiver and no luck on the switched outlet. Too bad, because that would have been a slick way to power a small fan. Maybe there’s a power source inside the receiver that can power up a small computer HDD fan that I have.

Thanks for the computer bug history lesson - never heard that story. Ants took up residence in my CD changer years ago, so I believe anything is possible (and likely!). I probably should pull the receiver out of its hole and give it a good blast of air. Who knows what might blow out!

akdiesel - Thanks. We eat salmon about one a week, but it’s the grocery store variety. It’s not bad though. Does anyone enjoy the cleaning part of the fishing trip? I remember cleaning buckets full of perch when I was a kid - not sure if I ever want to do that again. The fishing part of it is always great though.

djsadias - Did you try the other link in reply #7 of the Label thread? People recently reported that it was still working. I’m sorry my original link is not working; I need to find another server to put the file on.
 
OP
S

shopnut

Well-known member
Joined
Feb 22, 2006
Messages
4,237
Location
Florida
AFTER OVER 2 YEARS, THE FRONT LOFT IS FINISHED…

I really wasn't sure if this day would ever come, especially when I was lying in the emergency room after that spill from the ladder! But perseverance sometimes pays off. Well, I’m not sure about ‘paying off”, but it definitely gets things finished.

I introduced the concept of a front loft way back in March of 2011 (although it had been on my mind for much longer than that). Check this link out: Reply #513


Here’s a “Before” shot from the outside when I was figuring out the exact height of the loft floor.

attachment.php


And here’s the “After” shot with the new siding metal installed and the fake hayloft door moved down:

attachment.php


This inside “Before” shot dates back to July of 2011 and shows the temporary library ladder framing being put into place:

attachment.php


And lastly, I will leave you with some “After” shots of the interior. Here’s a shot from below. The roll-up door covers sort of got rolled into this loft project. I will snap another one shortly when the scaffold rig is out of the way.

attachment.php


Here is a panoramic created directly by my camera.

attachment.php


And one last panoramic made from 4 photos stitched together.

attachment.php


There’s still a bit more work to do finishing up the porch ceiling below this loft, but I’m going to separate that out in my Task List so I may finally mark the Front Loft section as completely done. That’s not cheating, is it? :)

EDIT: Adding a few more pictures now that the scaffold has been moved out of the way...

attachment.php


attachment.php


attachment.php


attachment.php
 

Attachments

  • 2150-Front-Loft-985 Stitch.jpg
    2150-Front-Loft-985 Stitch.jpg
    137.7 KB · Views: 742
  • 2149-Front-Loft-980.JPG
    2149-Front-Loft-980.JPG
    135.8 KB · Views: 739
  • 2148-Front-Loft-978.JPG
    2148-Front-Loft-978.JPG
    141.7 KB · Views: 742
  • 2151-Front-Loft-991.JPG
    2151-Front-Loft-991.JPG
    138.2 KB · Views: 543
  • 2152-Front-Loft-992.JPG
    2152-Front-Loft-992.JPG
    132.1 KB · Views: 661
  • 2153-Front-Loft-993.JPG
    2153-Front-Loft-993.JPG
    130.5 KB · Views: 544
  • 2154-Front-Loft-994.JPG
    2154-Front-Loft-994.JPG
    143.8 KB · Views: 545
Last edited:

akdiesel

Well-known member
Joined
Aug 8, 2008
Messages
2,617
Location
Wasilla, AK
shopnut

Great work. And to think to think this has been done at those heights by one person.
Are you going to put some before and pics in you upstairs office to reflect back on?
 
OP
S

shopnut

Well-known member
Joined
Feb 22, 2006
Messages
4,237
Location
Florida
Vernmotor - It has been a long road so far - thanks for following along with every step.

akdiesel - Thanks. Yeah, the height really made some (well, most :() jobs a real pain in the ****.

That’s a great idea about the pictures up in the office. Side-by-side Before/After pictures would be entertaining for visitors (and for me to reflect back upon too). And maybe the collage pictures at the beginning of this thread could be blown up into some wall art. That reminds me, I’m about due for a new collage now that the loft is done.
 

Omphaloskeptic

Well-known member
Joined
Oct 11, 2008
Messages
2,346
Location
Ultima Ratio, Wa.
"There’s still a bit more work to do finishing up the porch ceiling below this loft, but I’m going to separate that out in my Task List so I may finally mark the Front Loft section as completely done. That’s not cheating, is it? "

Cheating? Nah, you are allowed to 'fool' yourself that a milestone is reached as proscribed in the 'Unofficial Garage Journal Forum' bylaws. It's just like filing an 'extension' for your taxes; they still have to be done but you've avoided being nailed by the April 15th deadline. The 'interest penalty' in your case is that every time you go to the Asylum, you will see the 'close-enough, sort-of, kind-of, almost-done loft project' and you will know in the back of your OCD mind that 'close-enough' is only good in two situations.....'Horseshoes & Hand Grenades'! lol
 

Vernmotor

Well-known member
Joined
Jan 12, 2008
Messages
1,318
Location
Mt.vernon oh
Vernmotor - It has been a long road so far - thanks for following along with every step.

akdiesel - Thanks. Yeah, the height really made some (well, most :() jobs a real pain in the ****.

That’s a great idea about the pictures up in the office. Side-by-side Before/After pictures would be entertaining for visitors (and for me to reflect back upon too). And maybe the collage pictures at the beginning of this thread could be blown up into some wall art. That reminds me, I’m about due for a new collage now that the loft is done.

I have enjoy the ride ! :)
 
To avoid these ads, REGISTER NOW!
Top Bottom