To avoid these ads, REGISTER NOW!

48x36 garage/apartment

jopickens

Well-known member
Joined
May 29, 2009
Messages
176
Location
Grafton, WV
Hello - I've gleaned a lot of great info. from this site over the years especially during construction of my 40x64x16 shop (much left to do here but it's functional and warm in the winter).

shopnosnow.jpg
shopsnow.jpg


Now it's time to build a garage to park in as well as finished space for overnight guests (i.e. ~900 sq. ft. apartment).

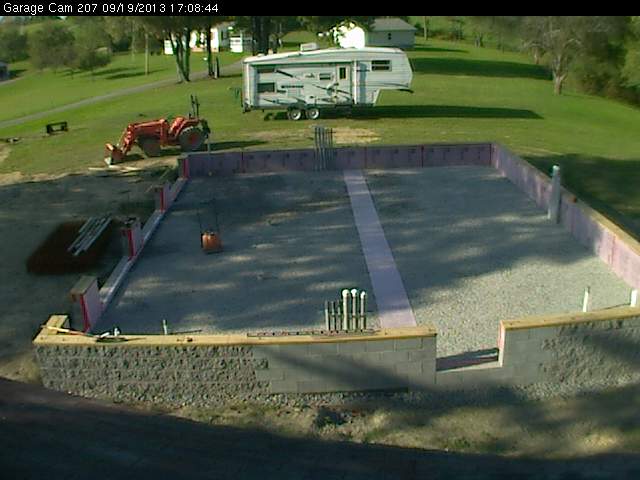
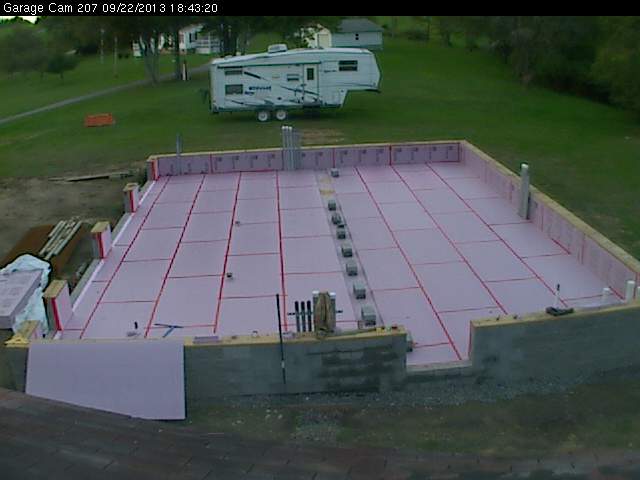
Here's an quick sketch from way back as to what I imagined I would eventually build. It's evolving as I go, nothing set in stone as far as the design ('cept for the 13yd footer and 517 CMUs that are now core filled :cool:

20120122pickensgarage36x48wApartment18x48.jpg


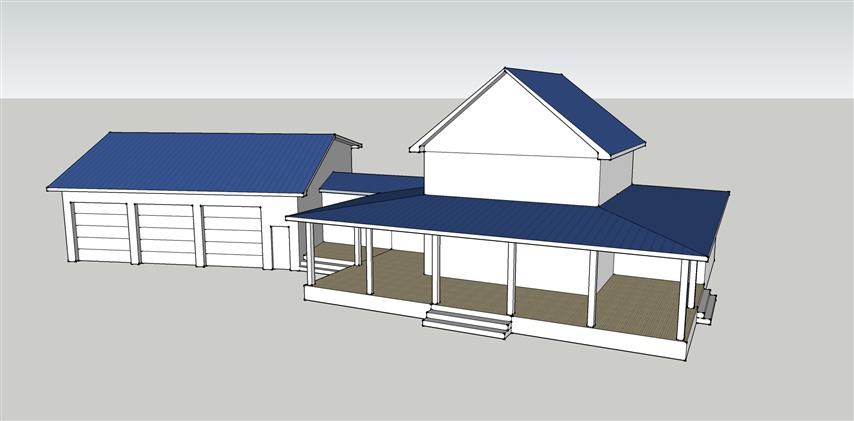
Here's an even older quick sketchup shot of how I imagined tying this garage/apartment into our existing farm house (post remodel of the farm house itself).

32x40garageRaisedRoof.jpg


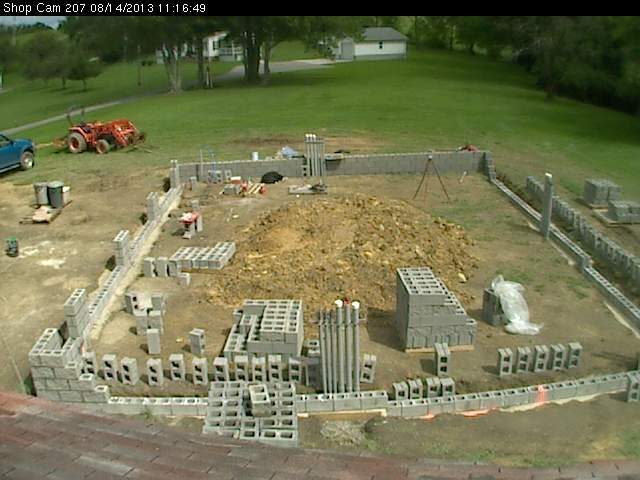
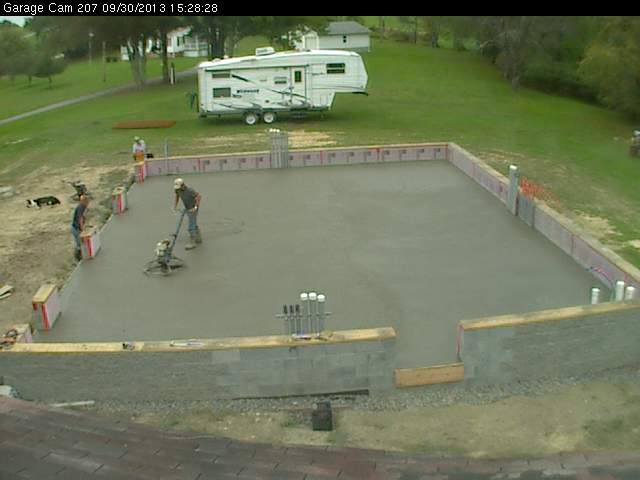
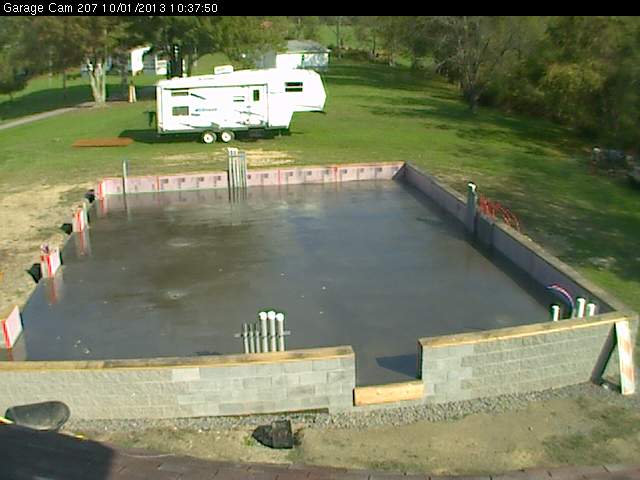
I've been plugging away for a few weeks now... putting materials I have been saving for years to use, but not skimping on what's important (to the limits of my knowledge - hence, hopes of guidance from the masses going forward).

Josh
 
To avoid these ads, REGISTER NOW!
OP
J

jopickens

Well-known member
Joined
May 29, 2009
Messages
176
Location
Grafton, WV
After taking the teeth off the mini-excavator bucket and scraping out the sediment/muck - my 10" thick footer quickly grew to 13".

rebar1.jpg


rebar2.jpg


concrete1.jpg


concrete2.jpg


concrete3.jpg


concrete4.jpg


And my total concrete overage for the 13yd footer pour... accurate calculation or just lucky??? :beer:

concrete5.jpg


Josh
 
OP
J

jopickens

Well-known member
Joined
May 29, 2009
Messages
176
Location
Grafton, WV
After scrubbing off the footer we squared things up and started laying block... (because it rained yet again... )

block1.jpg


block2.jpg


block3.jpg


Josh
 
Last edited:
OP
J

jopickens

Well-known member
Joined
May 29, 2009
Messages
176
Location
Grafton, WV
Day two of block... Prior to starting the second course I drilled the footer @ 4' intervals so I could epoxy in vertical rebar after the block was finished. Neighbors are helping me - thought I would help everyone out by eliminating the need to heave 'em up and over the reinforcing rods. :thumbup:

Pic from pre-lunch... we finished it up that evening. 517 CMUs, most of which were split-face etc.

blockday2.jpg


And a pic from the 2nd story the following morning.

blockfollowingmorning.jpg


Josh
 
OP
J

jopickens

Well-known member
Joined
May 29, 2009
Messages
176
Location
Grafton, WV
Cleaning things up...

epoxyrebar.jpg


cleanup1.jpg


cleanup2.jpg


And here is where it sits... (minus core filling the block Saturday afternoon).

48x36garageapartmentfoundationsmall.jpg


Josh
 
OP
J

jopickens

Well-known member
Joined
May 29, 2009
Messages
176
Location
Grafton, WV
Slab question...
5" slab w/pex, 6ga. wire mesh, 7" thick 1' out from perimeter with two runs of #4 rebar 2" off bottom of slab.

My current plans for slab insulation are 2" thick Foamular F-250 under entire slab with 3-1/2" thick Foamular F-150 around perimeter (a layer of 2" and 1-1/2" foam glued together).
Perimeter slab foam would extend from the top of the footer, up inside of block wall, and level with the top course.

Question - do I tape the seams of the foam for a vapor barrier or lay down 6mil poly? Or both (or something else)?
And if the poly sheeting is part of the solution should it go under or on top of the foam?

Thanks,
Josh
 
OP
J

jopickens

Well-known member
Joined
May 29, 2009
Messages
176
Location
Grafton, WV
Thank you - should be fun! I've been buried in research and material quotes for the past week. Should get the SIP panel wall package and most of the other wall/slab supplies ordered tomorrow.
Josh
 
OP
J

jopickens

Well-known member
Joined
May 29, 2009
Messages
176
Location
Grafton, WV
Didn't rain today for a change... Drains are in and vertical foam (1-1/2" + 2" sheets) is underway.

verticalfoam.jpg


Floor drain trap I glued up w/stub-up for cleanout...

floordraintrap.jpg


Easy way to scratch out a wee bit of a ditch without disturbing too much soil.

floordraintool.jpg


Three of the four drains... another small one in the rear as well.

floordrain1.jpg


Rest of the foam, gravel, and sill plates on the agenda for tomorrow. Happy Labor Day!

floordrain2.jpg


Josh
 
OP
J

jopickens

Well-known member
Joined
May 29, 2009
Messages
176
Location
Grafton, WV
Eric - you hit it, the vertical insulation is two layers. First is Foamular F-150 1-1/2" thick against the block - which is fronted by the second layer of Foamular F-250 2" thick for a total of 3-1/2" around the perimeter of the heated slab. It also insulates the 20" of block wall exposed above the slab up and to the point it meets the 8-1/4" thick SIP wall panels.
It's getting capped with a 2x12 pressure treated sill plate. I'll let the sill plate run out into the interior of the garage covering the top of the foam panels. I don't currently have a solution for covering the 20" of foam that will be visible from the inside of the garage. Had planned to paint it white with everything else when I get it water tight.
I've been 'sticking' the foam to the block and to each other with some old/left-over cove base adhesive a contractor threw away on a commercial building job near where I work. Under the slab will be a single 2" thick layer of F-250. I'm only using it in the vertical application because I could get it as cheap as F-150 2" thick - go figure (and 2" F-150 was out of stock anywho). I'm taping all the seams with the Venture construction tape mentioned above. Any suggestions would be more than welcome - I'm a network engineer by trade but enjoy researching/designing/constructing on my own when time permits. i.e. no professional building background or experience here. ;)
Josh
 
To avoid these ads, REGISTER NOW!

NUTTSGT

Super Moderator
Staff member
Joined
Sep 14, 2009
Messages
50,953
Location
Northern Central Ohio
I wouldn't just paint the foam white. It'll get banged into in the future, I'd try to cover it some how. Maybe set something down like a PT board for the moisture and then some metal siding or something similar on top of it.
 
OP
J

jopickens

Well-known member
Joined
May 29, 2009
Messages
176
Location
Grafton, WV
Understood - actively thinking about this now due to my issue at the overhead door openings. If I run my standard 3-1/2" of foam on the inside of those block walls (32" wide between the doors) it leaves that much offset for the standard 2x6 that the garage door track screws to. I need to post a pic to get your guys input as to how I could construct this...
Josh
 
OP
J

jopickens

Well-known member
Joined
May 29, 2009
Messages
176
Location
Grafton, WV
I will have to take a specific pic this evening to follow up on my comment above, but this should help make more sense how I'm letting a 2x12 overhang the 3-1/2" of foam placed on the inside of the block foundation walls. A 2x8 that the SIP wall panels sit upon goes down on top of the treated 2x12 sill plate.

foamsill1.jpg


foamsill2.jpg


foamsill3.jpg


foamsill4.jpg
 
OP
J

jopickens

Well-known member
Joined
May 29, 2009
Messages
176
Location
Grafton, WV
Ah yes... that 2' wide row of foam is below the rest. It's allowing me an 8" thick rebar reinforced "footer" down the middle to bear the weight of the 2nd story floor support columns (rest of the floor is 6"). When I initially placed it level with the surrounding gravel... we were forecasted to get copious amounts of rain Saturday. I didn't want that foam to 'float' out of the gravel embedded around it etc.
Josh
 
OP
J

jopickens

Well-known member
Joined
May 29, 2009
Messages
176
Location
Grafton, WV
Pouring concrete Monday morning... lots of work to accomplish this weekend.
Hauled our SIP walls home yesterday. Here's a shot while we stopped for lunch.

haulSIPwalls.jpg
 
To avoid these ads, REGISTER NOW!
Top Bottom