To avoid these ads, REGISTER NOW!

Garage Re-Organization....My Turn

Kevin54

MEMBER EMERITUS
Joined
Jan 12, 2005
Messages
29,341
Location
Urbana, Ohio
I hear you on the money.....of course if we all had the funds we'd all have a 100 X 40 shop attached to the house! :)

Now the fun part, figuring out where to put all the existing tools in the new boxes, and then trying to remember where I put them!

These boxes came with some strips that you can write on and slip into the handles - also some clear plastic covers for those strips. I think I'm going to print up some labels on the printer and slip them in instead, that way if I change things around later I can move the labels too.

I hear you on the money.....of course if we all had the funds we'd all have a house attached to the 100 X 40 shop.

Fixed it for you. :thumbup: One has to remember priorities :lol:

If you decide to put something on the back wall, have you given the French Cleats a thought? Or maybe one panel of the painted metal pegboard?

What you have done looks great though. Howzabout a picture from further back so we can get a better perspective of things?
 
To avoid these ads, REGISTER NOW!

nolimits76

Well-known member
Joined
Jul 11, 2013
Messages
959
Location
Oklahoma
I just wanted to drop by and say your re-build is looking great! The HF boxes look awesome in-place! Of course, I might be biased since I'm doing kind of the same myself.

You posted the first pic in my other thread, and I haven't responded yet, but I am curious about all the blocking down on the floor. I envisioned just laying a 2x4 down flat so I end up with a 1.5" profile. These would run 24" long (width of bench) and placed on the ends of the box and then (2) more equally spaced so a total of (4) was supporting each box.

Yours appear to be blocked up (lengthwise) on the front & back edges but from the first pic a single 2x2 appears to be holding the weight on the left and right sides. Maybe you have some better pics and/or explanation of the way you did it? I have a feeling it has to do with the way the bottom of the boxes are constructed, and the fact I don't have one in my garage to analyze.

Not criticizing at all. Just curious.

Lastly, the paint turned out nice. Your bench will pop with the stainless top. If you are so inclined I do think a black stripe would look nice separating the grey and white.


OP
J

Jagmandave

Well-known member
Joined
Nov 6, 2011
Messages
6,304
Location
Overland Park, Ks.
Whitefeather, I appreciate your kind words but - if I had to do it all again I'd do it differently, but only because my floor is so unflat and unlevel!

What I did was measure the amount of pitch of the floor using one 8 ft 2X, then took my saw and cut one 2X4 at that angle, then I notched it so the box would rest on both the long edge and the cross pieces under the box, I also screwed some cross pieces where the box cross tubes were for additional support, then I added a 2X4 flat under the 2x"s on edge, to get the height right. It was a PITA to do it this way, and in the end I wound up shimming it anyway.

Were I to do it again on such a miserable floor, I'd use leveling feet, and just build a kick panel for the upright supports for the top to sit on, and to keep stuff out from under the boxes.

After all this, there's a pretty good chance I may go back and do that anyway....as I'm not completely happy with how it turned out. So far my cost is just a few 2X4's and a lot of time and effort.

With my floor as uneven as it is, with leveling feet I could get the boxes to sit just right and solid, then just make the wood fit around it - much easier. But that's how we learn, right?

My whole goal was to make the top height to a level that's comfortable for me to use, and I accomplished that anyway. Even if I'd left the wheels on (which would have made it too high) the boxes wouldn't have sat square on the floor.
 
OP
J

Jagmandave

Well-known member
Joined
Nov 6, 2011
Messages
6,304
Location
Overland Park, Ks.
I have the same pair of HF 44s.
I decided to print out labels on a labelmaker and stick them to a large piece of flexible magnet.
Cut the magnets around the labels.
Now I have small, but easy to read labels that can be moved.
I stuck mine on the tops of the drawer pulls. Easy to read standing in front.

What kind of lablemaker?

And where does one get large pieces of flexible magnet?

Sears has packages of premarked magnetic labels, but they really didn't cover what I'm going to store in there.
 

nolimits76

Well-known member
Joined
Jul 11, 2013
Messages
959
Location
Oklahoma
What kind of lablemaker?

And where does one get large pieces of flexible magnet?

Sears has packages of premarked magnetic labels, but they really didn't cover what I'm going to store in there.

One of my other jobs, we had a label maker similar to the link below. Much quicker/easier than printing, cutting to size and taping (or sliding into a protective sleeve). Ours were sticky backed, so basically a "custom sticker" if you will. Easy to remove when/if you need to replace/update.

http://www.amazon.com/dp/B008HPTR9U/?tag=atomicindus08-20

On a home project, I used some of this flexible magnet "tape". It wasn't super strong, but for holding labels, it would be more than sufficient. Brand may be slightly different as it's been several years since I bought, but I bought from either Walmart or Target. Easy to cut to size with a pair of scissors or razor blade.

http://www.walmart.com/ip/21274049?...27029276&wl4=&wl5=pla&wl6=50564363916&veh=sem

I don't have a close up picture, but honestly I'd skip the magnet tape and apply the sticky label directly to the drawer myself.
 

nolimits76

Well-known member
Joined
Jul 11, 2013
Messages
959
Location
Oklahoma
Whitefeather, I appreciate your kind words but - if I had to do it all again I'd do it differently, but only because my floor is so unflat and unlevel!

What I did was measure the amount of pitch of the floor using one 8 ft 2X, then took my saw and cut one 2X4 at that angle, then I notched it so the box would rest on both the long edge and the cross pieces under the box, I also screwed some cross pieces where the box cross tubes were for additional support, then I added a 2X4 flat under the 2x"s on edge, to get the height right. It was a PITA to do it this way, and in the end I wound up shimming it anyway.

Were I to do it again on such a miserable floor, I'd use leveling feet, and just build a kick panel for the upright supports for the top to sit on, and to keep stuff out from under the boxes.

After all this, there's a pretty good chance I may go back and do that anyway....as I'm not completely happy with how it turned out. So far my cost is just a few 2X4's and a lot of time and effort.

With my floor as uneven as it is, with leveling feet I could get the boxes to sit just right and solid, then just make the wood fit around it - much easier. But that's how we learn, right?

My whole goal was to make the top height to a level that's comfortable for me to use, and I accomplished that anyway. Even if I'd left the wheels on (which would have made it too high) the boxes wouldn't have sat square on the floor.

Ah, okay that makes more sense. Sorry to hear of your woes, though...that *****! Guess I need to measure my floor to see where I stand. I was thinking 2x4 bracing just to save money from the levelers.

If you decide to do the leveling feet, here is a link that Steveo shared with me (guy that made the "first" metal work bench housing the 44" HF cabinets). Brace yourself....they are expensive!

http://www.jwwinco.com/products/section7/index.html

FYI, you may need to convert kN (kilonewtons) to pounds for ratings. 16 kN = 3,596#

http://www.unitconversion.org/force/kilonewtons-to-pound-forces-conversion.html
 
Last edited:
OP
J

Jagmandave

Well-known member
Joined
Nov 6, 2011
Messages
6,304
Location
Overland Park, Ks.
You can't readily tell from the pics, but there's an inch of difference from one end to the other - which is the normal 1/8" per foot pitch used in concrete work.

But if I ever build a house it will have flat garage floors. The driveway can pitch away, but I want the shop floors to be dead level flat! I am tired of stuff rolling away from me and having to work with pitch when trying to set a car on stands and so on, it's a complete PITA.

I know the arguments about drainage, but really, we just don't have that much precipitation per year here that would get drug into the house, and I have a good squeegee for the rest!

I've bought stuff from Winco before so I know they're somewhat spendy, but their stuff is good quality. My first challenge would be to get the baseplates made, the feet are the easy part. I'll bet someone sells them ready made, but those would be really spendy, and I need 8 of them.
 

nolimits76

Well-known member
Joined
Jul 11, 2013
Messages
959
Location
Oklahoma
I really need to check mine. I know my 2 car bay has some slope to it, as I can see the stem wall "grow" as it approaches the garage door. However, my 3rd car bay is "tucked" into the house more. Right now it's fairly cluttered but I pay attention to things like the stem wall heights and I don't recall it growing like in the 2 car bay.

Attached is a layout of my garage space and how I am laying out my workbenches (green lines). The ones on the 12' wall is getting ripped out and re-done to accommodate the 44" HF cabinet (1 for now...built for a 2nd, later).

Anyhow...enough about that. In regards to the plates you mentioned, these might work. Below is a copy & paste of his exact quote, as I felt there was value why he decided NOT to use them. Although it appears you have your bench loads transferred to the garage floor so this probably doesn't matter to you as much. Price seems "okay"....$10/ea.

Yes, I briefly toyed with the idea of replacing the casters with these:

http://na.suzohapp.com/vending/acesor/49150100.htm

And then using feet similar to what I used on my bench frame.
I was still uncomfortable with having my bench top sitting directly on top of the tool boxes, and all having weight and impacts associated with working on the bench being absorbed by the boxes. I just figured that in ten or twenty years it would lead to some structural weakening or failure.
Maybe not, but I am happier with the steel frame.

Edited to Add:
I noticed that plate company also had the matching leveler legs for much cheaper, $6.70/ea. Still almost $20/location total.

My only concern is those levelers are only rated for 500# loads. Theoretically if you had even load distribution of 2,000# / 4 locations then 500# levelers seem sufficient. However, I am fairly certain one side might be loaded more than the other, meaning maybe you need 750# at one location, 250# at another and so on and so forth.

Plus, assuming load distribution is equal...the box has a max capacity of 2,600#, so you would still be 600# shy of max capacity anyways.

Keep in mind the above thinking is my own, and I'm just thinking out loud here. I'm not an engineer. Maybe someone smarter can give you a more definite answer. I'm just saying if you load the hell out of the box, I think it MIGHT fail with these cheaper levelers. So use with caution if you decide to go that way.

http://na.suzohapp.com/amusement_products/accessories/49-1002-038?SS=ON
 

Attachments

  • Garage.jpg
    Garage.jpg
    18.8 KB · Views: 129
Last edited:

Mach5

Well-known member
Joined
Apr 30, 2011
Messages
292
Location
Phoenix, AZ
Aside from the height of the boxes on the casters, it seems to me the simple solution would be to leave the casters on, lock them, then build up the counter to a height just slightly higher than the HF cabinets. Now, with that solution the drawers wouldn't be exactly parallel to the countertop, assuming the countertop was installed to level. But at 1/8" to 10' slope, they'd be off only a tiny bit.

The other option would be to skim coat the floor where the boxes sit to get it level. Or grind the high end to get it level.
 
OP
J

Jagmandave

Well-known member
Joined
Nov 6, 2011
Messages
6,304
Location
Overland Park, Ks.
I knew someone had to make those plates!

However, the spacing on those is only 2", the holes in the bottom of the box are closer to 3.5" apart, also the holes in those plates are only .31" dia. which is just over 1/4" - point being I think those are not big enough or strong enough for this application.

I would probably just make them out of 1/4" plate with a 1/2" nut welded to the center. There are lots of heavier duty adjustable levelers available too, so finding some rated higher than that is not an issue. also, the bolts used to attach the wheels appear to be 10 mm - just over 3/8".

If I do change to the leveler feet, I'd still support the bench with support legs to the floor.

@MachV - I don't want the bench height any higher than it is, and leveling the floor would cost more than buying the feet. The tool boxes would be 1/2" lower on one end......
 
Last edited:
OP
J

Jagmandave

Well-known member
Joined
Nov 6, 2011
Messages
6,304
Location
Overland Park, Ks.
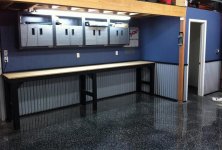
The long view, as requested.......it's hard to get a good shot as there's still so much **** in the left bay that needs to get sorted and put away, but one goal was accomplished - the small Craftsman top and bottom roller have been cleaned out and their stuff moved to the new HF boxes. I also spent some time while waiting for paint to dry putting a good coat of wax on them and cleaning them thoroughly, so the next owner will get a nice set.

I'm leaning towards a black stripe, but no decision's been made yet.....

View media item 34239
And from the left bay....the paint looks blotchy cause I just put the second coat on the grey and it's still wet in places. But, it sure looks better than the faded yellowy color that was on there!

View media item 34240
My poor old Jag is spending a couple of nights outside so I don't have to move all the **** around again, thank god the weather's been nice. All I have to watch out for are dents caused by the acorns falling out of the 100 ft tall pin oak! They sound like bombs when they hit the roof....

I'd plan to coat the floor next, but the outer half (where I park the cars) is so heaved and cracked that it really needs to be replaced, and I have no budget for that. I might coat the back half tho, where the work area is, just for the experience if nothing else - it's still in good shape.
 
Last edited:

jwicker

Well-known member
Joined
May 1, 2013
Messages
76
The big box stores have white magnetic sheet material in the a/c duct work area. They are for putting over room vents to block off heat or ac.

In my case, I had a large magnet from a vendor at work.

I used a P-Touch with white sticky back material and black letters. On the largest font setting.
 

nolimits76

Well-known member
Joined
Jul 11, 2013
Messages
959
Location
Oklahoma
Lookin' good! :)

I think a nice 6" black stripe with possible a 1" red stripe above & below it would look really nice. Especially with those monster red 44" HF boxes.
 

Mach5

Well-known member
Joined
Apr 30, 2011
Messages
292
Location
Phoenix, AZ
Why the grey at the bottom? I mean, don't get me wrong, it looks nice. The white at the top is definitely an improvement, since it brightens up the garage quite a bit. While visually I like the idea of the grey as an accent, I'm leery of doing anything like that because it will make the lower half of the garage darker at the point furthest from the light. When I'm working out in the garage, and particularly when under the car, it seems I need as much light as I can get.

Am I thinking about this wrong? Educate me, please, as I'm considering what I want to do to my garage.
 

wintermute

Well-known member
Joined
Sep 4, 2011
Messages
450
Location
Mount Vernon, WA
looking great! I hear you on the uneven floor! Mine's cracked and sagging, right across one of my benches, so it's shimmed! A lot of the box store leveling feet I've seen have plastic threaded inserts–not exactly something I'd want to hold a workbench up with.

For the stripe, maybe a nice British Racing Green?
 

Hornman

Well-known member
Joined
May 9, 2013
Messages
517
Location
Southwest DFW
If you decide you want to use magnetic drawer labels, check with your local sign shop. They stock the magnetic sheets for car door signs. If you know what you want on the labels, they can print them and cut the individual drawer labels to size.
 

nolimits76

Well-known member
Joined
Jul 11, 2013
Messages
959
Location
Oklahoma
Why the grey at the bottom? I mean, don't get me wrong, it looks nice. The white at the top is definitely an improvement, since it brightens up the garage quite a bit. While visually I like the idea of the grey as an accent, I'm leery of doing anything like that because it will make the lower half of the garage darker at the point furthest from the light. When I'm working out in the garage, and particularly when under the car, it seems I need as much light as I can get.

Am I thinking about this wrong? Educate me, please, as I'm considering what I want to do to my garage.

I think the grey will be okay. But then again, I am considering a black epoxy in my own garage, so maybe I'm the twisted one, lol.
 

Attachments

  • 3-100_1071.jpg
    3-100_1071.jpg
    63.5 KB · Views: 330
  • floor.jpg
    floor.jpg
    77.9 KB · Views: 433
To avoid these ads, REGISTER NOW!
OP
J

Jagmandave

Well-known member
Joined
Nov 6, 2011
Messages
6,304
Location
Overland Park, Ks.
Why the grey at the bottom? I mean, don't get me wrong, it looks nice. The white at the top is definitely an improvement, since it brightens up the garage quite a bit. While visually I like the idea of the grey as an accent, I'm leery of doing anything like that because it will make the lower half of the garage darker at the point furthest from the light. When I'm working out in the garage, and particularly when under the car, it seems I need as much light as I can get.

Am I thinking about this wrong? Educate me, please, as I'm considering what I want to do to my garage.

I just chose the grey for contrast, I didn't want a really dark color but something somewhat neutral....I'll have to let you know how it works out once it's all done.

I did add some more lights, three right at the garage doors and I'll be adding another over the big SS box - you just can't have too much light!

I think a light color floor would do more for light reflectivity than the color on the walls.
 
Last edited:

Mach5

Well-known member
Joined
Apr 30, 2011
Messages
292
Location
Phoenix, AZ
I agree about the light issue. You can never have enough light in a garage. At least not if you are trying to work in it. If it's just a nice place to show off your toys, then go ahead with a piano black epoxy floor. It will look stunning. But as a workspace, it wouldn't be so great.

I really like the work space inside the local MINI dealership. It's efficient, well laid out, not cramped, and CLEAN. But, it's Penske, and in Scottsdale, so the labor rates aren't the best.
 

dwm

Well-known member
Joined
Aug 28, 2010
Messages
861
Location
Southeast Michigan
Just to echo the sign shop idea for magnetic labels...

magnetsonthecheap.com is what I use for mine. They have significant sales fairly often. I draw the image (a whole bunch of text) offline. Have to cut the labels out myself, but that doesn't bother me since I don't have to do it often. Once printed, the stuff is practically indestructible. I've had one of their signs on the underside of my hood for many years, and it hasn't faded. And some of the ones on my toolboxes have been cycled through multiple boxes over the years and still look new. I like how easy it is to move the labels as I reorganize and that I don't have to deal with residue left behind. Since they sell sheets, I put duplicates and extras in my drawing for future use and just stick 'em to the side of a box or the inside of a locker door until I need them. You can get an awful lot of 3/4" or 1/2" tall labels out of a 12" x 24" sheet, and spend the time at home to get the color you want, the font you want, etc.
 

nolimits76

Well-known member
Joined
Jul 11, 2013
Messages
959
Location
Oklahoma
I just chose the grey for contrast, I didn't want a really dark color but something somewhat neutral....I'll have to let you know how it works out once it's all done.

I did add some more lights, three right at the garage doors and I'll be adding another over the big SS box - you just can't have too much light!

I think a light color floor would do more for light reflectivity than the color on the walls.

Check out this article by Sherwin Williams:
http://www.sherwin-williams.com/hom...plication/sw-article-pro-worthyofreflect.html

It is basically talking about light reflectivity value (LRV). Every color has an LRV from 0 to 100. The higher the number, the better. Whites are typically in the 90+ range, if they are truly white and not cream or muted tan/grey colors. Some of the grey colors I've looked at range from upper 60's to low 80's. The 80 values basically being almost like a greyish-white (silver) color.

Anyhow, doing this you can mathematically approach the situation to some degree. However, all that being said, painting the floors, walls and ceilings bright white would have awesome LRV's, but I doubt it will feel very comfortable. Colors set moods. Contrast plays a big role. Next thing you know I will tell you colors are warm or cool, lol.

Apparently I've worked with architects way too much. But the point remains, there is more to picking colors than reflectivity. Go with what you like.


Not twisted, just a tad different. I painted my ceiling black when everyone else says go white. :lol:

Thanks for the vote of confidence. FWIW, I don't think painting the ceiling black is that weird. You see this done all the time in commercial environments to hide HVAC ducts, exposed beams, etc.

Light shines down, not up, so unless you have low ceilings I wouldn't think it would matter much. Especially if you utilize the ballasts that kind of "cup" around the fluorescents.


I agree about the light issue. You can never have enough light in a garage. At least not if you are trying to work in it. If it's just a nice place to show off your toys, then go ahead with a piano black epoxy floor. It will look stunning. But as a workspace, it wouldn't be so great.

I really like the work space inside the local MINI dealership. It's efficient, well laid out, not cramped, and CLEAN. But, it's Penske, and in Scottsdale, so the labor rates aren't the best.

Actually, it's not piano black, it has flakes in it. :)

Seriously though, it's a multi-functional area. If I'm being realistic about it, my garage will be used for general car maintenance items and some wood working projects. Currently I have a Challenger that I like to tinker around with. Need to install some headers, high flow cats and new exhaust. Also, maybe soon I will be adding a super or turbo charger. Later down the road I could see an older CJ Jeep being added to the mix. I haven't learned to weld yet, but it's a skill I'd like to develop. Having owned a Jeep before, there would probably be suspension upgrades going on, along with stuff like adding beefy bumpers, armor protection, winches, etc.

Of course, all that being said, there are plenty of weekends, when life has me busy so the garage is just as storage for the vehicles.

Getting back on topic....Dave, have you thought any more about doing a floor covering? I know you said funds were kind of limited. Is black like this even a consideration for you? I know for most guys it's not. You mentioned your concrete was torn up in part of the garage earlier. Is it something that can be fixed by top coating? Or maybe Race Deck, or similar, tiles would be a solution to cover up the floor and give you a nice surface. Not sure your goal with the covering...to have a nice looking floor that is smooth and easy to clean or if you are looking for that plus ultimate chemical protection. Seems like most flooring has it's own set of pros & cons.
 
Last edited:
OP
J

Jagmandave

Well-known member
Joined
Nov 6, 2011
Messages
6,304
Location
Overland Park, Ks.
No budget for flooring at this time, truth be told I'd be perfectly happy with a nice smooth, sealed or polished concrete floor - although I do like the look of the coated ones. I know the flakes are great for hiding flaws, but if I were to coat it I'd go with a nice light grey - flakes and things can camoflage dropped parts, and my eyesight is not that great to start with!

The reason I went with the "brilliant white" upper paint was for reflectivity.....

Today was a red letter day, the SS workbench top was finished so I went and picked it up - looks terrific. Of course this is the last time it will ever be this clean or pristine and unscratched - after all, it's a workbench!

View media item 34314
View media item 34315
I've got some cabinets ordered to go above this bench and the one on the other side, the hope is that I can get all the stuff off the walls and into the boxes and cabinets and eliminate the shelves completely. The last piece of the puzzle will be some sort of bin arrangement for the nuts, bolts and hardware.....

This is what the other side looks like now - still a lot of work to be done!

View media item 34316
The other toolbox will come out and be sold or put downstairs to corral some of my woodworking stuff down there, then I might move the metal bench inwards towards the wooden one, or if I leave it there a 20 ton press will fit nicely in the gap!
 

Vegaman_Dan

Well-known member
Joined
Jun 1, 2012
Messages
2,453
Location
Pacific, WA
Painting the floor or using epoxy coatings with white or other light color will greatly help with reflected light. It's really handy when working under a vehicle on a bright surface since you can shine light down on the floor and have it reflect back up under the vehicle nicely.
 
OP
J

Jagmandave

Well-known member
Joined
Nov 6, 2011
Messages
6,304
Location
Overland Park, Ks.
I started another thread to discuss how to remove the paint on the floor without damaging the smooth concrete under it......I have no budget for flooring right now, but it would be nice to get rid of the old paint and even out the look.

http://www.garagejournal.com/forum/showthread.php?p=3436493&posted=1#post3436493

Got an email that my cabinets are on the way, still trying to decide which walls to mount them on.....in the meantime I'm still painting. Ideally I would have moved everything away from the walls and painted it all at once, but I just don't have the room to do that, so I have to remove everything off one wall or section, paint, organize, put away, then go to a new section and do it all again - a little at a time..... and since I'm mudding up holes, priming and coating with two colors, I have to let it dry in between - it really adds to the time it takes.

Here are the cabinets I bought.....I bought two of these triple sets - 35"W 30" tall and 12" deep.

4233989108
 
Last edited:

akdiesel

Well-known member
Joined
Aug 8, 2008
Messages
2,617
Location
Wasilla, AK
Great work on getting things in place. The bench looks perfect.
Are you planning on keeping the stainless rolling box in its current location or are you going to transfer all the tools to the HF boxes?.
I can feel the pain on taking a long time to get things finished and waiting to have a fully usable shop.
 
OP
J

Jagmandave

Well-known member
Joined
Nov 6, 2011
Messages
6,304
Location
Overland Park, Ks.
Yeah, the big roller will still be needed, the HF drawers are already full, that's why I needed the cabinets.

I think I'll be spending some time on Craigslist the next year or so getting rid of some of this accumulation.......I just don't need all this stuff anymore. This reorganization will help me cull what I need to keep and what I need to sell.
 
Last edited:
OP
J

Jagmandave

Well-known member
Joined
Nov 6, 2011
Messages
6,304
Location
Overland Park, Ks.
I'd seen them online all over the place for $159, and was just about to pull the trigger when these popped up for $125 so I pounced. The next day the same place had them for $189. Just got lucky I guess......

Of course I still don't have them yet.....
 
OP
J

Jagmandave

Well-known member
Joined
Nov 6, 2011
Messages
6,304
Location
Overland Park, Ks.
Oops, sorry about the bad link...the company is still there.

I have not gotten them yet, the email I got said they would ship in 3-5 business days and it's only been 2 as I ordered them late in the day. I do have a confirmation and expect them next week.

I must have lucked out on that price and just hit them at the right time......I haven't found them as cheap since......$159 is the best I've found lately tho when I first started looking they were $135.

Sears can order them too, and are currently offering 20% off (of the $189 list price), which would come out about the same as what I see online now - $159 or so.
 

nolimits76

Well-known member
Joined
Jul 11, 2013
Messages
959
Location
Oklahoma
Looking good Dave, really good. The work bench turned out the great. The stainless top is the icing on the cake. Would love that for my setup, but if so I will have to do an L shape. Not even sure I want to know what that will cost me, lol. Do you mind sharing who you used for the stainless and the approx cost?

In regards to the cabinets...nice score. I just visited the website, and they are $135...with free shipping. FYI...not saying these guys do it, but I've noticed before (like on DirecTV's website), if you are logged into your account and a cookie is stored in your browser, then sometimes you see different (higher) prices than new customers. Might explain why you see $159 and I see $135. I try to get into the habit of clearing out my browser cache or using a different browser when I shop.
 
To avoid these ads, REGISTER NOW!
Top Bottom