Day 3 Demo Turns to Buildout
Finalized my accessories order for the Storewall last night. Mostly an assortment of hooks and some 5" shelves. I want to get a bit of experience once the cabinets are in on what remains to be stored out on the walls within easy reach. Some of the hooks I'm getting now may eventually migrate to the HVAC utility room or a shed (rakes, shovels, etc.). The Storewall heavy duty cam locks are unique to them so that's what I focused on. Any 3" slatwall accessory will also work so I'll probably do a bit more research for things like small bins to hold small parts around the work bench during dis/assemblies. You can cut/drill shapes through their shelf material so I thought I would experiment with purpose built shelves to hold specific parts like valves, springs, bolts, etc. Time will tell.
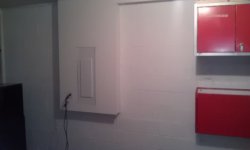
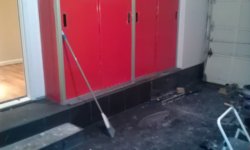
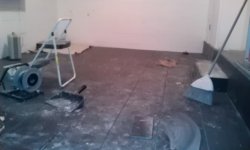
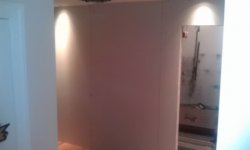
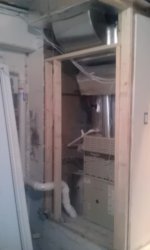
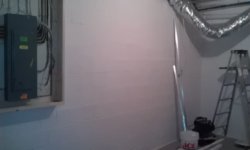
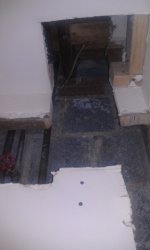
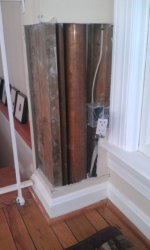
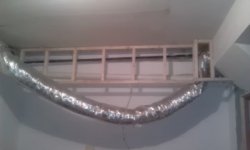
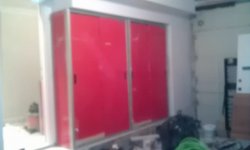
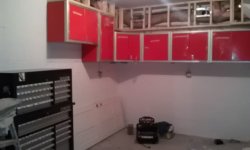
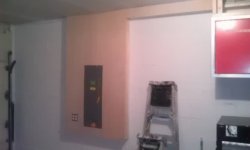
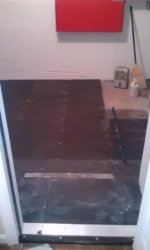
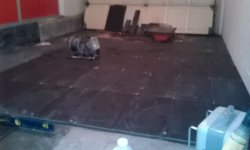
More work completed today. Drywall up on the new wall and the old metal studs removed on the garage side. Cut out the ceiling rail for the garage door to make room for the HVAC main ducting move. Was told last night they wouldn't be able to come straight out of the utility room into the house for some reason and was pretty bummed to loose to space but they did a great job moving it back into the area above where the sliding doors cabinets are going to go. I'm happier with the compromise. You can see in the last two photos where the old ducting was (wasn't even painted above it!) and also how it exits to HVAC utility room into the garage and then turns. If you look carefully you can now see the radon evacuation core hole and how it will now go straight up inside the utility room until it is high enough to join the new raised cross-garage pipe.
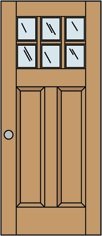
A little miscommunication and a little HD mistakes led to the wrong door being ordered last night and the wronger door set aside by HD! It turns out two wrongs do NOT make a right! I was told to get a 32" open frame door and I ordered a 32" door with casemoulding - so too wide. I also ordered a left handed in-swinging door and they set aside the opposite. So, loose a day on the turn-around but at least it wasn't put in first!") Still in packaging.
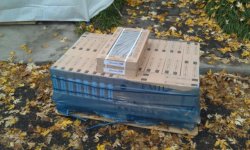
Still in packaging.
Tiles arrive Saturday and Cabinets arrive Monday ! This is really happening! Tiles are a little early but close enough. I need to find a place to put the cabinets! Time to repack the junk in the tent!
Talked to Real Carriage Doors - they are SO nice! They're sending designs over tonight for the garage and entry doors. I'm reusing the existing door knobs on the new garage entry door until the new carriage doors are here and I can match styles better. I want to move from brass egg knobs to black or dark bronze lever side knobs for ADA compliance and to actually be able to open the door with my elbow instead of my greasy hands!
Need to work on lighting design! You can't search on LED (too short!) in GJ! WT*! Time to trawl the lighting section and see of anyone has already given advice on LED ambient lighting...
Finalized my accessories order for the Storewall last night. Mostly an assortment of hooks and some 5" shelves. I want to get a bit of experience once the cabinets are in on what remains to be stored out on the walls within easy reach. Some of the hooks I'm getting now may eventually migrate to the HVAC utility room or a shed (rakes, shovels, etc.). The Storewall heavy duty cam locks are unique to them so that's what I focused on. Any 3" slatwall accessory will also work so I'll probably do a bit more research for things like small bins to hold small parts around the work bench during dis/assemblies. You can cut/drill shapes through their shelf material so I thought I would experiment with purpose built shelves to hold specific parts like valves, springs, bolts, etc. Time will tell.
More work completed today. Drywall up on the new wall and the old metal studs removed on the garage side. Cut out the ceiling rail for the garage door to make room for the HVAC main ducting move. Was told last night they wouldn't be able to come straight out of the utility room into the house for some reason and was pretty bummed to loose to space but they did a great job moving it back into the area above where the sliding doors cabinets are going to go. I'm happier with the compromise. You can see in the last two photos where the old ducting was (wasn't even painted above it!) and also how it exits to HVAC utility room into the garage and then turns. If you look carefully you can now see the radon evacuation core hole and how it will now go straight up inside the utility room until it is high enough to join the new raised cross-garage pipe.
A little miscommunication and a little HD mistakes led to the wrong door being ordered last night and the wronger door set aside by HD! It turns out two wrongs do NOT make a right! I was told to get a 32" open frame door and I ordered a 32" door with casemoulding - so too wide. I also ordered a left handed in-swinging door and they set aside the opposite. So, loose a day on the turn-around but at least it wasn't put in first!
Still in packaging.Tiles arrive Saturday
and Cabinets arrive Monday ! This is really happening! Tiles are a little early but close enough. I need to find a place to put the cabinets! Time to repack the junk in the tent!Talked to Real Carriage Doors - they are SO nice! They're sending designs over tonight for the garage and entry doors. I'm reusing the existing door knobs on the new garage entry door until the new carriage doors are here and I can match styles better. I want to move from brass egg knobs to black or dark bronze lever side knobs for ADA compliance and to actually be able to open the door with my elbow instead of my greasy hands!
Need to work on lighting design! You can't search on LED (too short!) in GJ! WT*! Time to trawl the lighting section and see of anyone has already given advice on LED ambient lighting...


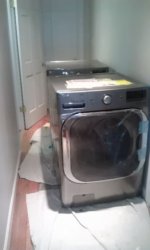


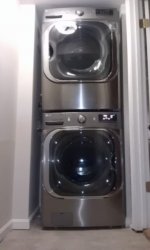
 Test runs pass! No leaks, fires, explosions - exterior vent functioning and pumping some serious hot air. Very solid and quiet machines. First load in three weeks under way! Everybody in the house is much happier tonight


 It generally pays to have a smart girlfriend. I drafted the design and sent it to RCD. The tech there (she is super helpful!) optimized the concept and sent back the shop drawings. They are now officially known as "The Wife's Design". It is perfect! Just the 1.5" jamb within the garage opening so only 2" narrower than the original space and it only needed a single 2by anchor board inside the trim box. We just have to be particular on the flashing for the top. The front entry door has an arched top so I may consider arching the garage top piece.... maybe.... have to look tomorrow but probably will keep it simple in line with the door design and let the entry door do the talking for the house.