Thomas:
I hadn't heard anyone make reference to a Rumford fireplace in many years. I built a Colonial Williamsburg style house in the Dallas area about 31 years ago and spent quite a bit of time researching the details at Colonial Williamsburg in Virginia when I was designing the house - correct chair rails, cornice moldings, paint colors, etc. and my architect had fun with the Rumford fireplace I wanted (and got). 
Rumford fireplaces were common from 1796, when Count Rumford first wrote about them, until about 1850. Jefferson had them built at Monticello, and Thoreau listed them among the modern conveniences that everyone took for granted.
For those who are not familiar with what a Rumford fireplace is, here's a link to what they are all about:
http://www.rumford.com/articleWhat.html
Good luck with the new house!
Fred
Fred, once again great minds think alike and thanks for the Rumford link! You beat me to it.
")
The first house we bought back in the mid '70's had no fireplace so I installed a masonry one during the winter of 1980/81. I just happened to be friends of a terrific mason who knew all about Rumfords and who had built several, so we proceeded to build one for me. The really good photographs of that build were taken with a nice 35 mm camera and then were developed into slides, no prints were made. Now if someone can tell me how to covert those slides so I can move them into my computer I'll have much better quality than this...

...photograph and others that were taken with my point and shoot camera circa 1970's, in other words, not so great. As for Rumford fireboxes, the openings are square, in this case 40" (101.5 cm) by 40" and shallow at 19" (48 cm) deep. (Those measurements might be off a bit, that's what I remember them to be) Note how the sides are angled in at the back and the back side of the box has a parabolic curve to it as it moves up into the smoke shelf and chimney. That curve however really can't be seen here. We did Count Rumford one better and used outside air to feed the combustion process so it doesn't draw room air into the fire thus making the house drafty and burning already warmed air. If you see those two white objects on either side of the opening, those are temporary covers over the outside air discharge, the hearth hasn't been installed yet. Another feature is that the entire fireplace is inside the house, note it protrudes into the room and is not flush with that exterior wall. By doing that it makes it much more efficient so that you're not losing radiant heat out the back side of the firebox to the cold outside, rather that heat remains inside the house. The mantel BTW is solid walnut that was wrapped in plastic as seen, while the stone was laid to protect the WATCO Danish oil finish.
But the real purpose of the photograph was to show
onething what Crab Orchard stone using deuce, 5's and 8's looks like. All those stones are either 2", 5" or 8" tall and that's what I'm proposing to use on the fireplace of the new house.

Here it is completed and has had a fire in it. Sorry it's such a crummy photograph, just tell me how I can transfer those slides.... To get an idea of how much the fireplace projects into the room, note the chair at the left is behind the front of the fireplace. I cut and faced all 12 tons of stone (the stone projected to the top of the chimney) while my buddy laid it. On a couple of occasions while facing it my sledge hammer missed the chisel and hit my hand prompting words I'm glad my mother didn't hear me, uh- hmm....recite shall we say. I can still recall how much that hurt and that was 32 years ago! Yeah, it hurt that much! You tend to not forget those things.

To shape the walnut mantel I decided I wanted to use only great Grand Dads hand tools, no power tools. Here's the wood slab that became the mantel on my old cabinet makers bench, the back of the future mantel is toward the camera. This is as it was milled from Bob Valentines saw mill but after it had dried for several years. I was thinking ahead when I initially had it milled.

This is the work in progress, the mantel is oriented upside down as seen with the front of it now facing the camera. Note the cove profile that has been shaped and the mound of shavings in the background. Also note the mallet and chisel on the mantel.

These are the same hand tools I used back then to fabricate it.

To remove saw marks from the mill and straighten all sides of the mantel...

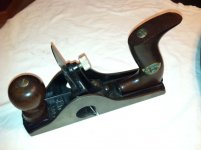
...I used Grand Dads jointer plane, that's the long plane in back. It's 23" (58.5 cm) long and will provide a very flat surface. In the foreground is a jack plane that's used to remove single high spots quickly. My Dad removed the old wood handles from the jack plane and replaced them with what you see. He did that in the late 1940's. The green painted tool is a modern made tool, it's a cabinet scraper from an old design. My Dad said Grand Dad just used a piece of glass to scrape his wood with but I decided to buy a proper cabinet scraper. I was taught the best way to prepare a wood surface is not to sand it but scrape it. Since I was going to use an oil finish, proper surface preparation was important.

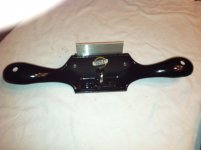
That's a small block plane on the left, chisels and mallet. It just so happens that Dad made that mallet...


...on this Delta wood lathe that he bought new in 1936 just after he graduated from high school, but I digress....

This is great Grand Dads rabbiting plane. It's made of Rosewood, brass and ivory. I think it's wonderful looking and it's also a great operating tool.

I also used a couple of great Grand Dads molding planes, this one in particular.

The profile seen is that of the major cove on the bottom of the mantel.

He had 40 or molding planes...


... all with different profiles. This shows some of them on end in his old tool box. Each one would produce a different molding profile. Here's an end view of one of the more complex ones...

You can see all the different names stamped into the ends of all the planes. Great Grand Dad's are the 4th set of names or initials stamped on it making him the 4th owner. Not sure how old these planes are but he passed away in the 1930's as an old man so I would guess these molding planes are kinda old.
What ties all this together is I'm planning on a putting another stone Rumford fireplace in the new house and I will be fabricating another solid Walnut mantel using old tools from my family. The tools are a bridge from the past to the future. I feel the same about Mr Johnson's shop, equipment and tools.
Thomas


 I'm always up for a road trip.