To avoid these ads, REGISTER NOW!

Between 265 & 485 SQ/FT Small, Messy Carport to Garage

Workspaces sized between 265 and 485 squarefeet.

rixtrix1

Well-known member
Joined
Aug 25, 2013
Messages
3,010
Location
Chandler, AZ (from west NE)
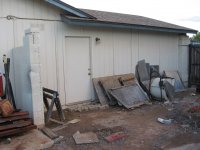
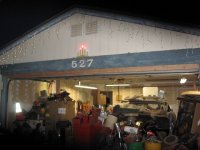
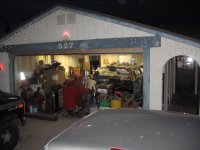
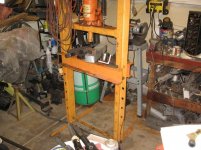
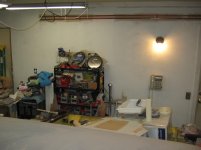
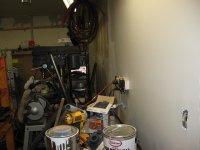
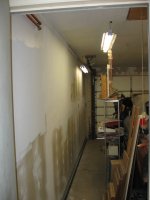
At the urging of a couple GJ friends, I’ve decided to start a thread about my small, messy garage. When we bought our home, it was listed a no garage and no patio. As we approached the property with the realtor, I couldn’t help but notice a double garage door at the front of the house. Upon asking, the realtor replied the second owner could get an insurance break on his new Pontiac Fiero is it wasn’t visible when parked at home, so he installed a garage door with opener on the carport!? Kinda strange, don’t you think? Regardless, score for us. The home was at the end of a cul-de-sac and has a minimal front exposure, while the back of the lot is 150’ wide. I had ambitions 23 years ago of building a large garage in the back to keep my 1966 Chevelle drag race car in as there was more than ample space and there are no HOA restrictions in my neighborhood. I immediately enclosed the carport during the first two week after purchasing the property as we had a lot of stuff sitting there while we renovated the inside of the home while taking care of our two year old and 7 months old sons. Needless to say, we kept pretty busy for the next few months. Due to extenuating circumstances(life) , the detached shop hasn’t happened yet.
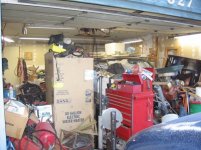
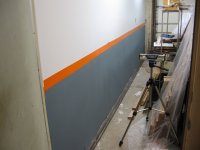
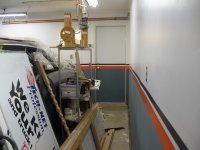
Carport to garage conversion consisted of a 4x6x16 single block around the perimeter of the slab while replacing the center wall posts with 2x4 stud walls covered with T111(?) siding and a mandoor to the side opposite the now covered entryway to the front door. There was a3’x6’ storage room to one side of the carport containing the hot water heater, which was fed by two 4x8 solar panels on the roof. This wasn’t listed on the sales proposal either as the listing was an HUD repossession. Score number two. Over the next few years, I added a 90 amp subpanel with a 50A 220V outlet, a 20A 220V outlet, a 30A 110V outlet and 3- 110V outlets inside and 2-110V outlets outside. I had also added several outlets on the ceiling for the door opener and lights. The walls got R13 batts and drywall with 5/8” Firestop and a combination of foam, batts and blown cellulose in the attic totaling R30. I added 2” rigid Styrofoam panels to the garage door and tightened up the assist springs. A pulldown attic access ladder allows storage of some lightweight items on ½” plywood on top of the foam with a pullstring light fixture making it a little easier to see when up there. By the way, the finished dimensions are 18’3"x 19'4" with a ceiling height of 8’3”. The third pic is definitely the title shot!
 

Attachments

  • 001.JPG
    001.JPG
    140.4 KB · Views: 2,482
  • 013.JPG
    013.JPG
    69.3 KB · Views: 2,192
  • 002.JPG
    002.JPG
    130.5 KB · Views: 2,774
  • 008.JPG
    008.JPG
    117 KB · Views: 2,114
Last edited:
To avoid these ads, REGISTER NOW!

marty_p

Well-known member
Joined
Aug 1, 2008
Messages
1,411
Location
SE LoUiSiAna
One day at a time, bud, and you'll get there.

Enjoy those little ones now, and update us as time allows!
 
OP
R

rixtrix1

Well-known member
Joined
Aug 25, 2013
Messages
3,010
Location
Chandler, AZ (from west NE)
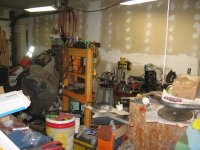
When I have time, I'll scan some old photos of some work I did on the Chevelle back in the mid 1990's, (backhalf, tubs, ladderbars and 9" rear axle with coilovers). Shortly after completing the chassis work on the Malibu, replacing most of the rust on the body, mating the two and installing the rollcage, we found out our two sons have Duchenne Muscular Dystrophy and their medical costs and need for attention escalated drastically, as did their education needs, so the garage pretty much got put on hold. I was PTO president in elementary school for a couple of years, served on the district site council, etc, throughout their school years, and while I kept acquiring tools and stuff for the garage and Malibu, It just kept getting put anywhere in the garage to the point where there was not much but a goat trail from the house door to the workbench, toolbox, drillpress, storage room ( which did get a 60 gal, 6 hp Campbell aircompressor and a watersoftener. I also had stopped dragracing and had taken up airgun Field Target shooting as a way to relax as I can shoot in my backyard where the 50 yard width is really nice. It also helped me relax as the concentration helped take my mind off my sons' medical problems as they were in and out of the hospital for the last six years with all kinds of breathing problems and eating difficulties from their Muscular Dystrophy resulting in both having trache tubes and feeding tubes put in. Kinda eliminated my "spare time" to work in the garage The past 6 months have been great for them with no hospitalizations, so I wanted to get back into the garage and straighten it up and install some of the cabinets, tools and organizers I had been accumulating.

Skipping ahead to the present, I got interested in NASA roadracing a couple of years ago when a work mate decided to convert his 94 Mustang into a track car. I drug out my SP175 Lincoln MIG to help him install a rollcage. and discovered a 1966 Chevelle Malibu buried under the garage accumulation! I had set it up for autuX during the late '70' and had a lot of suspension parts from that incarnation, plus I had picked up a lot of new knowledge over the last 30 years. ( BTW, I am an ASE Master Auto Technician/ L1 Diagnostics for the last 28 years and repair cars every day). Coming off a back injury from lifting one of our boys last June, I'm finally feeling good enough to start tackling the cleanup. Threw out all the cardboard flats I used for target backers, picked up most of the clutter from around the car, workbench and toolbox and vacuumed those areas. Lo and behold, I don't have a dirt floor garage! I had previously tied into the existing heatpump ductwork to supply conditioned air to the garage years ago, and with all the insulation, temps stay under 95 during 115+F summer days and above 55 during the winters, which often see sub-30F nights in December and January. Needless to say, the garage is workable during the evenings almost year round, if one has time to be out there.
 

Attachments

  • garage 003.JPG
    garage 003.JPG
    117.9 KB · Views: 1,399
  • garage 002.JPG
    garage 002.JPG
    105.7 KB · Views: 1,502
  • garage 001.JPG
    garage 001.JPG
    90.4 KB · Views: 1,546
  • 009.jpg
    009.jpg
    58.7 KB · Views: 1,586
Last edited:
OP
R

rixtrix1

Well-known member
Joined
Aug 25, 2013
Messages
3,010
Location
Chandler, AZ (from west NE)
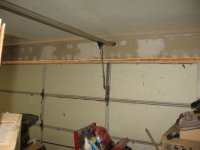
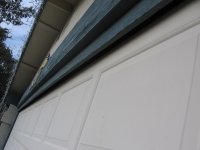
Today I decided to work on getting the garage door to seal better along the top, where there was an almost 2" gap from the previous owner's poor installation. I had also neglected to address this when I insulated and sheetrocked the space years ago. Out came the sawsall and after removing all the drywall nails from above the door, I cut the nails securing the 1x4 that had been tacked onto the faux beam above the door and left a large gap to the top of the door. The carport gable end relies on the end truss for support and a 2x12 between the columns is basically a design element. I slipped a 2x6 up into the gap between the 2x12 and the drywall and screwed it into place. I adjusted the upper g-door rollers to close the gap as good as possible. It appears that a brace for the upper panel will be needed to make the adjustment uniform. I've decided to wait a while before painting the new lumber , both to let it dry out some and until the temps rise high enough to let the paint dry properly. Then I can add some weatherstripping and see how much nicer a tight garage door allows the space to be.

The mess is embarrassing, yes, but I'm motivated to get it better. Thanks to Sergey from Siberia for pushing me to get started and post a thread. This will take a while and definitely won't be a color matching cabinets job. but it should be a functional workspace for doing all the fabrication work on the Malibu.

Then, instead of sitting here looking at all the other spaces here on GJ, which have been more than inspirational, I need to get out there and make mine work. After getting the clutter organized, I will finally texture and paint the walls. Or would it be better to leave them flat( untextured) to cut down on dust settling on the texture? We have tremendous duststorms here in the Sonorran desert.

You can see the gap in the first pics and maybe makeout the new lumber in the later pics, taken about 6 PM after cleaning up the mess.
 

Attachments

  • garage 010.JPG
    garage 010.JPG
    89.6 KB · Views: 908
  • garage 011.JPG
    garage 011.JPG
    85.1 KB · Views: 868
  • garage 012.JPG
    garage 012.JPG
    112.4 KB · Views: 973
  • garage 013.JPG
    garage 013.JPG
    128.9 KB · Views: 974
OP
R

rixtrix1

Well-known member
Joined
Aug 25, 2013
Messages
3,010
Location
Chandler, AZ (from west NE)
One day at a time, bud, and you'll get there.

Enjoy those little ones now, and update us as time allows!

Thanks, Marty. One day at a time is how we live and those little ones are now 25 and 24. As I said on another thread, they are terrors in their electric wheelchairs that go 12 mph. Imagine that in a 1500sf home! The drywall and doorways will never be the same, lol.

Ric
 
Last edited:

SBogaCH

Well-known member
Joined
Apr 24, 2013
Messages
302
Location
Russia
It is great that you have started your thread!
Chevelle Malibu is a fantastic car! I didn't notice it under the loads of things at first)) Do you have any other pics of it? I'm very interested...
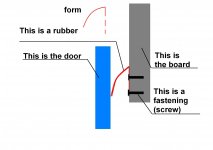
to my mind, you need to place some rubber into the door slit.
According to kinematics of the door motion this rubber will be working very well. I don't know what what you have got in your shops, that is why I 've roughed in the general shape of the pattern in section.


P.S. I am not from Siberia,I am from The Volga region. But the nearest river is the Ural
 

Attachments

  • garage.JPG
    garage.JPG
    94.5 KB · Views: 806
OP
R

rixtrix1

Well-known member
Joined
Aug 25, 2013
Messages
3,010
Location
Chandler, AZ (from west NE)
Thanks, Sergey.

I plan on adding some rubber lipped weatherstripping after I paint the new board, for a better seal. Sorry about the location mistake; my Grandparents on my Dad's side grew up near Volgograd in one of the German villages there. He immigrated to the USA when the Bolsheviks started taking over. My great-Grandparents on my Mom's side came from the same area in 1884.

I'll have to scan some pics of the Malibu. Most were taken long before the advent of the digital camera. I've owned the car since 1971. It was never a collectible condition vehicle, so I've just enjoyed modifying it to fit my taste and budget at the time.
 
Last edited:
OP
R

rixtrix1

Well-known member
Joined
Aug 25, 2013
Messages
3,010
Location
Chandler, AZ (from west NE)
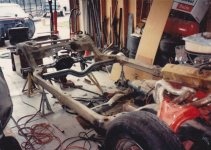
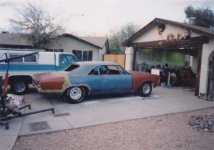
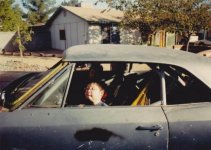
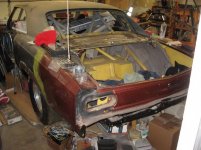
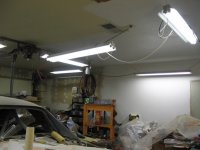
Found some old photos( remember those?!) and scanned them in. If one looks closely, the stud walls I added to enclose the carport are visible on the side. In another, the old T111 siding is visible on the front wall and in some later ones, the drywall and mudded finish is visible. These are from the 1990's if I remember correctly. The old rusty car is a two door body rolling chassis I bought for $200 to replace the original one from my Malibu. It was a previously wrecked A/C coupe to replace the 4 door body of my car. By the time I had stripped it down to the shell and sold off the pieces I didn't need or want( A/C, A/C dash, power steering, rear axle, seats and bumpers, I was $1500 richer! not a bad deal at the time. Four door body is outside and two door body is beside the frame inside. Frame is from the 4-door as the 2 door was 2" out of square from a poorly repaired hard RF hit. Being cheap, I cut and pasted the best parts of the two bodies together. Now. I'm working to get the space back to a workable area again. Got six T12 fixtures and 2 T8's working in there now. Didn't do too much this week in the garage as I cleaned off the patio and sideyard, put up some Xmas lights and splined together the two pieces of 2x6 I reframed the top of the garage door opening with. Some paint and weatherstrip next week and the door will be sealed!
 

Attachments

  • garage early 5.jpg
    garage early 5.jpg
    62.4 KB · Views: 998
  • garage early 6.jpg
    garage early 6.jpg
    68.5 KB · Views: 959
  • garage early 7.jpg
    garage early 7.jpg
    97.4 KB · Views: 992
  • garage early (640x449).jpg
    garage early (640x449).jpg
    38.8 KB · Views: 1,289
Last edited:
OP
R

rixtrix1

Well-known member
Joined
Aug 25, 2013
Messages
3,010
Location
Chandler, AZ (from west NE)
Got some more cleanup done today. Cleaned up around the bench, grinder, drillpress and press, and unpacked the trunk and roof of the Malibu( looks somewhat better than the pic in the post#3). Moving ahead.
 

Attachments

  • 003.jpg
    003.jpg
    74.5 KB · Views: 640
  • 004.jpg
    004.jpg
    84.1 KB · Views: 619
Last edited:

HSpencer

ALLIANCE MEMBER
Joined
Nov 28, 2010
Messages
2,854
Location
South Central US
Quite a task at hand, but there is a lot of great shop in there. I also thank you for starting your thread and we will be very interested in it. Keep on keeping on and you will have a lot of good success.

Best Regards
Herb Spencer
 
OP
R

rixtrix1

Well-known member
Joined
Aug 25, 2013
Messages
3,010
Location
Chandler, AZ (from west NE)
Thanks Herb, 1/2Cu qnd Sergey. Been too busy and tired from work to much but put some caulk and one coat of paint on the new wood over the door. Hope to do weatherstrip this weekend after a second coat of Dunn-Edwards paint. Love this stuff; had the home painted outside 10 years ago and have only had to do a little touchup here and there, mostly due to my negligence. Am going to repaint the south side trim when the weather gets nicer here. It's the coldest and rainiest time of the year in Phoenix, for the next couple of months or so. Always have a few exceptional days thrown in for enjoyment now and then.

What do you think about wall texture in a shop with a lot of grinding, welding, bodywork making dust. Shall I just paint the drywall smooth, or apply some kind of texture?
 
Last edited:
1/2 Cup

Member Emeritus
Joined
Apr 28, 2012
Messages
19,283
Location
Shepparton. Victoria. Australia
I tend to most of my dirty work outside, both metal work and wood work. That said our climate is perhaps a little kinder and allows me to do it most of the year round.
I am also mindfull of our nieghbours as well.
My shop is divided in to 3 sections, one for the office and Model A it is fully lined, the walls are cement sheet and painted pretty much a clean area with the ceilng suspended using 2 x 4 dry wall tiles and insulated.

The workshop and storage area have all the wall lined with cement sheet, and not painted and no ceiling.

Its pretty easy to keep clean except for all the stuff i have.

Try to keep the finish smooth as a textured finish tends to collect dust.:thumbup:

Thats my thoughts any way. Cheers..
 

taumac

Well-known member
Joined
Aug 30, 2011
Messages
8,104
Location
Brooksville, Fl
Did I miss the Model A? When it comes down to it you got to ask yourself honestly what will you use the space for, design a plan and stick to it. Then over time it will get there. I will admit my place changed several times but that's my ocd and tools I always wanted I got over the years. If I brought a new place now I could easily go there set it up cause I have about everything I going to need for projects I do. Good luck.
 
OP
R

rixtrix1

Well-known member
Joined
Aug 25, 2013
Messages
3,010
Location
Chandler, AZ (from west NE)
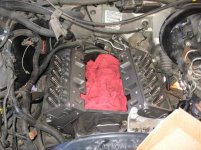
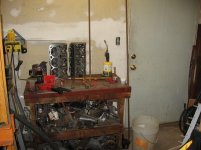
Steadily chipping away at the garage clean-up. Cleared off the benchtop as I got my S10 cylinder heads back from the machine shop today( valvejob with exhaust seats replaced due to stuck exh. valve) and needed a clean place to put them until I can start installing them tomorrow. Gathered up the rest of the removed parts of the engine from all over the place Sunday and organized them by the front door and put all my power tools back into the cabinet. This involved putting a bunch of broken boxes of nuts, bolts and other fasteners from the cabinet and workbench into a 5 gal bucket for future sorting.
A lot of other little hardware went into plastic bins which will be further organized when I get the floor cleaned off and the walls painted. It's sure nice having all the lights working to make it bright all over( even put the original outdoor light fixture back over the box by the house door to light up that corner as the pulldown attic door doesn't leave room for another 4' light there.

Workbench has followed me around since I found the 1/8" x 20.5 x 40" bent metal top back in 1974 laying beside the road. Maybe I'll get around to welding a backsplash on it some day. The vise is a 4" Ridgid Tool that I got when I was working in a US Supply Co. plumbing warehouse in 1976. As you can see from the shelf, I hate throwing anything made of metal away( another organization project!) And yeah, I'm that old, haha.

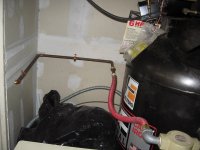
Laying out some copper to run an airline from the compressor in the closet out to the garage wall so I can leave that door closed and the noise out. Just need to find a flexhose to go between the compressor and the hardline. Hopefully I can find one in town tomorrow so I don't have to order it and wait.
 

Attachments

  • garage 001.jpg
    garage 001.jpg
    59.8 KB · Views: 707
Last edited:

Ed Litsch

Banned
Joined
Jun 24, 2013
Messages
457
Location
Riverside
It looks like you are coming along pretty well. You just need to sort things out and get rid of what you don't need. But it looks like the makings of a great place, there. Keep up the good work. You'll get there. ;)
 
To avoid these ads, REGISTER NOW!
OP
R

rixtrix1

Well-known member
Joined
Aug 25, 2013
Messages
3,010
Location
Chandler, AZ (from west NE)
Spent yesterday starting to put the cylinder heads back on my S10. It's been down for just over a year. Work, finances and a back injury kept me from finishing it earlier, but I hope to have it emission tested, licensed and back on the road by Friday. Collected up all the removed parts during my cleaning time in the garage on last Sunday. Rebuilt heads were seen on the bench in previous posts: one new exh. valve, all new valve seats, valve job and resurfacing. About $450 plus my labor including all new fluids.

Overeating, watching football and resting at the inlaws' today.
 

Attachments

  • garage 004.jpg
    garage 004.jpg
    91.2 KB · Views: 438
  • garage 003.jpg
    garage 003.jpg
    82.1 KB · Views: 397
OP
R

rixtrix1

Well-known member
Joined
Aug 25, 2013
Messages
3,010
Location
Chandler, AZ (from west NE)
Got the S10 up and running fine just after New Year's day, Happy NYD to all.

Last Sunday I decided my 30 year old workbench as a little too low and a little wobbly after all these years, so I sistered some new legs outside the existing ones. One I found had split on the bottom so it was definitely due. I built this bench from scrap crating lumber from the plumbing wholesale house I worked at back then, and had just nailed it together. After searching through about 200 KD 2x4's at HD to find three straight ones, I cut them to length, lifted up the bench and glued/screwed the legs to the outside of the old ones. The bench was still a little wobbly, so I started screwing all the pieces together. The 1x4 brace across the back of the shelf was dry and splitting so I replaced it with a 2x4. What a difference! Even after unloading all the metal I had sitting on the shelf, the bench was still rock solid. I placed all the small pieces of steel and aluminum in a couple of 5 gal bucked an placed my angle iron sheetmetal brake, my box of assorted screws and some lengths of 3x3x5/16 angle iron back on the shelf. On top is my drill charger, drill index, Drill doctor and a scrap can. I also had welded a piece of 1/8x 1-1/2 as a backstop for the 1/8 metal top. Of course, my 4" Ridgid vise remains on the LF corner. Not pretty, but it works for me. I now have a solid workspace that I used to assemble a shelf unit for our sons' bathroom this afternoon.

Then, with my 5' tall wife's help, I replaced the bottom seal on the garage door with a new one. What a pain to stretch 16' of vinyl through two tiny slots when one only has 3" of space to feed it from. Really need about three people to do this with the door hanging, although I suppose it would be easy for one if you disconnected the bottom panel. Getting there on the clean up/fix up.

First pic is from 3 weeks ago and second is today.
 

Attachments

  • garage and New Year's 2014 019.jpg
    garage and New Year's 2014 019.jpg
    66.9 KB · Views: 448
  • garage and New Year's 2014 001.jpg
    garage and New Year's 2014 001.jpg
    59.8 KB · Views: 432
OP
R

rixtrix1

Well-known member
Joined
Aug 25, 2013
Messages
3,010
Location
Chandler, AZ (from west NE)
Hi Rick!
Good job! Your garage has been transformed! Have you painted the walls?

Did some finish work on the drywall mud and tapework, and got the primer/sealer this past weekend. Hope to start the paint either tomorrow or this coming weekend. Rewiring my 240V subpanel that I found was not up to code. All that's left is to run the ground wires from the bus to earth and it will be good( tomorrow).

Got tired of having the airhose from my compressor go through the doorway of the storeroom, so I had a flexhose made up and soldered up some copper to route through the wall with a drip leg and valve. It's just a start as I plan to run more hardline and maybe a hosereel after I finish painting the walls.
There's a pic of me using my drillpress table as a support while I bend some sheetmetal in my homemade brake( one reason why I need to get the walls, or at least part of them painted soon) as I acquired some overhead cabinets on Craigslist this past Sunday; for FREE!
 

Attachments

  • garage 003.JPG
    garage 003.JPG
    108.2 KB · Views: 381
  • garage 005.JPG
    garage 005.JPG
    130.1 KB · Views: 393
  • garage 002.jpg
    garage 002.jpg
    63.8 KB · Views: 419
Last edited:
OP
R

rixtrix1

Well-known member
Joined
Aug 25, 2013
Messages
3,010
Location
Chandler, AZ (from west NE)
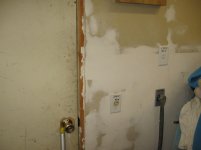
finally got back to working on the garage today. Found I could not easily access the subpanel from the attic, so I removed some drywall and drilled holes from the outside wall to route the groundwire above the storeroom door to the panel. Finished connecting all the wires back up and replaced two circuit breakers with the correct ones. Subpanel provides 240V power for my welders, air compressor along with a 20A, 120V circuit incase I get something that needs more power in 120V. I have a 40" extension cord for the welders, so I really don't see any need for more outlets around the garage like these. Nice being up to code on these.

Will be starting to prime the walls after putting our boys to bed tonight. Gotta get going to make room for the storage cab I got from work and a parts drawer cab I got from a Radio Shack that was closing in our plaza. As usual, I was too late to get any more than one cabinet from RS. Also need to make room for the bandsaw.

oops. Pics didn't come through.
 
OP
R

rixtrix1

Well-known member
Joined
Aug 25, 2013
Messages
3,010
Location
Chandler, AZ (from west NE)
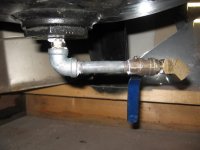
Here's the pics. I also replaced the petcock drain in my air compressor with some fittings and a ball valve for easier access. It was almost stripped out.
 

Attachments

  • garage and S10 003.JPG
    garage and S10 003.JPG
    105.4 KB · Views: 343
  • garage and S10 002.JPG
    garage and S10 002.JPG
    143.9 KB · Views: 322
  • garage and S10 001.jpg
    garage and S10 001.jpg
    86.7 KB · Views: 383
  • garage and S10 006.jpg
    garage and S10 006.jpg
    58 KB · Views: 365
OP
R

rixtrix1

Well-known member
Joined
Aug 25, 2013
Messages
3,010
Location
Chandler, AZ (from west NE)
Drywall work almost done, starting priming for paint

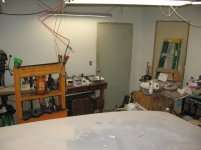
Got all the drywall mudwork done, except above the overhead door, where I earlier had put in a new trim board, and started with some primer on the exposed walls. I am going to get the garage emptied out this Sunday to do the rest of the mudwork and finish priming the walls and hopefully repaint the ceiling. Having the walls all the same color is such a difference. I need to paint some exposed copper tubing; can I use the same paint as on the walls( water-based), or will that cause corrosion?

Any thoughts on the three man doors at the front of the garage for paint color? Or maybe just the same color as the walls ( Semi-gloss white)? Thanks.

I want this garage cleanup done by the end of March as I have a bedroom remodel waiting.
 

Attachments

  • Garage primer 001.jpg
    Garage primer 001.jpg
    85.4 KB · Views: 413
  • Garage primer 002.jpg
    Garage primer 002.jpg
    79.8 KB · Views: 390
  • Garage primer 003.JPG
    Garage primer 003.JPG
    138.4 KB · Views: 396
Last edited:
OP
R

rixtrix1

Well-known member
Joined
Aug 25, 2013
Messages
3,010
Location
Chandler, AZ (from west NE)
Swapped some extra license plates I had with Grizz1963 after seeing his huge collection in his thread.

I got a really neat plate from South Africa and a bunch of neat stuff in return.
Thanks, Rian!
 

Attachments

  • Brit Stuff 002.jpg
    Brit Stuff 002.jpg
    72.5 KB · Views: 304
OP
R

rixtrix1

Well-known member
Joined
Aug 25, 2013
Messages
3,010
Location
Chandler, AZ (from west NE)
Setback on the garage cleanup today as the nurse that takes care of our two disabled sons called off today. I wasn't able to empty the space out for paint as planned due to caring for them until our night nurse showed up early, but I was able to paint about 1/3 of the ceiling and get a coat on the parts of the walls I had already primed. The ceiling alone will make a huge difference when done, I'm sure, as it is a light tan color. Oh well, the boys got great care and I was able to get some more prep work done too for whenever I get the garage cleared out. I decided to mask off the copper pipes and leave them that nice orange-ish natural color. The doors really look horrible now that the walls and ceiling around them are bright. I need to get some acrylic primer to use on the attic ladder door so it will be painted white, too.

The last pic is of a distraction that showed up at my neighbor's to look at a car he is selling, haha. His face was really red the whole time as her front side was better than her back side.
 

Attachments

  • 003.JPG
    003.JPG
    66.5 KB · Views: 1,168
  • 007.jpg
    007.jpg
    54.1 KB · Views: 598
  • 006.JPG
    006.JPG
    143.1 KB · Views: 556
  • 005.JPG
    005.JPG
    142.6 KB · Views: 582
OP
R

rixtrix1

Well-known member
Joined
Aug 25, 2013
Messages
3,010
Location
Chandler, AZ (from west NE)
Found all four walls in my garage!

Took a personal day yesterday so I'd have some time to spend in the garage. I actually found all 4 walls! Moved a lot of non-car related stuff to our other storage shed and threw out a bunch of other stuff, The rest I just moved toward the middle around my Chevelle for access. Sanded all the drywall mud I had added and cut in the paint in all the corners of the ceiling and walls. Need another gallon of primer and it's on to the painting.

Put one of my car clocks up on a finished spot( crappy pic) and while my Chevelle isn't a 1969, I think I'll have to change the name of this thread to " The Chevelle Shop".

Ric
 

Attachments

  • GARAGE PAINTING 007.JPG
    GARAGE PAINTING 007.JPG
    57.9 KB · Views: 298
  • GARAGE PAINTING 006.JPG
    GARAGE PAINTING 006.JPG
    135.4 KB · Views: 293
  • GARAGE PAINTING 005.JPG
    GARAGE PAINTING 005.JPG
    117.9 KB · Views: 292
  • GARAGE PAINTING 004.JPG
    GARAGE PAINTING 004.JPG
    95.5 KB · Views: 294
  • GARAGE PAINTING 003.JPG
    GARAGE PAINTING 003.JPG
    114.5 KB · Views: 309
OP
R

rixtrix1

Well-known member
Joined
Aug 25, 2013
Messages
3,010
Location
Chandler, AZ (from west NE)
Got the trim put on the storeroom and man doors, then did some more painting. Getting tired of it. Hopefully, there's only about an hours worth left on that, then I can start hanging some cabinets. Going to build one based on a Bob Heine suggestion I saw in another thread as I found a 27"x42"faceframe with 3 doors. I just need to build a box and hang it and I'll have some cheap storage.
 

Attachments

  • garage 003.JPG
    garage 003.JPG
    128.6 KB · Views: 307
  • garage 004.JPG
    garage 004.JPG
    121.2 KB · Views: 342
To avoid these ads, REGISTER NOW!
Top Bottom