To avoid these ads, REGISTER NOW!

5mall5nail5's Modest 2-car Clean-up and Setup

Double0fox

Member
Joined
Sep 28, 2013
Messages
8
Location
Tacoma Washington
Wow, loved reading through all your posts. Not a big BMW fan(don't hate them either), but I do enjoy looking at quality work, both the cars, and the garage.
 
To avoid these ads, REGISTER NOW!
OP
5

5mall5nail5

Well-known member
Joined
May 23, 2010
Messages
1,174
Location
Bucks County, PA
Is conduit in the cavity out of the question? Seems like that would make getting back there less of an issue.

I don't think so, romex isn't supposed to be in conduit and there's not much room to begin with. I will have to figure out a clever way of just leaving a big access panel there of drywall.
 

bhalv

Well-known member
Joined
Oct 27, 2011
Messages
346
Location
Boise Idaho
So do you do coating work professionally or is it just a side hobby? I've noticed a bunch of really nice powder coating and annodizing in your car albums
 
OP
5

5mall5nail5

Well-known member
Joined
May 23, 2010
Messages
1,174
Location
Bucks County, PA
So do you do coating work professionally or is it just a side hobby? I've noticed a bunch of really nice powder coating and annodizing in your car albums

Thanks! I do coating on the side. Really enjoy restoring parts and turning them into something fresh and new.

Sent from my SCH-I535 using Tapatalk
 

FarmerPete

Well-known member
Joined
Jul 24, 2013
Messages
258
Location
Lansing, MI
I don't think so, romex isn't supposed to be in conduit and there's not much room to begin with. I will have to figure out a clever way of just leaving a big access panel there of drywall.

Romex can be run in conduit. You just have to size it properly. They consider it a circle with a diameter of the widest point of the cable. Either way, you could use thhn and be safe. It's just a good way to preplan so you don't have to rip your walls back up.

Sent from my Nexus 4 using Tapatalk
 

MSD Shop

Well-known member
Joined
Dec 13, 2012
Messages
194
Location
Bend , OR.
Well I am a wiring n00b and in the middle of a huge build. Glad I found your thread, gonna try and get more educated so I can install my camera system, wifi, stereo and network cables. I am trying to save some $ , so this should help a bunch.
 
OP
5

5mall5nail5

Well-known member
Joined
May 23, 2010
Messages
1,174
Location
Bucks County, PA
Romex can be run in conduit. You just have to size it properly. They consider it a circle with a diameter of the widest point of the cable. Either way, you could use thhn and be safe. It's just a good way to preplan so you don't have to rip your walls back up.

Sent from my Nexus 4 using Tapatalk

Thanks for the idea - yeah just not sure on it. Plus, with the wires already run through the plate I am not sure how large of a conduit I could even run. That said, I think what I'll do is pre-drill 3 or 4 holes and use a smaller access panel biased toward the box side for accessing the NM-B connectors. That, or make a fully removable drywall panel. I have an idea on that.

Well I am a wiring n00b and in the middle of a huge build. Glad I found your thread, gonna try and get more educated so I can install my camera system, wifi, stereo and network cables. I am trying to save some $ , so this should help a bunch.

Thanks man - I am an IT guy by trade but have done a lot of automotive wiring and telecom/network wiring. The biggest thing you need to do is think ahead that's all. Let me know if you need help with anything.
 
OP
5

5mall5nail5

Well-known member
Joined
May 23, 2010
Messages
1,174
Location
Bucks County, PA
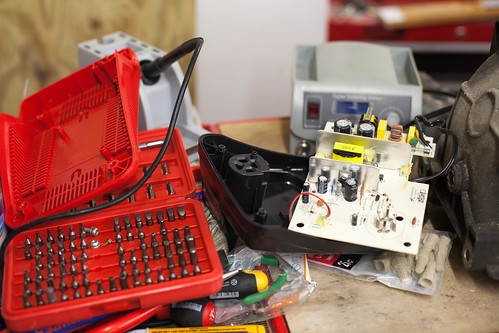
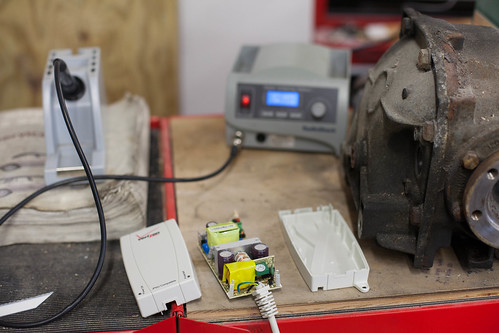
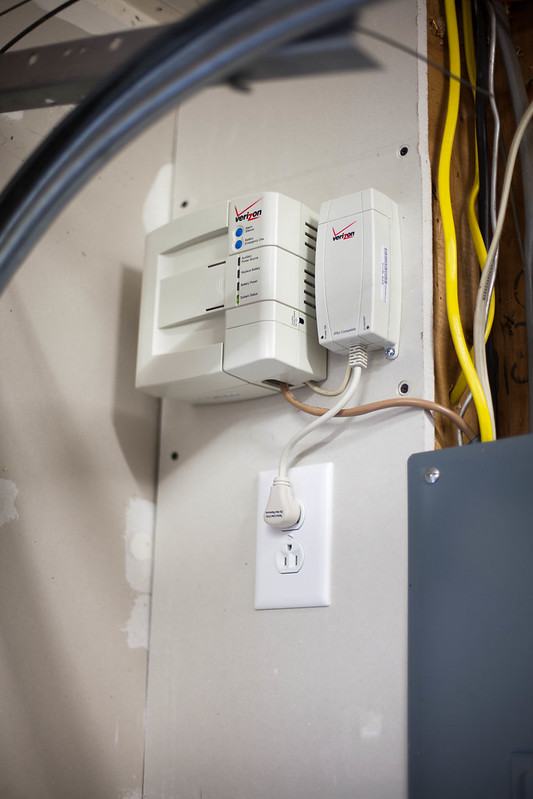
Little projects today. I shortened the cord on the Verizon FiOS Power Supply - not too hard, just a little desoldering and what not. The hardest part was getting that stupid stress relief boot back on lol.


FiOS Power Supply Shortened by Jon Kensy, on Flickr


FiOS Power Supply Shortened by Jon Kensy, on Flickr

Much nicer! No cords draped across the panel. I added that outlet today and split my garage into two circuits. The two opposite walls are on separate 20A circuits and the far wall opposite the breaker has two quad boxes on a third circuit. I know people might recommend having even fewer outlets on more circuits, but the truth is this is a 1-person shop and I doubt I'll ever run more than a shop vac and air compressor at the same time, so two 20A has always been enough for me and having three circuits for 120v should never pose a problem.

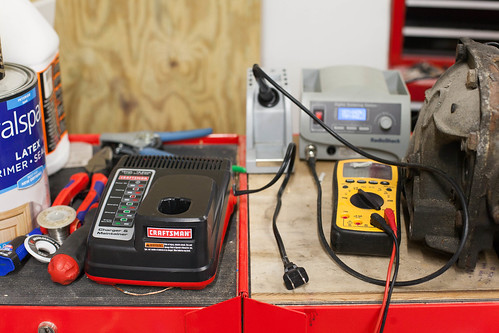
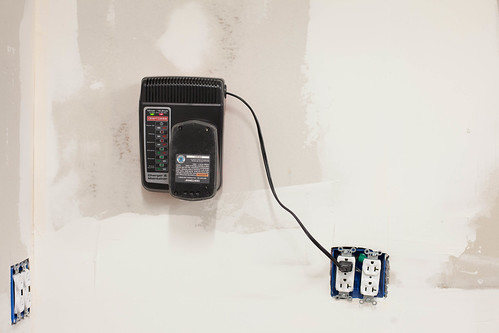
I also shortened the cord on my craftsman C3 charger as well - its mounted further from the outlet than I intend, but it's just temporary while I finish taping the seams of the drywall.


Shortened Verizon by Jon Kensy, on Flickr


Shortened charger by Jon Kensy, on Flickr


Shortened charger by Jon Kensy, on Flickr

And that's all for today. It's snowed about 7 - 10" so I haven't taken the time to move some things from the garage to the shed. I need to finish taping the drywall and then I will prime and get ready for paint! Oh, I also put a smoke detector in the garage w/ a 10-year lithium ion battery just for some comfort.
 
OP
5

5mall5nail5

Well-known member
Joined
May 23, 2010
Messages
1,174
Location
Bucks County, PA
Thanks again Don

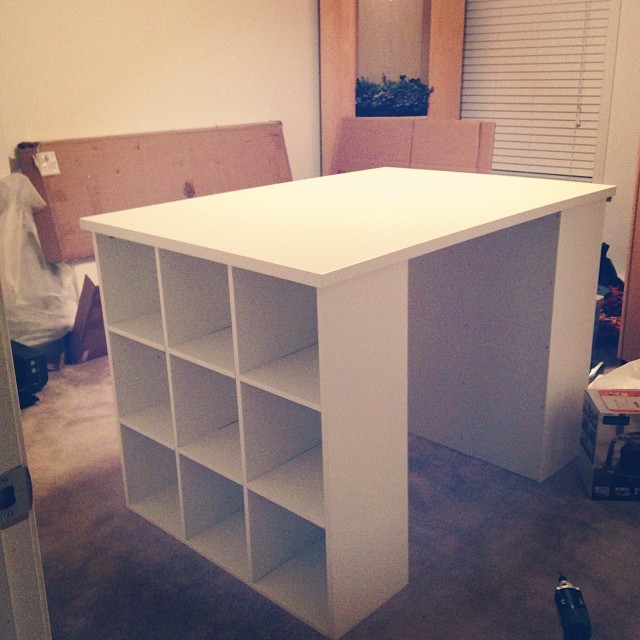
I was really hoping to focus on getting more work on the garage done this weekend but I ended up doing lunch with my mother on Friday and running errands and then I spent most of Saturday building my wife a new desktop. Well, its not "new", its from a server I had that my mom transitioned off of - Core i7 2.4GHz with 16GB ram, Nvidia GTX 275 SC, 4 or 5TB of disks (WD Caviar Blacks), Blu-ray writer, 700W corsair PSU, blah blah... either way, killer machine for her. She does a lot of graphic design (she's an editor by profession). So, I set it up for her, cloned her laptop to a bigger (500GB drive), and started setting up her craft room. She got an awesome standing project table for Christmas and I set that up for her. So anyway, that was the theme for the weekend...


Project Table by Jon Kensy, on Flickr

Excuse the mess the craft room has been the "****" room lol

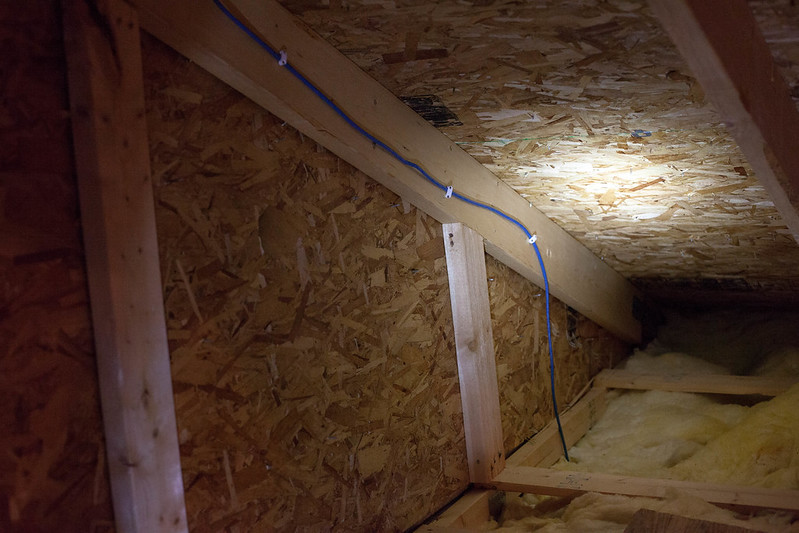
More fun though, I decided I am going to network the addition like I did the rest of the house so I started with dropping CAT6 in her craft room.


Craftroom CAT6 by Jon Kensy, on Flickr

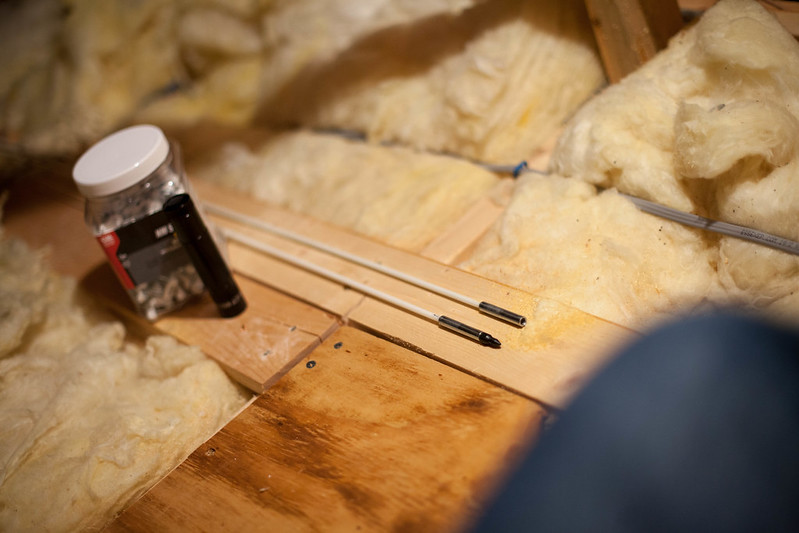
I started out using my Klein fish tape reel but it was being annoying going through an insulated wall. I ran to Lowes and picked up some "fish sticks" per a family members recommendation. They are awesome - they're 3/16" fiber glass rods that thread together for a total length of 15'. They are flexible enough to bend but at the same time poke through insulation and all. They worked WAY better than the fish reel.


Fish sticks! by Jon Kensy, on Flickr

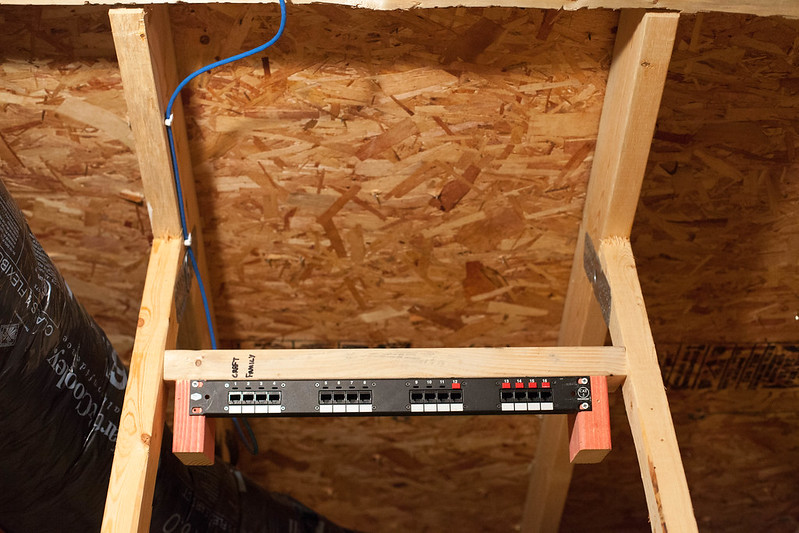
They also glow in the dark in case you leave them some place in the attic/etc. So I got done stapling the CAT6 wire every 12 - 16" and then made a quick and dirty rack for the punch panel I had laying around.


Attic 2 Patch Panel by Jon Kensy, on Flickr

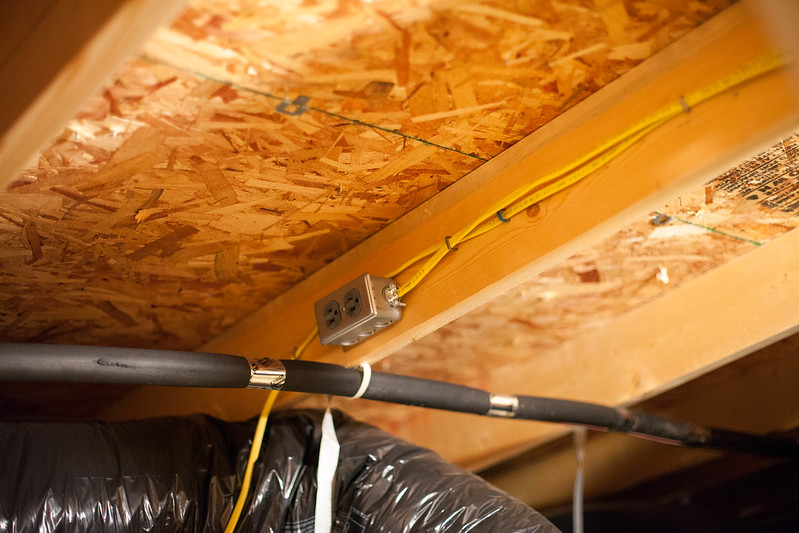
Pretty nice for 2x4's. Thought about doing it with a nice metal housing but for $60 its not worth it. My switch is not 1U so it doesn't matter at the end of the day. The FiOS modem/router will be going up here in the attack as well as an 8 port gigabit switch. Out of the way, high up for good wifi coverage, etc. But, in order to run the switch and FiOS stuff I needed power so I ran a quick and dirty 1-gang metal box with a receptacle to plug a surge protector into:


Attic receptacle by Jon Kensy, on Flickr

Annnnndddd that's pretty much all I got done. Oh, I cut a hole in the wall of the craft room for a 1-gang old work box with the CAT6 cable and nice keystone plate. All punched down and ready to rock once I move the rest of the electronics up to the attic.

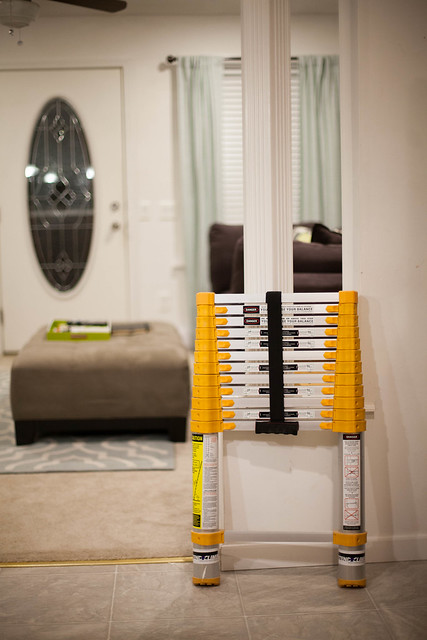
Also, if you don't have a ladder like this, get one - super convenient!


Extending ladder by Jon Kensy, on Flickr

Ok that's all. Maybe some more garage work tomorrow night after work. Need to change the oil in my wifes volvo. Zzzz.
 
OP
5

5mall5nail5

Well-known member
Joined
May 23, 2010
Messages
1,174
Location
Bucks County, PA
Been a while since I've updated - I took a break from the garage (specifically anyway) and finished my wife's craft room - it came out really nice!


Steph Craftroom by Jon Kensy, on Flickr

Took the breaker panel apart (sub panel) and painted it white to blend in a little better than the grey


White panel cover by Jon Kensy, on Flickr

Took the fan down and put up a chandelier, built her a Core i7 desktop w/ 24" monitor and 16BG of RAM, set up her project table, etc...


Craft room chandelier by Jon Kensy, on Flickr


Stephs paper cabinets by Jon Kensy, on Flickr

And then she treated me to these!


Gladiator cabinets by Jon Kensy, on Flickr

and I built myself a PC (started out modestly/budgeted but.. yeah that went out the window) involving a brand new Core i5 4670K, 16GB of RAM, a Samsung 840 Pro 256GB SSD, and dual 27" 1920x1080 displays that will be wall mounted above the bench top :)


Totally necessary by Jon Kensy, on Flickr

Going to be pretty awesome - I just had it set up there on the counter while installing Windows 8.1 and all. Oh, I also finished up networking the whole house and have two patch panels and switches with all CAT6 cable:


Attic patch panel by Jon Kensy, on Flickr

Going to get started on the workbench build so I can wall mount these displays and cabinets! Going to be so awesome. One monitor for youtube/etc., the other for schematics, procedures, documentation, etc.
 
OP
5

5mall5nail5

Well-known member
Joined
May 23, 2010
Messages
1,174
Location
Bucks County, PA
Attic spaces usually get hot. No concern that the switch/router will be overheated?

Not very concerned - I have a friend with a similar setup in his attic without issue. Worst case is I move the router which is easy because the only cable that matters is the WAN connection which is on a patch panel so I can easily run a longer cable into a 2nd floor closet/etc.
 

BigKid69er

Member
Joined
May 6, 2010
Messages
11
Been a while since I've updated - I took a break from the garage (specifically anyway) and finished my wife's craft room - it came out really nice!


Steph Craftroom by Jon Kensy, on Flickr

Took the breaker panel apart (sub panel) and painted it white to blend in a little better than the grey


White panel cover by Jon Kensy, on Flickr

Took the fan down and put up a chandelier, built her a Core i7 desktop w/ 24" monitor and 16BG of RAM, set up her project table, etc...


Craft room chandelier by Jon Kensy, on Flickr


Stephs paper cabinets by Jon Kensy, on Flickr

And then she treated me to these!


Gladiator cabinets by Jon Kensy, on Flickr

and I built myself a PC (started out modestly/budgeted but.. yeah that went out the window) involving a brand new Core i5 4670K, 16GB of RAM, a Samsung 840 Pro 256GB SSD, and dual 27" 1920x1080 displays that will be wall mounted above the bench top :)


Totally necessary by Jon Kensy, on Flickr

Going to be pretty awesome - I just had it set up there on the counter while installing Windows 8.1 and all. Oh, I also finished up networking the whole house and have two patch panels and switches with all CAT6 cable:


Attic patch panel by Jon Kensy, on Flickr

Going to get started on the workbench build so I can wall mount these displays and cabinets! Going to be so awesome. One monitor for youtube/etc., the other for schematics, procedures, documentation, etc.


I built the same craft table for my wife. She said if i get the garage then she gets the guest room as her craft room. We went to target and got the two bookcases and i built the top to put on it. She loves it. Her craft room has also been refered to as the **** room lol. She is however jealous of the desk and paper storage. Did you build them or was it from somewhere. Looks good!
 
OP
5

5mall5nail5

Well-known member
Joined
May 23, 2010
Messages
1,174
Location
Bucks County, PA
I built the same craft table for my wife. She said if i get the garage then she gets the guest room as her craft room. We went to target and got the two bookcases and i built the top to put on it. She loves it. Her craft room has also been refered to as the **** room lol. She is however jealous of the desk and paper storage. Did you build them or was it from somewhere. Looks good!

This table was actually sold as a project table - I didn't think to build one thats a good idea! Her paper paper storage and desk came from Ikea. She had the table and then we picked up two of the paper cabinets - the cabinets are from the "Alex" series.

Your wife must be very proud, awesome job man :bowdown:

She's so happy with the results! She's holding a crafting party soon!
 
To avoid these ads, REGISTER NOW!
OP
5

5mall5nail5

Well-known member
Joined
May 23, 2010
Messages
1,174
Location
Bucks County, PA
Thanks Hugo -

Threw some recessed lights in my wifes craft room - very nice 4" integral LED housings. Very easy to wire, too.


IMG_0367.jpg by Jon Kensy, on Flickr

And finally getting back into garage stuff - I need to clean off and then take down shelving in order to build my work bench. So, I figured I'd make shelving in the closet in the garage and make a rack on the backside of the door to hold spray paint etc.


Spray Paint Rack by Jon Kensy, on Flickr

Painted the trim and door on both sides along with the rack. Worked out very well. Will work more in the garage tomorrow!
 

Dr.AK

Well-known member
Joined
Feb 8, 2014
Messages
61
Location
Germany
5mall5nail5 - now there's a name I remember from BFc. Always loved the work you did to your BMWs and I can see you're keeping the same level of quality up with your garage and house. Great work, man!
 

FLI

Member
Joined
Mar 27, 2011
Messages
23
Location
CA
Man, I enjoyed going through your thread! You have really done a nice job using every area effectively. My last place was a 3 car and I built a 4 car in the back! My current place is an oversized 2 car! I understand the struggle, nice job.
 
OP
5

5mall5nail5

Well-known member
Joined
May 23, 2010
Messages
1,174
Location
Bucks County, PA
Thanks guys! Love your touring Dr. AK. I am almost done clearing the shelving/area around it which will allow for me to start my work bench build :)
 
OP
5

5mall5nail5

Well-known member
Joined
May 23, 2010
Messages
1,174
Location
Bucks County, PA
Not huge progress overall but a lot of work - in making the closet shelving and and rack for the closet door I was able to clear off the shelving along the back wall of my garage. So, today I finished clearing that off and broke the shelving down.

A lot of things around the house were made by the previous owner which, unfortunately, usually means its kind of lame and not done totally right. The shelving along the back wall of my garage, though, is a different story. Apparently the family room, laundry room, powder room, etc were all redone studs out as a result I think the company that took that all apart used the old studs and such to build these shelves. These things are legit. They're probably 14' long I think 12-18" deep, and man were they fastened to the wall. The were nail gunned on to the studs using like 1/8" thick 4" long nails - they were seriously difficult to remove and since they were actually in the wood I couldn't pull the nails but had to pull the shelves as a whole (meaning each shelf level). The downside is that they were also nailed in on the short end, so removing that end was hard up high and it damaged the drywall some - no big deal but annoying.


Old shelving by Jon Kensy, on Flickr


Old shelving by Jon Kensy, on Flickr


Shelves gone flooring down by Jon Kensy, on Flickr


Shelves gone flooring down by Jon Kensy, on Flickr

So with them removed (moved to the basement and will reinstall in unfinished section since about 3/4 of the basement is finished) I was able to finish putting the flooring down, clean everything, and fill the new nail holes as well as some old dings and dents. Spackle is drying so I will and tomorrow and prime! I measured out the area my toolbox workbench will occupy and have that all relatively mapped out. I am ordering steel tonight. I will have to patch the 6x7" area tomorrow or later and will finish taping and mudding the wall tomorrow. I also used expanding foam around the attic stairs to better insulate my heat in. Getting there!
 
OP
5

5mall5nail5

Well-known member
Joined
May 23, 2010
Messages
1,174
Location
Bucks County, PA
I used to carry my Dell laptop around and perch it precariously wherever I was working and hoped it didn't fall and crash to the ground. Having the desktop with two 27" displays will be awesome for youtubin, PDF'in, etc.

I spent today finish sanding and priming. So close with the walls! I picked up some cheap Valspar "Cool Gray" in flat for the walls - was going to just leave it primed but I wanted an actual color without going darker, etc. The cool gray (7006-10) is darn near white, but not quite. I think it'll be perfect. The room is SO much brighter with just being primed can't wait to get the paint up.


Garage Walls Primed by Jon Kensy, on Flickr


Garage Walls Primed by Jon Kensy, on Flickr


Garage Walls Primed by Jon Kensy, on Flickr


Garage Walls Primed by Jon Kensy, on Flickr


Garage Walls Primed by Jon Kensy, on Flickr

I need to clean and prime/paint the ceiling but I will do that once all is done so I can better cover things with drop cloths. The other awesome part someone really super observant might notice is that I have a few cardboard tubes propped up around the shop - full of the metal for the workbench build! It all arrived. Was hoping to put it together some this weekend but ended up going out with my wife and some friends for St Patricks day parade yesterday and so only worked on stuff today. Either way, I will throw the paint on the walls this week hopefully and start building the super bench later this week/weekend.

A little humble comment: I think the drywall came out AWESOME for being my first time and basically building much of the walls from studs.
 

Dr.AK

Well-known member
Joined
Feb 8, 2014
Messages
61
Location
Germany
A little humble comment: I think the drywall came out AWESOME for being my first time and basically building much of the walls from studs.

From what is visible via photographs, I'll definitely agree to that! Good work, man!
 
OP
5

5mall5nail5

Well-known member
Joined
May 23, 2010
Messages
1,174
Location
Bucks County, PA
Thanks! I know photos can make things look a lot better than in person but there aren't many flaws in person. Really content with how it turned out. The only annoying part is that the ceiling/etc is old/existing drywall so taping against that was a PITA. Next time I think I'll go so far as drywalling the ceiling or paying someone to.
 

Hpozzuoli

Well-known member
Joined
Dec 11, 2013
Messages
3,428
Location
Rhode Island
That's a pretty cool design with the garage in the back of the house. Keeps everything out of sight and you don't have to worry about nosey people looking into your garage.
 
OP
5

5mall5nail5

Well-known member
Joined
May 23, 2010
Messages
1,174
Location
Bucks County, PA
Ah ok, I have the 4310 and love the thing :D

Absolutely! I used my 5312 when cutting the RaceDeck tiles when they butted up against the curbing. So nice and quick to make clean, straight cuts. The 5312 is able to cut a 12x12 tile in half which is great for flooring projects! I had a few recommendations to just get a standard miter saw and skip the gliding/sliding... so glad I went with sliding - I wouldn't be able to cut the tile otherwise!
 

quasi_accurate

Well-known member
Joined
Oct 31, 2013
Messages
196
Location
Austin, TX
Absolutely! I used my 5312 when cutting the RaceDeck tiles when they butted up against the curbing. So nice and quick to make clean, straight cuts. The 5312 is able to cut a 12x12 tile in half which is great for flooring projects! I had a few recommendations to just get a standard miter saw and skip the gliding/sliding... so glad I went with sliding - I wouldn't be able to cut the tile otherwise!

Sliding is a must have IMHO. I got the 4310 in part because it is able to cut 12" wide materials :) My garage is small and space is at a premium, so I went for the 4310 instead of the 5312.
 
OP
5

5mall5nail5

Well-known member
Joined
May 23, 2010
Messages
1,174
Location
Bucks County, PA
Sliding is a must have IMHO. I got the 4310 in part because it is able to cut 12" wide materials :) My garage is small and space is at a premium, so I went for the 4310 instead of the 5312.

I agree now - sliding is mandatory. I didn't know there was that much size difference. I probably could have got away with a 4310 but I figured I'd get as much saw as I could afford. I think the only one up from what I got was the gliding one which didn't seem worth it.
 
OP
5

5mall5nail5

Well-known member
Joined
May 23, 2010
Messages
1,174
Location
Bucks County, PA
Alright, so now we're making progress. Whole garage is painted with the exception of a ~6' x 8' section of ceiling over the bay where all my **** is. Going to give the pull down stairs another coat of paint some time but for now I am calling the paint phase done.

So, I've started on the next big task and made some decent results thus far I'd say! This whole thing was built from about noon until 4 o'clock or so.


Bench frame by Jon Kensy, on Flickr


Bench frame by Jon Kensy, on Flickr


Bench 110-Inches Long by Jon Kensy, on Flickr

The length of the frame is over 110"! So, I picture butcher block with about 3" of overhang on the right hand side and 6" of overhang on the left as I am going to be mounting the PC under the table top. I need to move my second HF cabinet from my parents and put it in place and weld the rear support in - I used a floor jack to do this to make sure the box is square and proper. I have the small narrow section for the side cabinet - it's about 18" wide and deep and provides a nice break-up of the two cabinets + additional length for the bench top I love it.
 
To avoid these ads, REGISTER NOW!
Top Bottom