To avoid these ads, REGISTER NOW!

New 36'x48' x 12'4" Pole building

marzo91

Active member
Joined
Jan 5, 2014
Messages
32
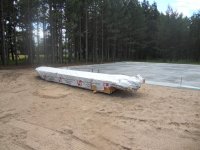
I've been wanting and needing a shop for many years. Over the years, I've built about a dozen racecars in my attached 2 stall garages. Finally decided to get a real nice place to work on my hobbies. Got the concrete down for a
36'x 48' a few weeks back. I'll be a Pinno built post on monolithic slab. I'm going with the Shallow Foundation Frost Protection insulation method. Insulated vertical sides of slab 2" of extruded foam and out around the perimeter 4' wide 2" thick.

Slab is a monolithic slab. 12"x12" perimeter beam with 4 rebar. Slab is on 6 mil barrier and welded steel mesh with the fiberglass strands. Steel plates are "L" shaped and are several inches into the slab to the rebar.

Should have mentioned it's a Central Wisconsin build. How can I edit the title?
 

Attachments
  • DSCN0440.jpg
    DSCN0440.jpg
    146.9 KB · Views: 144
Last edited:
To avoid these ads, REGISTER NOW!
OP
M

marzo91

Active member
Joined
Jan 5, 2014
Messages
32
Going to build a well insulated work shop; something nice to work in even in the cold Wisconsin winters. R-30 in the walls and R-50 in the ceiling. NG furnace, 12'5" ceiling so I have room for a lift. 2 12' wide by 10' tall OH in the gable end. One more OH off the side for storage.
 

Attachments

  • DSCN0441.jpg
    DSCN0441.jpg
    147.1 KB · Views: 86
  • DSCN0442.jpg
    DSCN0442.jpg
    148.1 KB · Views: 73
  • DSCN0443.jpg
    DSCN0443.jpg
    148.5 KB · Views: 79
OP
M

marzo91

Active member
Joined
Jan 5, 2014
Messages
32
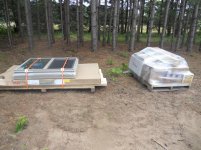
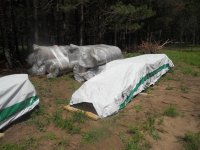
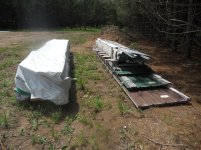
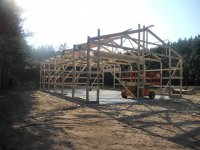
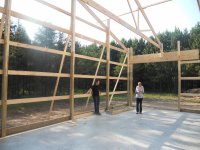
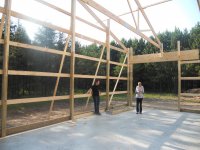
They started on the wood structure last week. Awesome materials. Laminated pressure treated beams and quality stuff around. Hard to see but there's a lot of wind-bracing in the roof and walls.
 

Attachments

  • DSCN0445.jpg
    DSCN0445.jpg
    146.5 KB · Views: 298
  • DSCN0446.jpg
    DSCN0446.jpg
    144.8 KB · Views: 268
  • DSCN0447.jpg
    DSCN0447.jpg
    144 KB · Views: 325
  • DSCN0448.jpg
    DSCN0448.jpg
    146.9 KB · Views: 226
OP
M

marzo91

Active member
Joined
Jan 5, 2014
Messages
32
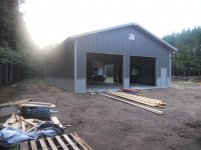
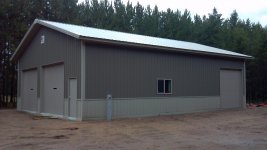
Here most of the exterior is done. 4-12 pitch, 18" boxed fascia and soffits, wainscoat style color break. Walls insulated with huge 8' wide fiberglass batts. 6 mil barrier before the wall and ceiling white liner.
 

Attachments

  • DSCN0449.jpg
    DSCN0449.jpg
    141.2 KB · Views: 275
  • DSCN0450.jpg
    DSCN0450.jpg
    139.5 KB · Views: 285
  • DSCN0451.jpg
    DSCN0451.jpg
    142.8 KB · Views: 301

ctgoodman

Well-known member
Joined
Mar 1, 2010
Messages
315
Location
Salisbury, NC
Very nice. So a little non-typical in the method for erecting a pole barn. Looks like your posts are held down by anchors and you still use a skirt board. In the later pictures it looks like something else has been added to the outside of the skirt board. What was done there? Can you post some pictures of that detail?
 
OP
M

marzo91

Active member
Joined
Jan 5, 2014
Messages
32
Very nice. So a little non-typical in the method for erecting a pole barn. Looks like your posts are held down by anchors and you still use a skirt board. In the later pictures it looks like something else has been added to the outside of the skirt board. What was done there? Can you post some pictures of that detail?

The skirt board has sill sealer and is on concrete. You might be seeing the aluminum flashing that comes out 2" and down 6" to cover the 2" foam insulation on the vertical foundation side. It'll look real nice after I get the stones around the outside of the shop.

I'll take some better pictures and post them soon.
 
Last edited:

ctgoodman

Well-known member
Joined
Mar 1, 2010
Messages
315
Location
Salisbury, NC
You might be seeing the aluminum flashing that comes out 2" and down 6" to cover the 2" foam insulation on the vertical foundation side. It'll look real nice after I get the stones around the outside of the shop.

That would be it. Does the flashing start under your metal siding then 2" out and then down? Probably not something that would be needed in NC. We just don't see that kind of cold you get there. I'm in the ideas and deciding what I want and need phase. It's great seeing all these different builds.
 
OP
M

marzo91

Active member
Joined
Jan 5, 2014
Messages
32
That would be it. Does the flashing start under your metal siding then 2" out and then down? Probably not something that would be needed in NC. We just don't see that kind of cold you get there. I'm in the ideas and deciding what I want and need phase. It's great seeing all these different builds.

Yes it does. 3" on the skirt side, then a 90 degree bend out to the foam edge, then a 90 degree bend, and 6" down. Nice finished look. The bottom edge of the steel lies tight to the flashing.
 

joed2323

Active member
Joined
May 11, 2014
Messages
42
Location
epping north dakota
Wow, i like this style build, alittle bit different then the norm putting poles into the ground!

What was the deciding factor for you building your garage this way over the traditional method of pole building, what is the cost difference of a stick built over the style you went with? Is their much savings if any?

I to am ready to pull the trigger on my 28x40 garage and ive been comparing the different construction methods
 
OP
M

marzo91

Active member
Joined
Jan 5, 2014
Messages
32
what kind of anchors did you use and where did you get them?There is not a whole lot of information around about this style.

They are 1/4" thick, 4"wide and about 24" long. They are bent in a "L" shape anchored deep in the concrete. Pinno Buildings does a lot of them like this. Less chance of frost heave. Posts will never be exposed to water. It also works great when the inside walls are finished. If anything moves or settles, it all moves together.
 
OP
M

marzo91

Active member
Joined
Jan 5, 2014
Messages
32
If you can zoom in on this picture, you can see where the anchors are bolted to the pressure treated laminated posts. Big half inch thread bolts with flat washers.
 

Attachments

  • DSCN0447.jpg
    DSCN0447.jpg
    144 KB · Views: 204
OP
M

marzo91

Active member
Joined
Jan 5, 2014
Messages
32
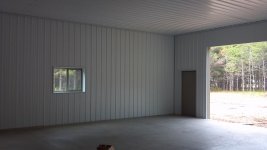
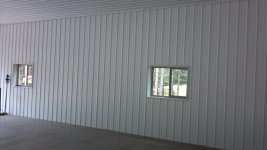
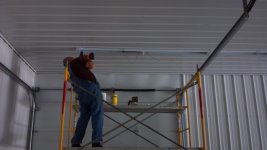
Here are a few pictures of the interior liner.
 

Attachments

  • 2014-08-01_15-54-47_425.jpg
    2014-08-01_15-54-47_425.jpg
    146.5 KB · Views: 173
  • 2014-08-01_15-54-18_580.jpg
    2014-08-01_15-54-18_580.jpg
    144.6 KB · Views: 179
  • 2014-08-01_15-54-01_463.jpg
    2014-08-01_15-54-01_463.jpg
    145.6 KB · Views: 200
  • 2014-08-01_15-53-45_5.jpg
    2014-08-01_15-53-45_5.jpg
    142.9 KB · Views: 201
To avoid these ads, REGISTER NOW!
OP
M

marzo91

Active member
Joined
Jan 5, 2014
Messages
32
Thanks.

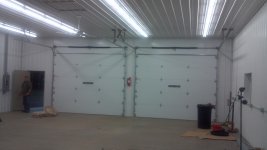
Still working on the shop. Garage doors are on now. Currently working on wiring and lighting. Last week I installed the meter base and 200 amp panel. Should get power hooked up next week.

Today, my wife and I put up 4 rows of fluorescent fixtures. It'll have 80 4' lamps on the ceiling for basic lighting. Task lighting will be added as needed after I build the new benches and arrange work stations.
 

Attachments

  • 2014-08-30_15-04-19_128.jpg
    2014-08-30_15-04-19_128.jpg
    135.3 KB · Views: 185
  • 2014-08-30_12-21-47_110.jpg
    2014-08-30_12-21-47_110.jpg
    144 KB · Views: 168
  • 2014-08-30_12-22-02_247.jpg
    2014-08-30_12-22-02_247.jpg
    143.4 KB · Views: 154
  • 2014-08-30_12-22-37_990.jpg
    2014-08-30_12-22-37_990.jpg
    143.4 KB · Views: 126

4cyclic

Well-known member
Joined
Sep 30, 2013
Messages
104
Location
Grand Isle, Vt
Yes it does. 3" on the skirt side, then a 90 degree bend out to the foam edge, then a 90 degree bend, and 6" down. Nice finished look. The bottom edge of the steel lies tight to the flashing.


Very nice build. I have the same construction concept in mind for a future shop.
The 90 degree bend out for the foam, did you use caulk to seal the bottom edge of the steel to the flashing or did you allow a few degrees in the bend for water drainage.

Also, how did you attach the 2 inch foam boards on the vertical outside perimeter of the slab.
 
OP
M

marzo91

Active member
Joined
Jan 5, 2014
Messages
32
Very nice build. I have the same construction concept in mind for a future shop.
The 90 degree bend out for the foam, did you use caulk to seal the bottom edge of the steel to the flashing or did you allow a few degrees in the bend for water drainage.

Also, how did you attach the 2 inch foam boards on the vertical outside perimeter of the slab.


It's a couple degree less than 90 degrees to board help drain. I sealed the skirt
board on the inside with spray foam insulation. I also sealed the girt where the wainscoat style color change meets. This cuts down on drafts in the walls and insects. They actually make a formed foam tape to seal the corrugated sheet metal siding. I think the foam insulation spray seals tighter and is many less $$. Ten $4 spray cans will do the 3 seams.

I"ve attached the pic.

On the exterior vertical slab, the 2" extruded foam is held in place with the dirt.
 

Attachments

  • 2014-07-29_20-19-49_751.jpg
    2014-07-29_20-19-49_751.jpg
    146.7 KB · Views: 143
Last edited:

rebelranger

Well-known member
Joined
Sep 18, 2012
Messages
188
So where is the interior wall support to attach things on the walls? Or are you only going to hit the wall support 2x4s?
 

4cyclic

Well-known member
Joined
Sep 30, 2013
Messages
104
Location
Grand Isle, Vt
Good idea on the foam cans.

Did you use 2 inch rigid foam under the slab and how will you heat the building.
The R30 in walls, how thick was the fiberglass batts.
Thanks for all the info.
 
OP
M

marzo91

Active member
Joined
Jan 5, 2014
Messages
32
I used the 2" extruded foam on the vertical sides of the slab and 4 feet of 2" foam horizontally outward around the perimeter of the entire slab. Many people wonder why a person would insulate the ground outside of the slab and not insulate under the slab. It's called Frost Protection Shallow Foundation, (FPSF).

I'm lucky enough to have a natural gas line 100 feet in front of the shop.

It has huge 8' wide fiberglass batts that completely fill the 9" area in the walls. That is a 6" post, and the 1.5" exterior girts and interior nailers.

http://www.cs.arizona.edu/people/jcropper/desguide.pdf Check out the link.

Basically, no insulation under the slab to take advantage of the constant temp of earth (and "heat bulb") below the slab. The horizontal insulation prevents the frost from freezing the ground below the slab. I'm going to start a new thread with the link about FPSF.
 
Last edited:
OP
M

marzo91

Active member
Joined
Jan 5, 2014
Messages
32
Finally got the power company out to run my line. Finished the wiring today. There are 80 T8 5000k lamps in the ceiling. Even though the picture doesn't show it well, it's plenty BRIGHT in there.
 

Attachments

  • 2014-09-28_18-40-20_797.jpg
    2014-09-28_18-40-20_797.jpg
    143.5 KB · Views: 139
OP
M

marzo91

Active member
Joined
Jan 5, 2014
Messages
32
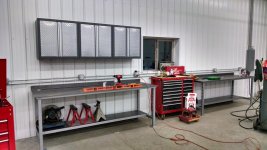
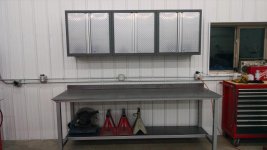
UPDATE: I built a couple new 8' benches. Installed a few cabinets too....
 

Attachments

  • IMG_20141208_162742509_HDR.jpg
    IMG_20141208_162742509_HDR.jpg
    148.7 KB · Views: 104
  • IMG_20141208_163041882.jpg
    IMG_20141208_163041882.jpg
    146.1 KB · Views: 83
Last edited:

rarebreed

Well-known member
Joined
Jun 26, 2013
Messages
146
Location
Clover, SC.
I think I have found my new garage idea :) This is how I want to do mine as long as the HOA where I will be living will accept this method. Mine will have to be vinyl siding and brick front to match the house though.

I have two questions for you regarding your build.

First : Why did you only use one L Bracket per post instead of two and are those 6x6 posts?
Second : I know this is personal, but how much did this building cost in the end?
 
OP
M

marzo91

Active member
Joined
Jan 5, 2014
Messages
32
Yes, 6x6 laminated posts. I suppose double shear would be stronger, but might not be needed.


I hate to post costs because someone can always do it cheaper. But I can say that things ALWAYS cost more than you plan, it ALWAYS takes longer than you think, and you always want to make improvements as you go. Spend the extra money and do it up right the first time.
 
Last edited:

rarebreed

Well-known member
Joined
Jun 26, 2013
Messages
146
Location
Clover, SC.
Wow, that's a lot of $$$. I am looking at pole barn kits from Carter Lumber here in SC and they are around $8k for a 24x32 ish without concrete. I am trying to keep mine at around $15 or less. I still like the post idea though.
 
OP
M

marzo91

Active member
Joined
Jan 5, 2014
Messages
32
Wow, that's a lot of $$$. I am looking at pole barn kits from Carter Lumber here in SC and they are around $8k for a 24x32 ish without concrete. I am trying to keep mine at around $15 or less. I still like the post idea though.

That's about the base kit cost around here too. That's for less than half the size building, no windows probably a slider door. Start putting on goodies and finishing the inside with windows trim and insulation and things add up fast. Heck it was 10 grand just to finish the interior and insulate.
 

rarebreed

Well-known member
Joined
Jun 26, 2013
Messages
146
Location
Clover, SC.
Gotcha. I plan to leave it unfinished on the inside and do it as the $$$ is available. I will likely insulate the interior walls and the do them in plywood after.
 
To avoid these ads, REGISTER NOW!
Top Bottom