To avoid these ads, REGISTER NOW!

VISE REPAIR 101 all vise repairs, lubricants, sources for parts and the tricks to fix

GUNpowder

Active member
Joined
Nov 11, 2014
Messages
32
hi all,

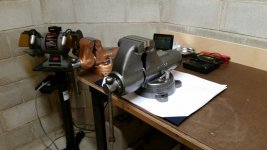
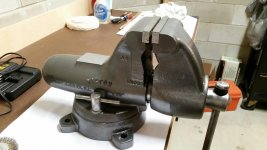
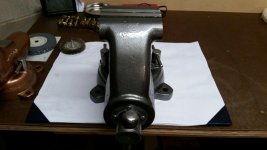
As I currently have no means to properly clean & repaint the Canadian No. 6, I reassembled everything using a bit of Anti-Seize on the wear pads.

I would like to add a grade 8 Flat Washer, Roll Pin, and stiffer Coil Spring.

Fortunately, this 75 lb. hunk of antique iron is very easy to work with. Sort of like a side-valve four stroke.

How does one research more history on such an apparently obscure brand?
I suspect it made have been a provincial government purchase for the local agricultural college, circa 1925 - 1935, but that is only a guess.

You guys said you strongly suspect this Vise is Record or Paramo. The vise may have been a local purchase from A.J. Walker & Sons Hardware. Wouldn't be the first time a manufacturer sold the same product under different names.

Like firearms, I am finding the history involved just as interesting as the artifact itself.
 
To avoid these ads, REGISTER NOW!

GUNpowder

Active member
Joined
Nov 11, 2014
Messages
32
Anyone know of a printed source of information on Vises? I ask, as helpful as this forum is, it is very difficult to search - or perhaps I just don't know the right questions yet.
 

Fretters

Well-known member
Joined
Jan 25, 2014
Messages
4,217
Location
South Yorkshire, England
The Leed Screw is retained by a floating Retainer Block, dovetailed into the Static Jaw and pinned in place.

The Retainer Block must be jockeyed into position into the dovetail while the Live Jaw is slid far enough to the back to allow finger access through an access hole in the bottom of the Static Jaw. Then the Retaining pin
is pushed in from the bottom.


The dovetailed nut is quite common. I simply didn't post a photo of that style as I didn't have one to hand. Is the rear end of the front jaws slide open or enclosed? If it's an open end slide, you should be able to just pull the pin from above and remove the nut, without fiddling from below, when the front jaw assembly is removed. It's only the closed end style slide which usually needs the finger dexterity session.

With regard to finding out whom the original manufacturer is, simple patience and keeping your eyes open for any relevant literature is usually the way forward. Canadian may have been the actual company or just a dealers brand which was imprinted on another company's vice. Styling is definitely English, so searching for Record/Paramo, Woden, Parkinson and Fortis may lead you to finding something similar. That one of yours has unique styling, so it should leap out at you if you come across any advertising literature showing one.

Simple luck does play part on occasion too. That's how I managed to find out what that Burgundy one was. Just random pot luck. Little lad mentioned he'd seen a vice on Ebay, and whilst I was looking trying to find the one he'd mentioned, I came across another listing for the same style of vice as the Burgundy one which still had remnants of the original label on it. I had been drawing a blank for ages up until that moment.
 
Last edited:
OP
D

drivesitfar

Well-known member
Joined
Oct 23, 2013
Messages
36,082
Location
Pacific Northwest
GunPowder: nice to see you are making good progress and thanks for the pictures. searching up vises (vices) history is not an easy thing. we don't have a book written like there is for old anvils. Garage journal seems to have the best resources for other vises of the same brands as the rarer ones and also guys that care about the history. as far as your Canadian one's history I'm guessing you might not be far off. it also could have been made for the government by the English vice makers during and just after WWII. hard to say.

i can tell you that I've seen one or two on the main vise thread so have a good read of the 1000+ pages and maybe PM the guys that posted one to see what they know.

good luck with the history and let us know what you find out and also getting that old Canadian sorted out and working on your bench.
 

GUNpowder

Active member
Joined
Nov 11, 2014
Messages
32
Fretters,

I found the exercise of stripping the Canadian a lot of fun! Question, what is the function of a "REVERSING COLLAR"? Not sure I fully understand the idea. Certainly appears to my less than experienced eye there is no such thing on the Canadian.

The dovetail is open at the back... but the rear of the slider masks the retainer block
... so one slides the dynamic jaw into place... then inserts the block from underneath. I found engaging the lead screw into the block before inserting the retainer pin was easiest. So there is some "finger fiddlin'" but not too much.
 

GUNpowder

Active member
Joined
Nov 11, 2014
Messages
32
drivesitfar,

Perhaps I should write a book on the subject of Vises, if no one else has. I could be the Ian Skennerton of Vises.
 
OP
D

drivesitfar

Well-known member
Joined
Oct 23, 2013
Messages
36,082
Location
Pacific Northwest
GP: if you have the talent and the patience to find all the history on our old vises i'd be happy to help and share what i've found out and i'm sure others would too.
 

Fretters

Well-known member
Joined
Jan 25, 2014
Messages
4,217
Location
South Yorkshire, England
Question, what is the function of a "REVERSING COLLAR"? Not sure I fully understand the idea. Certainly appears to my less than experienced eye there is no such thing on the Canadian.

What were you reading or looking at to see the part about a reversing collar? Can't say as I'm familiar with that myself.
 

GUNpowder

Active member
Joined
Nov 11, 2014
Messages
32
What were you reading or looking at to see the part about a reversing collar? Can't say as I'm familiar with that myself.

==================
Well, while I was wandering around in the semi-darkness trying to bring myself up to speed... I found the following reference.

==================

http://garagejournal.com/forum/showthread.php?t=62717

Page 1 - mjozefow - "Rectangular Slide" Vises:

2. Remove the lead screw. Some prefer to do this before removing the dynamic jaw. It is your call, sometimes it is nice to be able to pull on the handle A BIT (keep in mind, pulling too hard on the leadscrew is bad, as you will be pulling opposite the direction of greater strength.

The anti-reversal mechanisms are usually one of these three.

A front collar, this is an older style favored in most (maybe all?) Parkers and Wiltons. Others too I would imagine. This is A_Pmech's Ridgid 4" swivel vise.
 

GUNpowder

Active member
Joined
Nov 11, 2014
Messages
32
GP: if you have the talent and the patience to find all the history on our old vises i'd be happy to help and share what i've found out and i'm sure others would too.

Ha! I have lots of patience, and some writing ability.

It's the research I find daunting as the web is becoming much less useful as a research tool as the new search algorithms attempt to second guess what I am looking for... typing in any mfg. of vices plus the word 'vice' usually brings up this site, and Visa card applications, and not much else.

I'm a book person. Personal research is great if one has the resources to travel; few things take the place of talking to experienced machinists and other users.
 

mtesh73

Well-known member
Joined
May 19, 2013
Messages
185
Location
Colts Neck, NJ
wilton C2 restoration begins

here is the before picture. i am calling it "divider line yellow".

more pictures to follow.
 

Attachments

  • 20141114_172835_resized_1.jpg
    20141114_172835_resized_1.jpg
    146.3 KB · Views: 77

mtesh73

Well-known member
Joined
May 19, 2013
Messages
185
Location
Colts Neck, NJ
wilton C2 restoration begins

after some wire brushing on the 6" grinder. one of the lockdown handles is bent and needs straightening. other than that the vise is in excellent condition.

more pictures to follow along the way.
 

Attachments

  • 20141115_081746_resized.jpg
    20141115_081746_resized.jpg
    139 KB · Views: 103
  • 20141115_081801_resized.jpg
    20141115_081801_resized.jpg
    140.5 KB · Views: 83
  • 20141116_104546_resized.jpg
    20141116_104546_resized.jpg
    142.2 KB · Views: 86
  • 20141116_151023_resized.jpg
    20141116_151023_resized.jpg
    144.7 KB · Views: 96
  • 20141117_095851_resized.jpg
    20141117_095851_resized.jpg
    143 KB · Views: 86
  • 20141117_095932_resized.jpg
    20141117_095932_resized.jpg
    139.4 KB · Views: 114
  • 20141117_095914_resized.jpg
    20141117_095914_resized.jpg
    134.2 KB · Views: 91
Last edited:

Fretters

Well-known member
Joined
Jan 25, 2014
Messages
4,217
Location
South Yorkshire, England
Well, while I was wandering around in the semi-darkness trying to bring myself up to speed... I found the following reference.

It's just misleading terminology which has been used there. He's referring to the leadscrew retainer, which on yours is the spring, washer and pin. The benefit of the spring setup over plain collars is that it removes any backlash from the leadscrew during use, so there's no deadspot, so to speak, on slide movement when turning the handle.
 

Fretters

Well-known member
Joined
Jan 25, 2014
Messages
4,217
Location
South Yorkshire, England
Re: wilton C2 restoration begins

here is the before picture. i am calling it "divider line yellow".

:D That's one of the three colours I pretty much detest with a vengeance on machinery. :D That yellow, naval grey and a certain shade of blue seem to have been plastered on so many industrial and hire machines that they almost get removed just on principal, if I come across the colour. :D The parts are looking much better cleaned up. :)
 

GUNpowder

Active member
Joined
Nov 11, 2014
Messages
32
It's just misleading terminology which has been used there. He's referring to the leadscrew retainer, which on yours is the spring, washer and pin. The benefit of the spring setup over plain collars is that it removes any backlash from the leadscrew during use, so there's no deadspot, so to speak, on slide movement when turning the handle.

Thanks Fretters! I like the internal arrangement as everything is out of the dust and chance of being bumped.
 

GUNpowder

Active member
Joined
Nov 11, 2014
Messages
32
REMOVABLE JAWS

I did remove one of the removable jaw plates... both retaining screws are worn & corroded almost to the point of uselessness. 5/16-18 NC counter sunk slotted. The screws on the other jaw have had their screw slots been effectively peened by years of use to the point where I may not be able to remove them using a slotted screwdriver.

I am guardedly optimistic the internal threads may not be as bad as the individual screws - otherwise I may need to drill and tap 3/8 - 16 NC to get full thread depth. I do notice the 5/16-24 NF takes an "I" size drill bit (this is NOT a workable idea); simply re-tap the existing holes. I would lose some thread depth - how much I have not calculated. The jaw plates are not under very much sheer force, so some loss of theoretical holding power may not matter. Then again...?

Re-tapping the holes in the static jaw is simple cleanup. Going up one size can be done with a drill press. Enlarging the holes in the dynamic and static jaws and would be mildly challenging for me as I have no drill press or milling machine handy in the apartment, but not impossible. Enlarging the holes in the removable jaw plates might prove more troublesome - they are not just counter sunk - the are counter-bored 0.050" as well.

I intend to try finding a small, square chisel, and cleaning up the screw slots first, before resorting to drilling. Finesse I think is called for.
 
Last edited:

GUNpowder

Active member
Joined
Nov 11, 2014
Messages
32
QUESTION:

How do I set up a "Quick Link" to my posts?

I am having a major hassle getting back to this discussion everytime I open my browser.
 

GUNpowder

Active member
Joined
Nov 11, 2014
Messages
32
RE: http://www.garagejournal.com/forum/showthread.php?t=44782&highlight=VISES

I did begin looking through the 1100 plus pages for an example of my 'Canadian" vise - nothing really close (although I do detect a family resemblance to the PARAMO on p. 24) of the in the first 30 pgs. Made me think about what color my rebuild will be. I like the off khaki greens, or greys I think. The original blue not so much.
 
Last edited:

exmaxima1

Well-known member
Joined
Jun 25, 2011
Messages
6,343
Location
Midwest
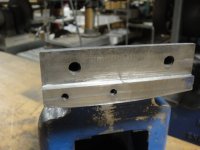
Here is another repair that I will fix, I am working with the owner on options, I am leaning to cutting a pocket and fit a piece of steel and pinning it down then re-machining the face. I do not want to weld if I can get away from it. I need material there to re-pin the new jaws. Any other suggestions?

I did exactly that with my Record 23. Fitted a new piece of steel, installed a pair of dowels, and clamped it together with JB Weld. Works perfectly, and practically invisible.
 

Attachments

  • record2.JPG
    record2.JPG
    135.5 KB · Views: 92
Last edited:
OP
D

drivesitfar

Well-known member
Joined
Oct 23, 2013
Messages
36,082
Location
Pacific Northwest
GunPowder: you can set up your browser to open Garage Journal as your home page like i have done in Internet Explorer. when i use Google Chrome as my browser i open to Google, but I have many quick links in my display just under where you can type in the website you want to use. if you don't know how to save a website to your favorites or make it your home page shoot me a PM and i'll walk you through it.

Ex: very cool fix on the old Record vice and probably exactly what KMScott was thinking about doing. also regarding your fix on your new Reed 2C i'd say weld, or JB Weld or there is another non welding material to use to fill in holes that i can't remember the name of that is a little more expensive and better than JB. again nice find
 
Last edited:
To avoid these ads, REGISTER NOW!

exmaxima1

Well-known member
Joined
Jun 25, 2011
Messages
6,343
Location
Midwest
Ex: very cool fix on the old Record vice and probably exactly what KMScott was thinking about doing. also regarding your fix on your new Reed 2C i'd say weld, or JB Weld or there is another non welding material to use to fill in holes that i can't remember the name of that is a little more expensive and better than JB. again nice find

If you think of that magic filler that's better than JB Weld, please let me know. BTW, though this vise was advertised as "50 lbs", it feels substantially more.....
 
OP
D

drivesitfar

Well-known member
Joined
Oct 23, 2013
Messages
36,082
Location
Pacific Northwest
Ex: I think it's called Devcon that is a better product than JB Weld. i haven't used it yet, but heard it's a lot better than JB. i also heard it costs quite a bit more. maybe another member has some thoughts about it and maybe used some on their projects.

Edit: looks like Jason had the name while i was searching an old thread for it.
 

exmaxima1

Well-known member
Joined
Jun 25, 2011
Messages
6,343
Location
Midwest
Ex: I think it's called Devcon that is a better product than JB Weld. i haven't used it yet, but heard it's a lot better than JB. i also heard it costs quite a bit more. maybe another member has some thoughts about it and maybe used some on their projects.

Edit: looks like Jason had the name while i was searching an old thread for it.

I see that Amazon has it, so I'll give it a try. Thanks!
 

exmaxima1

Well-known member
Joined
Jun 25, 2011
Messages
6,343
Location
Midwest
Devcon 10110 Steel Putty-- Zoro has the best price, even better if you can wait for a 25% off deal

I think I will want to use the devcon 52345 self-leveling liquid version to work its way into the chip. I'm putting an order together at work for Zoro, so I should have it soon. Thanks for the help.
 
Last edited:

EOC_Jason

Well-known member
Joined
Jun 25, 2012
Messages
11,388
Location
Bentonville, AR
There are lots of different kids for different applications, I would go to their website to see the specs and such before making a decision.
 

GUNpowder

Active member
Joined
Nov 11, 2014
Messages
32
GunPowder: you can set up your browser to open Garage Journal as your home page like i have done in Internet Explorer. when i use Google Chrome as my browser i open to Google, but I have many quick links in my display just under where you can type in the website you want to use. if you don't know how to save a website to your favorites or make it your home page shoot me a PM and i'll walk you through it.

Drivesitfar - the problem is not in getting to the web page - or even reaching any of several general internal pages regarding vises - it is in getting back to the page where my posts (and your replies reside). Already in My Favourites. I just don't want to spend 10 minutes finding this particular thread everytime I open the web page.

And the 'SEARCH' button is not of much use for focused searching. There should be a relatively easy way to link the Search function to User Name to bring up all of one's own posts.
 
Last edited:

mtesh73

Well-known member
Joined
May 19, 2013
Messages
185
Location
Colts Neck, NJ
Re: wilton C2 restoration begins

:D That's one of the three colours I pretty much detest with a vengeance on machinery. :D That yellow, naval grey and a certain shade of blue seem to have been plastered on so many industrial and hire machines that they almost get removed just on principal, if I come across the colour. :D The parts are looking much better cleaned up. :)

my sentiments exactly.....its not like its a porsche!!! LOL

thanks, i am having a lot of fun with this one :lol:
 

Outlawmws

Well-known member
Joined
Aug 9, 2011
Messages
39,350
Location
The Badlands
GunPowder: you can set up your browser to open Garage Journal as your home page like i have done in Internet Explorer. when i use Google Chrome as my browser i open to Google, but I have many quick links in my display just under where you can type in the website you want to use. if you don't know how to save a website to your favorites or make it your home page shoot me a PM and i'll walk you through it.

Drivesitfar - the problem is not in getting to the web page - or even reaching any of several general internal pages regarding vises - it is in getting back to the page where my posts (and your replies reside). Already in My Favourites. I just don't want to spend 10 minutes finding this particular thread everytime I open the web page.

And the 'SEARCH' button is not of much use for focused searching. There should be a relatively easy way to link the Search function to User Name to bring up all of one's own posts.

There is. LEFT click on your user name and click on "Find more posts by member"

In the advanced search you can also specify a user's name, and the same feature exists in the "search this thread" function.

if you save a book mark while on a particular page that book mark will come back to that page regardless...
 

Kickstart

Member
Joined
Nov 8, 2014
Messages
18
I've been looking on this site for a while and haven't found an answer to what I'm searching for or perhaps I missed it??

I have a Simplex vise that I wish to restore and I have mostly apart now. I'm wondering the best way to remove the screw mechanism from the dynamic end then re-install it after a repaint.

There is a washer on the screw mechanism that is held in buy some ridges created by what I assume is a chisel. Grinding out the little ridges would be no problem but re-installing the washer would need some sort of a way to keep it in place. Is it as simple as re-chiseling a couple new ridges or perhaps there is a better alternative?
 

jakemac

Well-known member
Joined
May 21, 2013
Messages
9,035
Location
New England
Three options :

1 - Find a way to make new chisel cuts to re-fit the washer

2 - Drill a hole through the spindle just behind the washer and insert a holding pin

3 - Go to the hardware store and find a collar with a set screw that fits over the spindle to replace the washer (a well stocked store will have parts bins near the nut/bolt bins)
 
Last edited:

Wanna Ride

Well-known member
Joined
Jul 28, 2010
Messages
2,790
Going to be rebuilding a vise I bought at a garage sale a couple years ago, and there's just a wealth of information in this thread. Thanks to all who have contributed!
 

coleman10

Well-known member
Joined
Nov 12, 2012
Messages
871
Location
Fort Lauderdale, FL
I think I decided to forget using wire brushes to strip my vice and use electrolysis instead. Far less effort, plus I can clean up some other stuff later on. Most of what I've seen says that you need to suspend the rusty item from the top of the tank. Instead, can I just rest it on a couple of bricks and then rotate it after a couple of days to get the bottom facing toward an anode?
 
OP
D

drivesitfar

Well-known member
Joined
Oct 23, 2013
Messages
36,082
Location
Pacific Northwest
Coleman: I'm guessing you are talking about bricks at the bottom of the tank? if so that sounds doable to adjust it after you get all but the part touching the bricks de rusted.

WannaRide: happy to hear you found information you can use. can you post a few pictures of your vise in a couple posts. one before and another one after you finish? good luck
 

metalhead140

Well-known member
Joined
Jan 15, 2013
Messages
1,456
Location
NSW, Australia
REMOVABLE JAWS

I did remove one of the removable jaw plates... both retaining screws are worn & corroded almost to the point of uselessness. 5/16-18 NC counter sunk slotted. The screws on the other jaw have had their screw slots been effectively peened by years of use to the point where I may not be able to remove them using a slotted screwdriver.

I am guardedly optimistic the internal threads may not be as bad as the individual screws - otherwise I may need to drill and tap 3/8 - 16 NC to get full thread depth. I do notice the 5/16-24 NF takes an "I" size drill bit (which might let me get away with not having to enlarge the countersink in the jaw plate); simply re-tap the existing holes. I would lose some thread depth - how much I have not calculated. The jaw plates are not under very much
sheer force, so some loss of theoretical holding power may not matter. Then again...?

Re-tapping the holes in the static jaw is simple cleanup. Going up one size can be done with a drill press. Enlarging the holes in the dynamic and static jaws and would be mildly challenging for me as I have no drill press or milling machine handy in the apartment, but not impossible. Enlarging the holes in the removable jaw plates might prove more troublesome - they are not just counter sunk - the are counter-bored 0.050" as well.

I intend to try finding a small, square chisel, and cleaning up the screw slots first, before resorting to drilling. Finesse I think is called for.

Bet your jaw screws aren't as bad as mine! My fun this past Saturday:

Spent some time trying to get the Dawn ready for its new jaws. One jaw was already detached when I bought it, so that was easy... As for the other side, well I will beat it, but not yet...

The screw heads had become one with the faces of the jaws, so the first thing I tried was grinding back the jaw to locate the screw and cutting some slots:


But no luck, stuck solid. So I tried drilling the centres of the screws and extracting with an easy out (note use of new drill press vice):


But nope, still no luck. So I drilled the heads off the screws and was able to remove the jaw, but so far have had no luck removing the remainder of the screws with either vice grips or easy outs. Will try again tomorrow, but at this point will likely end up drilling out the remainder of the bolts and tapping to a larger thread size I suspect...

Check out the difference between old and new jaws and bolts. This vice has seen some (ab)use!:


Joplin awaiting its bench to be built. It's really nice, no slop, very happy with it. :):


Mine are 5/16 also as best I can tell. Probably going to have to go to 3/8.
 

coleman10

Well-known member
Joined
Nov 12, 2012
Messages
871
Location
Fort Lauderdale, FL
Coleman: I'm guessing you are talking about bricks at the bottom of the tank? if so that sounds doable to adjust it after you get all but the part touching the bricks de rusted.


Cool. Can the jaw inserts and screws also be dumped into the tank or should those be polished by hand?

Also, I've seen some info online about possibly using a laptop charger instead of an auto battery charger. Has anyone had any success with that method? If not, is there newer charger that will work without including a battery in the circuit?
 

Fretters

Well-known member
Joined
Jan 25, 2014
Messages
4,217
Location
South Yorkshire, England
Also, I've seen some info online about possibly using a laptop charger instead of an auto battery charger. Has anyone had any success with that method? If not, is there newer charger that will work without including a battery in the circuit?

Any 6V to 12V supply will be fine, provided it can cope with current demand. You'll also have a far smoother output using some regulated supply than you will using a charger.
 
OP
D

drivesitfar

Well-known member
Joined
Oct 23, 2013
Messages
36,082
Location
Pacific Northwest
Coleman: check your local Craigslist or garage sales for older chargers you can buy for $5-25 or in that range. i hear the older ones don't need a battery in the loop, but i still need to clean out my shop and set up my tank. if you let us know where you live somebody here might have an extra one to sell you if you can't find one.

screws, jaws anything metal except stainless, nickel, chrome and other plated metals can go in your Electrolysis tank. here's a great read on the do's and don'ts of home electrolysis. i had a ton of questions and others did too and the experts were answering them all. i can't remember a question that didn't get answered on that thread.

http://www.garagejournal.com/forum/showthread.php?t=237752&highlight=homemade+electrolysis
 
Last edited:

GUNpowder

Active member
Joined
Nov 11, 2014
Messages
32
QUESTION:

How do I set up a "QUICK LINK" to MY posts?

I am having a major hassle getting back to this discussion everytime I open my browser.


How do I set up a "QUICK LINK" to MY posts within a particular forum?
Seem like a logical idea to me that one might want to connect with one's own posts and replies...
 
To avoid these ads, REGISTER NOW!
Top Bottom