
You are using an out of date browser. It may not display this or other websites correctly.
You should upgrade or use an alternative browser.
You should upgrade or use an alternative browser.
Between 265 & 485 SQ/FT Woody's Works Garage
- Thread starter Denwood
- Start date
Workspaces sized between 265 and 485 squarefeet.


mrzoop
Well-known member
Re: 8ft to 10ft ceiling in 8 hours, $650 ??
Great project. Keeping the cold out is always the toughest part. That door should do the trick.
I'm interested in knowing where you bought your max hoist? Did you buy it in Canada? I hope to get one for my shop soon.
Great project. Keeping the cold out is always the toughest part. That door should do the trick.
I'm interested in knowing where you bought your max hoist? Did you buy it in Canada? I hope to get one for my shop soon.
Re: 8ft to 10ft ceiling in 8 hours, $650 ??
Thanks zoo. The door needs a bit of tweaking IMHO to seal a bit better at the side rails, however the seamless design really appealed to me over conventional roll up doors. The MaxJax hoist came from Costco.ca. Their price includes shipping..which took about a week to my garage door.
Both the roll up door and hoist shipped from the West coast but lead times were 5 days on the hoist, and 4 weeks on the door. Smartgarage custom fabricates the door based on your color choice and door opening size.
Last edited:
Hugo L.
Well-known member
Re: 8ft to 10ft ceiling in 8 hours, $650 ??
Cheers from a fellow Canuck! Great setup you got there. And yes, keeping the cold out, especially in Canada (I'm in Québec, so it IS cold), is a priority.
I didn't know Costco sold lifts.
Cheers from a fellow Canuck! Great setup you got there. And yes, keeping the cold out, especially in Canada (I'm in Québec, so it IS cold), is a priority.
I didn't know Costco sold lifts.
Re: 8ft to 10ft ceiling in 8 hours, $650 ??
Hugo, neither did I. Free shipping on an 800lb pallet sealed the deal for me") I've never even been in a Costco store.
I've never even been in a Costco store.
I sourced some extra brush seals today (45 degree, 2" long brush) to add to the inner side rails. Slight pressure forward (need to take some pics to explain why) will help air seal the system as www.smartgarage.ca "fills" the edge of each corrugation on the front with a small foam block. This means that the outside facing seal on both sides/edges of the roll up door is more or less straight, so will form a good air seal as long as the door is not "floating" in the side rail.
Hugo, neither did I. Free shipping on an 800lb pallet sealed the deal for me
I've never even been in a Costco store.I sourced some extra brush seals today (45 degree, 2" long brush) to add to the inner side rails. Slight pressure forward (need to take some pics to explain why) will help air seal the system as www.smartgarage.ca "fills" the edge of each corrugation on the front with a small foam block. This means that the outside facing seal on both sides/edges of the roll up door is more or less straight, so will form a good air seal as long as the door is not "floating" in the side rail.
Re: 8ft to 10ft ceiling in 8 hours, $650 ??
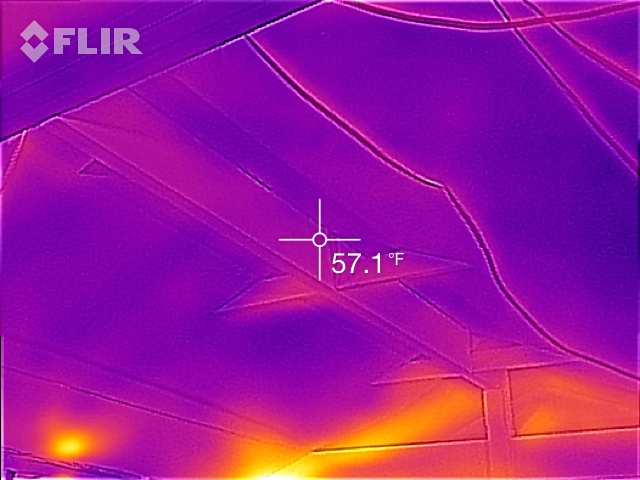
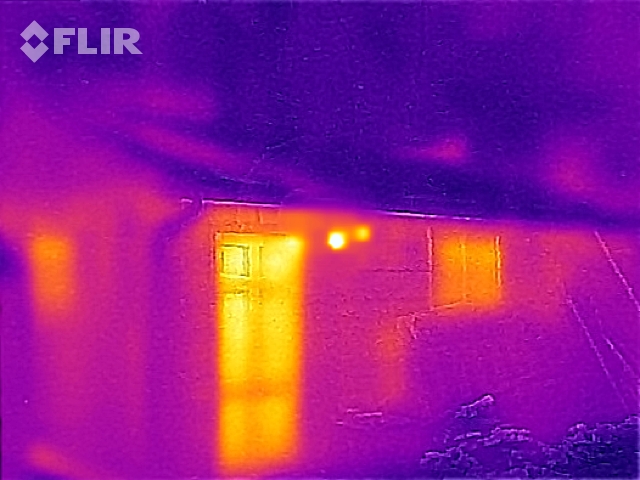
A few shots taken with a FLIR ONE thermal imager. Outside conditions, -20C, with a windchill at -24C (-11F)...brrr! The heat in the shop was on for about an hour, set at 15C (60F).
The roll up door, and spray foamed ceiling are shown. Note that the outside side "seals" for the roll up door are not installed yet. I'm using 2" nylon brush seals angled at 45 degrees, (not sent with the door) to improve the air sealing a bit from the outside..again, not installed yet. The drywall for the ceiling was delivered today so I figured I'd grab a few images before it's up.
Last edited:
drivesitfar
Well-known member
Re: 8ft to 10ft ceiling in 8 hours, $650 ??
Denwood: thanks for putting in that your -24 is actually -11 in my thinking. when you said your temps got below -35 I forgot you are on a different temperate measuring system than i'm used to here in the US. still cold as hell though and looks like you have almost eliminated heat loss. cool camera pictures by the way.
you are working on having the nicest 1 car garage I think I've ever seen. the cost to raise the ceiling was reasonable, but then you added the spray on insulation, new garage door and the lift. by the sounds of it you could have built a new garage on a vacant lot for less, but then you wouldn't have your cool neighbors and that old house i'm guessing that is spiffed up like you like it.
I hope the finish trim on your new door helps even more and for a guy that is very handy in the shop you take great pictures. i'm looking forward to see how you finish your shelving and toolboxes and tools in your space. At home i have a little less space than you in my attached single car garage that I've been using as a gym. I'd like to turn it into a shop and my wife has the other single car garage next to mine and i'm not allowed over there except for my work bench in the back of it that had squatting rights.
Happy Thanksgiving
Re: 8ft to 10ft ceiling in 8 hours, $650 ??
Drive, thanks so much for your thoughts. You're correct in that I could have likely built a larger shop adding in another 10K, however my general thoughts on sustainability kind of dictate (like so many on this forum) working with what I have, vs what I want. After finishing a very efficiency HQ for Cinevate (our heat bill for 9500 sq/ft is 50% less than my older home at 1800 sq/ft) the shop envelope is quite wasteful. That said, I only heat when using it, and turn off the heat completely otherwise.
Next step is drywall for the ceiling (hopefully "Bob") will show up and finish the boarding/taping this week. All of my storage is moving to suspended high cabinets around the perimeter, and all of my tools/fasteners etc. are moving to a few added tool chests. It should be an efficient space once complete. This forum has certainly shaped its design
drivesitfar
Well-known member
Re: 8ft to 10ft ceiling in 8 hours, $650 ??
Denwood: your garage is awesome and is getting better all the time. hopefully the sheet rock guy does a great job hanging and taping.
i started one corner of my shop i lease with this 8 foot butcher block top metal framed work bench and i found these 2 33 drawer metal cabinets that fit just barely inside the frame of the bench. it should work out well and i will either find another one identical for my house or take this one home. i'm not positive what the metal cabinet with all the drawers was originally made for, but mine held old TV parts so not any grease and only minor rust that i can live with.
I second the GJ influence because before i joined i had a couple carry tool boxes and a small 2 drawer tool box on top of my work bench. i can't tell you how many tools and tool boxes i own now, but i do have better tools for the jobs they were meant to do. looking forward to seeing how you manage your smallish garage's space.
good luck
Attachments
mrsingh
Active member
Re: 8ft to 10ft ceiling in 8 hours, $650 ??
Just a quick (and rather geeky) note. The celsius and fahrenheit temperature scales actually meet at -40 degrees. So -35 degrees C is actually -31 degrees F. Either way it is pretty damn cold, having experienced -58 degrees C with windchill (-72 degrees F) before, it is definitely not fun!
Denwood: thanks for putting in that your -24 is actually -11 in my thinking. when you said your temps got below -35 I forgot you are on a different temperate measuring system than i'm used to here in the US. still cold as hell though...
Just a quick (and rather geeky) note. The celsius and fahrenheit temperature scales actually meet at -40 degrees. So -35 degrees C is actually -31 degrees F. Either way it is pretty damn cold, having experienced -58 degrees C with windchill (-72 degrees F) before, it is definitely not fun!
drivesitfar
Well-known member
Re: 8ft to 10ft ceiling in 8 hours, $650 ??
Mrsingh: Sorry i was always told to take 32 degrees (water's freezing temp) as ZERO (O) and then every 2 degrees is 1 degree on the celcius scale. so 50 degrees is 9 according to that method. since we don't use that scale often I've never actually known the real math on it.
I can't imagine what 50 below would be and not sure i want to, but i do remember what -6 was because i was in Chicago on a layover. I was dressed for 80 degree weather in Myrtle Beach, SC and our plane in Chicago left us there overnight. the walk in and out of the airport and into the hotel was something i have to say wasn't pleasant in shorts and a short sleeve shirt because luggage was still at the airport.
thanks for clarifying the temperature scales and i'll do a little more research or change my personal scale a bit.
Denwood: now i understand why the extra expense for the spray on insulation. good call and sheet rock should help too.
Re: 8ft to 10ft ceiling in 8 hours, $650 ??
Drive, I looked at butcher block for tops (the cheap stuff from Menards) as I think it makes a perfect work surface. Right now, I'm attempting to buy some 42" tool chests on a special buy (Home Depot) with hardwood tops for $299 each...a great price. Nothing in my shop will be stationary. Everything will be on wheels.
MrSingh, I did a fly-in tour to remote Northern communities here and was treated to -48C (ambient) with wind chill in the -60 range. I rode about a mile in the back of a pick up truck (First Nations visit), an experience I can never forget. We were travelling with some animals (Staff Scientist, Science North) so I did this trip with a water snake and a few baby turtles in my jacket so they wouldn't freeze in the air plane. Ha.
One thing's for sure, air leaks and insulation holes are very noticeable when it's so cold and stack effect is busy sneaking air out of the envelope up high, and sucking it in furiously down low. Jeez, the lake even froze out front in Thunder Bay. This is what it looks like at -24C with water in the bay unfrozen. A very short time lapse hardware test...it was short as my iPhone died in about 30 seconds at these temps. The GoPro's kept shooting though...
http://vimeo.com/81284507
Re: 8ft to 10ft ceiling in 8 hours, $650 ??
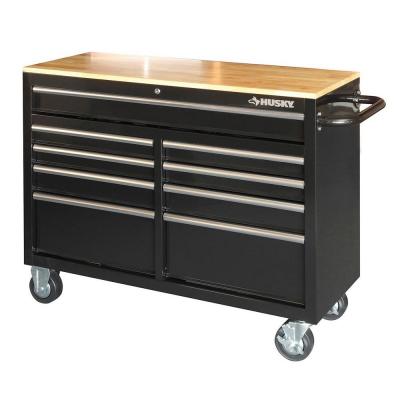
Davo, I figure the beams were a lot less expensive Score this am after waiting patiently for a few weeks. Local HD had two of these in stock. Surprisng quality at the close out price.
http://t.homedepot.com/p/Husky-46-i...h-with-Solid-Wood-Top-HOTC4609B1QBD/203859406
Davo, I figure the beams were a lot less expensive
Score this am after waiting patiently for a few weeks. Local HD had two of these in stock. Surprisng quality at the close out price.http://t.homedepot.com/p/Husky-46-i...h-with-Solid-Wood-Top-HOTC4609B1QBD/203859406
bazzateer
Well-known member
Re: 8ft to 10ft ceiling in 8 hours, $650 ??
To convert from C (foreign) into F (English ) multiply by 1.8 then add 32.
Mrsingh: Sorry i was always told to take 32 degrees (water's freezing temp) as ZERO (O) and then every 2 degrees is 1 degree on the celcius scale. so 50 degrees is 9 according to that method. since we don't use that scale often I've never actually known the real math on it.
To convert from C (foreign) into F (English
) multiply by 1.8 then add 32.drivesitfar
Well-known member
Re: 8ft to 10ft ceiling in 8 hours, $650 ??
Bazz: thanks for the math on the temps. it doesn't seem to work the same going in the negative temps, but maybe i'm doing something wrong.
Denwood: you have some amazing camera skills even if your cold weather causes issues with your equipment. also nice score on the tool boxes with the butcher block tops if those are the style you like.
Re: 8ft to 10ft ceiling in 8 hours, $650 ??
Bazz, love the signature. Most of the time when I need a calc or conversion I just type into google eg. 7C = ?F . Surprising how efficient that can be
Drive, the boxes are great. The tops are hardwood and sealed so are an improvement over what they replace. The built in bench (pretty ghetto) on one side of the shop is gone now, replaced with the two toolbox/benches which have organized a lot of clutter and will provide 8ft of work surface 18" wide. They are easily moved and the castors included are just fine with a very loaded box. Any projects needing center workspace can be addressed with these. At the sides of the shop, my cutoff is 18" intrusion so car doors can open wide. A larger bench ( on wheels but made with Kee Klamps) will cover the rear of the shop as soon as all the high wall cabinets are done.
Last edited:
bazzateer
Well-known member
Re: 8ft to 10ft ceiling in 8 hours, $650 ??
Nope, you're not doing anything wrong. No idea how the calculation works when dealing with the minus range!
The sig? I can't take credit for that but being a cop I have to say that Abbott was right!
Bazz: thanks for the math on the temps. it doesn't seem to work the same going in the negative temps, but maybe i'm doing something wrong.
Nope, you're not doing anything wrong. No idea how the calculation works when dealing with the minus range!
Bazz, love the signature.
The sig? I can't take credit for that but being a cop I have to say that Abbott was right!

sublime68charger
Well-known member
Looks good den wood
Thanks Sublime
I had the heat on for an hour or so to do endwall framing for drywall tonight. Here's a few more FLIR images of the smartgarage.ca roll up door before and after side seal installation. You can see I've still got a bit of work to do non the right side to adjust the seal. Outside temps tonight were -18C.
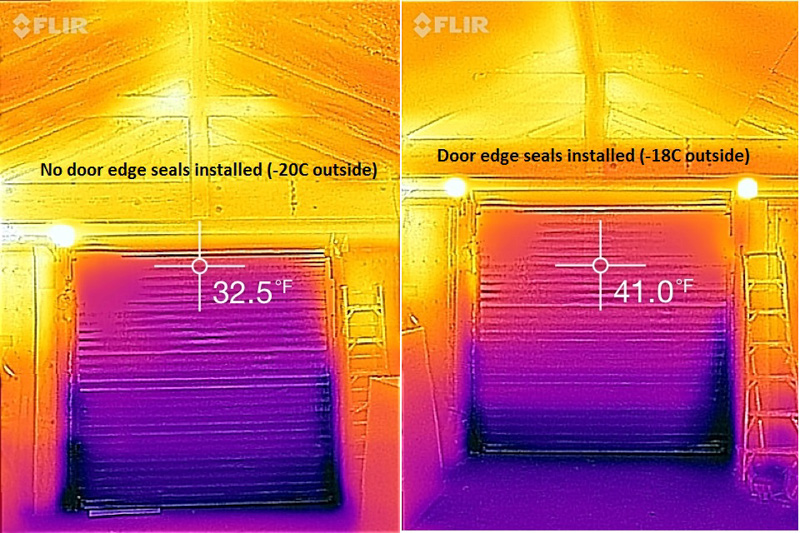
I had the heat on for an hour or so to do endwall framing for drywall tonight. Here's a few more FLIR images of the smartgarage.ca roll up door before and after side seal installation. You can see I've still got a bit of work to do non the right side to adjust the seal. Outside temps tonight were -18C.
Last edited:
drivesitfar
Well-known member
Denwood: i didn't notice the name change on your thread. very appropriate for what the project turned into. did you ever take any pictures of your garage door from the outside and can you post them on your thread? or did i miss that post?
boy that is a lot of seams for the drywaller to tape. any idea how long it's going to take him to finish up drywall mudding and taping?
did your heat loss improve in the ceiling with the rock installed?
very nice work. looking good.
boy that is a lot of seams for the drywaller to tape. any idea how long it's going to take him to finish up drywall mudding and taping?
did your heat loss improve in the ceiling with the rock installed?
very nice work. looking good.
DarrenF
Well-known member
How do i get ahold of one of those fancy flir cameras?
Darren, the FLIR ONE can be purchased online from the Apple Store for about $350. You plug your iphone 5/5s into it. Here's the FLIR ONE on my iPhone 5s, "flying" on our Morpheus Stabilizer One of the FLIR free apps does thermal time lapse, so we'll be doing some interesting thermal images to demonstrate the roll up door thermal reflective insulation and some other cool stuff. Our little Morpheus supports the combination of FLIR/iPhone rather nicely for this application. The clip below is a 15 second instagram video of the FLIR "flying" in our office Click the image to play.

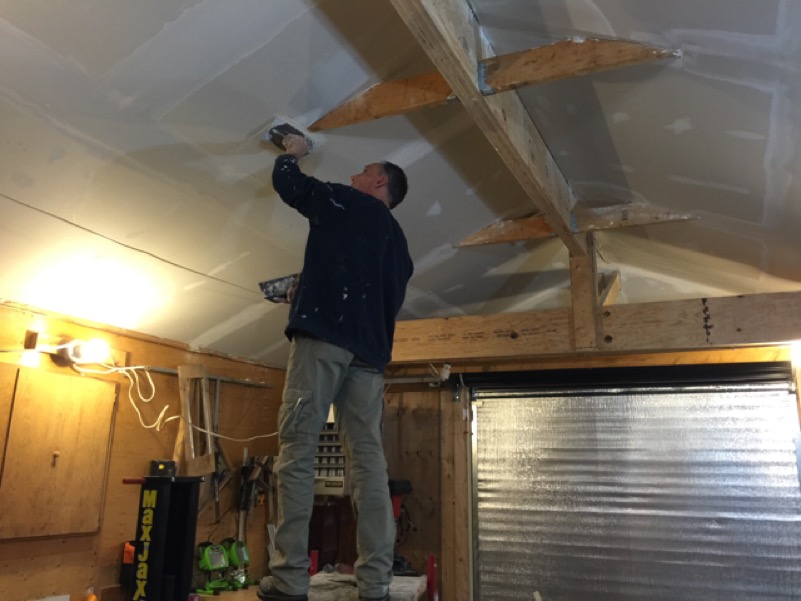
Drive, the thread started out as just raising the roof, but I figured a name change was required as this has turned into a full blown shop build. Poor Bob is pictured here at hour 19 here. It took a lot longer than he was expecting, but he figures another hour and we're good...20 hours all in. Adding the drywall traps some air in the gaps left over after between roof stringers after spray foaming, so there's likely another R4 or added between the .6R for 5/8 drywall and the trapped air space. I'll take another thermal once the mud has dried.
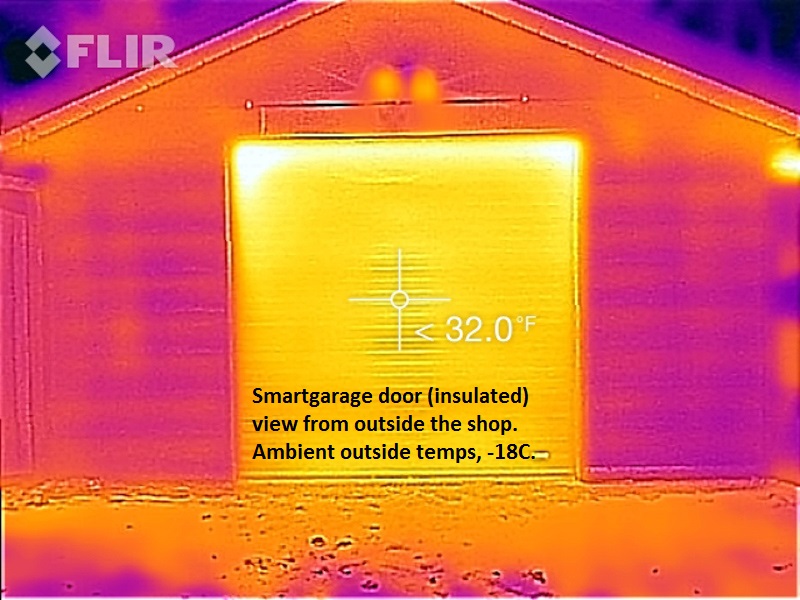
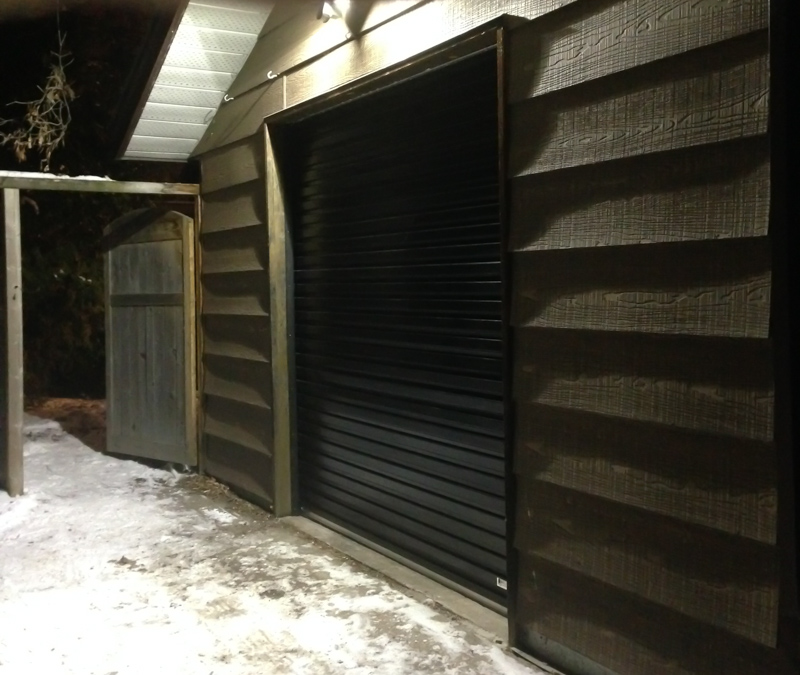
The roll up door from outside.
Click the image to play.
Drive, the thread started out as just raising the roof, but I figured a name change was required as this has turned into a full blown shop build. Poor Bob is pictured here at hour 19 here. It took a lot longer than he was expecting, but he figures another hour and we're good...20 hours all in. Adding the drywall traps some air in the gaps left over after between roof stringers after spray foaming, so there's likely another R4 or added between the .6R for 5/8 drywall and the trapped air space. I'll take another thermal once the mud has dried.
The roll up door from outside.
Last edited:

sublime68charger
Well-known member
Looks like its gonna turn out real nice for you.
awesome job
awesome job
sublime68charger
Well-known member
Sub, having read your build thread, I'm feeling a bit lazy actually
funny I could say the same thing when reading yours LOL
Grizzly Guy
Well-known member
Thats one fine looking job Denwood.You gotta be proud of that project.
Thanks Griz It sure is taking a loong time to churn through all the jobs in the queue.
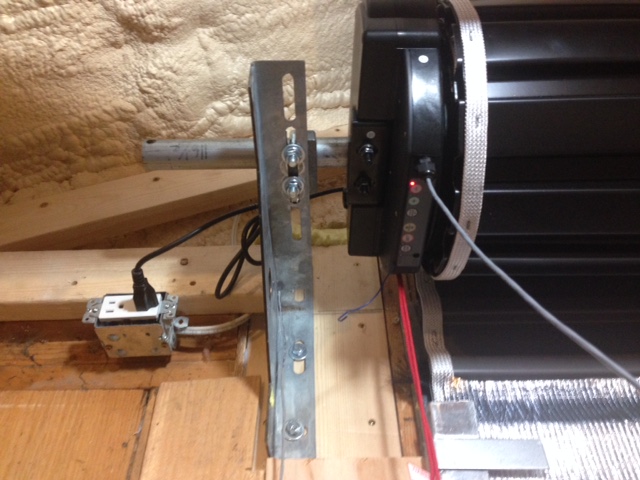
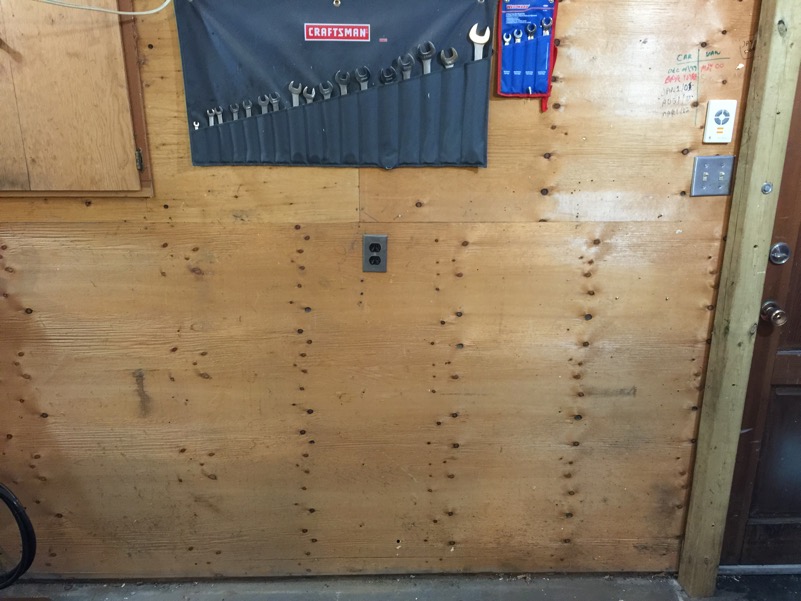
After quite a few references here I decided to free up more space again by moving the dual compressor setup to an existing shed. A few phone calls (this would be my first breaker panel mod) and a visit to a local electrical supplier cost me $130 for 12-3 Tec cable which will carry two 15 amp 110 circuits for each compressor. So from this:

To this:
Each compressor will be shut down when not in use via the panel:
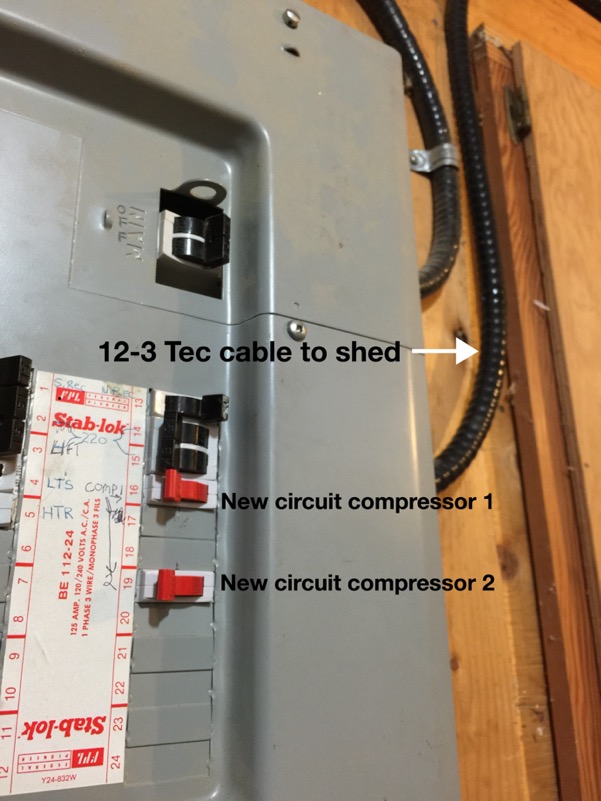
There is something wrong with this setup. Can you figure it out? Keep in mind I'm using 12-3 to carry two circuits...the setup could cause a fire if left as is.
I should have done this a long time ago. The floor space and peace/quiet is well worth the effort.
It sure is taking a loong time to churn through all the jobs in the queue.After quite a few references here I decided to free up more space again by moving the dual compressor setup to an existing shed. A few phone calls (this would be my first breaker panel mod) and a visit to a local electrical supplier cost me $130 for 12-3 Tec cable which will carry two 15 amp 110 circuits for each compressor. So from this:
To this:
Each compressor will be shut down when not in use via the panel:
There is something wrong with this setup. Can you figure it out? Keep in mind I'm using 12-3 to carry two circuits...the setup could cause a fire if left as is.
I should have done this a long time ago. The floor space and peace/quiet is well worth the effort.
Last edited:
sublime68charger
Well-known member
I worked for electrician way back in 1993 to 1995 during summers and remember just enough to be dangerous
And I've stayed at a holiday inn, it wasn't last night but still,
Ill take a stab and say your running two hots down the 12-3 one for each compressor but both compressor are sharing the same common back to the panel and that is wrong.
Along with sharing the same ground. Which is also wrong.
Each compressor should have its own 12-2 line from panel to compressor.
sublime68charger
Well-known member
The freed up floor space will be nice along with the peace and quiet you have not having to listen to the compressor run.
That's it. Actually the "Edison" circuit is fine as long as the hots are not on the same side of the panel. The reason is that equal load on the hot wires (providing they were connected to separate sides of the panel) would potentially see no current on the neutral, rather than stacking current. AC current in this case is your friend. I tested the compressors on the same phase (as pictured) to see if the shared neutral would even heat up. It didn't..but the compressors are not pulling 20 amps either. My brother is a licensed electrician (industrial)..so my setup is based on his recommendation.
The two 110V 20 amp breakers should be ganged together (once breaker 2 is properly relocated!) though so that the next owner doesn't get a nasty surprise if he/she decided to work on the shed wiring, shut off breaker 1, leaving breaker 2 of the shared neutral circuit on, and be hanging off the shared neutral for circuit 2 if a compressor fired up...
The two 110V 20 amp breakers should be ganged together (once breaker 2 is properly relocated!) though so that the next owner doesn't get a nasty surprise if he/she decided to work on the shed wiring, shut off breaker 1, leaving breaker 2 of the shared neutral circuit on, and be hanging off the shared neutral for circuit 2 if a compressor fired up...
Last edited:
drivesitfar
Well-known member
Denwood: the outside picture of your new garage door looks great and thanks for going out in the cold and taking that picture. the ceiling looks great too and i thought it might take a little time to mud and tape that. as far as color why don't you leave it white and start picking up a few banners and metal signs to give the ceiling a little pizazz other than paint?
without seeing the inside of the box i couldn't tell exactly what i was looking at, but sounds like you and 68 are on the same page with the problem and fix. also helps to have a wise brother checking in on you.
Can you tell me the reason for having two compressors instead of a bigger one? i'm guessing so you have one to take off the system and roll it out to the alley, but just curious to hear why from the designer.
its looking great and i bet you are going to like working in the garage this winter a lot more than in years past.
Happy Holidays
Drive, yes much quieter I think I'm nearing the end of the "wife patience factor" so the hours spent fixing up the shop will soon need to shift to house mode . I like your idea on leaving things white and adding detail. There's a few ultra clean shops here that really interest me...so I'd like to attempt a welding/auto/wood shop that is clean, but functional.
The two compressors work in concert very well, but the smaller one can still be wheeled out in seconds for use elsewhere on the property. For sandblasting, air sanding etc, they keep up nicely (11cfm@90psi). If I was starting from scratch, I likely would have just started with a big 220V version.
I think I'm nearing the end of the "wife patience factor" so the hours spent fixing up the shop will soon need to shift to house mode . I like your idea on leaving things white and adding detail. There's a few ultra clean shops here that really interest me...so I'd like to attempt a welding/auto/wood shop that is clean, but functional. The two compressors work in concert very well, but the smaller one can still be wheeled out in seconds for use elsewhere on the property. For sandblasting, air sanding etc, they keep up nicely (11cfm@90psi). If I was starting from scratch, I likely would have just started with a big 220V version.
drivesitfar
Well-known member
Denwood: one thing i learned from being a Realtor with all sorts of weird hours and a father to 5 kids (2 step and 3 of our own) is that a "happy wife is a happy life". since you are a workaholic might i recommend you schedule a date night at least 2 times a month or once a week if you are not already doing so.
when my wife was 9 months pregnant with our first (her third) she was stepping over a roll of carpet in the hallway to get in the bathroom because i hadn't quite finished up the bedroom remodeling.
your shop looks awesome and it sounds like you have great neighbors too which are hard to find in some parts of the world.
when you get some time to take more heat loss pictures of your ceilings with your cool camera that would be great.
take care and have a great holiday season.
Drive, here are a few shots after the 5/8" ceiling drywall was added over the spray foam. You do see a definite increase in R value.

A view of the drywalled ceiling to compare:
This was the ceiling before 5/8" drywall, just sprayfoam:

Outside, with snow still on the roof. This is a good sign as excessive heat loss would have melted it, particularly with our current mild temps just around freezing:
A view of the drywalled ceiling to compare:
This was the ceiling before 5/8" drywall, just sprayfoam:
Outside, with snow still on the roof. This is a good sign as excessive heat loss would have melted it, particularly with our current mild temps just around freezing:
Last edited:
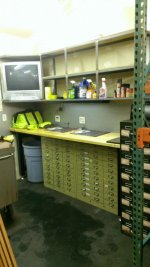
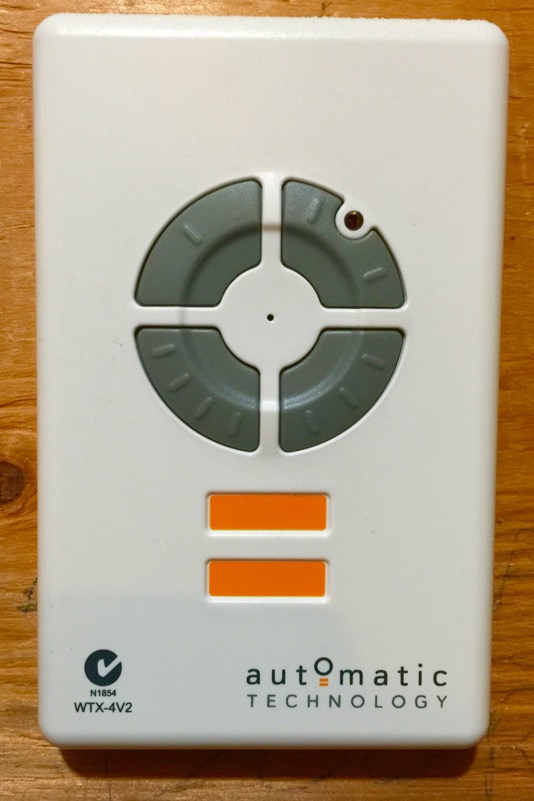
Interior lighting is done. I'm using my favorite bulbs (Philips TL950) with a color temp of 5000K and a very high CRI around 93. These bulbs are easily the most color accurate I've encountered. Fixtures were left over from our Cinevate building project. The T8 bulbs we special order from a local electrical supplier by the box, as we have about 9500 square ft lit with them. I added a motion sensing LED light (day/night aware)as the roll up door operator has no light integrated. This way when the missus pulls her car in, the garage will be lit for 5 minutes without touching a light switch. The storage over both ends of the garage is now finally ready for use.


Last edited: