

You are using an out of date browser. It may not display this or other websites correctly.
You should upgrade or use an alternative browser.
You should upgrade or use an alternative browser.
What did you do "IN" your garage today?
- Thread starter mayhemman
- Start date
rartuin270
Well-known member
Got some plastic hung up to isolate the sanding/painting I'll be doing on the wall. Got two passes with 60 grit done on a section of the wall. Getting a little OCD with the OSB.


What's going on with the IV drip?
Hephaestus29
Well-known member
You should go a little farther with it and put a dual quad intake on it.another coffee table I'm making an old Desoto hemi that laid in the water forever.made an engine cradle for it painted block hemi orange.will get valve covers chromed then top with glass
Hephaestus29
Well-known member
I started cleaning my mill up that I recently bought. It had quite a bit of grime & compacted chips in areas. I went through over two rolls of paper towels so far.
OCD
Well-known member
Finished up my winch wiring project!!
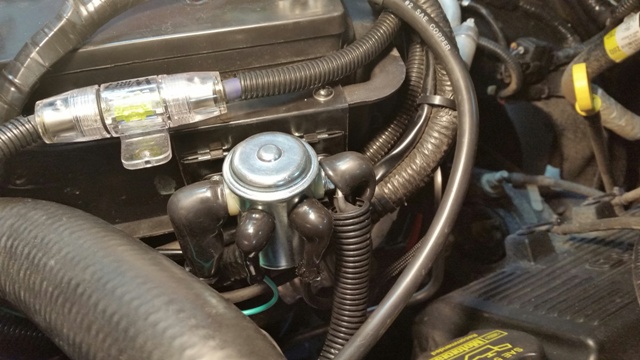
Solenoid, had to make up a bracket and mount it on the battery box...
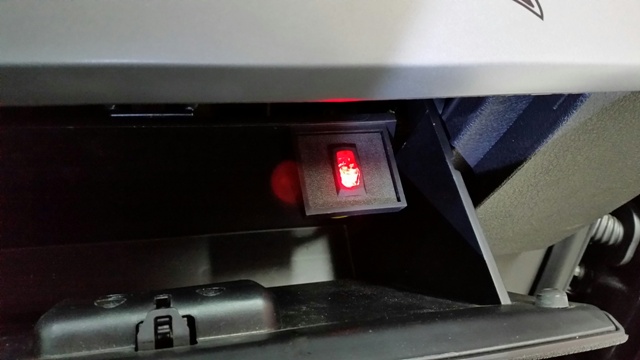
Hid the switch in the glove box...
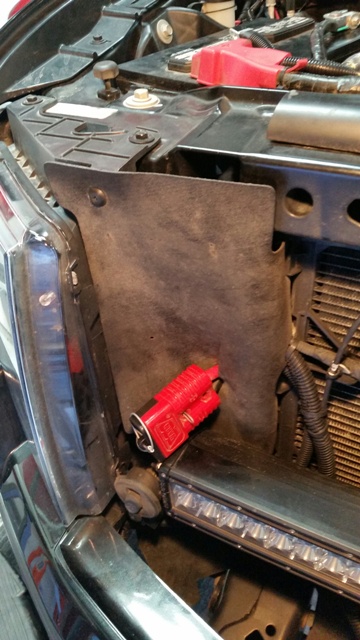
I ran a cable to the front of the truck, and one to the back... The rear one is to get power for the winch when it is on my trailer...
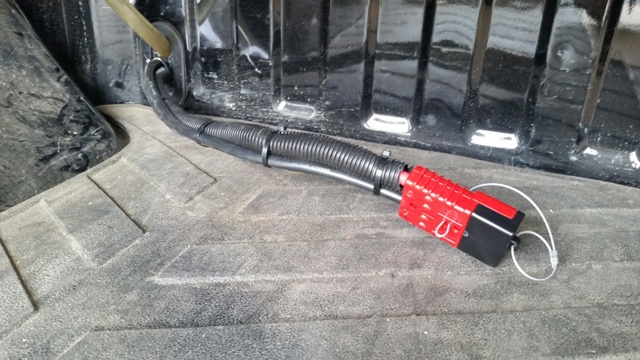
I could reroute the cables to make it all the way to the back, but I followed a harness that was easy to tie wrap to... The cable on the winch cradle will be 10' long and easily reach from the trailer into the back of the truck!!
Got a few minor cuts and scrapes, but it was sure nice when the test light lit up on all the power connections and none of the magic smoke escaped!! :Whew:
Solenoid, had to make up a bracket and mount it on the battery box...
Hid the switch in the glove box...
I ran a cable to the front of the truck, and one to the back... The rear one is to get power for the winch when it is on my trailer...
I could reroute the cables to make it all the way to the back, but I followed a harness that was easy to tie wrap to... The cable on the winch cradle will be 10' long and easily reach from the trailer into the back of the truck!!
Got a few minor cuts and scrapes, but it was sure nice when the test light lit up on all the power connections and none of the magic smoke escaped!! :Whew:
What's going on with the IV drip?
Stand for the auxiliary gas tank while tuning the motorcycle with the gas tank off.
PCO6
Well-known member
I modified my 12" metal shear. It's now a lot easier to use and works a lot faster!
View media item 48934
Here's what I did ...
http://www.garagejournal.com/forum/showthread.php?p=4720187#post4720187
View media item 48934
Here's what I did ...
http://www.garagejournal.com/forum/showthread.php?p=4720187#post4720187
ewils35
Well-known member
I cleaned up the garage a little bit. Looked around to set up plans to stud and insulate the block walls
mcgyverit
Well-known member
Put the rear frame on the Yam Venture, then proceeded to take the front fairing off looking for wiring issues and to begin working on rebuilding the front brake system
RivennHewn
Well-known member
Mopar65,
You've been busy!
It all looks great.
Love all your projects.
You've been busy!
It all looks great.
Love all your projects.
spent21
Well-known member
I've been on the road all last week so had a lot to catch up on. Saturday, I worked on my mower... I finished the Kawasaki Vtwin rebuild & buttoned it up, picked up some new wheel studs and lug nuts, dropped the hubs off at a local guy that is going to drill a new bolt pattern for me, mounted my new tires to an old set of wheels, bought 150 lbs of fescue, and aerated the yard. Sunday, I made a rake/harrow out of a piece of shelving, pulled it around the yard awhile, fixed a significant design flaw on it, spread my grass seed, and raked it in.
I'll have to get pictures of my rake later.
The turf tires keep sliding on my zero turn. I found that there are very limited styles of tires in the 8" variety, but in my atv experience, the 9" options are abundant. The mower hubs are 4 on 4" which is nearly non-existent in the atv world, save for some old school Polaris & Kawasakis which are 10" diameter, so buying new wheels would only work if I bought those, or bought 9" for a different bike and drilled the 4 on 4" in the new wheels.
Hondas are 4 on 110mm, and I have a spare set of wheels, so it was cheaper to get the hubs drilled for the new pattern and use my spare set


I'll have to get pictures of my rake later.
The turf tires keep sliding on my zero turn. I found that there are very limited styles of tires in the 8" variety, but in my atv experience, the 9" options are abundant. The mower hubs are 4 on 4" which is nearly non-existent in the atv world, save for some old school Polaris & Kawasakis which are 10" diameter, so buying new wheels would only work if I bought those, or bought 9" for a different bike and drilled the 4 on 4" in the new wheels.
Hondas are 4 on 110mm, and I have a spare set of wheels, so it was cheaper to get the hubs drilled for the new pattern and use my spare set
Last edited:
JonBoehman
Well-known member
4 on 4's are still used in the karting world. Have a look. I know you've already drilled your hubs but FYI.
http://www.bmikarts.com/Rims-Wheels_c_288-1-1.html
http://www.bmikarts.com/Rims-Wheels_c_288-1-1.html
classicharleyj
Well-known member
- Joined
- Apr 6, 2006
- Messages
- 197

Built the missus a cart for her miter saw to be used in her shop.
Jim
Dancing Bear
Well-known member
Wrapped up a repair on my lady's car. 2003 Volkswagen Jetta 2.0 non-turbo...
stupid plastic "water distribution block" on the back of the cylinder head decided to literally crack in half. It was not the OEM one, but a Dorman replacement. When I first put it back together, there were no leaks but the car was running terribly rough. I feared she might have popped the head gasket, so I ran a compression check. Compression was fine, so I checked the plugs. Three out of four had gaps that were nearly touching, one of them was a nut hair away from shorting out. I guess maybe when the engine overheated, it weakened the tips and ruined the gaps?
Maybe someone can chime in, I've never seen this before. I do believe it is an aluminum head, and the plugs were Denso so I believe they are platinum. Engine was not ran too hot, I believe the temp jumped to around 220 IIRC.
I re-gapped the plugs and she runs great now, and the ol lady rewarded me nicely
stupid plastic "water distribution block" on the back of the cylinder head decided to literally crack in half. It was not the OEM one, but a Dorman replacement. When I first put it back together, there were no leaks but the car was running terribly rough. I feared she might have popped the head gasket, so I ran a compression check. Compression was fine, so I checked the plugs. Three out of four had gaps that were nearly touching, one of them was a nut hair away from shorting out. I guess maybe when the engine overheated, it weakened the tips and ruined the gaps?
Maybe someone can chime in, I've never seen this before. I do believe it is an aluminum head, and the plugs were Denso so I believe they are platinum. Engine was not ran too hot, I believe the temp jumped to around 220 IIRC.
I re-gapped the plugs and she runs great now, and the ol lady rewarded me nicely
spent21
Well-known member
4 on 4's are still used in the karting world. Have a look. I know you've already drilled your hubs but FYI.
http://www.bmikarts.com/Rims-Wheels_c_288-1-1.html
I'd still be forced to run a 6", 8" or 10" wheel...
6's are out as I need a 20" tall tire, 8's don't have much for tread patterns, and the same for 10's as well as having very little sidewall on a 20" tire.
I looked extensively through ATV's, golf carts, and even equipment implementation. I even found an ATV bolt pattern guide (very useful) http://www.mud-throwers.com/atv_wheel_chart. Douglas said they used to carry a 9" wheel with a 4" pattern, but they discontinued them awhile back. I could have purchased a Douglas since they have a round center and had the 4" pattern drilled, but it's the same price to drill the hubs as the new wheels.
polexican23
Banned
kicked around the idea of cutting down the wall I put up 2 months ago, to get back about 5 inches so that a proper 6 ft work bench would fint in the small 1 car garage I have.
dcmus
Well-known member
No pictures so I know it didn't happen but....yesterday I put Color on the the walls and today I took off at noon, self-employed, and worked on stripes. The 2nd wall didn't turn out to bad so I took another shot at my first Effort. Am about to jump out there and start a build thread just to keep myself motivated
zmotorsports
ALLIANCE MEMBER
Last night I was able to start prepping the E-track on my utility trailer project so I can get it welded down. Then my father-in-law stopped by and had me swap out his tailgate for a louvered one.
Hopefully tonight I will be able to complete the E-track and get some POR-15 applied to the cracks and crevices on the trailer.
Mike.
Hopefully tonight I will be able to complete the E-track and get some POR-15 applied to the cracks and crevices on the trailer.
Mike.
Jimmy_B
Well-known member
Got the green widow maker out of the basement and in the garage. Removed the valve cover, it's valve lash time.
Support from 1/2 of Team Assclown, Carmen.


Support from 1/2 of Team Assclown, Carmen.
Installed a new interent access point and took the tonneau cover off the truck.
zmotorsports
ALLIANCE MEMBER
Yesterday afternoon after getting off work I actually mowed my lawn for the first time of the season. Felt good and the weather has been awesome here for this time of year, although we will probably pay dearly come summer for the mild winter we have had.
I then was able to get some more welding done on my utility trailer project. Just nipping away at the few last minute items before getting her ready for paint. I hope to have all of the fabrication/welding done by the weekend so I can start getting it prepped next week for paint and get it completed. It is taking up too much shop space and time.
Mike.
I then was able to get some more welding done on my utility trailer project. Just nipping away at the few last minute items before getting her ready for paint. I hope to have all of the fabrication/welding done by the weekend so I can start getting it prepped next week for paint and get it completed. It is taking up too much shop space and time.
Mike.
Dennis Leigh Henry
Well-known member
Not really in the garage (yesterday) but did require retrieving tools from the garage and basement/shop.. I worked on my exterior (poolside) stereo system (two of the hidden 'rock' speakers and two attached exterior speakers). Once I put the new receiver in, I discovered one speaker of the 4 not working (of course, the farthest one.. with the most buried speaker cable). After about a half hour of trouble shooting, I discovered that the wire underneath the back porch was 'chewed thru'.. not sure from the occasional mice we get in the fall around our tomato plants or maybe I chewed it up while trimming the greenery around the house. Replaced the bad section and now is the sound system is ready for summer. Now, just need to open the pool once I'm certain ol' man winter won't show up and ruin the party..
Dennis
Dennis
LS6 Tommy
Well-known member
Replaced the worn out driven disk and the cracked belt cover on Jake the snowblower. Darn thing will just about drag me down the driveway now. Just in time for the snow Thursday...
Tommy
Tommy
JimVonBaden
Well-known member
JVB added an LED. If the CANopener is used there isn't an on/off indicator. . .. Very slick install. . ..
I would like to say it was a breeze, but that would be lying! The concept and design was easy, applying it was not so much.
The light:
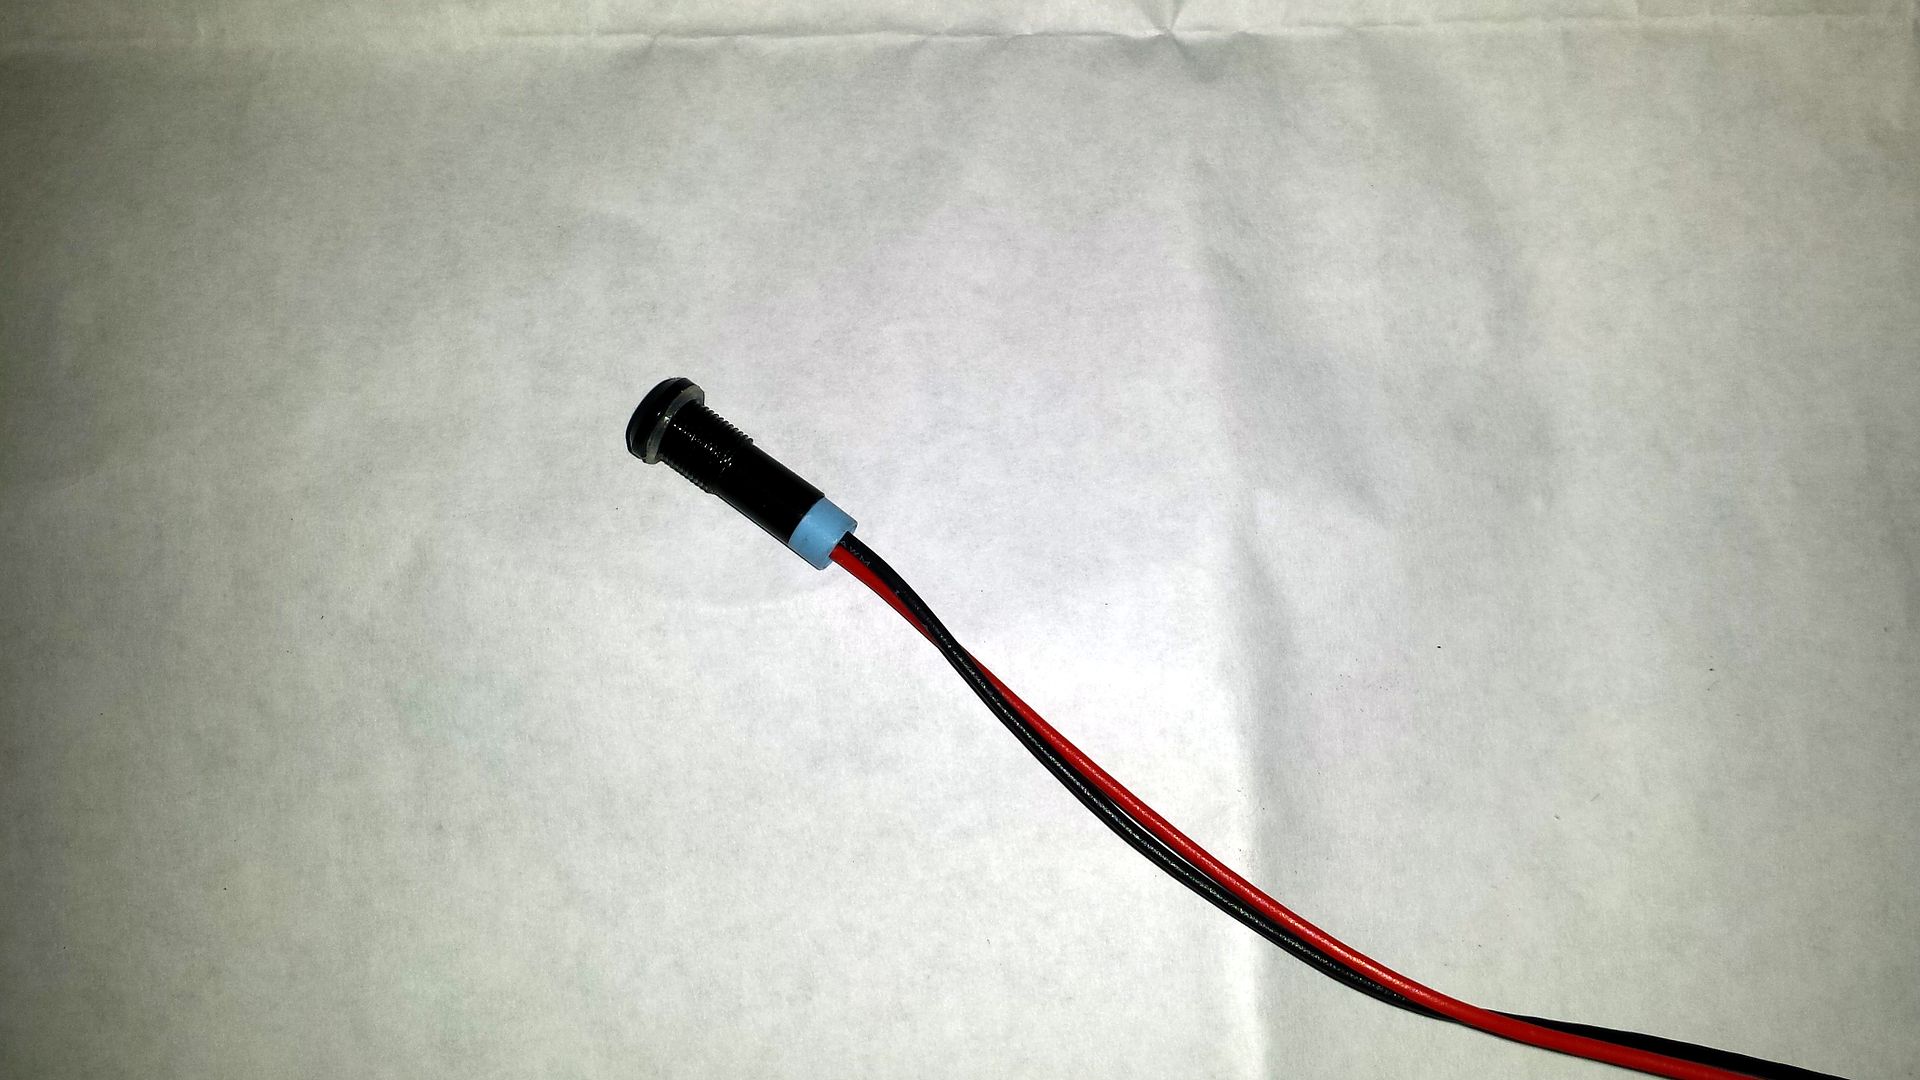
12 Volt LED with a threaded mount.
Mark the hole and centerpunch it. Make sure you have room on the back side.
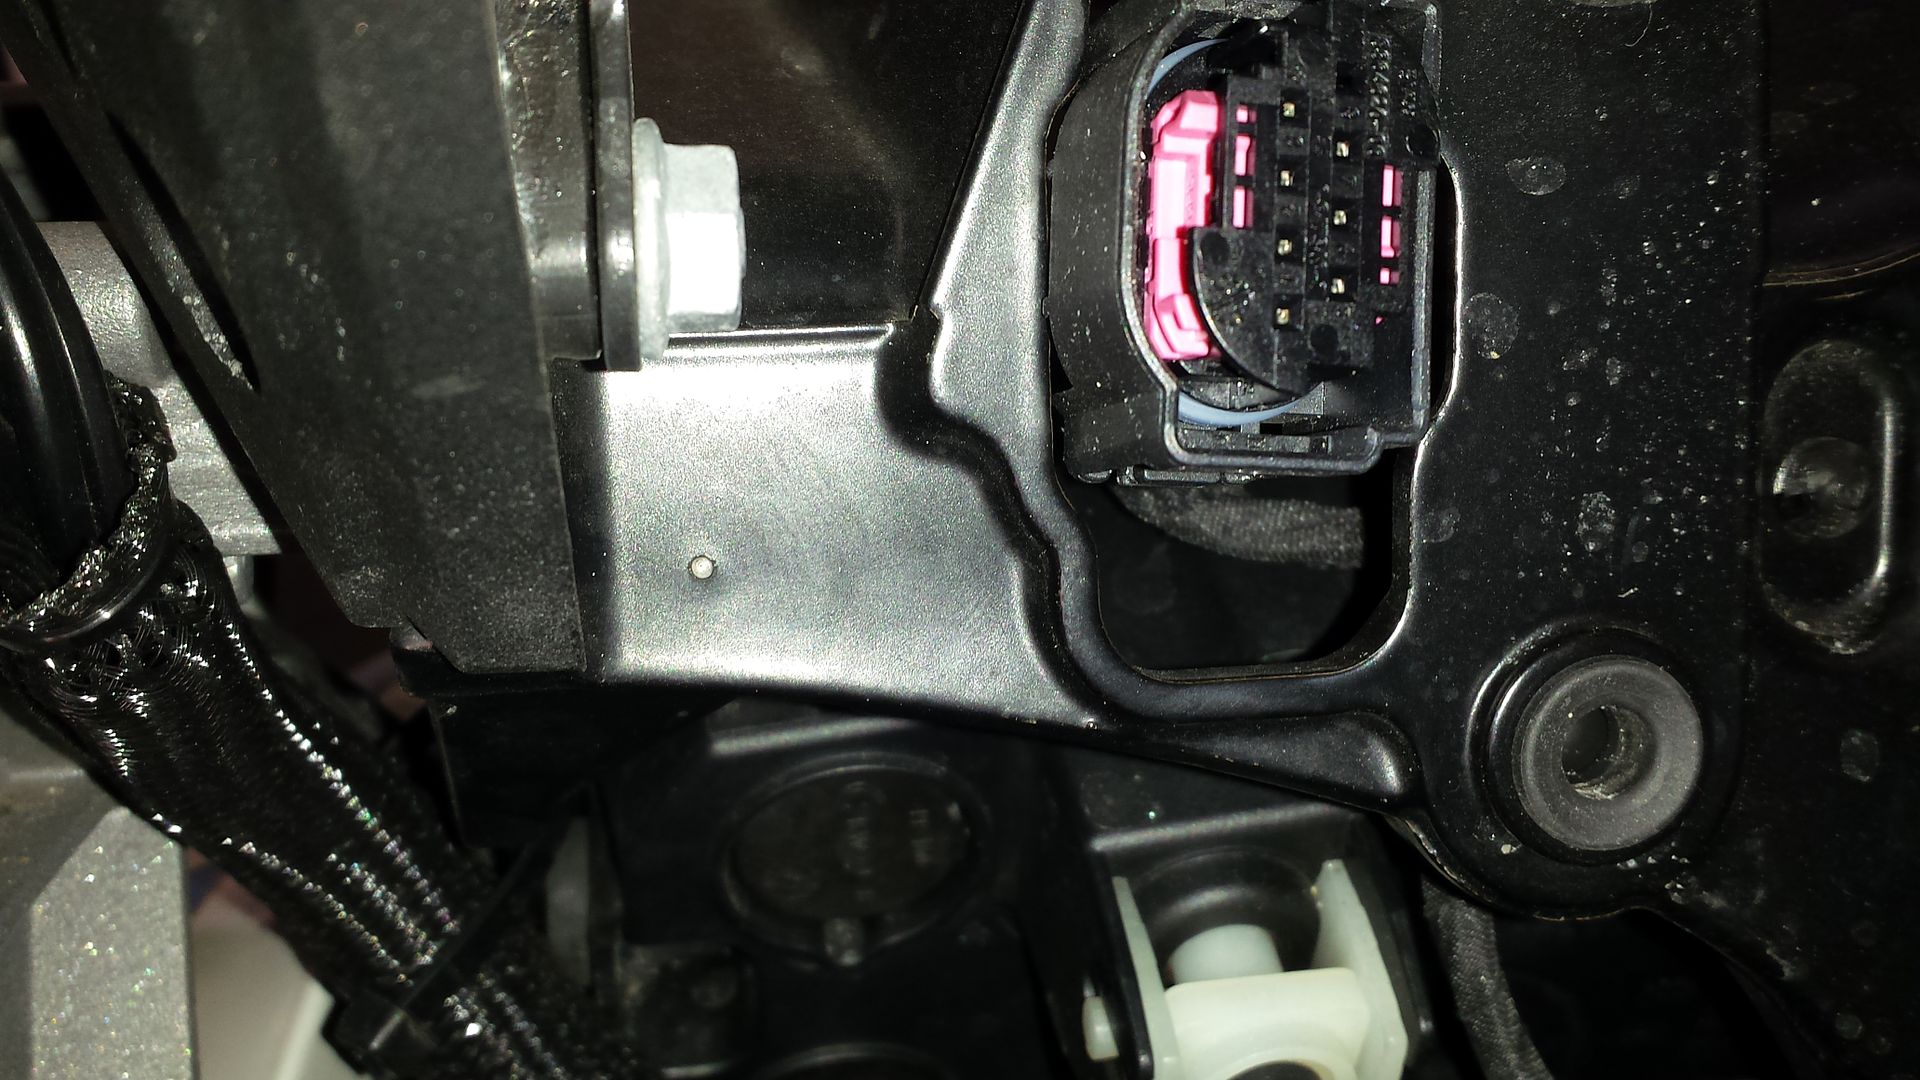
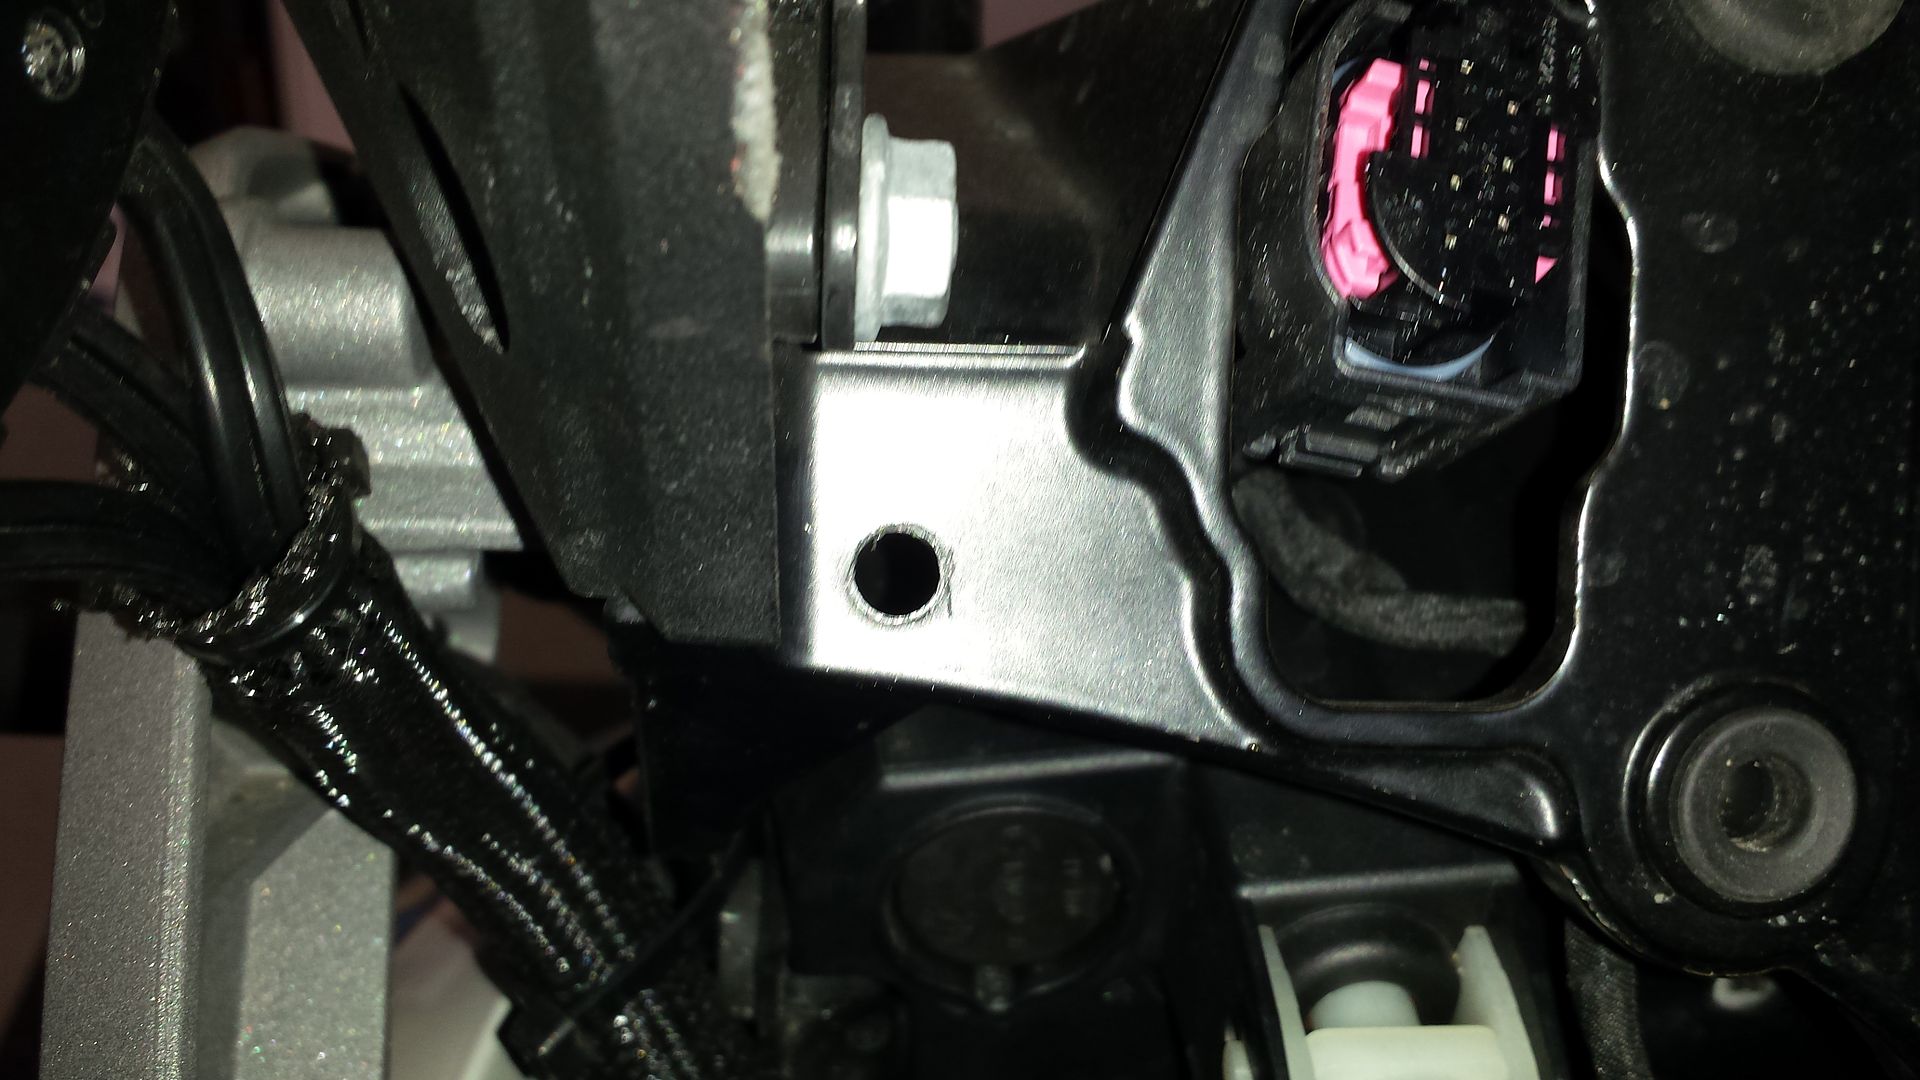
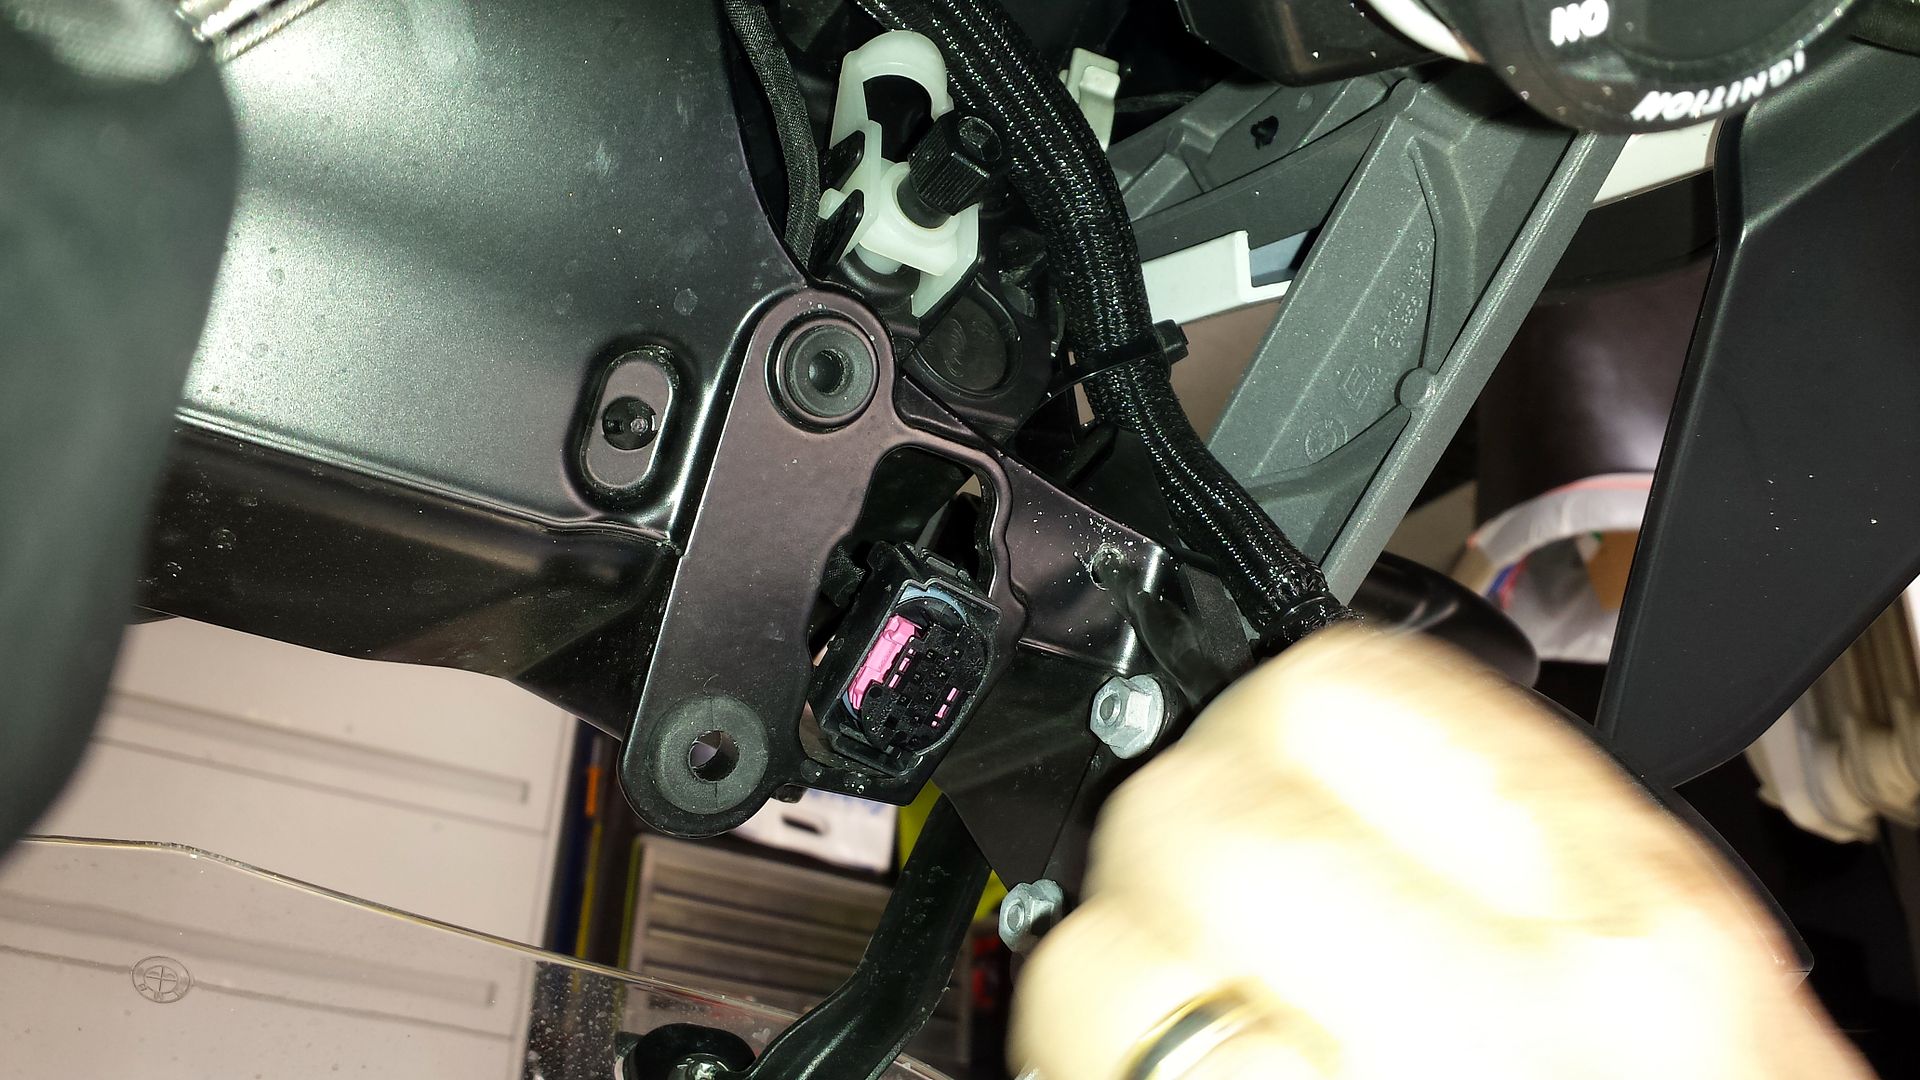
Drill the hole, then debur it. I use a larger drill bit on the softer materials.
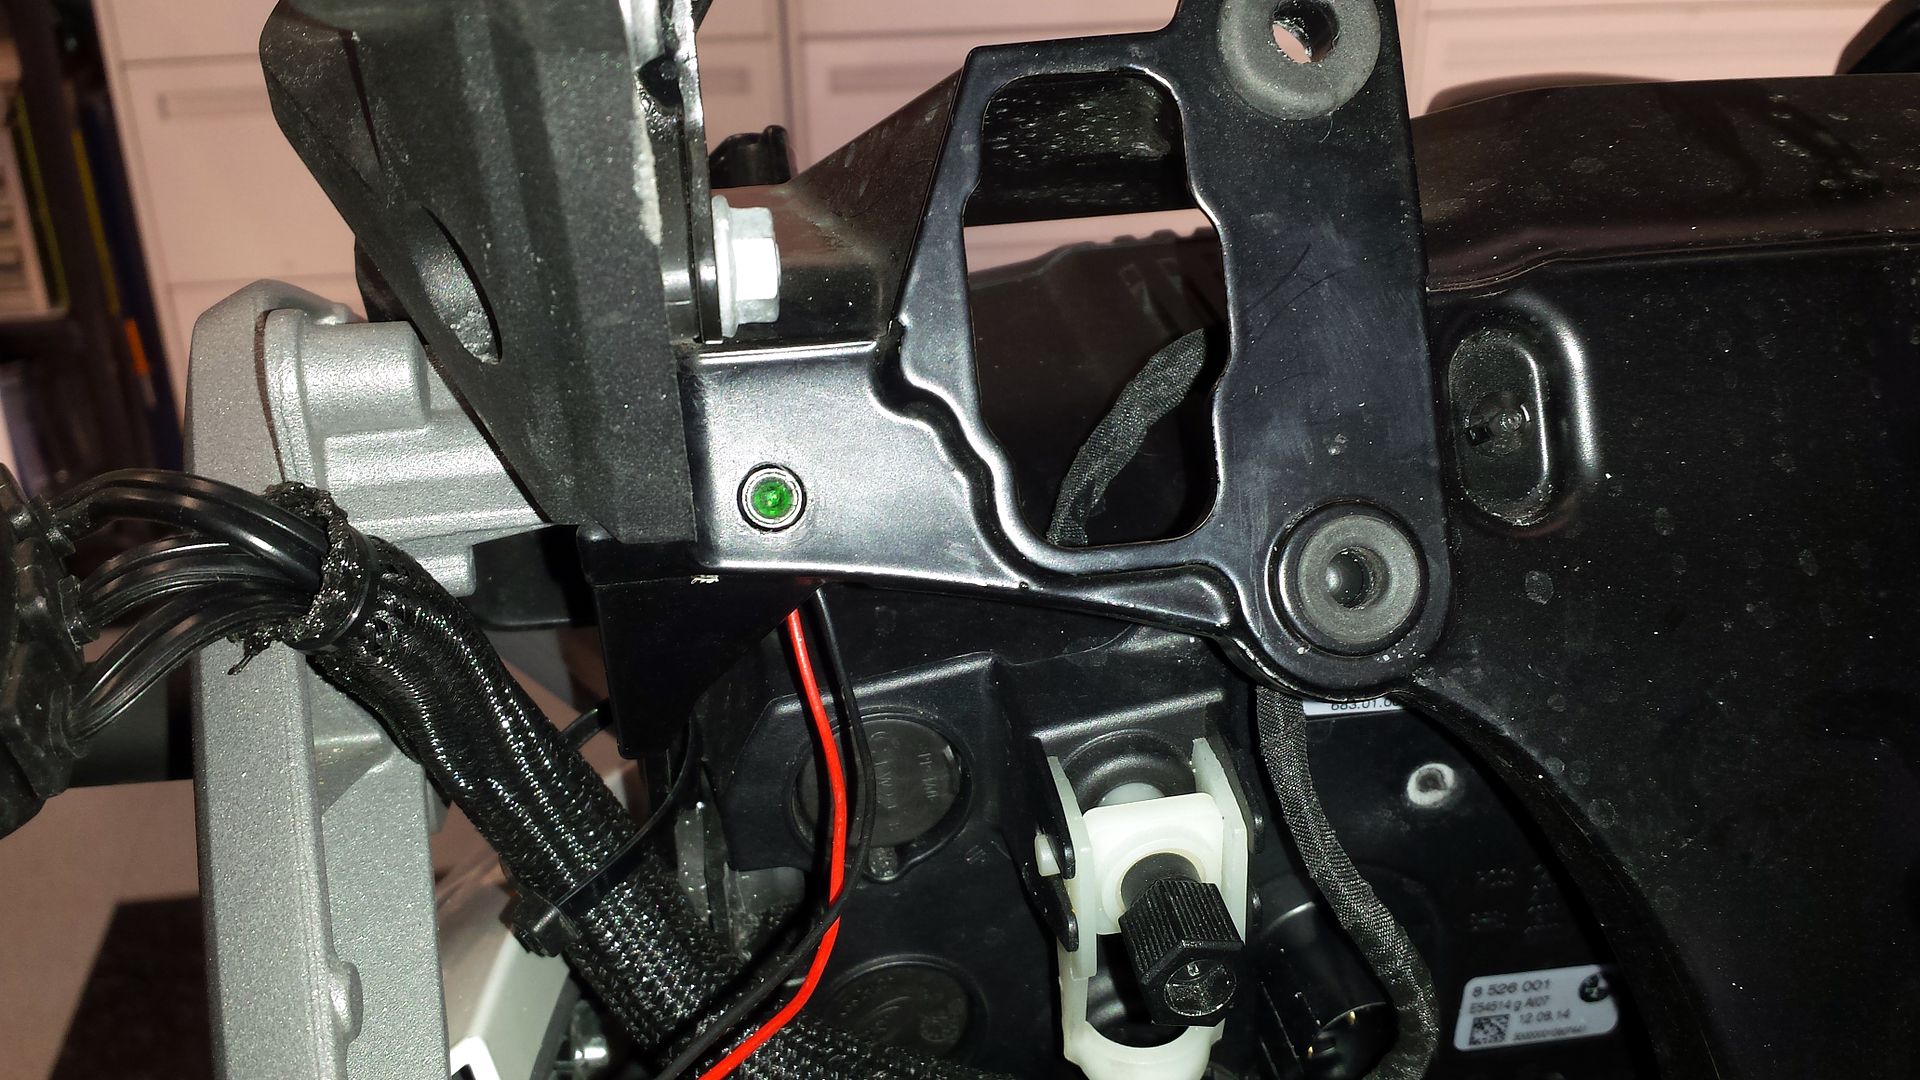
Test fit the light.
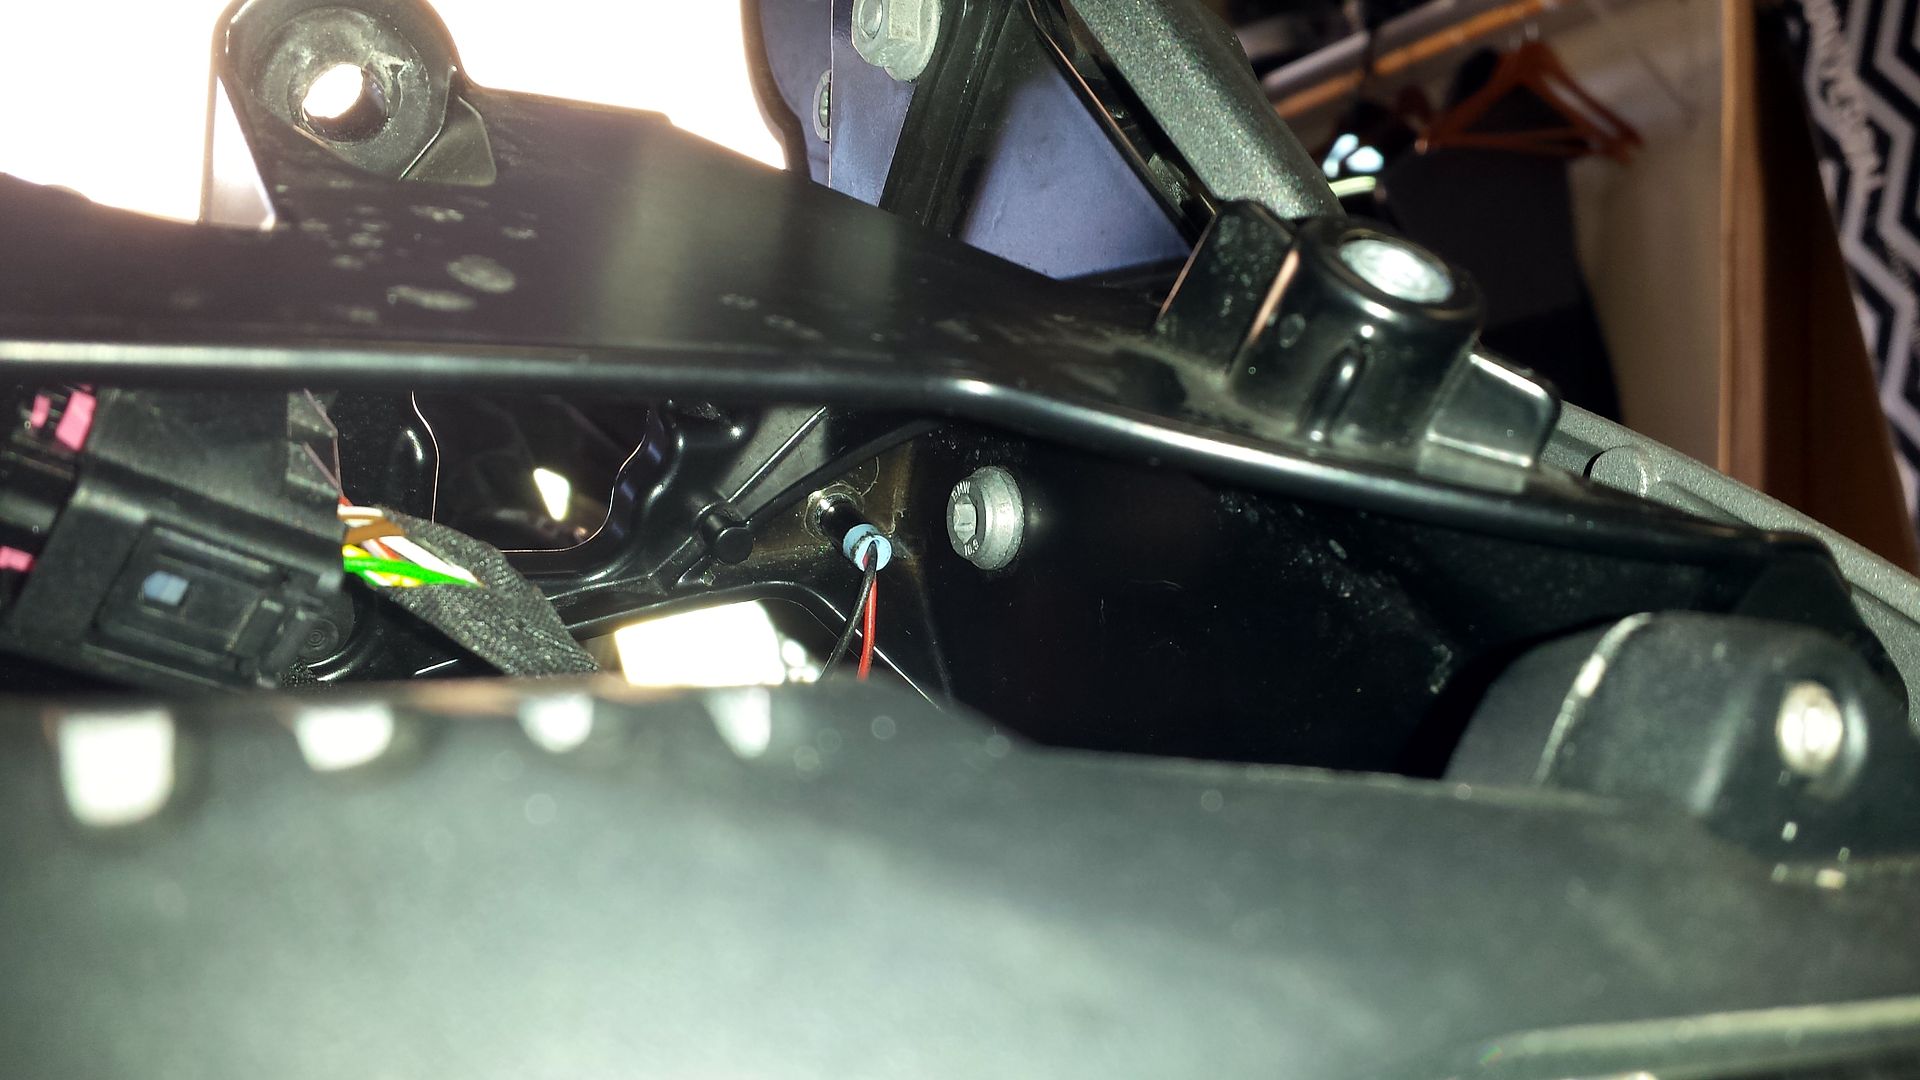
Install the light on the back, and snug down. This was the hard part. Pulling the headlight would have made it easy, but the LED need significant bodywork removed to do it, so we worked around it. We did pull the instruments to make it easier.
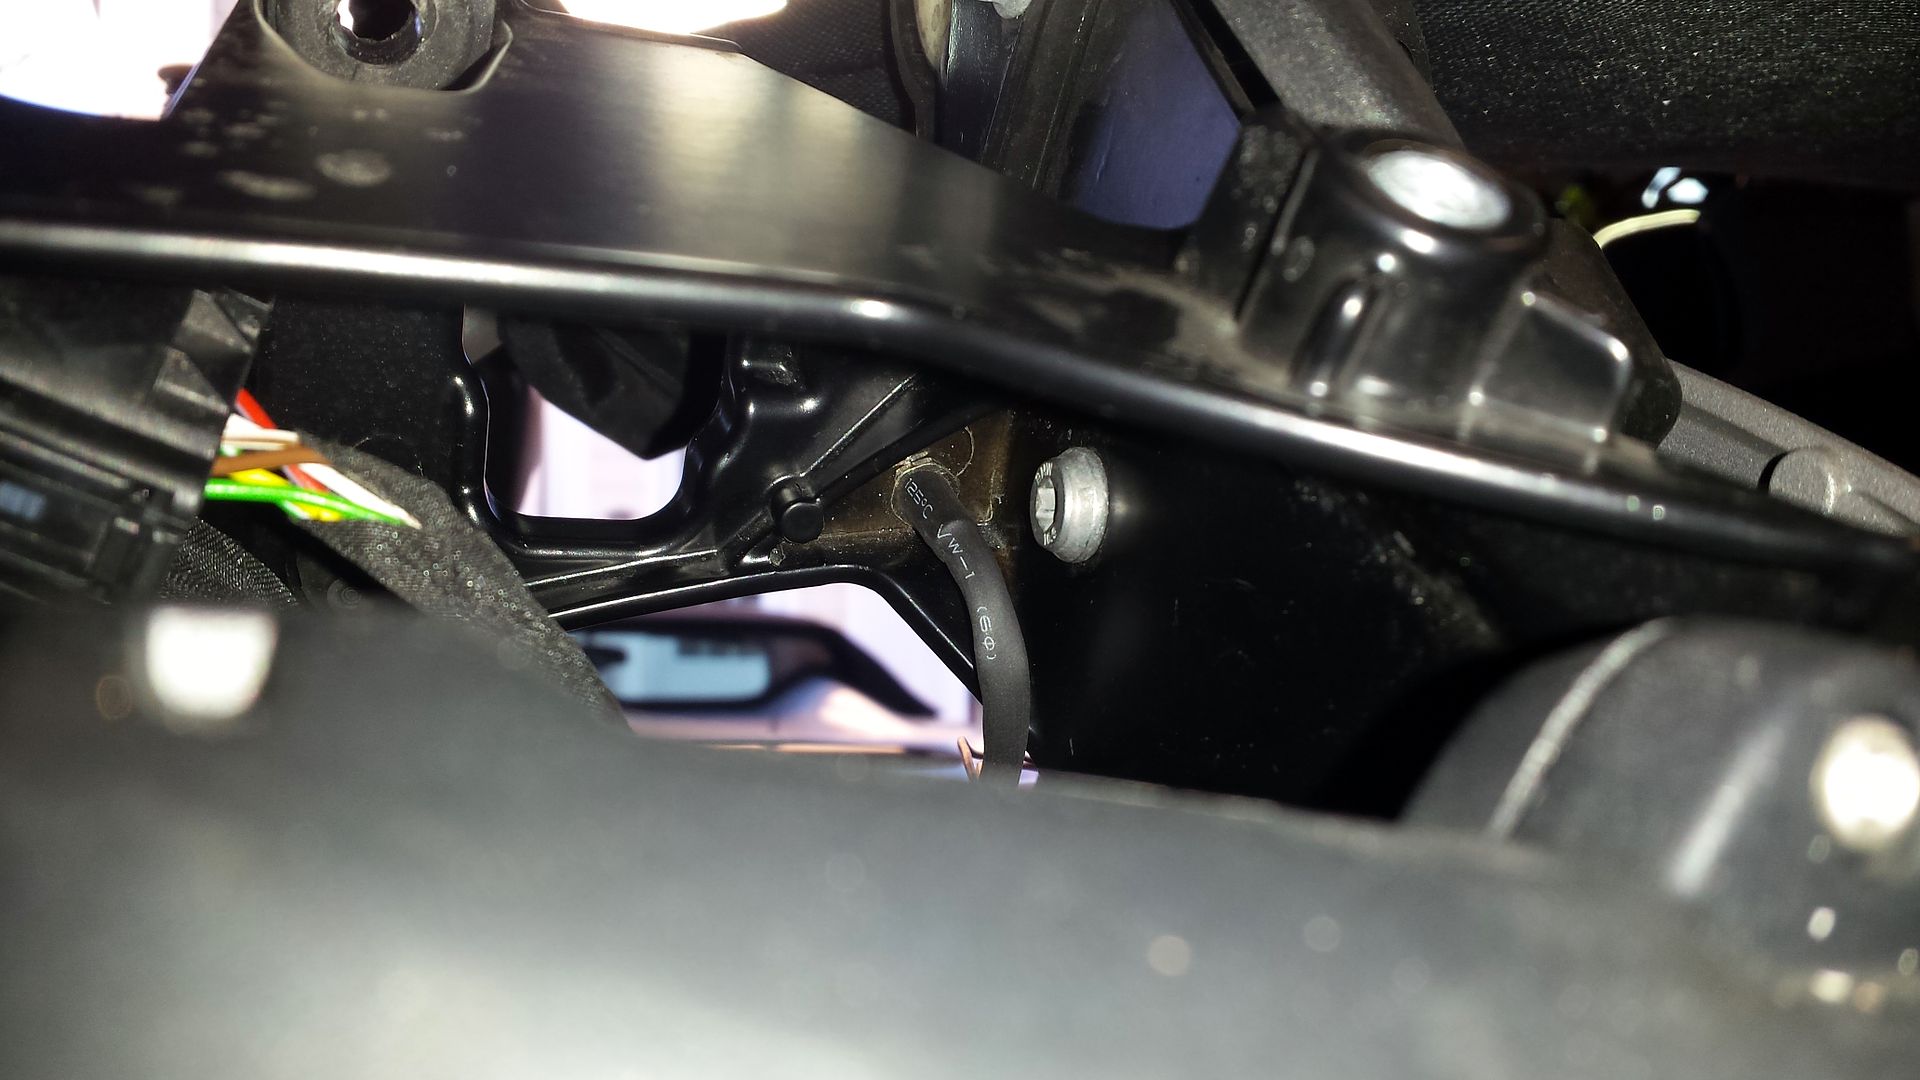
Seal the light, and lock the nut on, with shrink tubing. Be careful heating it not to damage the surrounding plastics.
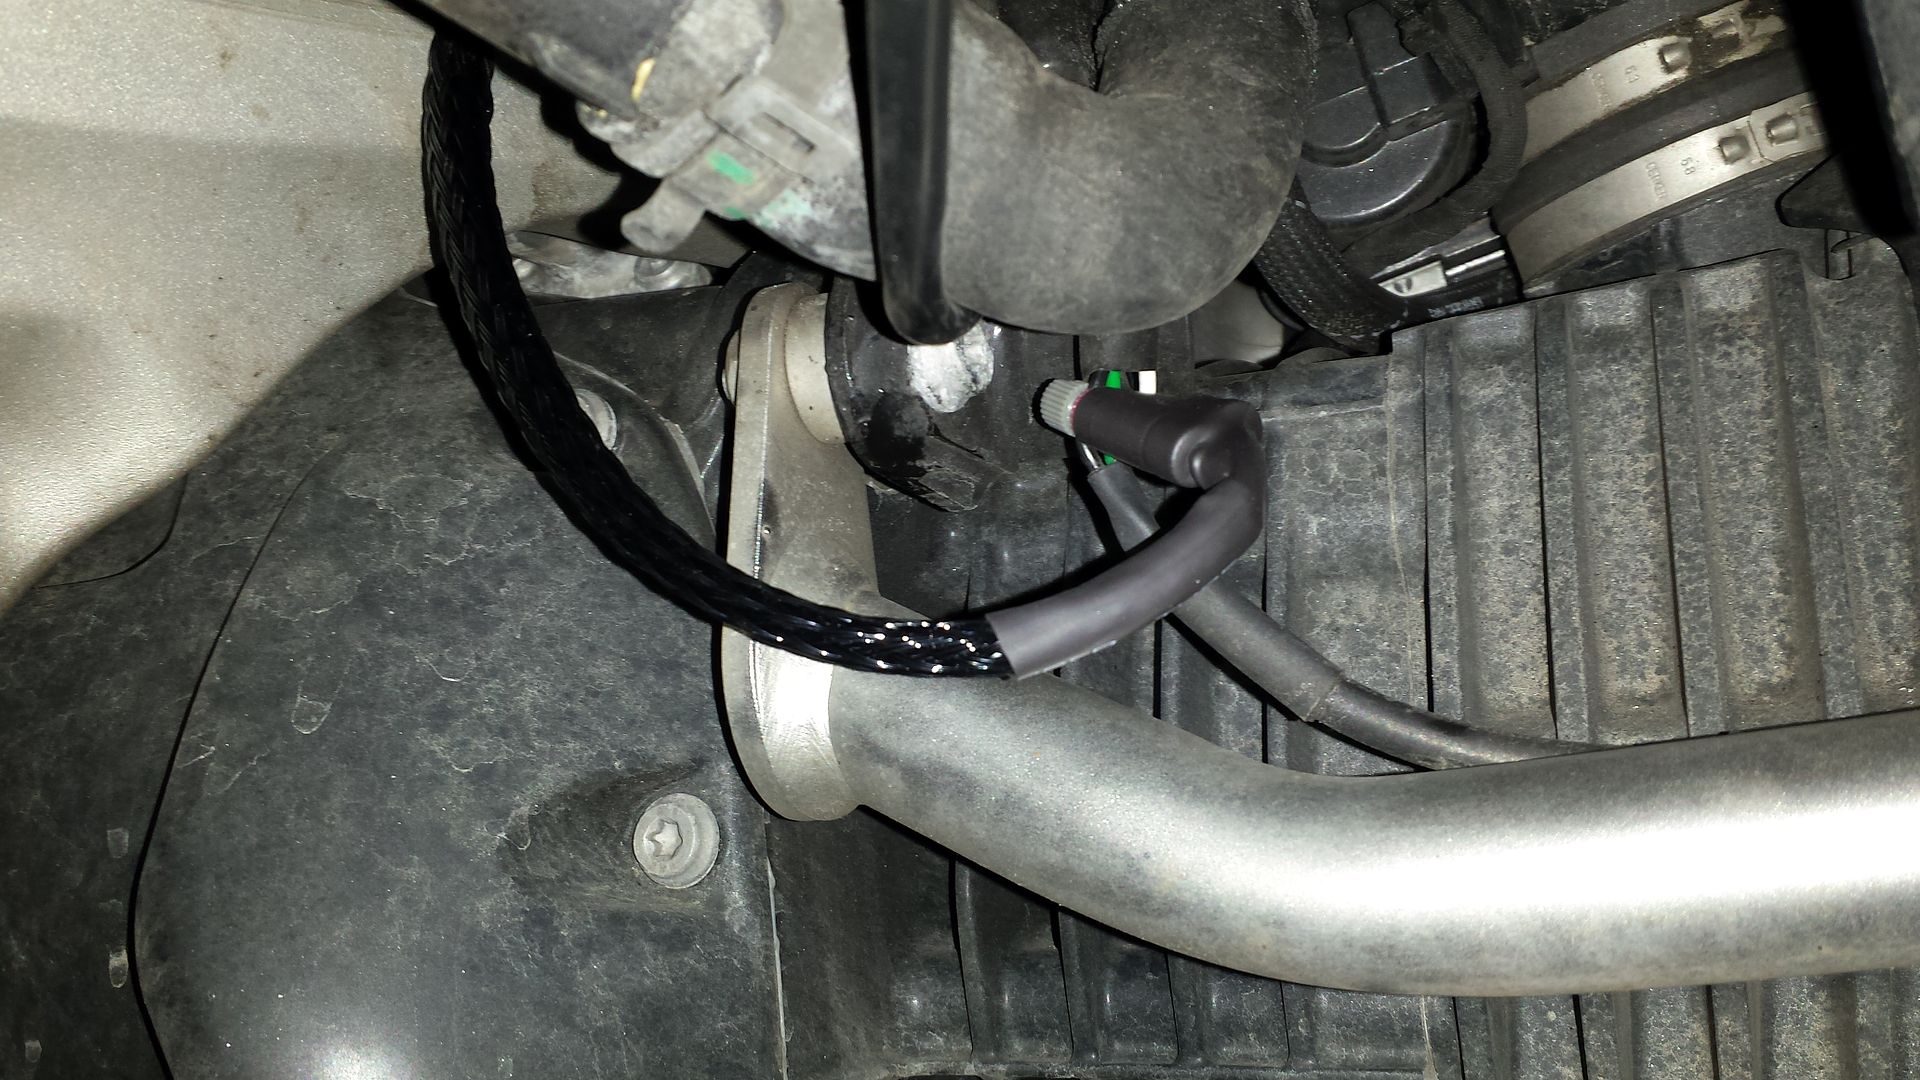
I covered the whole run with wire sheathing to protect it and hide it from view. I tapped the Erica lamp on the left side because it was accessible. You could tap the right if you wanted. I used Positaps because they are the least intrusive. I sealed both ends of the sheathing and sealed them to the Positaps and light as well with shrink tubing.
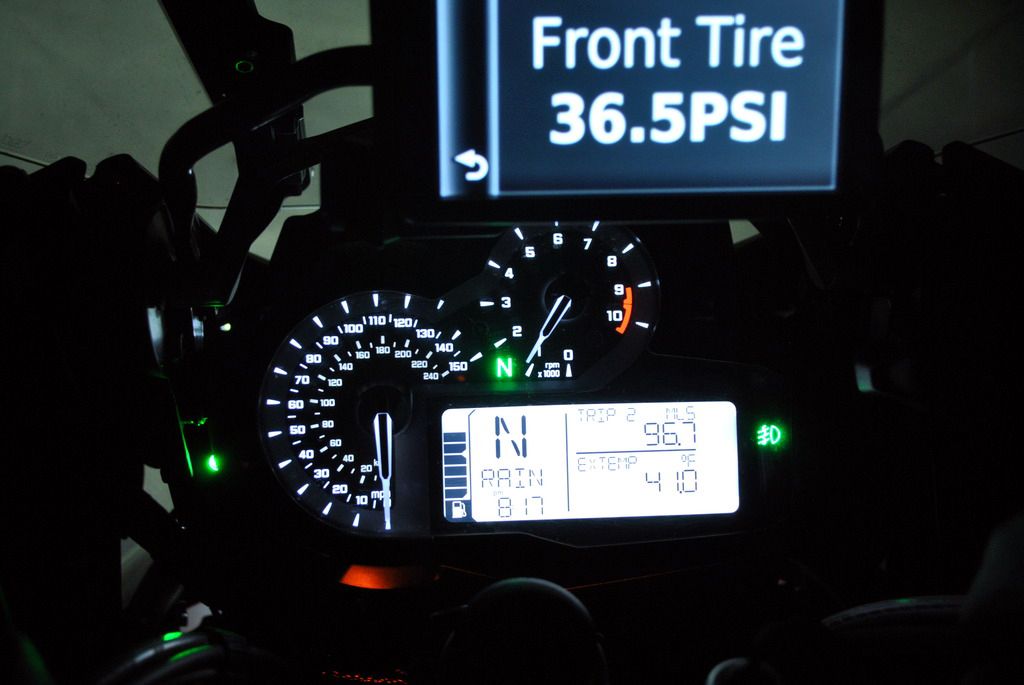
Night visibility is good from reflection. In daylight you tilt your head a bit and see it fully.
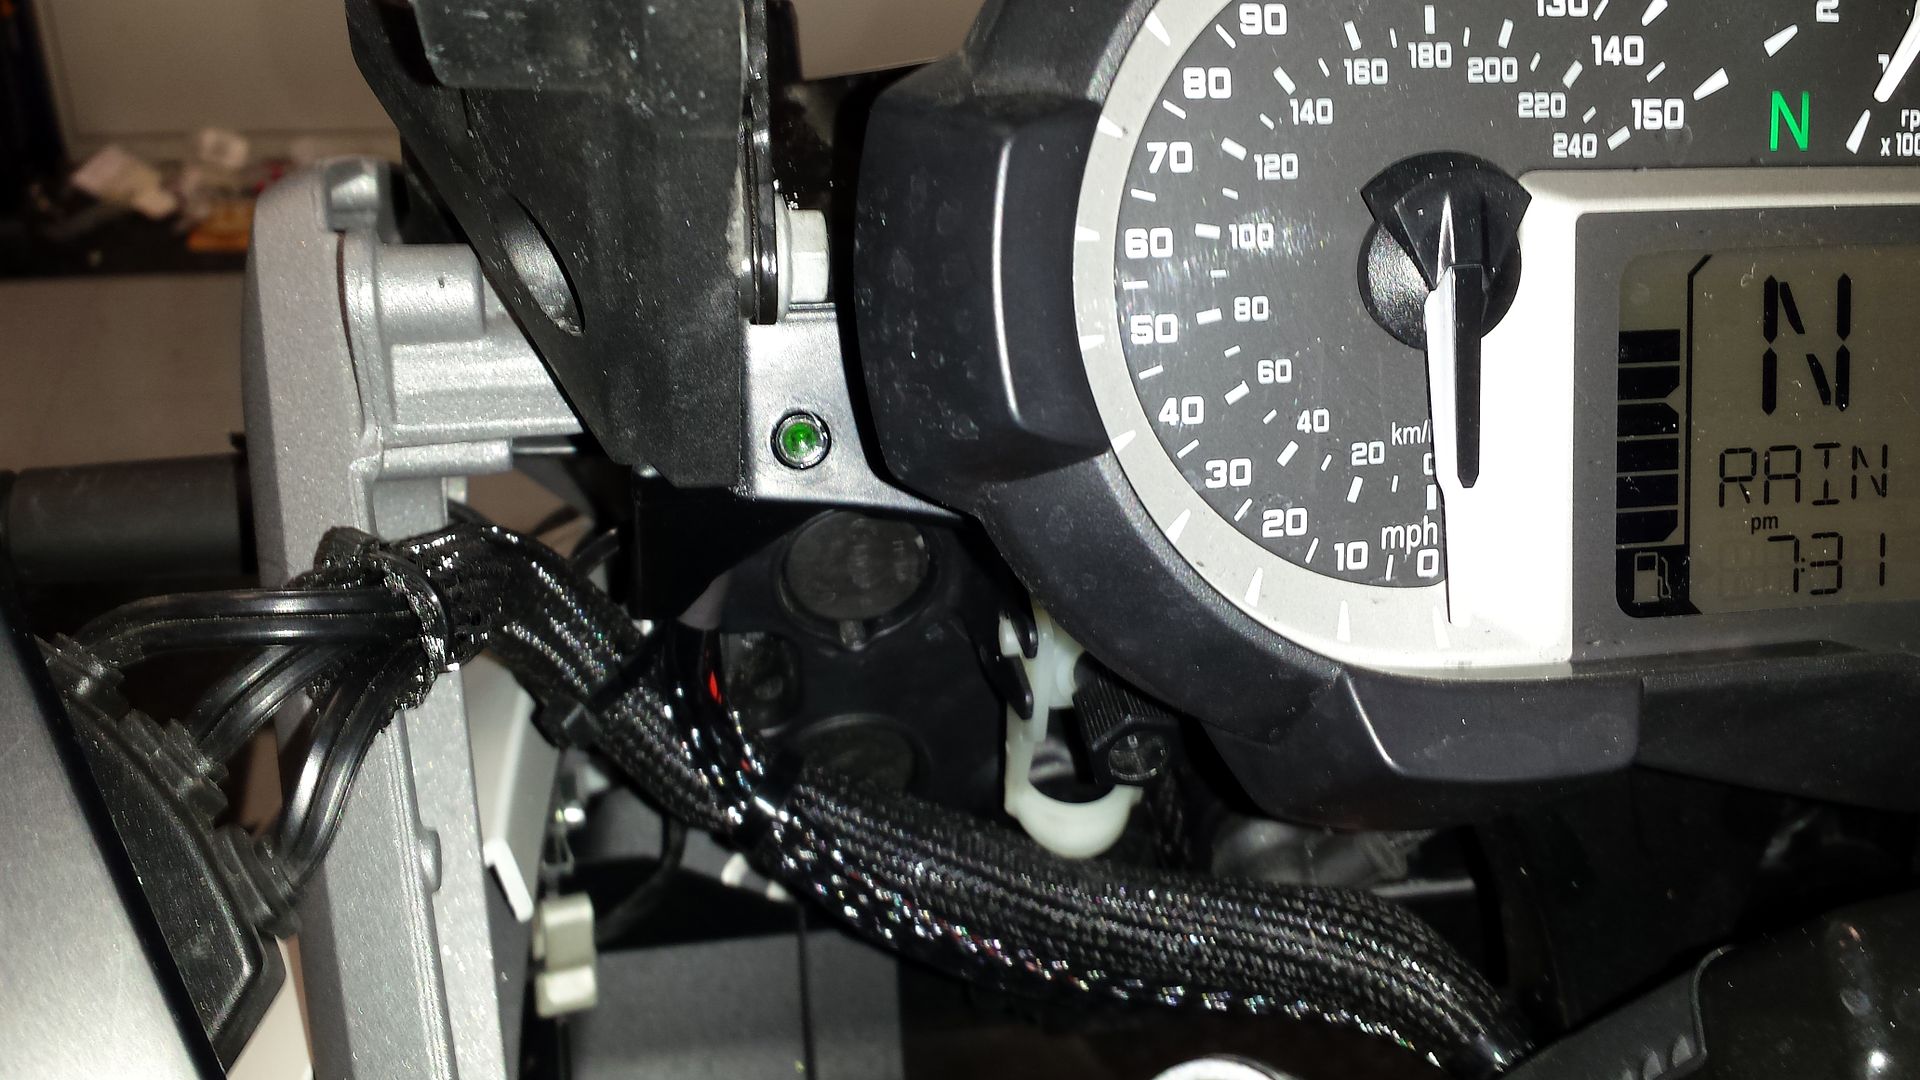
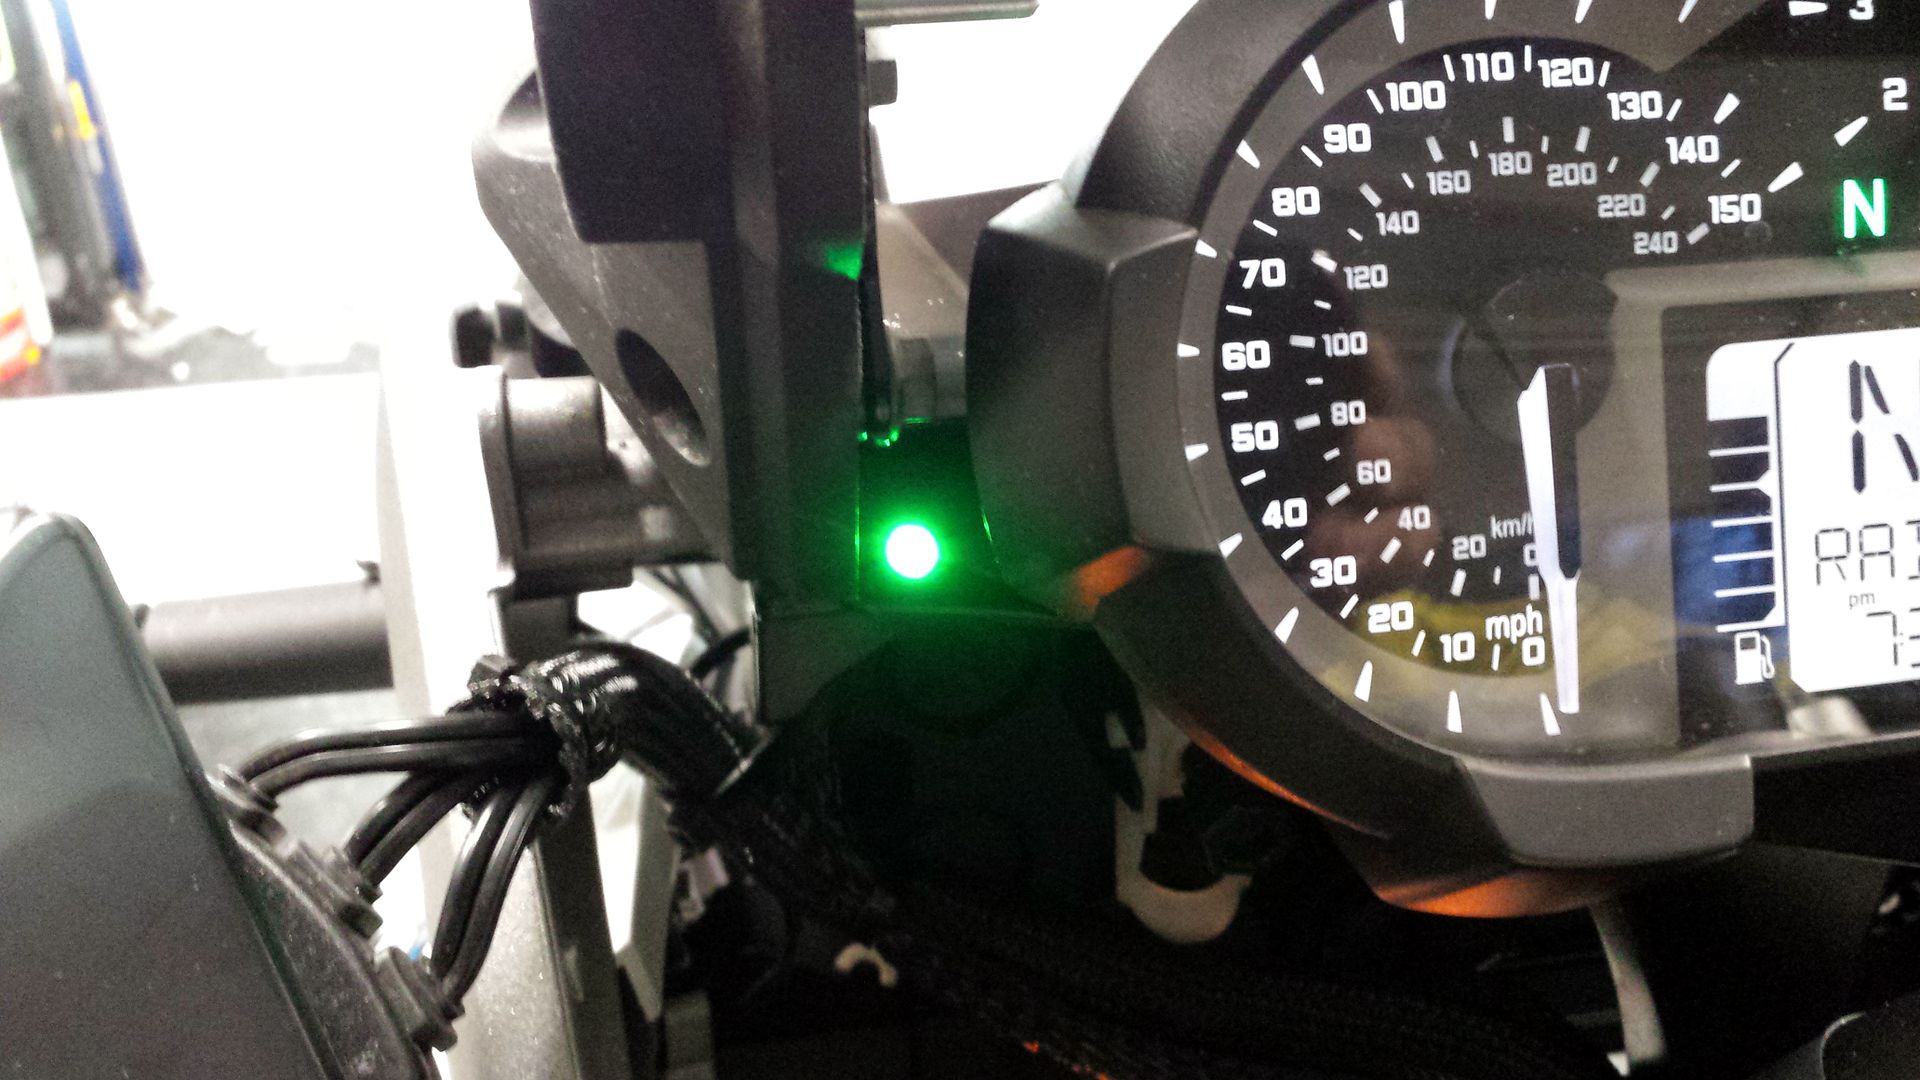
All in all a clean install!
spent21
Well-known member
I would like to say it was a breeze, but that would be lying! The concept and design was easy, applying it was not so much.
The light:
All in all a clean install!
I must have missed it... what is the led for?
Take note guys... you don't need to copy every picture when quoting someone's pix.
Just sayin
Take note guys... you don't need to copy every picture when quoting someone's pix.
Just sayin
Spent, you're pushing a rope with that one....

WeldTightFab
Member
- Joined
- Mar 2, 2015
- Messages
- 22


I must have missed it... what is the led for?
Good question, I was wondering the same thing, nice install though.
Something about a can opener? ↓ ↓ ↓
NoVa Rider said:JVB added an LED. If the CANopener is used there isn't an on/off indicator. . .. Very slick install. . ..
Not sure what this means...


bmxdad
Well-known member
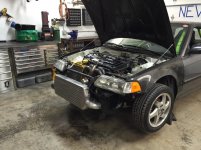
Pulled off the manifold and intercooler to clear the way for a new forward facing manifold.
Are you going to connect intercooler directly to turbo outlet?
This an outlaw car?
WeldTightFab
Member
- Joined
- Mar 2, 2015
- Messages
- 22
Are you going to connect intercooler directly to turbo outlet?
This an outlaw car?
You know, I have not fully decided yet on the setup, it will all depend on space ultimately. The intercooler is extremely large and takes up almost the entire front of the car. It is a drag car my twin brother and I built to go absurdly fast and not have to be a daily. which is good considering the motor has gone once (valve dropped) and the final drive gave up fourth gear. So when it has gone down there is no huge rush to get it back together. This is how it was currently set up.
Attachments
mikeburris
Well-known member
- Joined
- Aug 4, 2012
- Messages
- 188
rebuilt a NASTY carb for my BIL's new to him 67 ss 350 4speed project camaro. Didn't really want to run after new rebuild until some of that several year old gas got out. Purring like a tiger now though.
zcar751
Well-known member
justanengineer
Well-known member
SWMBO helped me with a bit of sanding and paint.


Sent from my iPhone using Tapatalk
Sent from my iPhone using Tapatalk

BradTx
Well-known member
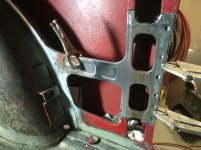
Trimmed and fit a piece to repair the damage done by an idiot PO when he installed speakers.
polexican23
Banned
zmotorsports
ALLIANCE MEMBER
Which was?????? Come on don't keep us waiting.
Mike.
zmotorsports
ALLIANCE MEMBER
Last night I was able to get a bit more work done on my utility trailer project. She's getting closer.
Mike.
Mike.