To avoid these ads, REGISTER NOW!

One man's garage project from Finland..

OP
J

JoniH

Well-known member
Joined
Oct 23, 2012
Messages
236
Location
Finland
Today i got the wifi-system done right after work. Timing was perfect because the missus was not home, and by that, i avoided many comments questioning my sanity as i began to drill through the window frame in the living room.. And she didn't see the mess i made. :thumbup:

Anyway, here's a couple of pics from that:

Split pipe pin to lock the parts together


Bracket assembled


Holes drilled and installed


Inside, the router will be hidden behind curtains


Antenna at the garage door, i need to fix a bracket for that. Temporary (yeah, right..) screws to hold it in place.


And the end of the line.. I still need to add a extension cord near that tilted shelve for cellphone/laptop/tablet use


The connection works perfect and fast, just for curiosity i'll do a speed test tomorrow, but i didn't notice any difference compared to the connection inside my house. Had Youtube on for three hours, and maybe once it paused for a couple of seconds in the middle of a song. I'm quite pleased with it now.

And since i'm having a 4 days weekend, i picked up some 40x40mm square tubing to start on the workbench build tomorrow.


That's all for now..
 
To avoid these ads, REGISTER NOW!
OP
J

JoniH

Well-known member
Joined
Oct 23, 2012
Messages
236
Location
Finland
Got the workbench frame mostly done today, ran out of square tubing so the support beams for shelving in the middle is still undone.

Brackets screwed into wall beams


Going to build some drawers on the smaller side on the left, they will get supports made out of angled iron. A air hose reel should find a place under the worktop, either near the wall behind those drawers, or right side on the longer part of the workbench.

Trying to figure out a quick release-type structure for a vise, or i just might drill holes on both ends of the worktop. Cable trunking with outlets and light switches will be installed under the worktop so there might not be room for a removable bracket.
 
Last edited:

drivesitfar

Well-known member
Joined
Oct 23, 2013
Messages
36,053
Location
Pacific Northwest
Joni: you make great progress every week. the yard should turn out great or you'll learn something and make it better if you want to.

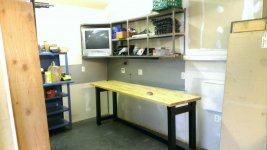
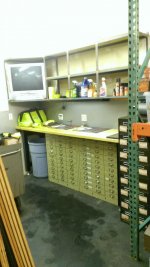
i do like your new workbench layout. i found some of these metal cabinets from a client's closing TV repair business that just barely fit under my wood bench and hopefully mine will work better than open shelving or a couple rolling tool boxes like I've owned in the past. i was also thinking of an open parts bin and still might so i can see and grab a little quicker.

i'm just posting a picture or two or three to give you some other ideas, but not sure you even have these metal cabinets in your part of the world. you are so handy you could probably make some.

nice work as per usual
 

Attachments

  • WP_20141012_001.jpg
    WP_20141012_001.jpg
    125 KB · Views: 102
  • WP_20141018_011.jpg
    WP_20141018_011.jpg
    143.3 KB · Views: 113
OP
J

JoniH

Well-known member
Joined
Oct 23, 2012
Messages
236
Location
Finland
Hello Drivesitfar!

Thanks, didn't have any specific plans on the workbench, just "went with the flow" while working on it. Nice looking cabinets, i've been looking for something like that, their either too expensive, in bad shape or both.. :)

I'll think i just go with the plywood DIY-models, gives me more options on sizing them right.

Edit: Just a quick look on the net and found these, need to do some measuring tomorrow..

http://www.ikea.com/us/en/catalog/products/40107872/
 
Last edited:

drivesitfar

Well-known member
Joined
Oct 23, 2013
Messages
36,053
Location
Pacific Northwest
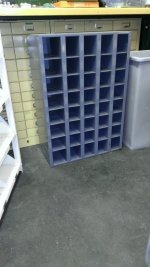
Joni: i'm sure whatever you choose will work fine. here's a parts bin that has the open shelving i mentioned. i'm probably going to try to put one of these under my welding table.

plywood doesn't sound too bad if you customize the spaces and you don't weld near it.

good luck
 

Attachments

  • WP_20150217_010.jpg
    WP_20150217_010.jpg
    141.7 KB · Views: 79
OP
J

JoniH

Well-known member
Joined
Oct 23, 2012
Messages
236
Location
Finland
It's been quiet in the garage, i had a busy week but managed to do some progress today..

1.2" (30mm) plywood for the workbench top, i might cover it up with sheet metal, not sure yet.


Air lines and sockets finding their place. I bought Cejn air couplings for the bench because they will be mostly used, so i didn't wan't to put cheap one's there.


Some small adjustments with my Dremel


Air lines in cover hose, easy to replace if needed


Plywood (again..) to attach the sockets


Workbench lightswitch, socket and a optional switch for air circulation fan


Sorry, nothing special here.. Tomorrows task will be planning the workbench drawers, get the top in place, installing cables for sockets and hopefully i'll get the frame welded together for those drawers.
 

udderlyoffroad

Well-known member
Joined
Aug 2, 2014
Messages
93
Location
Bristol, UK
Air lines and sockets finding their place. I bought Cejn air couplings for the bench because they will be mostly used, so i didn't wan't to put cheap one's there.

Allow me to not congratulate you on not ‘cheaping out’. I’m slowly replacing cheap-and-nasty copies of PCL standard fittings with genuine ones, and I notice the difference. :rocker:


Sorry, nothing special here.. Tomorrows task will be planning the workbench drawers, get the top in place, installing cables for sockets and hopefully i'll get the frame welded together for those drawers.

No need to be sorry. One of the great things about this forum is the detailed pictures, e.g. of workbench builds. Am shortly about to replace a horrible bench in my garage (built by the previous owner) with something similar to yours, so please keep the detailed pictures coming!

And I'm very jealous of your space - excellent build

Matt
 

drivesitfar

Well-known member
Joined
Oct 23, 2013
Messages
36,053
Location
Pacific Northwest
Joni: i agree that your pictures and your work are inspiring not only me, but probably a lot of members that don't post much to say so. i also like that you seem to be using high quality materials. your design and planning seem to be very well organized. i probably would have put the bench top on to get that surface to set things on and the ran the all the hoses and wires. much easier to do so from above and i'll remember that for the next time i make a bench.

keep up the great work and i'm guessing the snow is almost gone or is it still hanging around?
 
OP
J

JoniH

Well-known member
Joined
Oct 23, 2012
Messages
236
Location
Finland
Thank you udderlyoffroad, it's slowly moving on.. :)

Had the fever and flu for a couple of days, like my daughter, so most of the week went laying down in the bed. Or trying to, she had the same energy to run and play..

Feeling better now, so today as the weather was nice, we moved my 720 to her new home.. No brakes, a bag of rags for a seat and fingers crossed that all steering related parts would stay in place.. but it was fun to "drive" it for a long time.


Up on dollies so it's easy to move around, i still need to paint the floor.


My electrician connected the wiring for outlets at the workbench and light, so those work now. One 2x58w lamp over the bench, and it feels almost too bright..

drivesitfar, it usually looks more like a chaos than well organized, but thanks.. :) The snow is gone here, but up in north about 800 km from here in Rovaniemi there's still over 80 cm of snow.
 
OP
J

JoniH

Well-known member
Joined
Oct 23, 2012
Messages
236
Location
Finland
Formula 8-JJ x 15 -30 and 6x139.7 is all i know about them, but now that you mentioned Minilite, the logo on the wheels looks the same that Google gives, thanks.


drivesitfar

Well-known member
Joined
Oct 23, 2013
Messages
36,053
Location
Pacific Northwest
Joni: looks like the truck found it's way home. nice that you put it on wheels to roll it around out of the way if you need to.

i just noticed that awesome and huge floor drain you put in the middle of your garage. is that standard for all the garages in Finland because of all of the snow and water it creates? or your idea and did you just drain it on the ground outside the garage or some sort of collection system like you do with the roof's water?

i do like the floor drain and not wondering how to keep the oil and debris out of it if i install one in my new garage. you almost need a cover with a 2 year old stuffing your tools down there even though she seems like a great helper.
 
OP
J

JoniH

Well-known member
Joined
Oct 23, 2012
Messages
236
Location
Finland
Dollies are nice to have, no more playing with jacks, now the pickup is easy to move around on those.

It varies a bit in different municipalities, but here if i wanted to have hot & cold water in my garage, i'd have to connect the floor drain to a separate tank. And that's a few thousand euros i rather spend on tools, so only cold water for me.. :)

It's just a normal floor drain that has inside a 90 degree bend in the drain pipe. It separates oil and sand, the building codes requires that, again, usually.. I took the bigger version for easy cleaning, there was not much difference with the price on a smaller one. More room for me & my daughter to drop sockets and bolts in, but the lid comes off easy, so no problem. :)

I intend to have our cars sometimes inside in the winter to melt all the ice off and maybe a quick wash. The floor drain is connected to the rain water chamber and it drains outside in a soil covered old well casing part that's filled with stones.
 

Denwood

Well-known member
Joined
Sep 22, 2014
Messages
4,200
Location
Thunder Bay, Ontario, Canada
Joni, you've made excellent progress. I did a powerline run out to the shop which worked surprisingly well. You're wifi setup looks excellent. The level of detail/workmanship that you're incorporating will make for a world class shop once you're done.
 
OP
J

JoniH

Well-known member
Joined
Oct 23, 2012
Messages
236
Location
Finland
Thanks Denwood! I admit that i have put needless effort in some projects that would have worked/looked just fine in less time..

Wifi works still, too bad i can't say the same about our int. service provider..

But hey, i got something done today: workbench drawers.

First i needed to do some framing for those drawer brackets


And a couple of too-short-parts and welded-together-moments later


And drawers..


Drawer on bottom needs little adjustment to sit flush like others, i welded the angle iron bracket too close to the front.

Tomorrow building the smaller drawer, adding some dividers in them, painting the frame.. and so on.
 

drivesitfar

Well-known member
Joined
Oct 23, 2013
Messages
36,053
Location
Pacific Northwest
Joni: nice looking drawers. can you grind off the little bit of angle iron to make the drawer fit better? i didn't notice it until you mentioned it, but i know what you mean about having it right the first time so good luck with that.

thanks for the description on the floor drain and i hadn't thought of putting one in my new garage plan (a few years from starting that still), but it should be in mine and everybody's. also nice that you can take the cover off if something accidentally gets dropped or falls down the holes.
 

Bib Overalls

Well-known member
Joined
Dec 4, 2006
Messages
3,318
Location
Jonesboro, Arkansas
I am always amazed at how much tubing a small project can consume. A simple shop work table can consume 50 feet. I get mine in 20' lengths. I don't know where it goes but I seem to be ordering the stuff all the time. You to I suspect.
 
OP
J

JoniH

Well-known member
Joined
Oct 23, 2012
Messages
236
Location
Finland
That's true, i managed to use about 9 x 6m (20') square tubing on my workbench, luckily i have a good place near where i buy it. And i think i'll need to buy more, i was thinking of building a rack to store.. yes, tubing. Square and round, you got to have some of that laying around. :)
 

Denwood

Well-known member
Joined
Sep 22, 2014
Messages
4,200
Location
Thunder Bay, Ontario, Canada
I had to mention your welding table...mine is exactly the same. A piece of 4x8 plywood on collapsible table legs. Not exactly a 2 ton slab of steel but it works :). I don't have room for a dedicated heavy steel welding table.
 
OP
J

JoniH

Well-known member
Joined
Oct 23, 2012
Messages
236
Location
Finland
I was hoping that no one would notice my high tech-table.. i did throw the plywood outside for the night, just in case.. A small welding table on casters is on the to do-list, among many other things. Nothing heavy, just some square tubing and a steel grating top, that's enough for my projects.
 
To avoid these ads, REGISTER NOW!
OP
J

JoniH

Well-known member
Joined
Oct 23, 2012
Messages
236
Location
Finland
Thanks stoffels!

Been busy, as usual, so no big updates this time either..

Started on the workbench shelving, i just went with a quick way to get those done and settled with self-tapping metal screws and larger plywood pieces that fit between the bench legs and filling the gaps with slices..


Shelving inspection, i passed that.


And i got started on the sheet metal/tube rack. At the old garage those were just piled up somewhere, hated it.. First i thought i'd do a wall-mounted rack, but few minutes searching the web and i found some better ideas.

So, i got the basic frame done today, had some casters laying around, and again, self tapping screws..


It's just a rack, but why not try to do it properly


I hope i'll have some time tomorrow to continue on that.
 
Last edited:

RivennHewn

Well-known member
Joined
Jun 4, 2011
Messages
10,381
Location
PNW
"It's just a rack, but why not try to do it properly"


Considering how tough an inspector you've got(and adorable), you'd better do it right!

Place is looking great!
 
Last edited:
OP
J

JoniH

Well-known member
Joined
Oct 23, 2012
Messages
236
Location
Finland
Thanks RivennHewn, garage is coming along slowly but surely. Yeah, she keeps me on my toes.. :)

Today i had time to finish the rack, i might give it a thin coat of flat black when the weather gets better for painting outside..

Here's a few pics during the build:

Lining things up.. sorry about the picture quality.


Frame done


Shelving


Angle iron to keep smaller pieces from falling. I know, should have rounded the edges.. i might do that tomorrow.


Room for sheet metal


Rack feels very stable to move around, and next step is filling it up with iron.
 
Last edited:

Whitey1

Well-known member
Joined
Oct 26, 2013
Messages
132
Location
Ohio
Thank you for sharing your build with us. You have a great eye for detail and your build is looking great.
 
OP
J

JoniH

Well-known member
Joined
Oct 23, 2012
Messages
236
Location
Finland
Thanks, the rack turned out better than expected. Found this "thing" i made a few years ago going through boxes. First i was going to throw it away, but you got to have a bottle in case of emergency, a.k.a when the sh#t hits the fan at the garage. It was originally made for a different bottle, but some minor changes and it's a tight fit. Cap is welded on, so you need to put a little effort to have a drink.. :)

 
OP
J

JoniH

Well-known member
Joined
Oct 23, 2012
Messages
236
Location
Finland
I'm slowly starting to fill this thread with more than just the garage.

I have always liked photography, yeah i know, all my photos are taken with my phone.. sorry. Maybe two years ago i got interested in time lapse, those that are added with a little movement. So i had to get a time lapse rail, and with a quick search i found out that those cost a fair amount of money..

Well, everything that has to do with photo/filming is expensive. So i decided to try to build one myself. The basic for that is quite simple: a rail and a trolley. :)

Framing is made from square tubing, motor and pulleys are something i found from Ebay, and some parts are stuff i had laying around.


That was the easy part, what about the electronics?

Luckily i have a friend that works with electronics, i told what i needed it to do and he designed the electronics on a universal circuit board and programmed it. I can adjust time in half second steps, waiting time (interval), running time and speed for the motor. When the signal for the motor stops, it fires the camera.

The task to try and get it fitted inside a small box was left to me. To make things a little bit easier i made a separate box for batteries, it has 2 9v batteries connected parallel. The rail worked well right from the beginning, sadly i have used it just a couple of times.. too much things going on.


Tripod mounts on both ends, one for a smaller Slik tripod and a Manfrotto on the other side.


I'm hoping that this weekend i'd have a few hours to play with it, it's been collecting dust in the corner for over a year now.
 

drivesitfar

Well-known member
Joined
Oct 23, 2013
Messages
36,053
Location
Pacific Northwest
Joni: when i saw that time lapse camera set up you are working on I was going to PM Woody. He's a great guy and his videos are almost as cool as his like new remodeled garage he just finished. you couldn't be in better hands now that he saw your post.

BTW (by the way) you either have a great source for metal or you are spending all your assistant's college education building all those cool things in your shop. nice work as always.

best of luck with your projects and do you still have snow on the ground or is it all gone now?

cheers and take a nip off that bottle after your assistant goes to bed and i'll do the same only my choice is a bet tamer (Stella Artois).
 

Vieux

Well-known member
Joined
Jan 31, 2014
Messages
2,531
Location
Russia
JoniH This is a great idea for a little money to do a good thing for his camera! I also love photography and I also have an idea to make a similar design.
Subscribe to your theme!
 

Erkka Herola

Member
Joined
Apr 2, 2013
Messages
10
Hey Joni!

Super work on the rack, I need to remember that design when (if) we ever get around to remodeling our basement.

At the moment storage is in one end of the basement, sauna/bath and a movie room in between and the garage after that. The plan is to switch the sauna area to where the storage is now and vice versa and open up a wide doorway to the garage. This way I'd get all of my storage out of the garage/work area. Now a lot of stuff is stored there since I don't want to be carrying stuff through the movie room all the time.. :)

Joni:
BTW (by the way) you either have a great source for metal or you are spending all your assistant's college education building all those cool things in your shop.

OT: Joni won't have to worry about the cost of education as all of that has already been handled by all of us, the Finnish taxpayers. I do believe, though, that this leads to the metal being a bit more expensive than in many other places..:)
 

drivesitfar

Well-known member
Joined
Oct 23, 2013
Messages
36,053
Location
Pacific Northwest
Erkka: do all Scandinavian countries pay for the kid's to go to college or just Finland? thanks for the 411 (411 means information over here in US).

Joni: you still must be friends with the guy at the local steel company or he just smiles when you pull up to walk in with your cash. keep up the great work and keeping us in the loop.
 
OP
J

JoniH

Well-known member
Joined
Oct 23, 2012
Messages
236
Location
Finland
Thanks fellows! Vieux, took a quick visit @ your Flick page, nice photos. I'll have to take a closer look. :thumbup:

Hi Drivesitfar, what Denwood has going on at work is top quality, maybe one day i'll have a chance to improve my equipment with some of Cinevate gear.. ;) But first i'd have to practice with the gear i have now, it seems that i'm starting to forget even the most basic things on my dslr.. Just have to shoot more, practice makes if not perfect, at least a bit better.

Snow is gone now, we did have a small hale storm with thunder a few days ago, but that melted fast away. Hobbies cost, building things is my hobby. I don't drink, don't smoke, so i put that money in buying steel i guess.. :)

A 6m long 40x40mm with 2mm wall thickness costs ( where i buy them) 23 euros. A nice place to get materials, a small metal recycling/new steel/plywood-business. I did get a box of liquorice last christmas while picking up plywood there.. :)

Denwood, thanks for the link you PM me, i did use my slider today, i tried to get everything right at the first time, leveled it, etc. but for some reason i got it out of focus. Should have double checked everything. Noticed it right after importing the result from Panolapse on my computer.. Oh well, our backyard scenery would have sucked anyway. :)

I did find the first test run/video i made on my computer, added it on Youtube:

A lot of flickering and it looks a bit soft for some reason.

I have just some free editing programs, i think i made that clip with Windows movie maker. They all seem to have in common that the quality of the clip is mostly 480p.

Thanks Erkka, i would like a separate movie room too.. i had a 90" screen for a couple of years in our living room, but with big windows on both sides and a statement from the missus that no black curtains will enter this house, the movie watching was done mostly in winter. Now when i think of it, i should have installed some black out window shades.. :eek:
 
Last edited:

drivesitfar

Well-known member
Joined
Oct 23, 2013
Messages
36,053
Location
Pacific Northwest
Joni: anything new to report or have you been working your rear end off to be able to buy some more steel or other things for your shop? I'm guessing the snow is gone and maybe the temps are such where you are working outside?

cheers and hope you and the family are all doing well.
 

Lippyp

Well-known member
Joined
Jun 26, 2006
Messages
6,720
Location
Shropshire, UK
You should get these guys over to play at your garage, stumbled across them by accident, kind of weird Finnish hillbillies playing an acoustic version of AC/DC's Thunderstruck! Pretty cool although they do look like something out of Deliverance!

 
OP
J

JoniH

Well-known member
Joined
Oct 23, 2012
Messages
236
Location
Finland
Hello, it's been a while from my last post. Drivesitfar well, it's almost midsummer, and it's cold.. last time it's been this cold in summer was 15 years ago. Around +13 to +20 celsius..


Sorry, finishing the workbench shelving is all i have managed to get done, and that's almost a couple of weeks ago.. Other things have kept me busy for past two weeks, work, family, etc. Hey, wait, i did visit IKEA, bought a chair for the garage.. :)


I started my summer vacation this week, and i was hoping to get something done with our yard.. So building a small, 7m long cinder block retaining wall was first on my to do-list to start on this landscaping-project.

A quickly made cast


Cinder blocks and a big mess.. Now i need to order some gravel to fill this up, on the left side the gravel will cover only partially the first layer.


And almost finished


Yesterday i borrowed a backhoe and did a little work on the yard, moving some big stones and making the terrace side less steep for the grass. There's always something to dig if you can get your hands on such equipment.. :)

Today i cleaned the mess i made yesterday, and went through the surface with a rear blade. Next week i'm ordering some soil to cover this area up, to get a better base for the grass to grow.


The opening in the stone fence is reserved for a upcoming build, maybe something like this:


A place where you can sit by a fire, maybe have some cold drinks ;) and just relax..

Lippyp Ahh, Deliverance.. a legendary movie. :D I was expecting this banjo dueling clip on your link.. :D

Not bad, but i still prefer the original version:
:rocker:
 

drivesitfar

Well-known member
Joined
Oct 23, 2013
Messages
36,053
Location
Pacific Northwest
Joni: i suppose buying a chair for your garage counts as progress. :D

now to say you didn't do much when you did all the landscaping isn't quite true. nice work with the yard and the big rocks for the border.

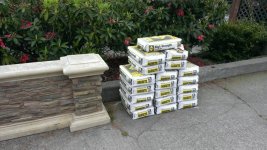
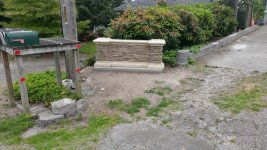
i do have one question for you. are you putting regular cement on the sides of the little wall you built or is that more of a mortar mix? i just poured a little foundation for a monument i still need to clean up and paint and i did my form a bit different than you by using stakes I've been gathering to do various projects. instead of re doing my form that i decided to shorten 6 inches i just moved in a new board. that way i can put a brick trim around the base of it to add a little color. A new driveway is on my long list of TO DO'S.

your little landscaping wall looks great BTW.
 

Attachments

  • WP_20150523_007.jpg
    WP_20150523_007.jpg
    156.5 KB · Views: 59
  • WP_20150524_002.jpg
    WP_20150524_002.jpg
    152.3 KB · Views: 54
  • WP_20150519_002.jpg
    WP_20150519_002.jpg
    155.2 KB · Views: 52
  • WP_20150525_009.jpg
    WP_20150525_009.jpg
    154.3 KB · Views: 55
  • WP_20150525_011.jpg
    WP_20150525_011.jpg
    147 KB · Views: 57
OP
J

JoniH

Well-known member
Joined
Oct 23, 2012
Messages
236
Location
Finland
Drivesitfar, that looks nice. I think i'll need to hide my photos or knock the wall down.. :)
I use Fescon socle and adjusting plaster, or that is what it says on the package. Quite easy and quick to use, for the finishing touch i spray a little water over it and brush it lightly with a wallpaper brush.
 
To avoid these ads, REGISTER NOW!
Top Bottom