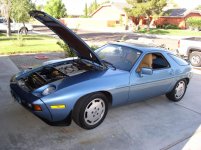
To avoid these ads, REGISTER NOW!

Hello from California/Oregon

Dwayne928

Member
Joined
Sep 25, 2015
Messages
10
Hello All,
This is an amazing forum! I've only been reading threads (mainly electrical and lighting) for a few days and already have had so many questions answered - THANK YOU to those that have invested time to share experiences and knowledge on this forum that has helped a newbie like me on my first shop construction.

I'm in the process of building my own shop in Oregon (future retirement location) although I live in California. I plan to learn a lot from this forum as I complete this construction project. Sounds like folks on this forum like to see pics, if possible so by way of introduction, I thought I'd share some pics of the construction progress of the shop.

This is a 3 year project and I just completed year 2. My goal was to build as much as possible by myself and see if I could do it and finish in 3 years. So far, so good. I have had to hire some help for a few jobs that were just too darned big for one person - I'll note those below.

First, was excavation of the site. Building size is 40 x 70 feet so I hired a local heavy equipment operator to excavate part of the hillside for the site. I then did the excavation for the building footings, placed gravel and compaction, built forms, placed rebar reinforcement, and did the concrete pour for the building footings. This was done last September (2014).
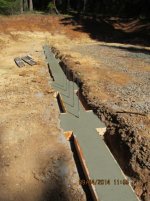
Oakridge Construction 046.jpg

Next, came the foundation wall. I decided to build it out of concrete filled concrete blocks - 5 courses. About 640 blocks altogether. I did this work over a 2 week period of time in December 2014. I have to say after the 2nd day of laying blocks, my back was complaining big time. However, I discovered Bayer extra strength back and body aspirin and was able to complete the job with no pain. Could not have done it without the Bayer!
IMG_0591_1598.jpg

Next, I worked on the concrete slab and walkways in February this year. Placed the vapor barrier, gravel, compaction, rebar reinforcement, expansion joints, walkway forms, grading for runoff, etc. However, when it came to the actual pour and finish work on the concrete, had to hire a contractor - just too much for one person to handle. The slab and walk ways are 6" thick with #3 rebar reinforcement on 2' centers.
Concrete Slab February 2015 025.jpg

Here's pic when they were finished with the pour. I've been very happy with the quality of work.
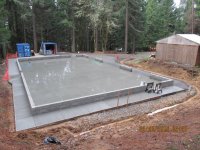
Concrete Slab February 2015 055.jpg

Next was framing in June. I did the framing myself with the help of this 5K 19-foot reach lift which came in real handy for installing the glulam beams over the 3 garage doors. Otherwise, the framing was done one stud at a time. Framing is 2x6 framing using 10-foot studs. Including the foundation wall, bottom and top plates and studs, floor to ceiling is 12 feet.
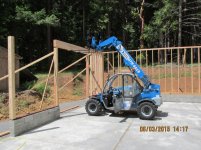
20150613 Oakridge Construction 012.jpg

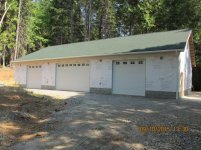
Three garage doors and three personnel doors. The 2 outer garage doors are 10 feet wide, 10 feet tall. The center garage door is 16 feet wide, 10 feet tall.
20150613 Oakridge Construction 019.jpg

After framing was done, I installed the wall sheathing with rough openings for windows and wall bracing in preparation for truss installation.
20150613 Oakridge Construction 035.jpg

Continued.....
 
To avoid these ads, REGISTER NOW!
OP
D

Dwayne928

Member
Joined
Sep 25, 2015
Messages
10
Next came truss installation. I had open span trusses with attic storage engineered, built and delivered to the site. I rented a 6K 42-foot reach lift with lift jib to lift the trusses in place.
20150717 Oakridge Construction 026.jpg

This was time consuming for one person because I had to get out of the reach lift frequently to steady the truss as I was putting it in place. The scissor lift was the other valuable piece of equipment that was essential to truss installation for one person.
20150717 Oakridge Construction 030.jpg

After several trusses were placed, I could see the roof line and attic space starting to take shape.
20150717 Oakridge Construction 037.jpg

After the trusses were in place it was time to install the roof sheathing, fascia, and roofing. At this point, a local contractor freed up some time and I hired them to install the sheathing, fascia, and roofing. Trusses were time consuming and I was spending more time than expected so the contractor's availability to finish off the roofing tasks was welcomed and they did a great job - and fast too (about 5 times faster than I could have done it). Trusses and roofing was completed in July.
20150717 Oakridge Construction 053.jpg

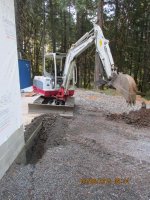
Quite a few things needed to be done this month so it was a busy visit in September. The company I purchased the garage doors from came out to install the garage doors and I hired a gutter contractor to install 74-foot seamless gutters along both eaves. In preparation and during this work, I set about renting a small excavator to dig two 60-foot trenches for the gutter runoff to go underground (2-feet) and down the hillside.
20150911 Oakridge Doors and Gutters 022.jpg

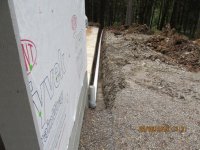
I installed the drain pipe and covered everything back up. My wife and I have been thinking about a water reclamation project with the runoff from the shop and house later.
20150911 Oakridge Doors and Gutters 027.jpg

Next I excavated the waste drainage line from the new shop and the existing sewer line and connected both and covered everything back up. Additionally, I trenched the stubbed out water supply line to the new shop and connected it to the existing water supply. Now I have running water for the sink and toilet in the new shop. While I was working on these things, my local contractor completed the stairs to the upstairs storage/work area. I'm very happy with the job they did on the stairs.
20150911 Oakridge Doors and Gutters 053.jpg

Continued....
 

mikes02ls1

Well-known member
Joined
Sep 26, 2015
Messages
427
Location
Casa Grande, AZ
Nice shop, baller status. Im on the beer budget garage, no getting any loans and just save save save. My 45k a year job aint cutting it for my hobbies, and projects...lol
 
OP
D

Dwayne928

Member
Joined
Sep 25, 2015
Messages
10
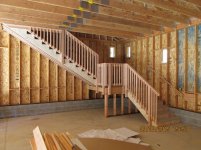
View of the shop floor from the stairs.
20150911 Oakridge Doors and Gutters 057.jpg

Upstairs, I planned to use the space for storage and clean workspace (e.g., auto electronics, soldering, automotive interior work, etc.) and install a couple of benches. The space is 6'10" tall, 13 feet wide and 70 feet long.
20150911 Oakridge Doors and Gutters 061.jpg

The garage door folks finished their work and I was very happy with their work.
20150911 Oakridge Doors and Gutters 067.jpg

After the garage door folks and gutter folks left, I started applying the floor finish/treatment. I thought I'd go with the epoxy coat with paint chips for traction. Seemed like a good solution for when I spill automotive juices on the floor for ease of clean up. The top of the picture is where the toilet room is and tub sink location.
20150911 Oakridge Doors and Gutters 068.jpg

Well, that's the progress so far. Still much to do in the next year. Siding will get installed next month and this winter I'll be working on installing the electrical. Next spring and summer I will be installing insulation and drywall and hopefully I'll finish everything up by next fall.

Still some things I need to work out are type and size of lighting fixtures, location of the 240V circuits and which bay to locate the car lift. I'm leaning toward the 4 post type of lift. I've got a lot of research to do on mapping out the electrical circuits before applying for the permit.

Thanks again for the great support on this forum - inspirational and helpful to me!
 
Last edited:

rdog422

Well-known member
Joined
Jul 26, 2015
Messages
105
Location
montgomery
that looks awesome!!!!!!!!!!!!!!!! Welcome to the forum. If you need more space for your stuff feel free to leave it with me. :)

attachment.php
 

drivesitfar

Well-known member
Joined
Oct 23, 2013
Messages
36,062
Location
Pacific Northwest
Dwyane: nice first post. that is an awesome garage shop and something like what i'd like to build for my retirement.

welcome to the group and you'll fit right in. now that you are a member you can read threads and if you like them just post a thank you or well done to the guys that helped write them. or if you have questions just ask.

any questions?

good luck
 

rburke65

Well-known member
Joined
Nov 10, 2007
Messages
12,349
Location
Canfield, Ohio
Hello and welcome from Ohio! I hired the shell of my 32' x56' x12' build out. There were 5 guys when the trusses were delivered and the truss company,sent a crane. 2 hours 11 minutes from the time the crane arrived to departure! Amazing. You could tell these guys had done this before. Very nice work that you have done yourself.
 

HSpencer

ALLIANCE MEMBER
Joined
Nov 28, 2010
Messages
2,854
Location
South Central US
WOW that is a massive and very nice place your building! It will be outstanding for a retirement shop. I would also welcome you here and you will find a whole lot of very friendly people who love seeing photos of your place, your projects, and whatever your wanting to do at any given time. Thanks for coming in and joining in with us!!

Best Regards and Welcome Here

Herb Spencer
 
OP
D

Dwayne928

Member
Joined
Sep 25, 2015
Messages
10
Thanks all for the warm welcome! ...especially rdog422 for his generous offer to store my stuff in his blue man cave :)

Great folks here on the forum!
 
To avoid these ads, REGISTER NOW!

drivesitfar

Well-known member
Joined
Oct 23, 2013
Messages
36,062
Location
Pacific Northwest
Dwayne: since your intro thread (this great build thread) was moved you might want to start another thread in the intro section so if you have any questions about the forum you can ask there.

welcome again to the group and it looks like you'll fit in nicely with your skills, quality building to store some cool stuff in and your sense of humor.

cheers
 
OP
D

Dwayne928

Member
Joined
Sep 25, 2015
Messages
10
Dwayne928, do you have a 928 to park in that garage? If so, pictures are requested :)

I do have a 928 affliction :D

So, there may be a few 928s in the garage....as requested, here's some pics of the current inventory.

In order to keep track of them, we decided to name them after the state in which we purchased them. Since we had 2 from Virginia, we called one "Iris"

This is "Iris" a 1985.
85 Arrival at New Home_3591.jpg

This is "Colorado" a 1986.5
DSC00419.jpg

This is "Virginia" a 1987 (wife's daily driver)
DSC00499.jpg

This is "Oregon" a 1987 (my daily driver)
Mammoth_9088.jpg

This is "Idaho" a 1988
P1010009.jpg
 
OP
D

Dwayne928

Member
Joined
Sep 25, 2015
Messages
10
Dwayne: since your intro thread (this great build thread) was moved you might want to start another thread in the intro section so if you have any questions about the forum you can ask there.

welcome again to the group and it looks like you'll fit in nicely with your skills, quality building to store some cool stuff in and your sense of humor.

cheers

Great idea! I'll post an intro in the intro section - I do have a few questions. THANKS!
 

drivesitfar

Well-known member
Joined
Oct 23, 2013
Messages
36,062
Location
Pacific Northwest
Dwayne: you can ask here too in case one of us sees this and misses the intro post.

you're very welcome and hope you stick around here with your positive attitude.

cheers
 
OP
D

Dwayne928

Member
Joined
Sep 25, 2015
Messages
10
Dwayne: you can ask here too in case one of us sees this and misses the intro post...

Excellent!

OK....here goes newbie question #1....

Why do my picture uploads appear to be small in my posts when other pictures I see in posts are rather normal size? I'm guessing there's some setting I have overlooked for uploading?

THANKS!
 

drivesitfar

Well-known member
Joined
Oct 23, 2013
Messages
36,062
Location
Pacific Northwest
Dwayne: you are actually downloading your .jpg pictures to the Garage Journal web site's data base so the thumbnails show up. with two clicks you should have a full size picture and my preference because otherwise posting a few pictures full size off www.photobucket.com or some other online hosting site takes up a full page. also when the user quits paying or doesn't want to use that site anymore the pictures can disappear.

i can teach you how to open a photobucket account and post links if you want to, but since they changed their site to a pay site the free site is so full of **** i don't use it any more and i used to love it.

the way you are posting is exactly how i post pictures now.

any other questions just ask
 
OP
D

Dwayne928

Member
Joined
Sep 25, 2015
Messages
10
Cool! I see now I can click on the pictures to get a normal size. Very good - I will continue uploading as I have. THANKS for the quick response!

Building in a small town outside Eugene.
 
Last edited:

Bib Overalls

Well-known member
Joined
Dec 4, 2006
Messages
3,318
Location
Jonesboro, Arkansas
Will you be living in the shop while you build your retirement home? There are a number of young couples in our area that are building their homes that way.
 

drivesitfar

Well-known member
Joined
Oct 23, 2013
Messages
36,062
Location
Pacific Northwest
Dwayne: good to know you are satisfied and not only a pro at building a shop, but at joining and participating in a forum.

ask questions as you need to or just keep posting pictures on this and any thread you like.

take care and hope you have some fun here.

good luck
 
OP
D

Dwayne928

Member
Joined
Sep 25, 2015
Messages
10
Will you be living in the shop while you build your retirement home? There are a number of young couples in our area that are building their homes that way.

I do plan on "camping out" in the shop when I'm in Oregon and working on the house. Too bad I'm not retired already - then I could work on the house full-time! :willy_nil
 

Havana Special

New member
Joined
Sep 17, 2015
Messages
1
Wow this is a very impressive build! Not far from my hometown of Eugene, either. That attic is amazing and looks like a ton of usable space! I'm really looking forward to seeing how you finish things out.

What was the reason for choosing the cinder blocks for the foundation wall vs. forms and concrete? Were the blocks already filled or did you fill them as you went? How is the sill plate attached to the foundation wall?

Also, you said your door height is 10' so your ceiling is what - 11'6"? That should be a comfortable height for working under the lift. Looks like you really did some good planning.
 

C_F

ALLIANCE MEMBER
Joined
Jan 21, 2005
Messages
9,675
Location
Utah...SNOW BLOWS!
I just found this thread today, your build looks fantastic thus far! Looking forward to progress pics as you go. Welcome aboard! :)
 
OP
D

Dwayne928

Member
Joined
Sep 25, 2015
Messages
10
....What was the reason for choosing the cinder blocks for the foundation wall vs. forms and concrete? Were the blocks already filled or did you fill them as you went? How is the sill plate attached to the foundation wall?

Also, you said your door height is 10' so your ceiling is what - 11'6"? That should be a comfortable height for working under the lift. Looks like you really did some good planning.

Hello Havana,
Thanks for the questions. Sorry I could not get back to you until now. I just got back from Oregon today and found your post.

To answer your questions....I decided to go with concrete blocks for the foundation wall because I wanted to do as much of the work myself. I had laid concrete blocks once before so wanted to do it myself. Besides, I did not have concrete forms for the foundation wall and it needed to be 40" in height - a lot of forms to build/buy/rent for a one-time use.

Once I finished laying in the concrete block (with rebar reinforcement, of course), I attached 6" long "J" bolts in under the top course rebar with rebar ties. Concrete block work and rebar reinforcement was inspected. Then I ordered concrete (block fill mix) along with a pumper truck. The pumper filled the blocks and I went behind him to trowel off any excess.

The sill plates are attached to the block wall through the use of the "J" bolts I attached to the rebar and embedded in the concrete block fill cement. About 2.5" of threaded "J" bolt is left protruding above the block wall to attach the 2x6 pressure treated sill plate.

Ceiling height as measured from the concrete slab to the bottom of the truss is 12' and 1/2 inch (20" foundation wall, 10' wall studs, 1.5" sill plate, and 3" top plate = 144.5"). If my calculations are right (and sometimes they're not!), when the drywall ceiling is installed, it should be exactly 12' floor to ceiling.

THANKS again for the questions.

Hello CF, THANKS for the feedback!

Dwayne
 

drivesitfar

Well-known member
Joined
Oct 23, 2013
Messages
36,062
Location
Pacific Northwest
Dwayne: did somebody scare you off of GJ or are you ok? we started a Woodworking thread you might like and the link is in my sig line.

update your garage thread here if you have any new pictures and some time to post up a few. ok?

cheers
 
To avoid these ads, REGISTER NOW!
Top Bottom