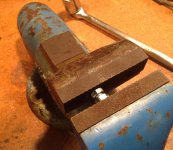
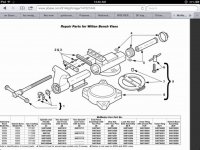
I hope this isn't too boring to you machinist types. For me it's machining 101 as I'm a newbie to lathe work. In an 8' wide shop you can't always get in position to saw, file, bang or work on an item in your vice so being able to rotate the vice allows you to get the best angle on things and still be standing comfortably so on spur of the moment I decided to make a swivel base for a vise. I had a rough idea in my head for a simple set up and sketched it out. I probably should have spent a bunch of time looking them over on the vise threads here but I wanted to start making chips.
I'm a cheap sob so I had some scavenged materials to draw from. The ********* plate was a seat mount from a forklift, the silver disc thing was a base for rope stanchions used to cordon off a public area that a guy was throwing out (imagine that). The 2 rusty discs were given to me by someone who let them get too rusty and the threaded rod was a piece of drill rod that was in a scrap pile. All good stuff!

The principal is: the base ring that has 3 tabs sticking off it so it can be bolted down, gets welded to the body ring so the 2 (in the middle) become the main stationary body. The locating ring bolts to the base of the vice and keeps it from wandering and binding on the lock bolts because it could work itself on an angle to the other plates otherwise. The lock ring gets drawn up into the body ring where it butts up to the inner abutment when you turn the lock bolts.

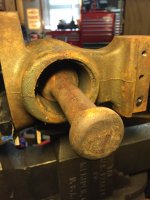
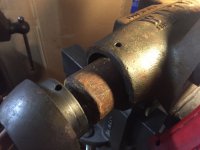
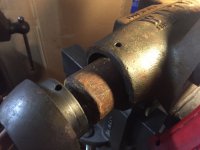
Here the main body ring is taking shape. The centre has just been cut out and the base recess is cut to accommodate the lock ring. This steel was extremely hard and had to be machined with carbide bits. My normal high speed steel bits couldn't touch it. I broke 3 carbide bits and wore out 3 more on the project.

:
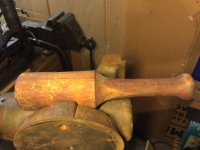
This is the salvage operation of reclaiming what good steel may be left inside these pieces of rust.

Once the lock ring and locating ring were cleaned up I marked the mounting holes from the vice on them, centre punched em and then clamped the 2 plates together and drilled them as one to keep the exact alignment. I started with a small 3/16" drill for the pilot hole and went larger in steps. The locator plate has 2 holes to let the lock bolts pass through and one hole that is threaded so the vice can be bolted to it from it's rear mount. For this reason the plates were separated after the pilot holes were drilled so smaller holes could be drilled into the bottom lock plate for tapping.

The bottom lock plate was positioned using a pin the size of the pilot drill, then clamped rigidly into the T-slot drill press table for the proper size drilling to accommodate the correct tap (1/2" x 20 tpi). Since I was only left with about 3/8" thickness on the 2 lock and locating rings after turning off all the rust I decided to use stronger fine threads and don't cut as deep into the metal but would get me more threads in the material. Coarse threads would have lifted the lock ring up higher per turn of the lock bolts but I didn't like the low thread count I'd have ended up with in the thin rings.

By swapping the drill for a counter sink with a fine point I was able to use the point to keep the tap centred and cut the threads exactly perpendicular to the work piece as nothing else had moved and my drill press is square to the table. Unlike a lot of the newer offshore stuff, good taps have a divot in the centre for this.

I tried something at the last minute that worked great. I've been collecting end mills for a milling machine for the day I get my milling machine so had some on hand. I stuck one in the lathe chuck and stuck the turned down end of the lock bolt in a boring bar fixture for my lathe which allowed me to feed the big end of the lock bolt into the rapidly spinning end mill and it cut a neat channel through the end of it to accommodate the lever used to turn the lock bolt. After that I centre drilled the big ends for a dowel pin to hold the levers in place and allow the levers to flip from one side to the other. (sorry, no photos).

Next I laid out the base ring that would have the mounting tabs on it to facilitate fixing the vice to the bench. I cut it out of the plate with the cutting torch and ground it by hand on my 10" grinder with the coarse stone. It didn't take too long and came out well. Fortunately after reshaping the way oil seal retainers on the carriage of the lathe the base ring just cleared the carriage by 1/16" or so. This meant I could cut the centre of the base ring out on the lathe and save myself a lot of heavy grinding. This would be far more accurate as it had to match the body ring perfectly too.

I didn't want the base to warp too badly from welding so I drilled 9 - 1/4" holes equidistant around the circumference of the base ring, clamped it to the body ring and plug welded it through the 1/4" holes. Then I ran a bead along the outside join in 3 places opposite each other. These little weld spots should hold adequately.

With that done I was able to assemble everything and I'm happy to say it seems to work great although I haven't mounted it to a bench and really torqued on it but it all feels good. I want to strip and paint the vice, maybe put brass jaw faces on it and paint the new base too. I may even continue welding the whole perimeter join and then turn it down on the lathe to give it a more finished look. Anyway it's functional now and I'm glad to see it at this stage. The vise is a paramo #2 but I cake drill the plates to accommodate a different one in the future if desired.