To avoid these ads, REGISTER NOW!

VISE REPAIR 101 all vise repairs, lubricants, sources for parts and the tricks to fix

CRSINMICH

Well-known member
Joined
Aug 15, 2015
Messages
2,414
Location
Southeastern Michigan
Hey guys I've got an old Wilton here with seized up jaw Phillips. I tried many methods to removing them. They are soaking in PB blaster now. Tomorrow I'll try another attempt at shocking them loose, if not I guess it's off to drill them out.

Is there something else I should try? Heat? Drill and remove with ez out?


Thanks

mr: Look back to page 127 post #2534 from a member named Ganymede. There are pictures of the method Outlaw is talking about. I haven't tried it yet but I will when the weather warms and I can get back to working on vises. Good luck.
 
Last edited:
To avoid these ads, REGISTER NOW!

va.grouseman

Well-known member
Joined
Mar 26, 2011
Messages
4,965
Location
Southern-Central VA.
Have you tried an impact driver?---And try tapping with the impact driver forwards and backwards until you see a little movement, and keep putting the penetrating oil to it as you progress.
 

mroneeyedboh

Well-known member
Joined
Dec 30, 2011
Messages
459
Have you tried an impact driver?---And try tapping with the impact driver forwards and backwards until you see a little movement, and keep putting the penetrating oil to it as you progress.
I have. I even tried an impact driver on an air hammer.


Does anyone know what's a good match brush paint wise? I have access to an oven, so I will bake it. I think I read to add valspar hardener to the paints, but I want something that's durable...

Would an etch primer help?
 
Last edited:

McBrownie

Well-known member
Joined
Mar 27, 2014
Messages
1,827
Location
Cleveland, OH
OK I found it under a link:

http://vintagemachinery.org/Craftsman/manufacturers.aspx?sort=1

391 __?__ (wood & metal vises, possibly Adjustable Clamp Co)

Not sure where they got this, but 391 is definitely attributable to a company in Japan at a later date.

Outlaw and Shiftless,

I started with this post over on the Vises thread

http://www.garagejournal.com/forum/showpost.php?p=5510239&postcount=41091

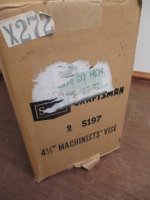
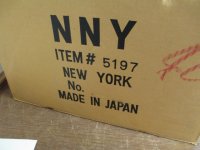
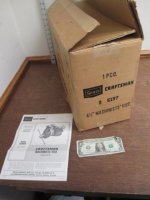
Which linked to these photos on an auction site. Sure enough, the box says "Made in Japan". Here are the photos for the record.
 

Attachments

  • 5197_1.jpg
    5197_1.jpg
    48 KB · Views: 37
  • 5197_2.jpg
    5197_2.jpg
    44 KB · Views: 50
  • 5197_3.jpg
    5197_3.jpg
    70.2 KB · Views: 48
  • 5197_4.jpg
    5197_4.jpg
    46.6 KB · Views: 34
  • 5197_5.jpg
    5197_5.jpg
    74.1 KB · Views: 34

Shiftless

Well-known member
Joined
Mar 9, 2014
Messages
14,557
Location
East Bay SFO
Outlaw and Shiftless,

I started with this post over on the Vises thread

http://www.garagejournal.com/forum/showpost.php?p=5510239&postcount=41091

Which linked to these photos on an auction site. Sure enough, the box says "Made in Japan". Here are the photos for the record.

I doubt that the vise in that box is original. Has anybody seen a gray Craftsman utility type vise of that era? I've seen many and ALL of them were painted red.
But the box with the numbers and the "made in Japan" is the supporting evidence we need.

IMHO, the question about country of origin is answered.
 
Last edited:

fullthrottle24

Well-known member
Joined
Oct 22, 2010
Messages
367
Location
Ohio
I doubt that the vise in that box is original. Has anybody seen a gray Craftsman utility type vise of that era? I've seen many and ALL of them were painted red.
But the box with the numbers and the "made in Japan" is the supporting evidence we need.

IMHO, the question about country of origin is answered.

That style vise was from the 1960's thru the 70's. Columbian was the maker of the USA version. Columbian made the USA version, unsure if at that time they also had an agreement with a foundry in Japan. Even the small red Art Deco style Craftsman vises were made in both countries with same style, just different prefixes. I do believe that is the correct vise and color. However, the earlier 51xx vises still seem more Rock Island then Columbian. I have Columbians, Rock Islands, and Reeds. The only one I can't compare with is the Starrett, which some believe is the maker. They just a hybrid, with some of the best parts and ideas of each of these companies. It was the 50's, everything was done to the excess.
 
OP
D

drivesitfar

Well-known member
Joined
Oct 23, 2013
Messages
36,041
Location
Pacific Northwest
Outlaw: I really like all the FACTS you have put on the thread about the 519x's and also like that you might have changed your mind from Columbian to possibly Reed. I'm wondering how many manufacturers were involved with this 519x vise. the ones with the printing on the side with Craftsman in the cast look more like Columbian than the earlier versions and the Japan connection might be theirs.

the earlier versions have date stamps on the back of the slides like Rock Island vises and i think one of my 519x's is a 1948. did Sears or any company have manufacturing going on over in Japan that close to the end of WWII? sounds like FullThrottle posted something like this as i'm writing this when i just flipped back to see another post.

I do think the 519x's with the Heritage badges on them look a lot like Rock Island and Reed vises and this all started with a great old guy telling me he was sure Starrett made them. good talk and research guys.

McB, FT and Shift: good research and let's wait to see if OTC starts a thread on 519x's and let's transfer all this good talk and research over there. sound good??
 

Off-Street Parking

Well-known member
Joined
Aug 1, 2015
Messages
351
Location
Midwest
McB, FT and Shift: good research and let's wait to see if OTC starts a thread on 519x's and let's transfer all this good talk and research over there. sound good??

Haha. It's not an "if", I have a bunch of info ready to go. :thumbup:

You know that phrase, "if it's worth doing, it's worth doing right"... So I'm collecting my research to kick it off with a good organized start that we can build on top of. :beer:
 

02superduty

Well-known member
Joined
Aug 3, 2014
Messages
136
Location
LI, NY
ONEEYE I just had the same issue. I haven't had time post. I ended up drilling. Couldn't wait for the kroil I ordered. Some of the screw heads are stick in the jaw. Jaws are beat up anyway. I wanted to try what OUTLAW said, but it was too late. Once again Thanks for all the help.
 

Outlawmws

Well-known member
Joined
Aug 9, 2011
Messages
39,302
Location
The Badlands
Outlaw and Shiftless,

I started with this post over on the Vises thread

http://www.garagejournal.com/forum/showpost.php?p=5510239&postcount=41091

Which linked to these photos on an auction site. Sure enough, the box says "Made in Japan". Here are the photos for the record.

I doubt that the vise in that box is original. Has anybody seen a gray Craftsman utility type vise of that era? I've seen many and ALL of them were painted red.
But the box with the numbers and the "made in Japan" is the supporting evidence we need.

IMHO, the question about country of origin is answered.

That style vise was from the 1960's thru the 70's. Columbian was the maker of the USA version. Columbian made the USA version, unsure if at that time they also had an agreement with a foundry in Japan. Even the small red Art Deco style Craftsman vises were made in both countries with same style, just different prefixes. I do believe that is the correct vise and color. However, the earlier 51xx vises still seem more Rock Island then Columbian. I have Columbians, Rock Islands, and Reeds. The only one I can't compare with is the Starrett, which some believe is the maker. They just a hybrid, with some of the best parts and ideas of each of these companies. It was the 50's, everything was done to the excess.

Agreed that this is a different vise. VERY odd that they reused the same Model number and for the same size. I have catalog pages that show the vise, BUT (much) older than the Sears logos on that box.

THIS is the real deal:

attachment.php


THIS is the earlier ('73) version of that NOS Vise (Note the add states "T" Jaw, so not the same as the "C" jaws on the original):

attachment.php


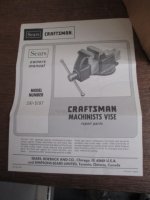
And the NOS vise off the Owner's manual:

attachment.php
 

Attachments

  • 5197_2.jpg
    5197_2.jpg
    81.1 KB · Views: 309
Last edited:
OP
D

drivesitfar

Well-known member
Joined
Oct 23, 2013
Messages
36,041
Location
Pacific Northwest
OSP: great that you are doing more than just starting a thread and asking. if you reserve a few posts maybe 5 or so at the beginning of the new thread for catalogs, history, pictures or whatever you can edit them a year or two later if you want to and have sort of a legend for the thread as new information is gathered. you can only post every 30 seconds so to keep others from posting on the thread before you get them reserved i usually start a thread like that either really early or late when nobody is online.

thanks for taking it on and i'll be happy to help you (us) if i can. :bowdown:

Outlaw: good stuff :thumbup:
 

Shiftless

Well-known member
Joined
Mar 9, 2014
Messages
14,557
Location
East Bay SFO
OSP:
Drives is giving you excellent advice. And another big "thank you" to you for volunteering to organize all of the legends associated with Craftsman vises.
I used to have two of the 391 dot series, but I gave them away.
 
Last edited:

mroneeyedboh

Well-known member
Joined
Dec 30, 2011
Messages
459
ONEEYE I just had the same issue. I haven't had time post. I ended up drilling. Couldn't wait for the kroil I ordered. Some of the screw heads are stick in the jaw. Jaws are beat up anyway. I wanted to try what OUTLAW said, but it was too late. Once again Thanks for all the help.
Same here. Used and end mill on a drill press. I may have to step up a size. Assuming I don't hit all 4 dead center. What I'm also going to do it end mill the drilled screw studs ( the little piece that is left in the actual vice ) so I get a flat start. Or should I just center drill and try an easy out? Almost seems easier to just mill flat and then drill the next size up and tap.
 

tool_scrounge

Well-known member
Joined
Jul 20, 2010
Messages
4,206
Location
Southern California
Hey guys I've got an old Wilton here with seized up jaw Phillips. I tried many methods to removing them. They are soaking in PB blaster now. Tomorrow I'll try another attempt at shocking them loose, if not I guess it's off to drill them out.

Is there something else I should try? Heat? Drill and remove with ez out?


Thanks


I have had good luck soaking in Kroil. Rotate the vise so a puddle of it remains over the head. A few days later use a hammer driven hand held impact driver with the proper fitting tip. The screws in the jaws of my 80 year old vise came out fine.
 

Shiftless

Well-known member
Joined
Mar 9, 2014
Messages
14,557
Location
East Bay SFO
I have had good luck soaking in Kroil. Rotate the vise so a puddle of it remains over the head. A few days later use a hammer driven hand held impact driver with the proper fitting tip. The screws in the jaws of my 80 year old vise came out fine.

:+1:

That's exactly how I got the corroded original slotted screws out of a Chicago era bullet. Jaw facing up, puddle up a few squirts of Kroil in the screw hole depressions every day, then extract with an impact driver. All 4 screws came out whole.
 
Last edited:

mdbeck1

Well-known member
Joined
Mar 7, 2010
Messages
2,297
Location
Norman, OK
Same here. Used and end mill on a drill press. I may have to step up a size. Assuming I don't hit all 4 dead center. What I'm also going to do it end mill the drilled screw studs ( the little piece that is left in the actual vice ) so I get a flat start. Or should I just center drill and try an easy out? Almost seems easier to just mill flat and then drill the next size up and tap.

If you're going to drill it start with a left-handed drill bit. It cuts in reverse and sometimes the stud will just spin out.
 

Mark in Indiana

Well-known member
Joined
Aug 11, 2010
Messages
3,057
Location
Southern Indiana
All,
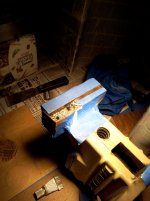
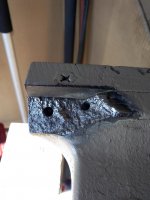
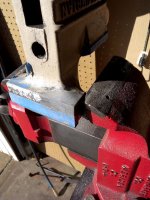
This week I finished some vise restorations. I wanted to post some pictures of how I used an epoxy filler like JB Weld to repair a vise jaw that was missing a chunk from below the jaw face:

First image: Clean the area. Drill a couple holes into the area that you're going to fill in. this will help anchor the epoxy.
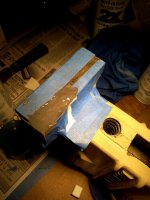
Second image: Using thin cardboard & masking tape, make a form to hold the epoxy in place. Try to get as close to the shape that you need, make the form a little larger than what you need, and make sure that you seal the bottom & sides of your form so there are no leaks.
Third image: Mix & pour in the epoxy. Wait for a day or two to make sure that it's cured.
Fourth image: Remove as much of your form as you can. Sand down the hardened epoxy carefully. I started with an air sander, then finished with a sanding block.
Fifth & sixth images: The finished product.

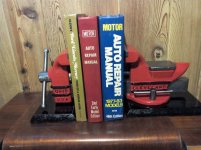
This is a good solution for those who don't have access to a welder or an oxy/acetylene kit. The areas that I repair with this method will not see any abuse. In fact, this repair was for a vise bookend set (seventh image)
 

Attachments

  • COLUMBIAN C44 VISE7.jpg
    COLUMBIAN C44 VISE7.jpg
    139.8 KB · Views: 84
  • COLUMBIAN C44 VISE6.jpg
    COLUMBIAN C44 VISE6.jpg
    138.3 KB · Views: 82
  • COLUMBIAN C44 VISE5.jpg
    COLUMBIAN C44 VISE5.jpg
    140.1 KB · Views: 86
  • COLUMBIAN C44 VISE4.jpg
    COLUMBIAN C44 VISE4.jpg
    138.9 KB · Views: 87
  • COLUMBIAN C44 VISE9.jpg
    COLUMBIAN C44 VISE9.jpg
    146.4 KB · Views: 83
  • COLUMBIAN C44 VISE10.jpg
    COLUMBIAN C44 VISE10.jpg
    130.9 KB · Views: 92
  • COLUMBIAN C44A.jpg
    COLUMBIAN C44A.jpg
    141.6 KB · Views: 101

stitan06

Well-known member
Joined
Dec 31, 2012
Messages
154
All,
This week I finished some vise restorations. I wanted to post some pictures of how I used an epoxy filler like JB Weld to repair a vise jaw that was missing a chunk from below the jaw face:

First image: Clean the area. Drill a couple holes into the area that you're going to fill in. this will help anchor the epoxy.
Second image: Using thin cardboard & masking tape, make a form to hold the epoxy in place. Try to get as close to the shape that you need, make the form a little larger than what you need, and make sure that you seal the bottom & sides of your form so there are no leaks.
Third image: Mix & pour in the epoxy. Wait for a day or two to make sure that it's cured.
Fourth image: Remove as much of your form as you can. Sand down the hardened epoxy carefully. I started with an air sander, then finished with a sanding block.
Fifth & sixth images: The finished product.

This is a good solution for those who don't have access to a welder or an oxy/acetylene kit. The areas that I repair with this method will not see any abuse. In fact, this repair was for a vise bookend set (seventh image)
thats a cool way to use a vise i my dad just gave me one like that mine said 44 on side not sure what urs is
 

mroneeyedboh

Well-known member
Joined
Dec 30, 2011
Messages
459
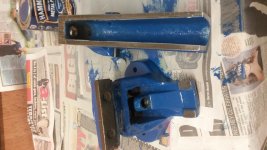
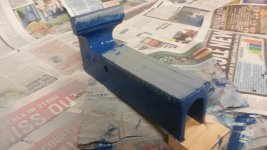
Hey guys so this is where Im at with this old Wilton. I cant find much info on it ( no date ) and when I received it , it was covered in many layers of paint and thick flaky rust. This vise came from the shores of Delaware so Id assume the salt water did its work on this bad boy.

zZiD5HQ.jpg


Once it was cleaned, you could see the damage the rust did. Although its just surface and to me doesnt look compromised at all.

e1lePU3.jpg


BMPOa50.jpg


OTGBlI3.jpg


CJYamcG.jpg


zHoPbR2.jpg


n24ZQXx.jpg


HejEBvE.jpg


UkyPOmM.jpg


ZaUr9lN.jpg


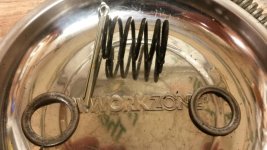
I had one hell of a time getting the screw out of the jaws/vise. I ended up soaking and that didnt do anything. Then I drilled out the heads and had to chisel/pry the jaws off of the vise ( pressed center pin was seized ). One pin stayed in and the other was in the jaw ( where it should be ). Then once the jaws were removed, the dynamic side screws came right out with an extractor. The other set of screws were drilled out progressively ( not to damage the original holes ) but could not get the screws out. I had to drill out the screws and then insert two Heli-Coils.

RRJDy8w.jpg


FFozzhI.jpg


iflVKfy.jpg


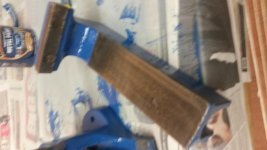
All in all it went well. Now Im off to trying to clean up some rough edges and then its off to paint. Im not going to repair the pitting etc as it shows where it came from. The spindle is PERFECT thread wise and the dynamic slide isnt too bad either. It has some pitting on the exposed portion of the slide, but the interior portion was very clean.
 
To avoid these ads, REGISTER NOW!

McBrownie

Well-known member
Joined
Mar 27, 2014
Messages
1,827
Location
Cleveland, OH
Hey guys so this is where Im at with this old Wilton. I cant find much info on it ( no date ) and when I received it , it was covered in many layers of paint and thick flaky rust. This vise came from the shores of Delaware so Id assume the salt water did its work on this bad boy.

Based on the hex hold down bolts and the squarish base legs, I would say late 1950's or early 1960's. That salt water did a number, but I don't think it hurt it a bit. Can't wait to see it finished up. :thumbup:
 

Fordriver6

Well-known member
Joined
Feb 6, 2016
Messages
200
Location
Afton, VA
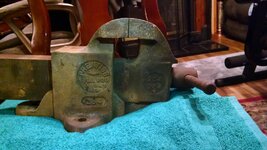
Once again on the advise of Drivesitfar, I'm posting a vise restoration that I originally posted in the main vise thread. This time I'm direct quoting that post. Enjoy!!!

As promised Friday night, here is the restoration of the Prentiss 254 I picked up. The first picture is from Friday right after I got home.
217c0441467834743718c537c0bc9d97.jpg


First step simply is to unscrew the dynamic jaw all of the way and put it out of the base.

29eddc9db9984efe34748e52aa8172d4.jpg


To remove the lead screw from the dynamic jaw, on this particular model, you have to pull this clip out. I caught the edge with a screwdriver and pulled it up a little, then grabbed it with a pair of needle nose pliers and pulled it the rest of the way out. Then the lead screw pulls out. The spacer inside falls out after the lead screw is removed.

29933a9ae1eb58fdf90c1bb3e2d1e87e.jpg
6443aa718e9807b9a825954262d482fe.jpg


Next step is removing the jaws. I hit them with a wire wheel to get most of the built up **** out of the slot, then pulled the screws out.

Once the screws are out, I tapped the jaw with a hammer to get a little separation then tapped a screwdriver and pried the jaw out.

7bf7b619a3a67787a2fac365cb889199.jpg
51c5f0fd8ec6f3f9d43a8b3e72c21626.jpg
4bd2c1a29b089d49d16ee462d2fb2f72.jpg


Once I had a little wiggle room, put a screwdriver on each side and pried the jaw fully out.

a97b8ea0f83e87ee6c61c8905ba065fd.jpg
Time to fire up the wire wheel!!! No pictures of me in action as I was by myself in the shop today, so I simply took one of the wire wheel I used with the dynamic jaw in the picture.

1498b2b93ce63a59d275073f1eac6215.jpg


Here is the dynamic jaw mostly cleaned up next to the base.

dba156f035771f698cbc78eb6b87b0cc.jpg


Next up the base gets the same treatment.
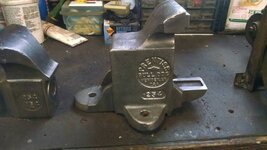
cfcb818e3bb87a10c6e3ee6e6c250696.jpg
Followed by the lead screw and handle assembly.

b73e4970126beb07431552cdc1a6f5c9.jpg
After cleaning, I wrapped up parts that I did not want to get paint on. If you look closely in this picture, I rolled up a little piece of a Scott shop towel and put it in the screw holes so I wouldn’t gum up the threads with paint. Then I proceeded to wrap up the slide with painters tape.


a05920fea757ee8d80ce7ea9d8c3432c.jpg
Here is a better shot of the paper towels in the screw holes, as well as a balled up paper towel in the main nut area to keep paint out.

67c3cc77209fa56a6e4e9b4e8875ec9d.jpg


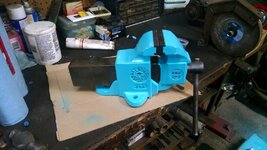
The color I chose is a little different, it’s Rust-Oleum Gloss Seaside. Found this can at a local trucking salvage store for the princely sum of $1.95. It is paint and primer in one can.


d8758c12c17c0738583da21e3957b1f0.jpg


Excellent coverage, put a couple coats on.
3974a49527ef76f2902a83d636d5c6e8.jpg


To do the raised lettering, I rolled up a small piece of paper towel and dipped it in some black paint then dabbed it onto the lettering.


453b07e4fe92226740d3bc0d1dff60c4.jpg
03bdff20ab0c5bcc8ce11592aad1691b.jpg

After reversing the disassembly steps, here is the finished product. I need to put another coat of black on the lettering; and before anybody asks about the other side, I screwed up on the lettering on that side and had to put a little more of the base seaside paint on it. So the other lettering will get painted tomorrow.

ed069650882c234e64987fbd790c10ea.jpg
f96b88a352b0561c10ef39e9c944a727.jpg
a72d41530d4a4c95658580202cac4cf7.jpg
3e98f8ada03167a821726669e5d5619f.jpg

Sent from my XT1080 using Tapatalk
 

McBrownie

Well-known member
Joined
Mar 27, 2014
Messages
1,827
Location
Cleveland, OH
Once again on the advise of Drivesitfar, I'm posting a vise restoration that I originally posted in the main vise thread. This time I'm direct quoting that post. Enjoy!!!

Ford,

Nice job on your Prentiss. It turned out great. Can you share a little more info about the tool rest on your grinder? That is pretty slick looking too.
 
Last edited:

Fordriver6

Well-known member
Joined
Feb 6, 2016
Messages
200
Location
Afton, VA
Ford,

Nice job on your Prentiss. It turned out great. Can you share a little more info about the tool rest on your grinder? That is pretty slick looking too.
It's called the Veritas Grinder Tool Rest. Picked it up from Lee Valley.

http://www.leevalley.com/us/wood/page.aspx?cat=1,43072,45938&p=32973

This is a stock photo from Lee Valley's website, but it shows it in pretty good detail.
f63b2c11cfc105812401a24b68016cec.jpg

Best tool rest I've ever used. I also got the tool sharpening jig along with it.

Sent from my XT1080 using Tapatalk
 
OP
D

drivesitfar

Well-known member
Joined
Oct 23, 2013
Messages
36,041
Location
Pacific Northwest
FD: thank you very much for posting up your Prentiss vise restoration over here with all the great pictures and information. a couple items that were mentioned to make your next restoration maybe a little easier were to push ear plugs in the jaw holes and trim them and put either a plastic bag or newspaper over the slide to save a little tape. i do like the paper towel method for painting letters if and when i ever paint mine.

i really like your custom guards on your old grinder and McB also mentioned the nice tool rest which it great too. did you make the guards? if you haven't already you can post up your grinder over in the vintage grinder thread and maybe explain how you made the guards if you did or just post up plenty of pictures.

thanks
 

dkroth

Well-known member
Joined
Mar 11, 2010
Messages
3,067
Location
Rochester, New York
What's the best way to lube up a wilton? Where should I apply grease and where shouldn't I?


Put a thin coat of grease on the round slide of the dynamic jaw, including the key on the bottom of the slide.

Lube the slide hole and key-way in the static jaw with another thin coat of grease.

Grease the screw threads and the interface where the screw contacts the dynamic jaw behind the c-clip. The c-clip should get a light coat of grease, too.

Make sure all these surfaces are clean before applying fresh lube.
 
Last edited:

slotard

Well-known member
Joined
Jun 21, 2012
Messages
137
Location
Alameda, CA
I have a Littlestown No400 vise that appears to be missing a bushing where the screw goes through the dynamic jaw. 3/4" ID, 15/16" OD, 2 1/8" length (although it could probably use a flange too). Otherwise it seems to be in reasonable shape. Any suggestions on bushing material or where I could source it?
 

GETRIDAONE

Well-known member
Joined
May 21, 2013
Messages
1,549
Location
Auburn, GA
There was never a bushing in that vise. The larger hole in the dynamic jaw was to allow for a loose fit over the screw. The home owner type vises were not made with precision or quality in mind. A bushing is a good idea but even the high end vises didn't get a bushing. The hole would be machined a bit tighter but still enough to allow for nut & slide movement without binding on the screw shaft. You might try a washer between the split ring retainer and the housing the reduce movement of the shaft passing through. A piece of 3/4" copper pipe would slip over but the OD is to large I think, just an idea to play with ?
 
Last edited:
OP
D

drivesitfar

Well-known member
Joined
Oct 23, 2013
Messages
36,041
Location
Pacific Northwest
Slot: Getridofone has good ideas on your fix. also when you make posts like this if you are able to post pictures and close ups of the parts maybe some of us that are not as familiar with the vise can also help you. good luck

Mr: Did you get your Wilton lubed up and is it working. need any help just ask and like i mentioned to Slot if you can post pictures it always makes your posts look better.

JC: :beer:

how do you like using that Reed 2C you restored? Did your Dad ever get his Reed 204 mounted that you gave him? might be a good father's day present to go clean off his bench and mount it for him?
 

Outlawmws

Well-known member
Joined
Aug 9, 2011
Messages
39,302
Location
The Badlands
Slot, several people have used a stintered bronze bushing to take some of that excess slack. both with and without flanges depending on if they had space.
 

Jcrapola

Well-known member
Joined
Mar 12, 2013
Messages
147
Location
North of Detroit
JC:how do you like using that Reed 2C you restored? Did your Dad ever get his Reed 204 mounted that you gave him? might be a good father's day present to go clean off his bench and mount it for him?[/QUOTE]


Love the 2C. I am not even bummed about scratching up the pretty paint anymore! What a great garage tool! Nice pipe jaws are SO handy (they appear to have never been used before i got it).

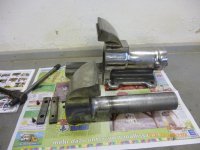
Dad wont let me mount up his xmas present. "Its too damn big!":dunno:. Im restoring a 6"cman that i found in the dirt. When its done i will swap it for the Reed 204 1/2 and stick it to his bench! It is much smaller, but still a nice usable size.
 

Jcrapola

Well-known member
Joined
Mar 12, 2013
Messages
147
Location
North of Detroit
Speaking of the Reed... (204 1/2)
I have leftover parts from the restoration. I have a nice mainscrew, and a dynamic jaw and slide in decent shape. I would send em along for the cost of shipping to anyone that needs them.


Do not have parts any longer.mdrivesitfar has offered the bits a new home!
 
Last edited:

Butze

Member
Joined
Oct 16, 2011
Messages
8
Location
Germany
Hello
today I want to show you pictures of my restauration vise.
It is a LES, Leipziger Eisen und Stahlwerke. (Leipzig Iron and Steel Works)
Width 4.92 inches
Weight pound 53

Best regards
Steve
 

Attachments

  • Vise (2).jpg
    Vise (2).jpg
    140.9 KB · Views: 56
  • Vise (3).jpg
    Vise (3).jpg
    142 KB · Views: 61
  • Vise (4).jpg
    Vise (4).jpg
    141.9 KB · Views: 62
  • Vise (5).jpg
    Vise (5).jpg
    134.4 KB · Views: 73
  • Vise (1).jpg
    Vise (1).jpg
    135.8 KB · Views: 58

KMScott

Well-known member
Joined
Feb 14, 2012
Messages
4,643
Location
Daufuskie Island, South Carolina
Hello
today I want to show you pictures of my restauration vise.
It is a LES, Leipziger Eisen und Stahlwerke. (Leipzig Iron and Steel Works)
Width 4.92 inches
Weight pound 53

Best regards
Steve

Nice job Steve on your restoration. Very interesting vise. I like how they put the keyway in the Static Jaw Support. I am assuming it is a German made vise. Thanks for sharing.
 

Gert

Well-known member
Joined
Feb 21, 2012
Messages
139
Location
Netherlands
Hello
today I want to show you pictures of my restauration vise.
It is a LES, Leipziger Eisen und Stahlwerke. (Leipzig Iron and Steel Works)
Width 4.92 inches
Weight pound 53

Best regards
Steve

Very nice paint job ! :thumbup:
 

Bobnoxious32

Well-known member
Joined
Feb 21, 2016
Messages
54
Location
Ireland
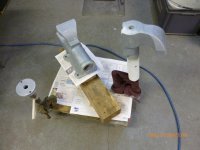
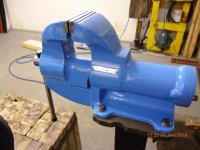
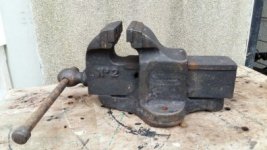
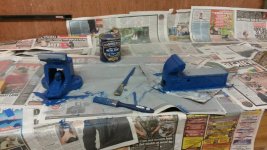
Heres some photos of a Vice Restore i did this week. Its a Record No 2 Mechanics Vice, circa 1950. It was fairly beat up when i got it. Cost €60.
Its my first Vice restoration but got some good tips here!

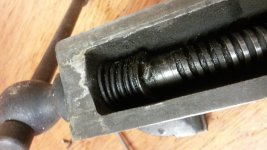
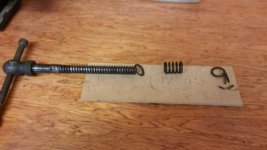
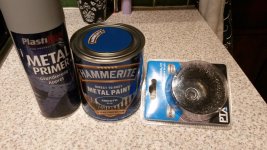
1. I used a stainless steel wire wheel to clean it up.
2. Cleaned up the bearing surfaces with emery paper.
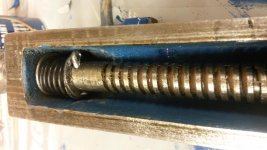
3. Before I primed it, i stuffed a piece of old sock into the thread for the screw and also into the receiver for the vice screw.
4. I used Hammerite Smooth Blue to paint it up. Took 2 days to dry in the cold Irish weather.
5. I cleaned out the screw with a few dremel brushes and cleaned up the handle with emery paper.
6. The split pin perished the minute i bent back the pins, must be the pin from day 1. The new split pin had to be cut and re-sized twice before i managed to re-assemble it without fouling the sides of the dynamic slide.
7. With it all reassembled i greased up the screw with some fresh grease.
8. Painted up the No. 2 with some white Hammerite, the record Logo was too small to paint, need a finer brush!

Heres some Photos
Bob
 

Attachments

  • 1.jpg
    1.jpg
    24.3 KB · Views: 41
  • 20160214_100010.jpg
    20160214_100010.jpg
    147 KB · Views: 42
  • 20160214_104410.jpg
    20160214_104410.jpg
    141.8 KB · Views: 45
  • 20160214_104957.jpg
    20160214_104957.jpg
    140.6 KB · Views: 40
  • 20160214_123238.jpg
    20160214_123238.jpg
    138.9 KB · Views: 40
  • 20160215_194359.jpg
    20160215_194359.jpg
    153.1 KB · Views: 45
  • 20160211_190246.jpg
    20160211_190246.jpg
    153 KB · Views: 43

Bobnoxious32

Well-known member
Joined
Feb 21, 2016
Messages
54
Location
Ireland
I'm new to this Garage Journal so heres some more photos of the finishing process!

The old split pin was fairly knackered compared to the shiny new one!
 

Attachments

  • 20160217_185931.jpg
    20160217_185931.jpg
    143.7 KB · Views: 30
  • 20160217_191921.jpg
    20160217_191921.jpg
    144.3 KB · Views: 35
  • 20160217_185132.jpg
    20160217_185132.jpg
    145.9 KB · Views: 32
  • 20160216_191518.jpg
    20160216_191518.jpg
    138.1 KB · Views: 30
  • 20160215_202817.jpg
    20160215_202817.jpg
    145.2 KB · Views: 32
  • 20160217_185142.jpg
    20160217_185142.jpg
    137 KB · Views: 30
  • 20160215_202805.jpg
    20160215_202805.jpg
    142.3 KB · Views: 31
Last edited:
To avoid these ads, REGISTER NOW!
Top Bottom