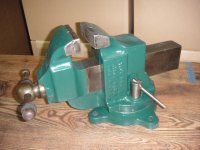
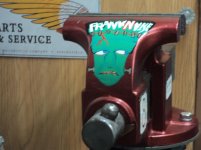
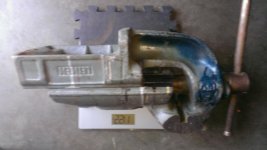
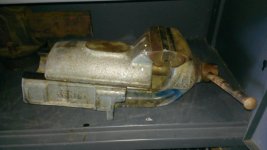
As promised Friday night, here is the restoration of the Prentiss 254 I picked up. The first picture is from Friday right after I got home.

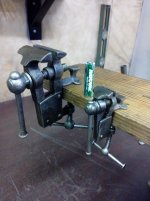
First step simply is to unscrew the dynamic jaw all of the way and put it out of the base.

To remove the lead screw from the dynamic jaw, on this particular model, you have to pull this clip out. I caught the edge with a screwdriver and pulled it up a little, then grabbed it with a pair of needle nose pliers and pulled it the rest of the way out. Then the lead screw pulls out. The spacer inside falls out after the lead screw is removed.


Next step is removing the jaws. I hit them with a wire wheel to get most of the built up **** out of the slot, then pulled the screws out.
Once the screws are out, I tapped the jaw with a hammer to get a little separation then tapped a screwdriver and pried the jaw out.


Once I had a little wiggle room, put a screwdriver on each side and pried the jaw fully out.

Time to fire up the wire wheel!!! No pictures of me in action as I was by myself in the shop today, so I simply took one of the wire wheel I used with the dynamic jaw in the picture.

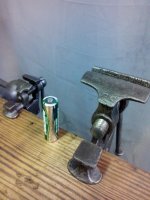
Here is the dynamic jaw mostly cleaned up next to the base.

Next up the base gets the same treatment.

Followed by the lead screw and handle assembly.

After cleaning, I wrapped up parts that I did not want to get paint on. If you look closely in this picture, I rolled up a little piece of a Scott shop towel and put it in the screw holes so I wouldn’t gum up the threads with paint. Then I proceeded to wrap up the slide with painters tape.

Here is a better shot of the paper towels in the screw holes, as well as a balled up paper towel in the main nut area to keep paint out.

The color I chose is a little different, it’s Rust-Oleum Gloss Seaside. Found this can at a local trucking salvage store for the princely sum of $1.95. It is paint and primer in one can.

Excellent coverage, put a couple coats on.

To do the raised lettering, I rolled up a small piece of paper towel and dipped it in some black paint then dabbed it onto the lettering.


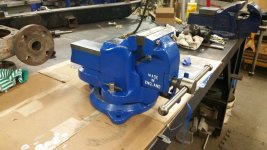
After reversing the disassembly steps, here is the finished product. I need to put another coat of black on the lettering; and before anybody asks about the other side, I screwed up on the lettering on that side and had to put a little more of the base seaside paint on it. So the other lettering will get painted tomorrow.


Sent from my XT1080 using Tapatalk

Look again; I'm pretty sure that is U.S.A.


 .
.


 ..." forgetaboutit".... !


 Joking. PM me while you're here. The vise market here is hit and miss. The few good brands showing on CL in recent months have been priced ridiculously high.


