To avoid these ads, REGISTER NOW!

VISE REPAIR 101 all vise repairs, lubricants, sources for parts and the tricks to fix

To avoid these ads, REGISTER NOW!

toolferone

Well-known member
Joined
Feb 27, 2016
Messages
93
Location
Raleigh, NC
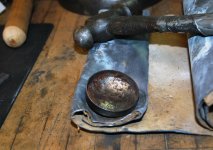
No pics... but I simply sat the freeze plug in the open end of the socket on the bench (cup facing up) and tapped on the carriage bolt double nut with a hammer. Not a perfect way as the freeze plug wants to move around and I had to re-center the carriage bolt head each time before tapping it. A machined convex piece of stock and slightly larger carriage bolt head or equivalent would make this real easy... especially for these brass plugs.

If you do a search on leather sandbag, you will find metal smiths use them to beat metal into shape. Just a FYI

112503IN2.jpg
 

vertguy

Well-known member
Joined
Apr 6, 2010
Messages
1,262
Location
SE WI
After further thought and the great "recommendations" from this thread, mine will get a good polish and no paint!

I looked into one of those bags. But they seemed a bit pricey for limited use. Then again, I have many tools like that in the garage :D


Sent from my iPad using Tapatalk
 

Fordriver6

Well-known member
Joined
Feb 6, 2016
Messages
200
Location
Afton, VA
FR: I doubt your key was flipped and more likely the date stamp wore off. a lot of Wilton bullet vises were sold to government and used in public school's shops so they had a lot of use. if you want to confirm and take it off and flip it to see I won't stop you, but just saying usually the ones without a date are the old Patent or Chicago stamped ones.


Tool: if your Wilton doesn't have a date stamp i'd guess it was because it was well used like I mentioned in the above post to FR. if more pop up without dates in our date stamping thread that I started, but Bluebolt took a lot of time compiling the data then we'll maybe rethink the no date. for now i'd say just well used at some shop probably in a school.

Drives : I went ahead and drove the pins out of the key because they looked like they have been out before. Alas, no date stamp on the other side. In some ways the C1 looks as if it was used right much from the condition of the paint, over spray and a small chip missing from the dynamic jaw; but not in others such as hardly any marks on the slide. Very well could have worn off and could have been stamped lightly to begin with.

Sent from my XT1080 using Tapatalk
 

1982fxr

Well-known member
Joined
Jan 7, 2012
Messages
10,012
Location
Phoenix
I have a big wilton 1646 utility vise that takes those stamped steel pipe jaws...(that are always missing) anyone got a line on a pair?
 

Shiftless

Well-known member
Joined
Mar 9, 2014
Messages
14,557
Location
East Bay SFO
After further thought and the great "recommendations" from this thread, mine will get a good polish and no paint!

I looked into one of those bags. But they seemed a bit pricey for limited use. Then again, I have many tools like that in the garage :D


Sent from my iPad using Tapatalk

Here's an idea...

For a one time or experimental use, why not fill an old sock with sand? I need an end cap for my 3 inch bullet... if I try it, I will take pics. Dont be surprised to see sand all over my workbench!
 
Last edited:

bagged89s10

Well-known member
Joined
Mar 13, 2005
Messages
4,607
Location
CT
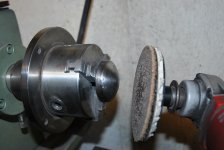
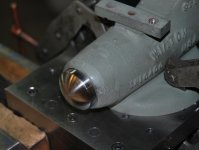
I finally got around to modifying a brass freeze plug to replace the missing dust cap on my 3.5 inch. So I scrounged around the garage for some way to put a dome into the flat plug and I found a large cap screw with a 1.25 inch head. After smoothing the head a bit on the cap screw, I started slowly tapping the inside of the plug with it resting in a large socket (36mm to be exact). Although a 1.5 inch head cap screw would have worked better, I went with what was available.


I plan to paint it later, but another fun little project complete.


Great minds think alike. !! Nice job


Great job on those caps. Where do you get those freeze plugs? Any part number I should be looking for?
 
OP
D

drivesitfar

Well-known member
Joined
Oct 23, 2013
Messages
36,041
Location
Pacific Northwest
Bagged: I think Vert and Get buy them at their local auto parts store just like regular freeze plugs. you just need to order the correct size diameter and I think Get said it was only about $1.50 for brass while aluminum was $1.09 IIRC.

don't they look cool and would look great on your vises that already look like they are art with all the bling and shine you do?
 

vertguy

Well-known member
Joined
Apr 6, 2010
Messages
1,262
Location
SE WI
Drives is correct... mine was a 1-5/8 inch OD brass expansion plug (Dorman 333082.1) and it ran $1.99 from Advance Auto.
 

GETRIDAONE

Well-known member
Joined
May 21, 2013
Messages
1,549
Location
Auburn, GA
I use a piece of wood instead of the socket. As vert said a little larger head would of been better, and that's where the old handle end of the Prentiss 98 came in handy. :lol_hitti
 

Attachments

  • IMG_20151210_164544.jpg
    IMG_20151210_164544.jpg
    139.1 KB · Views: 40

Outlawmws

Well-known member
Joined
Aug 9, 2011
Messages
39,302
Location
The Badlands


Here's an idea...

For a one time or experimental use, why not fill an old sock with sand? I need an end cap for my 3 inch bullet... if I try it, I will take pics. Dont be surprised to see sand all over my workbench!

I suspect the sock would have too much stretch. The leather sandbag has minimal stretch, but will hold a shape pretty well. Maybe a shooters sandbag.
 

KMScott

Well-known member
Joined
Feb 14, 2012
Messages
4,643
Location
Daufuskie Island, South Carolina


Here's an idea...

For a one time or experimental use, why not fill an old sock with sand? I need an end cap for my 3 inch bullet... if I try it, I will take pics. Dont be surprised to see sand all over my workbench!
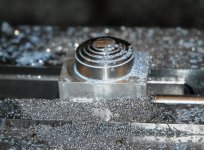
I have a lead blanket that works for me. I use it to pound out dents in the original end caps then finish polishing on my wood lathe. As for new endcaps I make mine a different way. These are the sizes I have found so far. 1", 1-11/16, 2", 1-1/8, 2-3/16 and 2-1/2.
 

Attachments

  • Wilton-2-500 Endcap (9).jpg
    Wilton-2-500 Endcap (9).jpg
    115 KB · Views: 58
  • Wilton-2-500 Endcap (5).jpg
    Wilton-2-500 Endcap (5).jpg
    129.7 KB · Views: 51
  • Wilton-2-500 Endcap (1).jpg
    Wilton-2-500 Endcap (1).jpg
    145.9 KB · Views: 51
  • Wilton EndCaps (3).jpg
    Wilton EndCaps (3).jpg
    134.6 KB · Views: 50
  • Wilton EndCaps (5).jpg
    Wilton EndCaps (5).jpg
    134.3 KB · Views: 52
  • Wilton EndCaps (4).jpg
    Wilton EndCaps (4).jpg
    100.1 KB · Views: 47
  • Wilton EndCaps (1).jpg
    Wilton EndCaps (1).jpg
    141.1 KB · Views: 51

Fretters

Well-known member
Joined
Jan 25, 2014
Messages
4,217
Location
South Yorkshire, England
Why? What did you think I meant? :dunno: :evil:

I daren't even imagine. :D


After further thought and the great "recommendations" from this thread, mine will get a good polish and no paint!

Jolly good decision. Plain brass and copper always add an extra touch to something, IMHO, and should only ever be polished, if one chooses, but not painted.
 

GETRIDAONE

Well-known member
Joined
May 21, 2013
Messages
1,549
Location
Auburn, GA
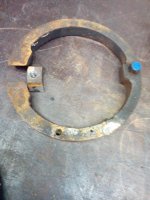
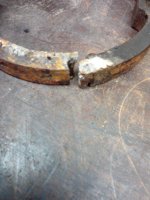
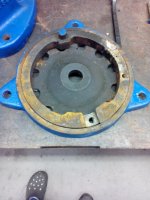
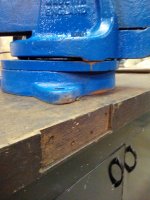
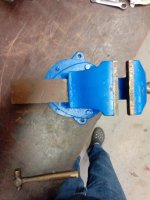
Parkinson 3C swivel base. It looks like a copy of Parker's brake shoes. The bad is its broken and someone tried to fix it with solder :lol: It is one solid piece instead of a swivel pin hinge like Parker. I think the top mounting plate has been replaced or modified because none of the holes align like they should and it is a strange shape. There are extra bolts just to keep it locked down and from swiveling.
 

Attachments

  • IMG_20160302_074709_1.jpg
    IMG_20160302_074709_1.jpg
    135.6 KB · Views: 61
  • IMG_20160302_074459.jpg
    IMG_20160302_074459.jpg
    138.6 KB · Views: 64
  • IMG_20160302_074432.jpg
    IMG_20160302_074432.jpg
    134.3 KB · Views: 65
  • IMG_20160302_074256.jpg
    IMG_20160302_074256.jpg
    136.7 KB · Views: 60
  • IMG_20160302_065142.jpg
    IMG_20160302_065142.jpg
    143.3 KB · Views: 60
  • IMG_20160302_065038.jpg
    IMG_20160302_065038.jpg
    137.6 KB · Views: 60

McBrownie

Well-known member
Joined
Mar 27, 2014
Messages
1,827
Location
Cleveland, OH
Parkinson 3C swivel base. It looks like a copy of Parker's brake shoes. The bad is its broken and someone tried to fix it with solder :lol: It is one solid piece instead of a swivel pin hinge like Parker. I think the top mounting plate has been replaced or modified because none of the holes align like they should and it is a strange shape. There are extra bolts just to keep it locked down and from swiveling.

My older Parker 203 is a one piece as well. It's much harder to lock down than the two piece in my 974.
 

GETRIDAONE

Well-known member
Joined
May 21, 2013
Messages
1,549
Location
Auburn, GA
Fretters, I like the spring over the screw to keep the backlash at "0". The slide & housing are machined c!ose to keep everything tight. The housing is as stout as any US vise, the cast in nut is not what we are use to seeing. The weight difference may be in slide as it is not as thick as a 6" US vise typically is. I already put the housing in the E Tank to loosen up the paint for stripping. The jaw screws will be drilled out as the slots are almost flat :sad:
After media blasting (I know what your thinking right now) the brake shoes and base I found a previous attempt at arc welding the shoe back together. I now have a larger oxy-acet torch so I will try brazing it together.

McBrownie, Interesting, I haven't seen a one piece shoe on a Parker before. I have two older ones with swivel bases that I never took apart. I will have to check them out.
 

McBrownie

Well-known member
Joined
Mar 27, 2014
Messages
1,827
Location
Cleveland, OH
Fretters, I like the spring over the screw to keep the backlash at "0". The slide & housing are machined c!ose to keep everything tight. The housing is as stout as any US vise, the cast in nut is not what we are use to seeing. The weight difference may be in slide as it is not as thick as a 6" US vise typically is. I already put the housing in the E Tank to loosen up the paint for stripping. The jaw screws will be drilled out as the slots are almost flat :sad:
After media blasting (I know what your thinking right now) the brake shoes and base I found a previous attempt at arc welding the shoe back together. I now have a larger oxy-acet torch so I will try brazing it together.

McBrownie, Interesting, I haven't seen a one piece shoe on a Parker before. I have two older ones with swivel bases that I never took apart. I will have to check them out.

Get,

This isn't a great picture of my 203 (3 1/2" jaws), but it's too cold tonight to get a better one. :) You can see that it still has the pin, but it's a press fit into a single cast piece.

View media item 42919
 
To avoid these ads, REGISTER NOW!

GETRIDAONE

Well-known member
Joined
May 21, 2013
Messages
1,549
Location
Auburn, GA
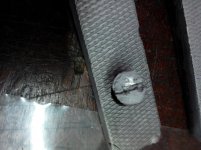
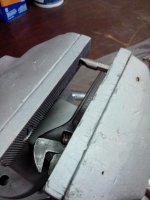
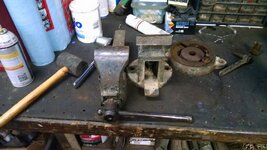
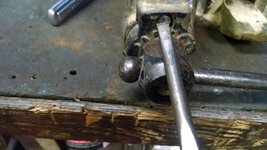
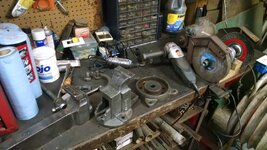
I don't recall who it was that posted about removing jaw screws with a bit on a breaker bar tightened between the jaws. I used just the bit from an impact driver and a wrench.
This works great !!!!!!

THANKS TO WHOEVER IT WAS. :thumbup:
 

Attachments

  • IMG_20160304_184930.jpg
    IMG_20160304_184930.jpg
    135.9 KB · Views: 44
  • IMG_20160304_184317.jpg
    IMG_20160304_184317.jpg
    134.8 KB · Views: 65
OP
D

drivesitfar

Well-known member
Joined
Oct 23, 2013
Messages
36,041
Location
Pacific Northwest
Get: I think Shift mentioned it, but not 100% on that. I wasn't quite sure what he meant so thanks for the picture. looks like it got R done.

ALL: Mark from Indiana mentioned on the big vise thread to use furniture wax and silicone spray on my wood vise. he agreed with me it's a good idea to throw a rag over the open threads before placing a piece of wood in the jaws to cut or sand to keep grit and debris out of the threads.

have a great weekend
 
Last edited:

Fordriver6

Well-known member
Joined
Feb 6, 2016
Messages
200
Location
Afton, VA
Here is a copy of the post I just put in the main vise thread of the restoration of a Parker 973 1/2 I just completed.

As promised, here is the restoration of the Parker 973 ½ I recently acquired. Here it is in the condition that I got it.

0c087f84b1826322f210eff611c7f8f8.jpg

I began by taking the swivel bolt and wrench out, then flipped it over and removed the 1 ¼ bolt from the bottom of the vise.

0d914b5a5146ce5a390a9f0af24505a3.jpg
ae6fce85fc04dcb608597eb216194fb3.jpg
I shot some PB Blaster down in the swivel part to help loosen it up to get it to separate. It finally came apart and then I unscrewed the lead screw all the way out and removed the dynamic jaw from the base.
bdf150343554ba85a6233a8554c53393.jpg

597ed4b8a9bb4605c6ed70996cd8f0a7.jpg
The screw holding the front collar was the next thing to be removed. Made sure to remove the lock washer from the collar as it was stuck in there.
Then pulled the lead screw out of the dynamic jaw.
f23934b5f54e00708eeda6b0e290986e.jpg
83e526208c20c78a3a45a8a3c3a60146.jpg
Next up was using a punch to get the jaw pins out. Having another vise to hold the Parker was extremely useful. Wound up destroying the cheap punch I was using. I bought a Mayhew set this morning to replace it. Did manage to get the pins out using some other punches and a small rod I used as a punch.

6de36c789d6b72b2c942e656408434b7.jpg
ebda0368490406a58eb3bcb984a7a652.jpg
c67ea4167e45f9f6ff3260de1b7d08b0.jpg
ad4acf9feab18e9220e71202114b9f15.jpg
Like last time, I was working alone, so don’t have any pictures of me using the wire wheel, but I used a combination of the wire wheel on my bench grinder, one on a angle grinder, as well as one on a dremel.

eedc62b4cbf5a4b3c1116755a4603845.jpg
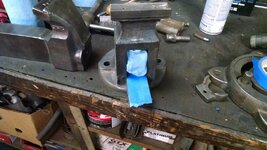
More painters tape and paper towels to keep paint off of contact areas. Used a plastic shopping bag on the slide this time to save some of the painters tape thanks to some tips posted by other members who saw my last restoration.

981fd3234bde2bd8f05ab0bd07f87718.jpg
044314e086bf741b8d3ffc5b9810bed3.jpg
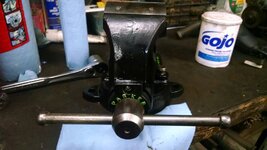
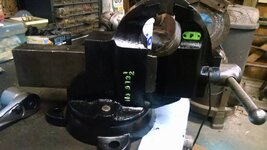
Didn’t get any pictures of me spray bombing it with Rust-Oleum gloss black, but instead of going with the usual white lettering over black, I went with lime green to be a little different. I have always liked green accents on black. Tried the brush method for the lettering this time instead of the paper towel dabbing I’ve used in the past.
e97c5991b7028e9b58c502658bb0bcf3.jpg
f3e3fcae359ee401e07ccb279ae47180.jpg
Assembly is the reverse of disassembly. Here is the finished product. . The lettering came out really well for a guy who can screw up a stick figure pretty regularly.
715b931f2edec0d082bcd43f8cc205fe.jpg
31a611f45ab5c2f7c5a47aeda3183781.jpg
424c164bb90041edd7fc77c6ad1058a4.jpg

Sent from my XT1080 using Tapatalk

Sent from my XT1080 using Tapatalk
 

McBrownie

Well-known member
Joined
Mar 27, 2014
Messages
1,827
Location
Cleveland, OH
Got a delivery from the Good Reverend today for my Wilton 9300. I decided a new handle was needed and also sent Kevin the spindle to get a Parker-style "speed handle" set screw installed. Here is the before with my Browns helmet paint job. That was supposed to bring a winning season to Cleveland, but seems to have resulted in a Broncos Super Bowl win. :headscrat That paint job no longer exists.

Here is the before with the standard 9/16" dia 8" handle. Pretty dinged up and kind of a pain to use on a vise with almost no backlash.
View media item 58201
Here it is with a new 5/8" dia 10" handle with the speed handle option. A really nice job by Kevin and gives me the precision of a Wilton with the easier use of a Parker.

View media item 58655View media item 58657
The new set screw. There was not room for a spring and ball bearing, so Kevin made up a nylon plug that works just fine.
View media item 58658
The spindle knob was mushroomed, so boring it out to 5/8" made for a nicer fit.
View media item 58659
Ready for another 50 years. :thumbup:
 

bagged89s10

Well-known member
Joined
Mar 13, 2005
Messages
4,607
Location
CT
VISE REPAIR 101 all vise repairs, lubricants, sources for parts and the trick...

Got a delivery from the Good Reverend today for my Wilton 9300. I decided a new handle was needed and also sent Kevin the spindle to get a Parker-style "speed handle" set screw installed. Here is the before with my Browns helmet paint job. That was supposed to bring a winning season to Cleveland, but seems to have resulted in a Broncos Super Bowl win. :headscrat That paint job no longer exists.


Here is the before with the standard 9/16" dia 8" handle. Pretty dinged up and kind of a pain to use on a vise with almost no backlash.

View media item 58201


Here it is with a new 5/8" dia 10" handle with the speed handle option. A really nice job by Kevin and gives me the precision of a Wilton with the easier use of a Parker.


View media item 58655
View media item 58657


The new set screw. There was not room for a spring and ball bearing, so Kevin made up a nylon plug that works just fine.

View media item 58658


The spindle knob was mushroomed, so boring it out to 5/8" made for a nicer fit.

View media item 58659


Ready for another 50 years. :thumbup:


That's an awesome setup! I'm nervous about drilling and tapping a spindle to put in a set screw. I'll have to try it on my Wilton 9300. What's the nylon plug look like?
 
Last edited:

slotard

Well-known member
Joined
Jun 21, 2012
Messages
137
Location
Alameda, CA
I like that idea too. I'd almost like to put a thumbscrew or similar there though, so I can do it without any other tools. I wonder if I could manage it on my mini lathe or whether it's too big.
 

McBrownie

Well-known member
Joined
Mar 27, 2014
Messages
1,827
Location
Cleveland, OH
Bagged,

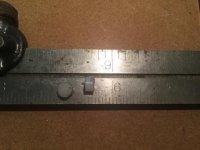
Here are a couple of spares. A little under 5/16" in diameter and about an 1/8" thick and made out of nylon.

Slo,

No need for a thumb screw. Just snug up the set screw and the handle stays wherever you slide it to.
 

Attachments

  • image.jpg
    image.jpg
    14.2 KB · Views: 56
OP
D

drivesitfar

Well-known member
Joined
Oct 23, 2013
Messages
36,041
Location
Pacific Northwest
McB: Amazing and looking even better now. i like the speed handle option too.

Slotard: i bought this Morgan 88 that has a bolt that is sort of an option like you are talking about that snugs in the handle in any position for quick turns of the handle.
 

Attachments

  • WP_20140706_014.jpg
    WP_20140706_014.jpg
    89.6 KB · Views: 43
  • V__DE26.jpg
    V__DE26.jpg
    140.6 KB · Views: 42
  • WP_20140227_013.jpg
    WP_20140227_013.jpg
    114.8 KB · Views: 36
  • WP_20140227_014.jpg
    WP_20140227_014.jpg
    133.8 KB · Views: 39

bagged89s10

Well-known member
Joined
Mar 13, 2005
Messages
4,607
Location
CT
McB: Amazing and looking even better now. i like the speed handle option too.


Slotard: i bought this Morgan 88 that has a bolt that is sort of an option like you are talking about that snugs in the handle in any position for quick turns of the handle.


Drives I have a Parker that somebody took out the setscrew and put a Bolton just like they did on that Morgan. Of course the bolt snapped off when I went to loosen it so i have to drill it out now.

ImageUploadedByTapatalk1457228024.929944.jpg

But there's really no need to put a bolt or thumbscrew in. Usually the small spring behind the set screw on a parket gives just enough tension where the handle will stay put but you can also slide it back-and-forth.
 

bagged89s10

Well-known member
Joined
Mar 13, 2005
Messages
4,607
Location
CT
Bagged,


Here are a couple of spares. A little under 5/16" in diameter and about an 1/8" thick and made out of nylon.


Slo,


No need for a thumb screw. Just snug up the set screw and the handle stays wherever you slide it to.


Ahh it's the size of the little piece of steel Parker used behind the spring. Is it just a piece of nylon or some special material, and did you buy them in those diameters? Where do I get them? I'm going to use those from now on on all my Parker restorations.
 

McBrownie

Well-known member
Joined
Mar 27, 2014
Messages
1,827
Location
Cleveland, OH
Ahh it's the size of the little piece of steel Parker used behind the spring. Is it just a piece of nylon or some special material, and did you buy them in those diameters? Where do I get them? I'm going to use those from now on on all my Parker restorations.

KMScott made them. I think it's just nylon rod. Nothing fancy.
 

KMScott

Well-known member
Joined
Feb 14, 2012
Messages
4,643
Location
Daufuskie Island, South Carolina
KMScott made them. I think it's just nylon rod. Nothing fancy.

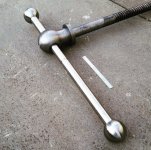
I machined them round in my CNC, I had a block of Nylon 6/6. There is several types of Nylon but this stuff holds its shape. McBrownie will be the test pilot on this one.

There was only 3/8 of space to work in. I have 1/4 balls I like to use but did not have the room on this one. The other spindles I reworked had more room to work with (7/16 minimum)and we decided to try a piece of Teflon but it was way to soft and would not stay tight. The Nylon worked. It is the same stuff they use for hammer heads. The spud was machined at .245 diameter and .150 thick and the 5/16:18 set screw was shortened to a 1/4 inch. The tap drill size for a 5/16:18 thread is .257. McB came up with this idea and took the risk.
 

Attachments

  • Bills Spindle (2).jpg
    Bills Spindle (2).jpg
    140.8 KB · Views: 44
  • Bills Spindle (1).jpg
    Bills Spindle (1).jpg
    136 KB · Views: 51
OP
D

drivesitfar

Well-known member
Joined
Oct 23, 2013
Messages
36,041
Location
Pacific Northwest
McB: nice upgrade. did you ship the Wilton's screw with hub on it to KM? or did you cut off the handle first to ship it and how did you ship if you did? nice idea with the speed handle and do you or KM have a picture of that piece of nylon you are mentioning? who cut the hole to 5/8 or did you just dremel it a little bigger? how hard was it to drill and tap the hole in the end of the hub? giving up on the Browns by changing color?

FR: nice restoration and the plastic bag saves a little time and tape so happy on of us mentioned it on your first restoration. i've heard taking Parker's jaws off and replacing them are a PITA so not surprised you broke a punch. the only thing i think you might do is make sure to primer the inside of the static except where the slide rubs or even BLO or wax so it doesn't rust. WELL DONE overall and thanks again for sharing.
 

bagged89s10

Well-known member
Joined
Mar 13, 2005
Messages
4,607
Location
CT
I machined them round in my CNC, I had a block of Nylon 6/6. There is several types of Nylon but this stuff holds its shape. McBrownie will be the test pilot on this one.


There was only 3/8 of space to work in. I have 1/4 balls I like to use but did not have the room on this one. The other spindles I reworked had more room to work with (7/16 minimum)and we decided to try a piece of Teflon but it was way to soft and would not stay tight. The Nylon worked. It is the same stuff they use for hammer heads. The spud was machined at .245 diameter and .150 thick and the 5/16:18 set screw was shortened to a 1/4 inch. The tap drill size for a 5/16:18 thread is .257. McB came up with this idea and took the risk.


Ok I see now. I like the idea of using the nylon. I looked and I can buy nylon rods and turn them down to the correct diameter if I have to.

Also I remember ritzblitz making handles with a grove in the center of the handle for a ball detent to hold the handle in place. He sleeved the hole in the spindle before putting the handle through. A lot more work but very cool.

ImageUploadedByTapatalk1457278502.113862.jpg
 

McBrownie

Well-known member
Joined
Mar 27, 2014
Messages
1,827
Location
Cleveland, OH
McB: nice upgrade. did you ship the Wilton's screw with hub on it to KM? or did you cut off the handle first to ship it and how did you ship if you did? nice idea with the speed handle and do you or KM have a picture of that piece of nylon you are mentioning? who cut the hole to 5/8 or did you just dremel it a little bigger? how hard was it to drill and tap the hole in the end of the hub? giving up on the Browns by changing color?

Drives,

I shipped it out to Kevin. It fit in a medium flat rate box. I cut the handle off first just to save Kevin the effort. Kevin also bored out the spindle to 5/8". I posted a picture of nylon plugs above. They are pretty simple. Not giving up on the Browns either. That color scheme wasn't good luck, apparently. Well, it seems to have worked for Denver. We hired the Moneyball guy to work for the Browns this year. How can we lose?
 
OP
D

drivesitfar

Well-known member
Joined
Oct 23, 2013
Messages
36,041
Location
Pacific Northwest
McB: on my cell phone those nylon plugs looked like pins on a slide so didn't notice them. simple idea even better if it works.

as far as your Browns I don't know what to tell you, but if they don't win a Super Bowl soon you might be like us Seahawk fans were almost giving up hope when we won one 38 years after they became a team.

good luck with trying to figure out the color schemes and luck part. :lol_hitti
 

CwazyWabbit

Well-known member
Joined
Jan 9, 2015
Messages
1,189
Location
Surrey, UK
I machined them round in my CNC, I had a block of Nylon 6/6. There is several types of Nylon but this stuff holds its shape. McBrownie will be the test pilot on this one.

There was only 3/8 of space to work in. I have 1/4 balls I like to use but did not have the room on this one. The other spindles I reworked had more room to work with (7/16 minimum)and we decided to try a piece of Teflon but it was way to soft and would not stay tight. The Nylon worked. It is the same stuff they use for hammer heads. The spud was machined at .245 diameter and .150 thick and the 5/16:18 set screw was shortened to a 1/4 inch. The tap drill size for a 5/16:18 thread is .257. McB came up with this idea and took the risk.

Could you not have carried on drilling through to the back and placed a spring and ball in there where there is more meat?
 

KMScott

Well-known member
Joined
Feb 14, 2012
Messages
4,643
Location
Daufuskie Island, South Carolina
Could you not have carried on drilling through to the back and placed a spring and ball in there where there is more meat?

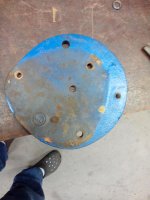
Yes. The only draw back is if you have to replace the spring if it gets gummed up then the handle has to be removed and the set screw on out side would should be loc-tite in. Cw, the nylon plug worked and easy to tighten and replace.
 
To avoid these ads, REGISTER NOW!
Top Bottom