bshusted
Well-known member
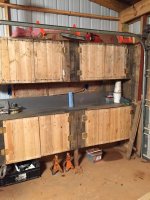
I made mine with cheapo HD plywood to the dimensions of the IKEA BESTA cabinets. This way I could pick up the doors at IKEA and paint the cabinets. Here are a couple of pics before the cabinets got painted.


What paint did you use? Looks easy to wipe down. Any issues with degrading with chemical contact?
Sent from my SM-N910V using Tapatalk
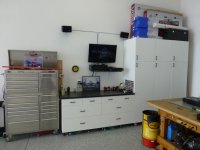
@Buening your cabinets and bench are nice. What are the cabinets constructed from?
What kind of paint did you use? The finish looks flawless. Thanks.
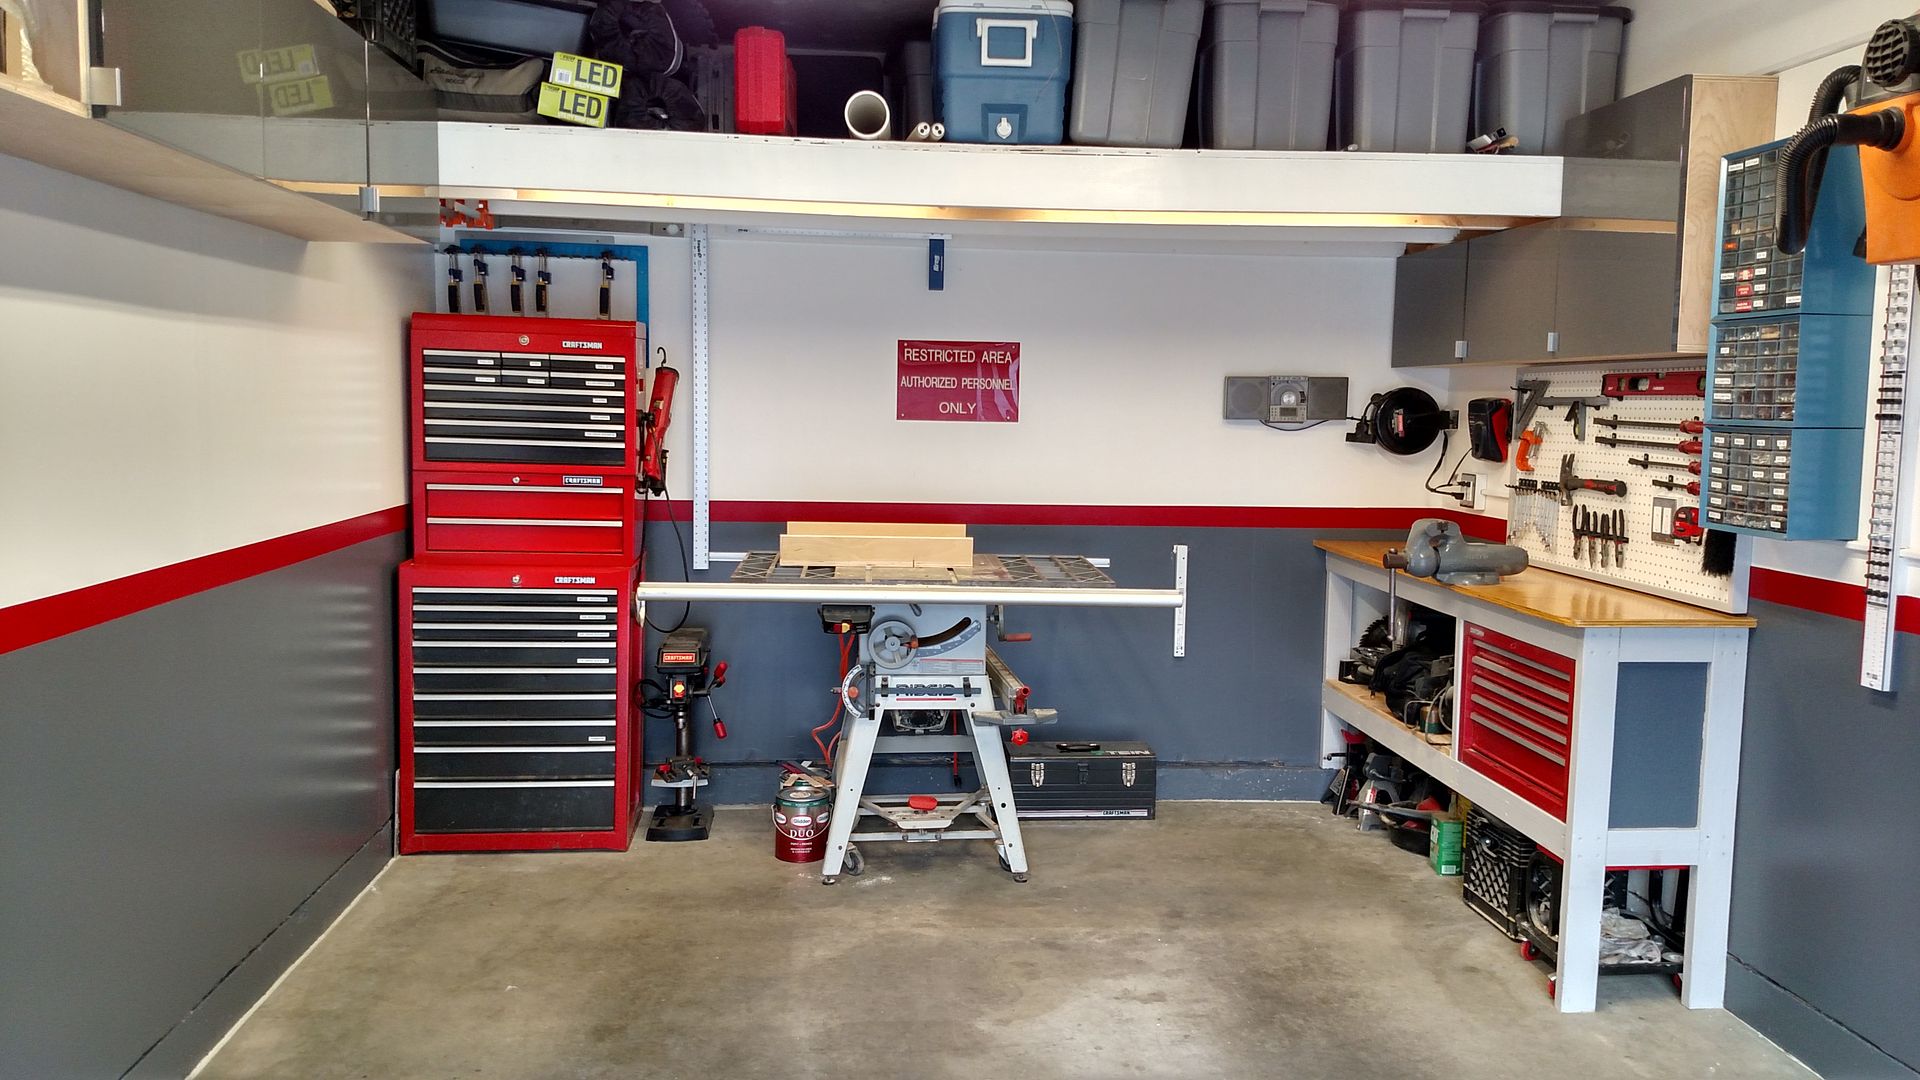
Especially love the idea of using square tubing as mount for your grinder and vice. Absolutely brilliant idea!
Rustoleum Enamel from a quart can, sprayed via HVLP gun. Charcoal Gray I believe was the color. Its the darker of the two grays they offer. Very easy to wipe down. Don't really expose them to chemicals outside of a cleaner on a rag, but am sure it won't handle brake fluid or carb/brake cleaner exposure.
Is there a particular reason you went with mdf for the doors? Btw, they look sharp!
 Thankfully that was before paint.
I made mine with cheapo HD plywood to the dimensions of the IKEA BESTA cabinets. This way I could pick up the doors at IKEA and paint the cabinets.
I like that. Makes me wish sometimes I had not discarded all the pallets that were in my barn when I first moved here.I just built this shop it really took all the money I had. So work has plenty of pallets that they pay to have hauled away any chance I get I bring them home.
Most if not all the lumber used on the cabinets is free. I took pallets apart to make the cabinets. I went to the Restore in town and picked up hinges for $.50 each.
Not real pretty but at least they are functional..
I just built this shop it really took all the money I had. So work has plenty of pallets that they pay to have hauled away any chance I get I bring them home.
Most if not all the lumber used on the cabinets is free. I took pallets apart to make the cabinets. I went to the Restore in town and picked up hinges for $.50 each.
Not real pretty but at least they are functional..


Rustoleum Enamel from a quart can, sprayed via HVLP gun. Charcoal Gray I believe was the color. Its the darker of the two grays they offer. Very easy to wipe down. Don't really expose them to chemicals outside of a cleaner on a rag, but am sure it won't handle brake fluid or carb/brake cleaner exposure.
Thanks for the compliments. They are good 10'ers, I really needed to color sand and buff but for a garage they look good enough. The top, bottom, sides, and shelves are 3/4" oak plywood. The back is 1/2" plywood, and the doors are 3/4" MDF. Glued and screwed together for a tight fit. Shelves have 1"x1"x1/4" angle iron screwed to the fronts for added stiffness, since they are 4' spans on the large cabinet.
Tubing for grinder and vice work great, thanks! I still need to make one for my buffer yet. The only downside is the grinder and buffer sling **** on my bench and cabinet. I need to create a dust shield to catch most of it.
....you have 1st prime the mdf, then spray it with Rostoleum enamel with HVLP gun then you add the Valspar hardener.....did you mix the hardener with the last coat of the Rostoleum or only spray it after?
fleeders-
Hardener gets mixed in with the paint before you apply it.
For the guys painting the inside of the cabinets, are you painting prior to final assembly in order to get even coverage?


View attachment 537508
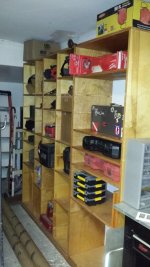
Got three walls of floor to ceiling cabinets...
Quick question for buening...I really love the finish on your cabinet and just to make sure I understand the step you have done....you have 1st prime the mdf, then spray it with Rostoleum enamel with HVLP gun then you add the Valspar hardener.....did you mix the hardener with the last coat of the Rostoleum or only spray it after?
Thanks