To avoid these ads, REGISTER NOW!

2 post lift and expansion joints

bobj49f2

Banned
Joined
Nov 13, 2009
Messages
430
Location
SE Wisconsin
I have another question about the installation of my Manitowoc CFF-90 lift and I need suggestions, clarifications.

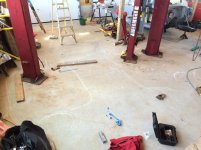
The building I am installing the lift in is my non-automotive related business shop. The building is 50'X50' and I have a roughly 25' deep by 20' wide area for working on my vehicles, company vehicles that is. See image below. The building is in a business condo complex with 5 other identical buildings. The buildings are marketed toward small businesses and auto enthusiasts and are designed to install automotive lifts with 5" floors. The installation manual that came with the lift specifies 4" floors but doesn't say anything about seam, cracks or joints in relationship to the lift.

liftarea002.jpg


I've been reading all of the posts here and on lift manufacturer's sites I can find about lifts and expansion joints and also the different types of grooves in concrete that aren't really expansion joints so I think I have the lines in my drawing mislabeled. They were cut into the floor after the pour but before the wooden forms were removed so I'm pretty sure they only go down an inch of so, just cut for stress relief. I'm 99% certain they don't go all the way down. I had the floor coated and the lines filled with epoxy so I can't get a good gage of how deep they are. There are five other exact buildings in this complex but only one is occupied but the owner isn't always there so it's kind of hard to get into one to see how deep the lines actually are.

I would like someone in the know, an engineer or floor contractor take a look at my drawing and tell me what they think. I can move the lift a few inches right or left but I have a '04 Dodge 1500 4X4 with a dual cab and 8' box that I want to use the lift for and can't really move it forward or back and still have room to work around it or close the overhead door. I have limited space because I can't infringe on my business shop space because that's where I make my money and need to use one of the two overhead doors to load machines and supplies. I also need the work area for assembly.

I plan to install this lift with the help of a couple of friends and my forklift truck. My friends and I are all pretty well mechanically inclined and do just about anything but we're not structural engineers and need just a little guidance in this installation to make sure it's done right. Yes, doing it right probably would mean hiring an installer but that's not in the budget.
 
To avoid these ads, REGISTER NOW!

mad57

Well-known member
Joined
Jan 30, 2009
Messages
1,698
worked for me ,will it go the distance time will tell.
 

Attachments

  • 1 lift.jpg
    1 lift.jpg
    142.4 KB · Views: 477
OP
B

bobj49f2

Banned
Joined
Nov 13, 2009
Messages
430
Location
SE Wisconsin
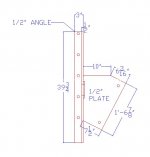
Just for added detail this is the mounting foot print of on of the posts for my lift. The CFF-90 is an asymmetrical lift, if that matters.
 

Attachments

  • footprint001.jpg
    footprint001.jpg
    26.2 KB · Views: 259

SteveU

Well-known member
Joined
Nov 20, 2006
Messages
1,243
Location
Michigan
Mine said to stay a minimum of 6" away from any cracks/joints in the concrete. The way my floor was poured I would either have had to go with a narrower spacing or have the 2 posts on different slabs, I chose the latter & haven't had any problem almost 4 yrs later. When the installer was here I asked him & he was adamant to stay away from the joint. With a 4 post lift it wouldn't be a big deal but on a 2 post the bolts in the floor are what keep it from tipping over so you don't want their ability to do that lessened by being too close to a crack or joint.
 

wssix99

Well-known member
Joined
Mar 2, 2011
Messages
5,162
Location
Chicago, IL
If the groove was cut, its just a control joint and not an expansion joint. Expansion joints are filled with a different material than the concrete and are only required where there are broad temperature swings. So, you'll typically see expansion joints outside (sidewalks, driveways, etc.) and not on slabs in conditioned spaces.

All concrete floors will crack. Some more/less than others but regardless - the control joints act as a relief to encourage cracking along those lines for aesthetic reasons. The fact that they are lined up with the FD Access hole is another indication they are control joints as cracking will also tend to radiate out from the hole.

When cracks form, the concrete will be weaker in those areas, which is probably why the lift manufacturers don't want the bearing plates near them. If you can find another placement away from the control joints, that would probably be best.
 

ConCretin

Well-known member
Joined
Jan 20, 2011
Messages
3,379
Location
Central Maine
For the record, your slab probably cracked under the saw cuts so the groove does go "all the way down". The saw cuts are intended to induce a crack in order to avoid random cracks elsewhere.

By all means, follow the recommendations for the lift manufacturer but in general, if the slab is properly reinforced, the saw cut won't significantly affect strength. If a slab doesn't have reinforcing, the crack can open up. Once the aggregate interlock is lost, you have two different slabs.
 

Charles (in GA)

Well-known member
Joined
Jan 11, 2006
Messages
12,489
Location
50 mi south of Atlanta
For the record, your slab probably cracked under the saw cuts so the groove does go "all the way down". The saw cuts are intended to induce a crack in order to avoid random cracks elsewhere.

By all means, follow the recommendations for the lift manufacturer but in general, if the slab is properly reinforced, the saw cut won't significantly affect strength. If a slab doesn't have reinforcing, the crack can open up. Once the aggregate interlock is lost, you have two different slabs.

^^^ THIS ^^^

My Challenger lift instructions said to mount the columns no closer than 18" to any joint, crack, etc, this would include control cuts that will crack all the way down thru. In my case I used metal keys. Both posts of my lift are on the same section of slab and at least 24" from the joints.

Charles
 

bmwpower

Super Moderator
Staff member
Joined
Apr 24, 2005
Messages
12,578
Location
NJ
Instead of a cross, why not do 2 horizontal cuts - above and below the lift - if you feel you need joints.

Rotary said the same thing, stay away from the joints or edges.

I went without any joints in my 30x30. No problems. No joints to roll my jack or engine stand over, added plus.
 
OP
B

bobj49f2

Banned
Joined
Nov 13, 2009
Messages
430
Location
SE Wisconsin
I am not sawing the joins in now, the building is two years old and had the joins saws before the walls were put up.

My slab is 50X50, I'd rather have the controlled joins in the floor than random cracks forming. I also had the floor coated and the lines filled with expoxy to bring them up to almost floor level to avoid have debry from getting trapped down inside of them.
 
OP
B

bobj49f2

Banned
Joined
Nov 13, 2009
Messages
430
Location
SE Wisconsin
OK, I finally got into the building next door this morning. The owner of the building left his lines in the concrete empty so I was able to measure the depth. The grooves are approximately 1 1/4" deep in a 5" floor. Would this be considered one solid floor. Again, the floor was engineered to install a lift on.

Sorry for beating this subject to death but I just want to make sure before installing the lift.
 

ConCretin

Well-known member
Joined
Jan 20, 2011
Messages
3,379
Location
Central Maine
A saw cut control joint should be 1/4 of the slab depth so the 1 1/4" cuts are correct for a 5" slab.

Your question regarding whether it is a solid floor is difficult to answer. As mentioned earlier there is likely a full depth crack under the saw cut so the slab is no longer 'monolithic'. If the slab is steel reinforced and/or the aggregate is still fully interlocked, the slab will generally behave as if it were.

It appears you will not be able to place the lift where you want and meet typical lift guidelines. Can you shift the location of the lift? If not you may have to do some modifications to the floor or roll the dice.
 
Last edited:

nehog

Well-known member
Joined
Jan 2, 2010
Messages
7,935
Location
Jaffrey, NH
1. I straddled the saw cuts on my lift. No problems, but
2. Do you have rebar in the floor? Mine is rebared (is that a word?) which made me much more comfortable about doing this, since were the cut to crack all the way down, the rebar still holds things together.

and...

3. My cuts are about 1/2" deep. Some places I can see very thin cracking that follows them, but nothing significant, and nothing anywhere near the lift.
 

1956f100

Member
Joined
Jul 22, 2009
Messages
21
Location
Birdseye, IN
I am also contemplating a two post lift and have the same problem with control joints being near where I want the lift. I did not forsee a lift when i built 13 years ago. I work for a machinery company and have access to steel plate and had considered expanding the the length and width of the column plate from original to add more mounting bolts the required distance
from the control joint as well as using the mfg mounting points. This would add a obstruction / trip point on the floor, but I thought about making a tollbox stand or a vise post platform to try to make a feature out of the problem. Has anyone heard of or have done something similar?
 
OP
B

bobj49f2

Banned
Joined
Nov 13, 2009
Messages
430
Location
SE Wisconsin
I sent a message to the developer asking for floor design specs but I'm not going to hold my breath. The last I heard was the developer's company is in receivership and a bank is handling the property. I however has some pictures of the slab before it was poured and after it was poured, before the building was erected. In the second picture it shows they poured the side and back parts of the floor. For some reason they poured the areas around the floor drain a day or two later. The last area poured were slanted toward the drains.

The different sections of the floor are tied together with rebar.
 

Attachments

  • DSC00050.jpg
    DSC00050.jpg
    145 KB · Views: 223
  • DSC00034.jpg
    DSC00034.jpg
    146.1 KB · Views: 185
OP
B

bobj49f2

Banned
Joined
Nov 13, 2009
Messages
430
Location
SE Wisconsin
I might have to move the lift over 16" to center it in one of the floor panels but I don't want to. 16" doesn't seem like much but that's 16" X 25' of less business shop space.
 

mad57

Well-known member
Joined
Jan 30, 2009
Messages
1,698
i was told that an epoxy anchor will help in your case and mine, so far mine is holding stout no epoxy for me , no over head bar just floor plate, lifting suburbans, 57 chevs, vans ect no cracks at all no flex, no rebar just 6 to 8 inchs of 4500lbs concrete with fiber mesh.
 
To avoid these ads, REGISTER NOW!

Perci

New member
Joined
Jul 20, 2015
Messages
1
Location
India
One of my friend did a 4 post only because he was not sure about the floor. A 2 post is nicer, but did not want the risk of an installation issue.
 

Speed Farm

Active member
Joined
Oct 17, 2012
Messages
28
Old thread, new question...

Is the reason that one shouldn't go too close to a cut/seam because when drilling the bolts will "crack" out the edge of the cut?

or is it

because the lift will put pressure and "rip out" the portion of concrete 6" or less?

I am in a bind because it seems where ever I need to put my lift due to pex being underneath, there is a cut mark
 

Attachments

  • P6060001.jpg
    P6060001.jpg
    146.1 KB · Views: 141
Last edited:

walrus

Well-known member
Joined
Nov 12, 2008
Messages
11,681
Location
Maine
Old thread, new question...

Is the reason that one shouldn't go too close to a cut/seam because when drilling the bolts will "crack" out the edge of the cut?

or is it

because the lift will put pressure and "rip out" the portion of concrete 6" or less?

I am in a bind because it seems where ever I need to put my lift due to pex being underneath, there is a cut mark

Thats the problem with radiant floors and lifts. I planned the placement of a lift before I poured so I had blank spots in the right place.

I'd think the reason for not having the lift near a saw cut is cracking and possible "rip out" of floor. In my case there is #4 rebar I doubt it would rip out anyway but I have no saw cuts in my floor.
 

Speed Farm

Active member
Joined
Oct 17, 2012
Messages
28
I put huge "islands" of no pex 4-5 foot around, but what i never thought of was the concrete cuts and the go dead nuts center right where I was going to put them... if I cheat 6" away from the cuts I am too close to the pex (24" base pad" ) and if i go on top of the cuts, some of the bolt holes would be within 4" of the cut seams and others would obviously all be centered within about a foot of the cuts...

Mnnnnnnnnn, if only I wouldn't have lost that piece of paper with all the pex dimensions and the photos that went with it :0
 

walrus

Well-known member
Joined
Nov 12, 2008
Messages
11,681
Location
Maine
I put huge "islands" of no pex 4-5 foot around, but what i never thought of was the concrete cuts and the go dead nuts center right where I was going to put them... if I cheat 6" away from the cuts I am too close to the pex (24" base pad" ) and if i go on top of the cuts, some of the bolt holes would be within 4" of the cut seams and others would obviously all be centered within about a foot of the cuts...

Mnnnnnnnnn, if only I wouldn't have lost that piece of paper with all the pex dimensions and the photos that went with it :0
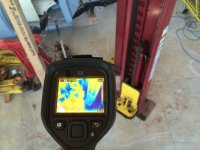
I had my hard drive crash with the pics of cut outs, areas with no pex ;) I got a guy with thermal imaging camera to find the exact locations, worked well. My areas were 3 ft bt 3ft though so more room for error. You could see the pipes though and my radiant is run with solar so not very hot
 

Speed Farm

Active member
Joined
Oct 17, 2012
Messages
28
thermal imaging might be a good option... trouble is I haven't hooked up the manifold/pex yet to my outdoor boiler and I am dying to work on a hotrod!
 

Speed Farm

Active member
Joined
Oct 17, 2012
Messages
28
you inspired me today Walrus... as a result I hooked up the pex to the manifold and just finished extended some lines to my outdoor boiler. Tomorrow I plan on drilling through some joists and connecting it all together, it was getting dark or I would still be going.

Was your friends thermal imaging camera a high end one? I saw there is a camera that plugs into an iphone. I will be able to get the water at about 175 degrees running through but it is under 5" of concrete, so I am not sure how accurate it would work.

I am curious to know how accurate the camera you used was? For example could you have traced the pex lines or was it just the general area was hot and the other area's wern't? I have a pretty accurate infrared thermometer and I am wondering if that might work? I guess I will know more by tomorrow.
 

walrus

Well-known member
Joined
Nov 12, 2008
Messages
11,681
Location
Maine
you inspired me today Walrus... as a result I hooked up the pex to the manifold and just finished extended some lines to my outdoor boiler. Tomorrow I plan on drilling through some joists and connecting it all together, it was getting dark or I would still be going.

Was your friends thermal imaging camera a high end one? I saw there is a camera that plugs into an iphone. I will be able to get the water at about 175 degrees running through but it is under 5" of concrete, so I am not sure how accurate it would work.

I am curious to know how accurate the camera you used was? For example could you have traced the pex lines or was it just the general area was hot and the other area's wern't? I have a pretty accurate infrared thermometer and I am wondering if that might work? I guess I will know more by tomorrow.
It was high end, flir, he does home inspections . You could see exactly where the pipes were. I have flir that goes into my smart phone I couldn't tell **** with it
 

Speed Farm

Active member
Joined
Oct 17, 2012
Messages
28
thanks for the info... I almost bought the phone version, so I am glad to read they sucked before I bought one.


home depot here rents the high end ones, so that might work. I did get the outdoor wood boiler hooked up to it this morning... which is funny because all winter long I froze and it only took about 4 hours to hook it up.

I am not seeing a big difference with my infrared but the concrete is still at around 44 degree so we'll see... thanks again for the advice.
 

wssix99

Well-known member
Joined
Mar 2, 2011
Messages
5,162
Location
Chicago, IL
Old thread, new question...

Is the reason that one shouldn't go too close to a cut/seam because when drilling the bolts will "crack" out the edge of the cut?

or is it

because the lift will put pressure and "rip out" the portion of concrete 6" or less?

I am in a bind because it seems where ever I need to put my lift due to pex being underneath, there is a cut mark

Neither. The lift, bolted to the slab, forms an inverted "T", which gives you stability. If you have a crack (there are cracks in the control joints) too close to the post, you don't have a "T" - you get an upside-down "L", which would have a tendency to tip over. So, the manufacturers will want you to stay away from the cracks a certain distance to get a proper contiguous pad underneath the post.

I had this problem in my garage and solved it by adding control joints. (I also planned my layout and kept open areas, with no PEX, where I will bolt my lift legs.) The spacing of the joints is just a minimum - so you can add more and space them closer together in certain areas, if you need to.

(One can also engineer the slab with added rebar to space the joints further apart, but I suspect that opportunity has passed, here.)
 

Goldhawg

Well-known member
Joined
Nov 27, 2010
Messages
363
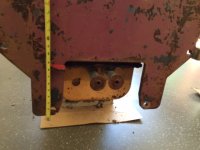
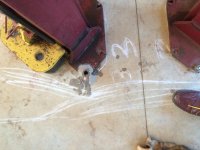
I have a similar problem. I have a used Mohawk System 1 I am getting ready to clean up, paint, refresh and install in my new shop. Unfortunately the massive base of the mohawk means its going to be near a control joint. If you can see from the pictures (I know its hard--the red welding magnet is ~ where the control joint would be), where I need to have the bolts will be about 8 inches away from the rear facing 4 main bolts. The two outside bolts would be about 2" away from the control joint. Then the front two bolts would be about 6" on the other side of the control joint. The tape measure on the floor shows where the rear 4 bolts would be. Any other mounting would make my oversized two car garage door shop area only able to support one car. Is there a problem in straddling the two areas? If not, are the two bolts that are going to be closest (2") likely to be a problem when they will be in the middle?

Thanks
 

Attachments

  • IMG_1640.JPG
    IMG_1640.JPG
    91.2 KB · Views: 123
  • IMG_1641.JPG
    IMG_1641.JPG
    114.7 KB · Views: 135
  • IMG_1637.JPG
    IMG_1637.JPG
    86.9 KB · Views: 131

Speed Farm

Active member
Joined
Oct 17, 2012
Messages
28
I ended up going for it and just seeing what happened... so far no visible cracks; so I assume it is going to work. I figured that worst case is that I have to chisel out a 4x4' pad and re-pour, but glad with it so far.
 

Goldhawg

Well-known member
Joined
Nov 27, 2010
Messages
363
If I go ahead, what are the best bolts to use? The Mohawk recommended wedgit bolts or epoxy the bolts in?
 

Speed Farm

Active member
Joined
Oct 17, 2012
Messages
28
and because every body like a fail... "100% certain; there is no way I am going to hit the line"
 

Attachments

  • IMG_0395.jpg
    IMG_0395.jpg
    124.5 KB · Views: 155
  • IMG_0411.jpg
    IMG_0411.jpg
    147.4 KB · Views: 163
  • IMG_0388.jpg
    IMG_0388.jpg
    127.1 KB · Views: 150
  • IMG_0398.jpg
    IMG_0398.jpg
    138.4 KB · Views: 151
  • IMG_0392.jpg
    IMG_0392.jpg
    136.1 KB · Views: 152
  • IMG_0385.jpg
    IMG_0385.jpg
    137.6 KB · Views: 167

Speed Farm

Active member
Joined
Oct 17, 2012
Messages
28
fun, actually only took about an hour to repair, managed to hit the line on my second drilled hole; it looked for sure like I was free and clear.
 

Attachments

  • IMG_0411.jpg
    IMG_0411.jpg
    147.4 KB · Views: 84
  • IMG_0407.jpg
    IMG_0407.jpg
    137.7 KB · Views: 89

Speed Farm

Active member
Joined
Oct 17, 2012
Messages
28
this was a couple of weeks ago... everything is up and running now and I love the lifts...
 

Attachments

  • IMG_0382.jpg
    IMG_0382.jpg
    139.3 KB · Views: 155

Speed Farm

Active member
Joined
Oct 17, 2012
Messages
28
I figured that since they recommended 5.5 inch ones, that 7" would be better, I ordered them online and they were cheaper... you'll read it on the advice section but for sure drill through the slab all the way so that if you screw up you can pound them down/through... I had poured a 15" pad underneath so I knew I had plenty of slab
 
To avoid these ads, REGISTER NOW!
Top Bottom