To avoid these ads, REGISTER NOW!

What did you do "IN" your garage today?

Pathfinders

Well-known member
Joined
Sep 23, 2013
Messages
1,300
Location
Upstate SC
Had to take about half the bike apart to chase down a electrical problem. Got pissed off when I started pulling covers off. The PO had added a lot of electrical stuff. I cut it all out and returned the bike to stock.
Went for my first ride this year, 96 miles on back roads. Still got a little grin.
 

Attachments

  • 20160726_144038.jpg
    20160726_144038.jpg
    129.3 KB · Views: 56
To avoid these ads, REGISTER NOW!

rt dak

Well-known member
Joined
Nov 16, 2010
Messages
714
Location
Putnam County, NY
Front brakes on the Ram and shined up the Dakota

20160730_133030.jpg
 

Finky198

Well-known member
Joined
Feb 25, 2014
Messages
2,120
Location
North East
Awesome truck!!!! My father had a green 5.2L, so I'm kind partial to the dakota :evil: 
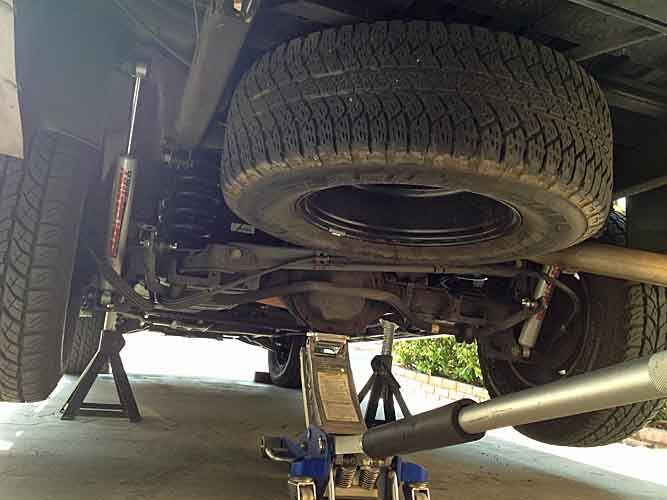
and now I have a 1998 Jeep GC with the 5.9L.... :3gears: What have you done to it? looks lowered? looks like fun brings back memories....

Heres my jeep
2mmahad.jpg
 

Xicaque

Well-known member
Joined
Jun 24, 2012
Messages
463
Location
I move every 2.5-3 yrs. No choice.
Had to take about half the bike apart to chase down a electrical problem. Got pissed off when I started pulling covers off. The PO had added a lot of electrical stuff. I cut it all out and returned the bike to stock.
Went for my first ride this year, 96 miles on back roads. Still got a little grin.

That's awesome! I hate it when some riders add so much **** and the wiring is a mess:3gears:
 

rayra

Well-known member
Joined
Dec 1, 2014
Messages
4,724
Location
Escaped from Los Angeles
Woodworking, #147 in a series, More 'Jake's Chair' Adirondacks

chair05.jpg


The chair blueprints are available on the interwebthingy, called 'Jake's Chair'. It's a modified adirondack design. It's a bit larger and a good bit more upright than a typical low-slung northeastern adirondack. Folks with lower back pain often have trouble with the traditional designs. It also has wide flat level armrests - which I've widened even more - which readily hold a dinner plate. I've also added a built-in beer / cup-holder in both arms.

So the neighbors hit me up for a pair. A cost plus cold beer deal. $110 for lumber. I've got a partial 5# box of 1-1/4# plated screws laying around, as well as some latex primer. If one were to start with no materials, retail cost would be about $80 for materials. Takes (5) 1"x8"x8' and (1) 1"x6"x8' with very little remainder. After some experimentation with layout I got things condensed as tightly as possible.

Take some care in wood selection and placement of your cuts, avoid knots in the seat slats, especially at the peak front area where everybody perches. The slats are only 1-1/2" wide so a knot destroys their strength. I sometimes built them with hardwood slats in that area, if they're being painted. I've also rebuilt my own with a wider curved backbrace, also of hardwood, after its mountings failed at around the 3yr mark.

I'm doing much of the work as batch processes. I traced the patterns in pairs. I arranged my cutting layouts so I can chop the full planks down to more manageable pieces. Then I ran what I could thru the table saw, mostly the straight slats, backrest staves, the major leg and armrest supports.

Then it was on to the bandsaw for a rough-cut pass, basically breaking down all the pieces from the traced planks. Then a second pass cutting closer to the traced lines to get rid of as much of the waste as possible.

On to the big heavy table 12" disc sander, where I worked all the outside curves down to their lines. And hogged out as much of the inside curves as I could reach.

I'll use an oscillating orbital handheld disc sander to work most of the inside curves. Sure could use a table / drum sander. I might clamp the like pieces (4 of each in this build) and work them with a belt sander, too.

Have to get the neighbors to pick a pattern for the tops of the backrest pieces. A large continuous curve, a sharper parabola, a stair stepped design, or something similar in a sort of curved scallop-shell pattern. Sky's the limit really, as long as you make the backrest high enough that leaning your head back doesn't rub on the ends.

Also to that end, I run all the seat slats, backrest staves and the armrest flats thru my table router with a roundover bit, for comfort.

Time requirements are variable, depending on how much you want to fiddle with it. Minimum time is 3-4hrs.

Jakes04_zpsbpdltnv6.jpg
Jakes05_zpsekw77eto.jpg
Jakes06_zpsqjllkaso.jpg
Jakes07_zpsxdbczvzt.jpg


And I'm building on my modified Ron Paulk design portable workbench. I chopped down my old rolling work table, re-worked its chassis to fit the new smaller overall size and lowered the height so the Paulk portable modules remain level with my table saw.
 
Last edited:

Scales

Member
Joined
Oct 28, 2012
Messages
8
Location
Left Coast
Cleaned off the workbench, again. And organized some pegboard hangers.
Still working on my socket holders and trying to decide what I need at arms length.
album-72157671771008655
 

PassnThru

Well-known member
Joined
Jan 5, 2010
Messages
6,511
Location
Bowling Green KY
New fuel filter for the Explorer. I guess I should really go through the maintenance schedule - it was supposed to be done at 30K - not 90K :willy_nil

Anyhoo - some pretty nasty gas leaked out the inlet - cut the case off to see the filter.
 

Attachments

  • IMG_0416.jpg
    IMG_0416.jpg
    47 KB · Views: 68

kberjian

Well-known member
Joined
Jun 1, 2016
Messages
258
Location
Calgary
With the space out here on our acreage I wanted to get a few play structures for the kids. I was pretty shocked at how expensive they are and how flimsy most pieces are. I decided to make a few pieces myself out of stock steel and leftover parts I have.

First one up was a teeter totter. Used some 2x3 tube with a 1x2 on it for stiffness for the main beam, dismantled two bikes from the junkyard for their handlebars and seats, and used the main steering bearings for the mid bearing on the teeter totter. One day of work later and it is ready for paint! I will be staking the four corners down into the grass when it is in position. Total cost was about 250$ including paint.

PS: disregard the booger welds on some parts, I was having welder issues..... I fixed the welder (gas flow in the hose) and ground down the welds before I put it all together.


Geek

Well-known member
Joined
Nov 13, 2010
Messages
271
Location
8000'
Changed my diff oil in the jeep

c385b6ed1b1a1838365285d569c63f73.jpg

Then re-lifted a buddy's jeep from 2.5 to 3.5 with high steer

b139a599e5014f02839fc2142fcc6e13.jpg


.mobile
 

90zcar

Well-known member
Joined
Nov 8, 2013
Messages
3,254
I opened a box for a 1" dimple die I ordered from eBay only to find they sent me a 2"!!
01cc902eacbb33c41a1edbd55f20c9d6_thumb.jpg


Sent from my iPhone using Tapatalk
 

90zcar

Well-known member
Joined
Nov 8, 2013
Messages
3,254
Yeah that's where they are originally made. These came from California. They seem very nice and have tight tolerances. Just got the wrong size lol


Sent from my iPhone using Tapatalk
 

Outlawmws

Well-known member
Joined
Aug 9, 2011
Messages
39,279
Location
The Badlands
Worked on the "new" camp trailer to start getting a deck/rack up front to hold my cooler chest. once that's done, then I will make up a mount for the small Prop tank.

After I was done for the day I replaced the cord on one Milwaukee Portland, and replaced the plug on the other, as it was twist lock...
 
To avoid these ads, REGISTER NOW!

Outlander

Well-known member
Joined
Jul 30, 2010
Messages
5,154
Location
Quebec, Canada
Went to the local hardware store (15 minute drive) for propane. Got home, wife had just broken the toilet handle. Went back to said hardware store for the part. Had to heat it up with the heat gun so I could manipulate the plastic into the right shape to work.

For some reason, I was a star in Mrs Outlander's eyes! :evil:
 

spent21

Well-known member
Joined
Apr 9, 2013
Messages
168
Location
Franklin, Tn
I made a terrific mess.
20160703_093230_zpsuezyxsug.jpg


20160704_172754_zpsu8wwlutp.jpg


But I did manage to build a bench for the wife. I bought her a storage cabinet to keep her gardening stuff on the patio. Even though I sealed the seams, it would pull water into some of the joints & rust. The new bench has enough storage to keep all her stuff in & provide some additional seating on the patio.

20160704_161011_zpssrj4zpmd.jpg


20160704_171143_zpsged0xakb.jpg


20160704_171118_zpselzgwkxo.jpg

I'll get it painted & clean up the metal cabinet for repurpousing in the shop this weekend.

I also hung her barn door at the entry of our guest rooms
20160702_121130_zpsdkpiucy9.jpg

20160702_121106_zpsw3vqadn1.jpg


Finished the bench.
20160728_192701_zpseqvfcdhl.jpg


20160728_192642_zps9febagh2.jpg


20160728_192617_zpskmvm3gwf.jpg
 

spent21

Well-known member
Joined
Apr 9, 2013
Messages
168
Location
Franklin, Tn
We had a party in it. I had to move some stuff around, but cleaned up nice. Everyone had a good time & can't move.

60 burgers, 32 hotdogs, 120lb ice & twin lane slip 'n slide.


slip%20n%20slide_zpsxgn8kfy3.jpg


slip_zpsyven0ysj.jpg


shark_zpsl7lcnfr7.jpg


shots%202_zpsgkquqirf.jpg


booze_zps94d8vinf.jpg


pool_zpsfqv27fyo.jpg


pong_zpsttltnmio.jpg


flip_zpswh9i2wke.jpg


20160730_215337_zpsnztjek1z.jpg


20160730_201631_zps26maqytc.jpg


20160730_201611_zpsqfxthnpq.jpg
 

zak77

Well-known member
Joined
Sep 18, 2014
Messages
1,355
Location
Monson, MA
My GF and i picked up a '96 4runner for her kid to drive as a first car so being 20 years old and having 225k on the clock, it needed a going through even though the previous owner took very good care of it. I figured it'd need some brake work done and some fluids changed so i got at it sunday morning. It didnt need the oil changed but figured i'd toss spark plugs in it. Well, first problem was that plug #2 came out with a heli-coil insert. The rest went great but i need to address that issue.

Pulled the front tires and brakes look GREAT!!! I bled them since the pedal felt spongy and got some air out of the system. Everything up front looks good and feels tight, sway bar bushings are cracked and showing their age. Otherwise i just cleaned things up and put it all back together. Next were rear brakes and knew they were gonna be an issue. Pulled the rear tires and new i had to R&R the bell crank adjusters, very well known issue on the taco's/4runner and tundras. The ones on there were absolutely seized solid, gotta order new ones. The shoes were about 50% gone so i'm just going to replace those while it's apart.

Rear diff oil got changed out also, looked good with some shavings on the magnet. Rear shocks need to be replaced to that's on the list. Greased the u-joints and checked for play, all good. Needs an exhaust hanger welded on but otherwise a very clean suv. Not bad for $2500.

Still need to change the ****** fluid and few other things but it looks pretty good so far. The frame's starting to rust but i'll spray some fluid film on it.
 

logan_gibson

Well-known member
Joined
Oct 8, 2015
Messages
65
Refinished a wheelbarrow someone was throwing out, I've got a new/better wheel for the front, but I've gotta make an axle for it or make a sleeve for the old one.
IMG_9509.jpg

Also assembled my 3 1/2 vice I got for free, Still need to located a swivel clamp. Does anyone know if wiltonviseparts.net is a reliable source?

IMG_9489.jpg
 

BleedingBlue

Well-known member
Joined
Dec 27, 2012
Messages
271
Location
Indianapolis
I attempted to cut and install crown moulding for my basement columns. Of course my columns are way out of square so my ends line up terribly.

This is my first time doing crown molding and it is not fun haha


Sent from my iPhone using Tapatalk
 

zmotorsports

ALLIANCE MEMBER
Joined
Oct 20, 2009
Messages
21,427
Location
Northern Utah
Didn't do much in the shop last night other than a BS session. I had a friend whom I met online and have communicated with many, many times via an rv forum, telephone and emails stop by. He is from North Carolina and was heading back home from an Alaska trip and decided to take a southern detour to meet up with me. Awesome night of BSing, comparing notes and hanging out in my shop. Great guy.

Mike.
 

JimVonBaden

Well-known member
Joined
Dec 2, 2011
Messages
15,716
Location
Northern Virginia
JVB,

are you posting your XS400 build somewhere? Like at the XS400 forum? I'd like to see how you are coming along. I have a 1980 model that I restored to full stock. Thinking of looking for another one to make it into a cafe project.

Tell us more about those 25 pounds of washers... I thought I had a ton but you take the cake.

There and on ADVRider, full build thread on ADV: http://advrider.com/index.php?threads/1981-yamaha-xs400-scramblerized-eventually.1092208/

The 25 pounds of washers started as 50 pounds! :D

A friend gave me a box of them when his company, AOL was tossing out a couple of tons of unused hardware. I also got many pounds of nuts and bolts, and misc hardware.
 

Outlander

Well-known member
Joined
Jul 30, 2010
Messages
5,154
Location
Quebec, Canada
Last edited:

phayzer5

Member
Joined
Apr 21, 2015
Messages
20
Location
Gainesville, FL
Re: What did you do "IN" your garage today?

Reassembled my new $5 toolbox after a quick repaint last week. Badge seems legit
 

Attachments

  • uploadfromtaptalk1470187004246.jpg
    uploadfromtaptalk1470187004246.jpg
    41.3 KB · Views: 122
To avoid these ads, REGISTER NOW!
Top Bottom