Re: The Lone Beech Garage Build Thread (60x46)
Continued...
Having dealt with the cable in the Power Post, the instructions now turned to some of the hydraulic lines. These instructions were particularly vague.
There are 4 lengths of Hydraulic Hose included in the parts package. Three of the hoses are the same diameter but different lengths. The one thicker hose appears to be the hose that brings hydraulic fluid from the pump. One has to skip ahead to Step 10 to see a drawing of these hoses. This drawing does not include the 3rd small hose. Some head scratching resulted until a note was found that indicated a "13 inch extension hose" must be added if configuring the lift in the "Wide" configuration. A brief explanation followed about the hardware required for this option (which was included in the parts box).
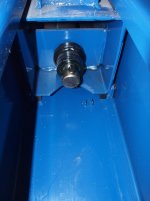
A hydraulic cylinder protrudes below the carriage. It has a plug that needs to be removed with a 10mm wrench.

This hydraulic line must be placed into the post so that its fitting will be able to be fastened to a fitting in the hydraulic cylinder. So this fitting will live at the very bottom of the post.
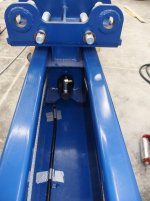
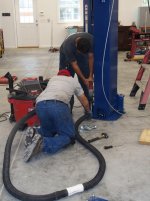
A hydraulic fitting is torqued into the Hydraulic Cylinder. Care must be taken to point the fitting in a direction that will allow it to mate with the hydraulic line pictured above. Once this fitting is fastened to the Hydraulic Cylinder, the Cylinder is rotated about 180 degrees so that the fitting is now close to the wall of the post - and pointing in the opposite direction.
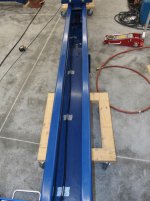
The hydraulic lines are placed in little hose clips. The instructions note that "It may be necessary to tie hoses... ...using nylon tie straps or wire." I see no way to secure the hose to the hose clips using wire or straps. For the moment, I've used some duct tape.
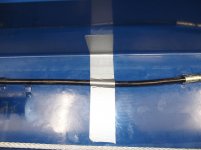

A lesson learned was that the duct tape must be placed so that the plastic blocks that the carriage uses as "bearings" will not rub on them. Initially I was too generous with the tape and it was pulled up when the carriage's bearings rubbed over them.
Also, I assumed that the "hose clips" should line up so I skipped one when I was placing the hydraulic line. I assumed that one "odd" clip would be used for a wire bundle or such. Now I'm having second thoughts. I'll probably call BendPak and ask about that before setting the post upright.
Continued in next post...
Continued...
Having dealt with the cable in the Power Post, the instructions now turned to some of the hydraulic lines. These instructions were particularly vague.
There are 4 lengths of Hydraulic Hose included in the parts package. Three of the hoses are the same diameter but different lengths. The one thicker hose appears to be the hose that brings hydraulic fluid from the pump. One has to skip ahead to Step 10 to see a drawing of these hoses. This drawing does not include the 3rd small hose. Some head scratching resulted until a note was found that indicated a "13 inch extension hose" must be added if configuring the lift in the "Wide" configuration. A brief explanation followed about the hardware required for this option (which was included in the parts box).
A hydraulic cylinder protrudes below the carriage. It has a plug that needs to be removed with a 10mm wrench.
This hydraulic line must be placed into the post so that its fitting will be able to be fastened to a fitting in the hydraulic cylinder. So this fitting will live at the very bottom of the post.
A hydraulic fitting is torqued into the Hydraulic Cylinder. Care must be taken to point the fitting in a direction that will allow it to mate with the hydraulic line pictured above. Once this fitting is fastened to the Hydraulic Cylinder, the Cylinder is rotated about 180 degrees so that the fitting is now close to the wall of the post - and pointing in the opposite direction.
The hydraulic lines are placed in little hose clips. The instructions note that "It may be necessary to tie hoses... ...using nylon tie straps or wire." I see no way to secure the hose to the hose clips using wire or straps. For the moment, I've used some duct tape.
A lesson learned was that the duct tape must be placed so that the plastic blocks that the carriage uses as "bearings" will not rub on them. Initially I was too generous with the tape and it was pulled up when the carriage's bearings rubbed over them.
Also, I assumed that the "hose clips" should line up so I skipped one when I was placing the hydraulic line. I assumed that one "odd" clip would be used for a wire bundle or such. Now I'm having second thoughts. I'll probably call BendPak and ask about that before setting the post upright.
Continued in next post...
Last edited: