To avoid these ads, REGISTER NOW!

Installing New Floorpans, Welding Questions, Robert, TW, HDFLX?

bulletpruf

Well-known member
Joined
Nov 28, 2013
Messages
11,136
Location
San Antonio
Fellas -

Cut and pasted a pic from my build thread; could use some input on how to do this. I have limited experience welding. FYI - using a Miller 211 MIG with .023 Lincoln wire, should be 75/25 mix of shielding gas (argon/CO2).


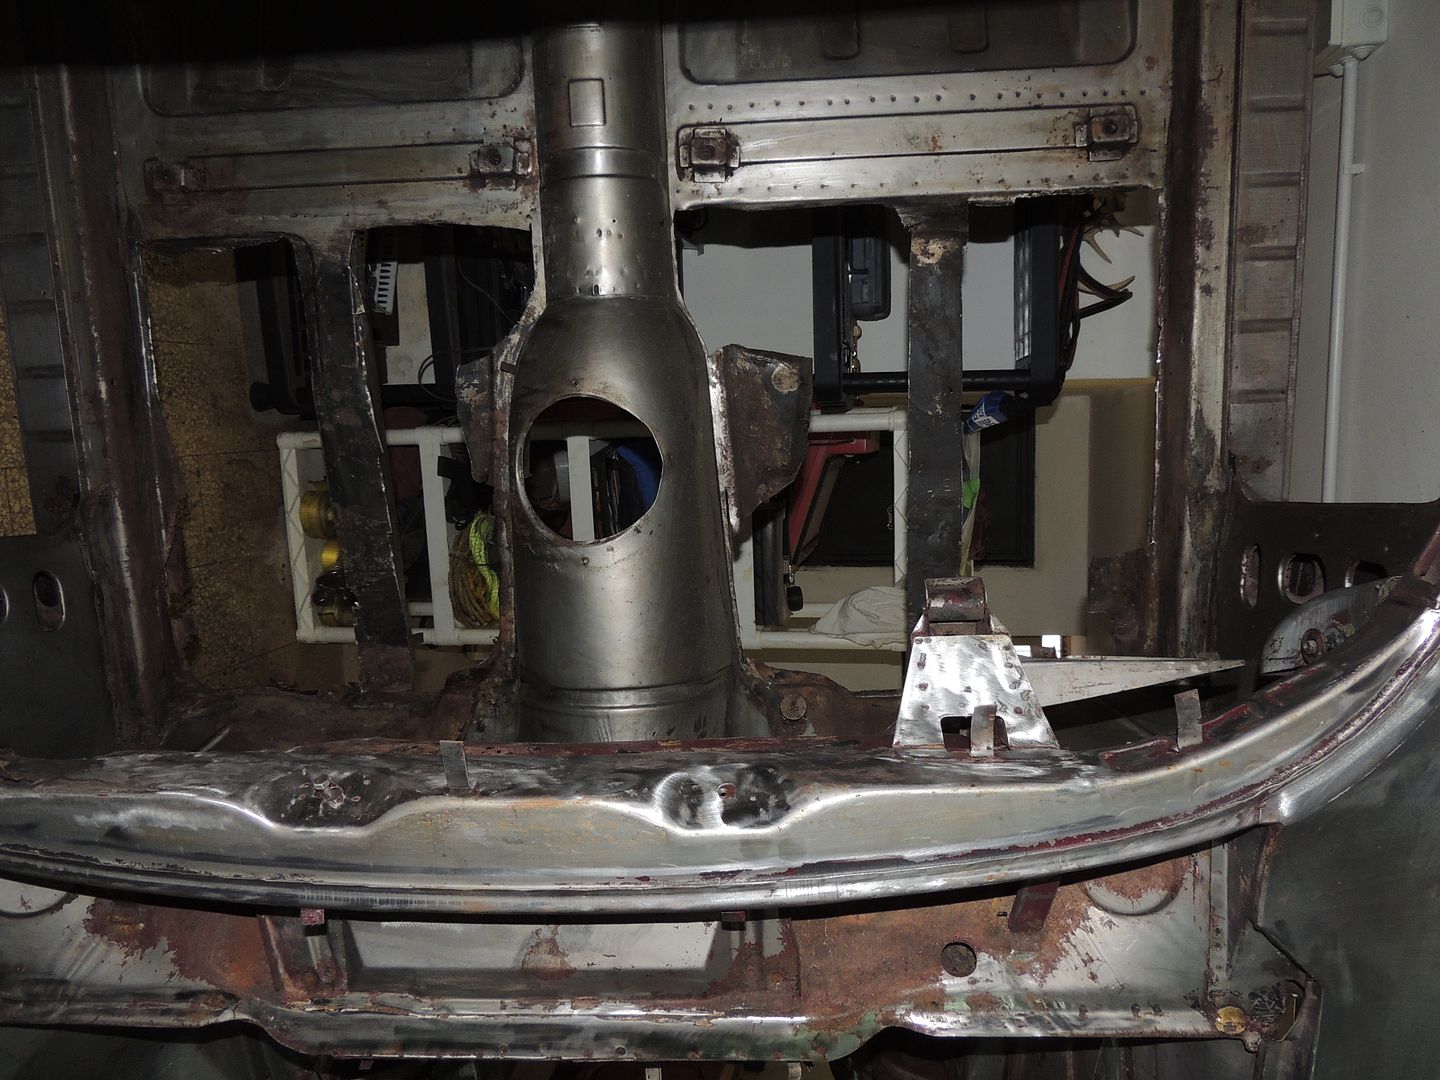
So, here's a picture of the floor. Looking from the top of the car towards the ground (you can see the back wall through the floor because the car is on a rotisserie tilted at a 90 degree angle). As mentioned above, I was just cutting the old metal out of the way so it would be easier to get to the spot welds to drill them out.


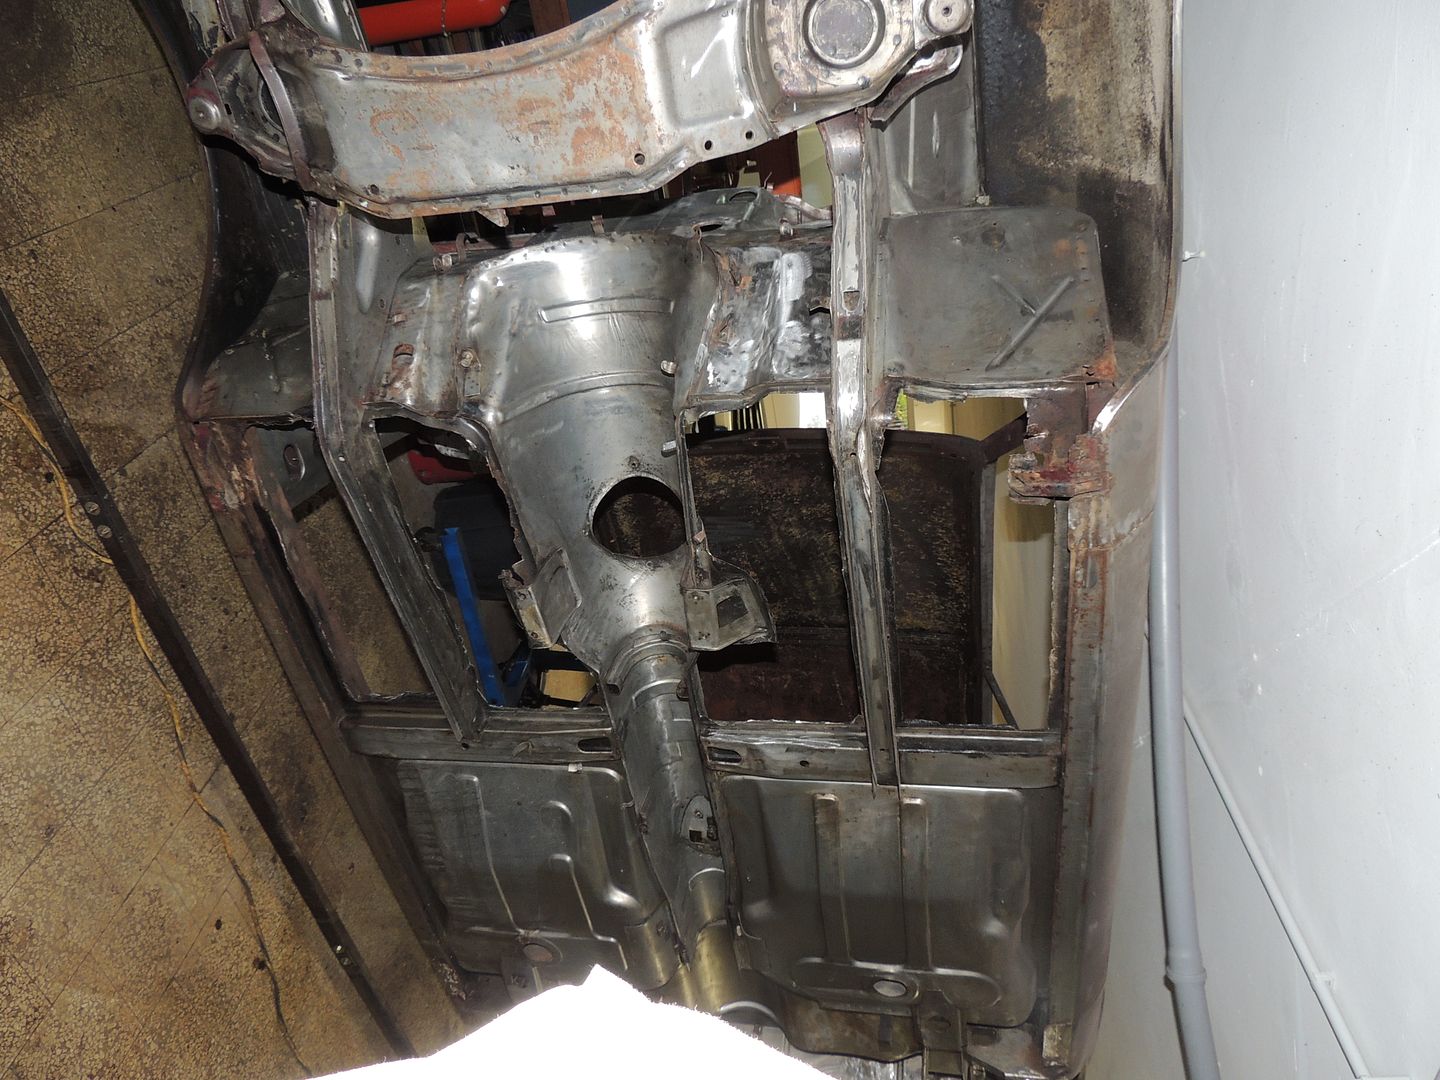
And a view from the bottom looking up -- you can see the chassis legs that run underneath the floor pans.


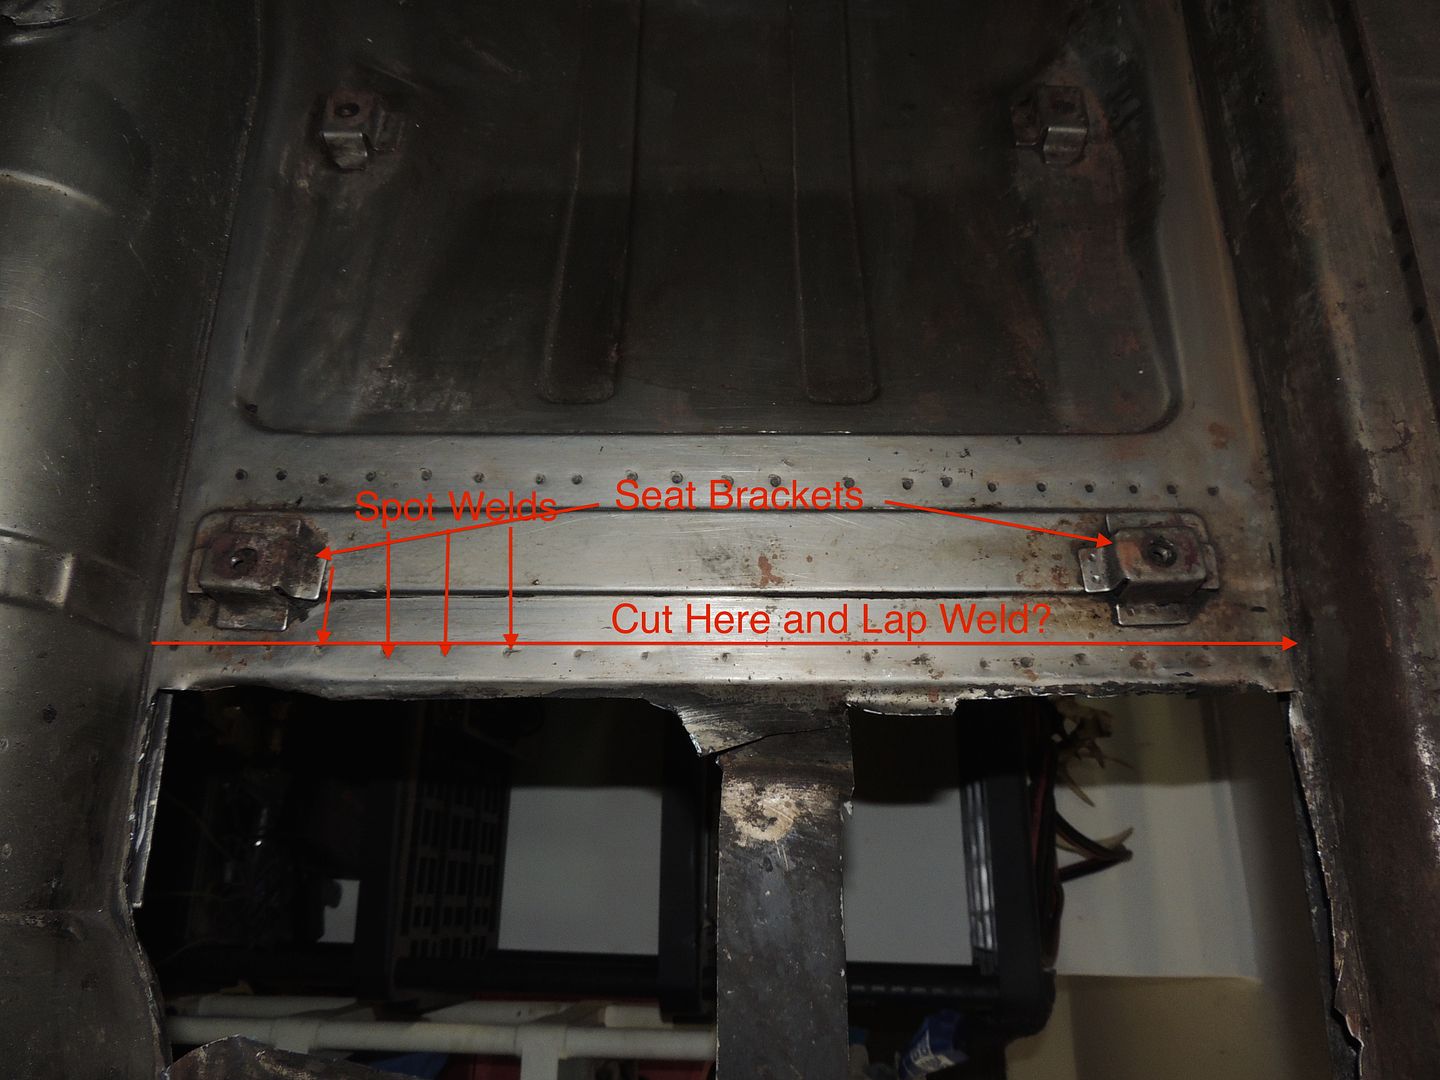
And the money shot -- that's the driver's front floorpan that's been cut out. I bought half floor pans new, and they are long enough to cover the area where the two front seat brackets are (the ones closest to the cut out metal). However, I'm trying to figure out the best way to fit and weld it up. I'm thinking that I can cut the old floor again between the two rows of spot welds. That way, the old floor would be secured by spot welds in that area and so would the new one. Then I could **** weld the two together, or I could also try to put a bit of a flange in the new piece and lap weld it over the original section. Suppose if I did that, I could do a bit of plug welding in the overlapped area, too, but that might be overkill. If I cut it in that spot, I would not have to mess with removing and re-welding the seat bracket mounts.

Curious to hear thoughts or recommendations!


Thanks

Scott
 
To avoid these ads, REGISTER NOW!

TimeWarpF100

Well-known member
Joined
Aug 21, 2010
Messages
6,784
Location
not here
Anyone here? Hello? Bueller?

What do the new floor pans look like? Are they OEM or repops?

Since the floor brace looks solid I would drill out the spot welds and cut down center of lip on cross support Pretty much where you have the line. Be nice to see a pic of new pans.
What size are the spot welds? Looks to be about a 1" wide area or less you have to work with?


I have not been on in a while so missed it until now just as I was going to quit for the night. Will look at photo's better in morning when my eyes are not trying to close
 
Last edited:
To avoid these ads, REGISTER NOW!
OP
B

bulletpruf

Well-known member
Joined
Nov 28, 2013
Messages
11,136
Location
San Antonio
What do the new floor pans look like? Are they OEM or repops?

Since the floor brace looks solid I would drill out the spot welds and cut down center of lip on cross support Pretty much where you have the line. Be nice to see a pic of new pans.
What size are the spot welds? Looks to be about a 1" wide area or less you have to work with?

I have not been on in a while so missed it until now just as I was going to quit for the night. Will look at photo's better in morning when my eyes are not trying to close

TW -

Floor brace is solid. Will have to post pics of the new pans later; I'm in Macedonia for work until late Friday night. Yes, area I have to work with is about 1" wide.

I'm using 5/16" spot weld cutters so the spot welds are probably about 1/4".

What would you use to cut the floorpan? Cutoff wheel? If so, any trick to limiting the depth so I don't gouge the floor brace?

thanks!

Scott
 

dnroe

Well-known member
Joined
Nov 4, 2010
Messages
113
Location
Easley, SC
What you have left in place looks really nice so I would not cut out any more metal. I replaced my trunk pan in the same manner by cutting it directly over the top of the rear frame rail. The flange on the frame rail was around an inch in width so I cut just inboard of the row of spot welds using a cut off wheel. Just cut it slowly almost all the way through and then pop the scrap piece off so you dont cut the bottom rail. Cut your replacement panel as close as possible to an exact fit and then but weld together. If there is room at all do your cutting on the bad side of the spot welds and try to leave them in place. Anytime I can I try to leave factory spot welds in place because it is less work not having to drill,plug weld and grind them down. Also it keeps the factory look by leaving them in place. By but welding the panel directly over the factory support you can get by with a slightly looser fit with the replacement panel, you can crank the amps up a little getting full penetration and you dont have to jump around quite as much with less of a chance of warpage. The biggest plus is you shouldnt have any metal finishing to do on the bottom of the panel and it will be seamless in that area. A little extra time thinking about where you make your cuts can save you loads of time and hassle in the long run on these types of projects.
 
OP
B

bulletpruf

Well-known member
Joined
Nov 28, 2013
Messages
11,136
Location
San Antonio
What you have left in place looks really nice so I would not cut out any more metal. I replaced my trunk pan in the same manner by cutting it directly over the top of the rear frame rail. The flange on the frame rail was around an inch in width so I cut just inboard of the row of spot welds using a cut off wheel. Just cut it slowly almost all the way through and then pop the scrap piece off so you dont cut the bottom rail. Cut your replacement panel as close as possible to an exact fit and then but weld together. If there is room at all do your cutting on the bad side of the spot welds and try to leave them in place. Anytime I can I try to leave factory spot welds in place because it is less work not having to drill,plug weld and grind them down. Also it keeps the factory look by leaving them in place. By but welding the panel directly over the factory support you can get by with a slightly looser fit with the replacement panel, you can crank the amps up a little getting full penetration and you dont have to jump around quite as much with less of a chance of warpage. The biggest plus is you shouldnt have any metal finishing to do on the bottom of the panel and it will be seamless in that area. A little extra time thinking about where you make your cuts can save you loads of time and hassle in the long run on these types of projects.

Thanks for the details. Very helpful.

Scott
 
To avoid these ads, REGISTER NOW!
Top Bottom