To avoid these ads, REGISTER NOW!

Between 485 & 705 SQ/FT A Garage Rehabbed

Workspaces between 485 and 705 squarefeet.
OP
B

-Brent-

Well-known member
Joined
Dec 23, 2009
Messages
4,709
Location
Utah
How long had the kerosene been in storage? How has it been stored? I'd be wary of anything that's more than a few months old in a vented container.

I've just read the Kerosene is good indefinitely if sealed but (still) I have no clue. Also, I've read counter-opinions saying 6-12 months, assuming that's like what you said, in a non-sealed container. I just shot a text over to a guy I know that's big into disaster preparedness (or prepping as it's known by outside Utah).

His reply, "Sealed - I keep 1k ten years. No microbial growth problems because all my fuel is sealed and if your buying someone's stored fuel, likely theres is good to. I used my oldest container last winter and it looked "new" and fired without issue. My fathers opinion is that it will last longer. I have had to treat diesel every year to make it last but that was in vented cans."

I trust this guy's opinion as I've been around him enough. He's really dedicated to it. But, he's really stringent about things. I was just looking for a place to get some fuel when I need it. In looking for a place is where this opportunity came up.

Other than that, I have no clue. Our family would survive less than a week on the food in the house before they resort to putting me on a spit and roasting me. :lol:

What I don't want to be doing is storing any more than I need since the plan is to install a mini split this coming summer.
 
To avoid these ads, REGISTER NOW!
OP
B

-Brent-

Well-known member
Joined
Dec 23, 2009
Messages
4,709
Location
Utah
Here's a bit of an aside question:

I've been bringing items over to the guy I have do a bunch of painting for me - some stuff to hang in the shop when it's finished. He does some really great stripe/sign work but the stuff I bring him is like asking him to work left-handed. :D

Anyway, when it comes to color, I am a simpleton. If it's outside my simple style, artistically and color-wise I'm pretty intimidated. Which is why I leave the art and color up to the artist. This tank is the fuel tank in my barnstormer old roadster. It's crude, mostly, but it has a few neat parts here and there.

This tank, where the black is, is where I prepped for the tig. I wanted the black to cover those areas and to give it a finished, purposeful vibe. The apple/lime green is something that could have very well been used in the era of my car (it was a Model A wheel color and have seen striping this color on era correct vehicles) but to my eye, especially looking so freshly painted, it looks off a bit. Is it me?

A guy on IG said when it's worn it'll look good and I agree. Either way, I'm leaving it, because I actually dig when things are a little unsettling. Still, I'd love your opinion. My first choice was a white line. I think that, too, would have looked a bit out of place, as well.

What say you?
 

bdbecker

ALLIANCE MEMBER
Joined
Nov 18, 2015
Messages
5,573
Location
Iowa
I totally agree with everything your buddy is saying. I was just pointing out that the container in which its stored, and for how long its been in storage is important, but it sounds like you've done your homework. :thumbup:
 
OP
B

-Brent-

Well-known member
Joined
Dec 23, 2009
Messages
4,709
Location
Utah
...

I was just pointing out that the container in which its stored, and for how long its been in storage is important, but it sounds like you've done your homework. :thumbup:

I got ya. I should've combined both times I quoted you.
 

drivesitfar

Well-known member
Joined
Oct 23, 2013
Messages
36,037
Location
Pacific Northwest
BRENT: compressor and shop are coming along nicely. sorry to see you broke that big fitting, but i doubt HD will replace it after installation.

i've never had Kerosene go bad like gas can, but i didn't know for sure so i can't say for sure that it wouldn't and i've stored in plastic and metal cans. i'd probably offer $2.50 per gallon used just in case if the lady might accept it, but i think it was $10 per gallon the last time i bought some so not cheap that is for certain if you want new stuff.
 

krcoomer

Well-known member
Joined
Jul 22, 2016
Messages
379
Location
Bluegrass region
Brent: I saw your tagline about a 2 bay concrete block and was intrigued. Seeing what you have done with yours has me hooked. I see very few block garages on here and am still trying to figure out what to do with my 24X24. Your thread will be a go to for me as I go forward. I did not see if you mentioned the height of your walls, but they look higher than my 7' walls. I have a hip roof with sagging hip ties which I have planned to replace when I replace the roof in a year or so, but your beam setup has given me ideas that may accelerate my plans.

On another note, around here K-1 kerosene is sold at some gas stations. It is usually a separate pump off to the side of the parking lot. It might be worth your while to check for it. Pricing is much lower than the sealed cans you can get at box stores.
 
OP
B

-Brent-

Well-known member
Joined
Dec 23, 2009
Messages
4,709
Location
Utah
BRENT: compressor and shop are coming along nicely. sorry to see you broke that big fitting, but i doubt HD will replace it after installation.

i've never had Kerosene go bad like gas can, but i didn't know for sure so i can't say for sure that it wouldn't and i've stored in plastic and metal cans. i'd probably offer $2.50 per gallon used just in case if the lady might accept it, but i think it was $10 per gallon the last time i bought some so not cheap that is for certain if you want new stuff.

Hey Drives, thanks.

I didn't even bother returning it. They'll pretty much take anything back, from what I have experienced but I forgot to grab it out of the bin so now it's off to China to become something new and of equally poor quality. :D

I certainly am learning my share about kerosene. I just paid $6.50 a gal at a place not all that far from me. At HD it's a little less than ten bucks a gallon. I only bought that once to get the thing running before I found a place that sells it at the pump. If that were my only choice, I'd adjust the pressure and run diesel and deal with the smell.
 
OP
B

-Brent-

Well-known member
Joined
Dec 23, 2009
Messages
4,709
Location
Utah
Brent: I saw your tagline about a 2 bay concrete block and was intrigued. Seeing what you have done with yours has me hooked. I see very few block garages on here and am still trying to figure out what to do with my 24X24. Your thread will be a go to for me as I go forward. I did not see if you mentioned the height of your walls, but they look higher than my 7' walls. I have a hip roof with sagging hip ties which I have planned to replace when I replace the roof in a year or so, but your beam setup has given me ideas that may accelerate my plans.

On another note, around here K-1 kerosene is sold at some gas stations. It is usually a separate pump off to the side of the parking lot. It might be worth your while to check for it. Pricing is much lower than the sealed cans you can get at box stores.

Cool! Glad you can take something from this project. Thanks for posting up. Let me know when you start a thread, I'll be sure to follow along.

I think my wall height is just shy of 8 feet. I should know that, haha, I'll have to check the next time I'm out there.

I asked around and found a handful of places in the Salt Lake valley and just north or south of it. Luckily, one place that was recommended to me is about 5 miles away. Thankfully I won't be using it for more than this winter. This heater is just to get me through this season. By next winter I'll have a mini split.

Anyway, thanks for posting up! I appreciate it. And, like I said, I'll be on the lookout for what you do with yours.
 

drivesitfar

Well-known member
Joined
Oct 23, 2013
Messages
36,037
Location
Pacific Northwest
Brent: i know you've been working on so many things and doing a great job i might add, but did i miss where you had that garage door opener installed? i think you had a guy come fix the door and he was coming back to install the liftmaster you already owned, but can't recall if it was installed yet. if i missed it i'm just curious if you like yours as much as i like mine?

i have an idea i'm going to GET ORGANIZED and i'm going to keep working on my FSD (flat surface disease) while you are getting your little 31 or 32 running in 2017. here's to a great 2017 and Merry Christmas to you and your family.

cheers
 
OP
B

-Brent-

Well-known member
Joined
Dec 23, 2009
Messages
4,709
Location
Utah
just read thru your thread,

back to the garage door insulation, about how much weight do you think it added to the door?

I didn't know until I just looked it up. The sheets feel so light that I was surprised to see the weight is listed at 7lb a sheet. However, they list that same weight for the 1" so it could be a tad heavier.

To answer your question, I added about 25 lb. I used roughly three and a half sheets. I can tell when lifting the door since I open the door manually, for the time being. But it's not too heavy that the balance is effected. I will have the springs re-tensioned when the opener is installed just to do things by the book.

Brent: i know you've been working on so many things and doing a great job i might add, but did i miss where you had that garage door opener installed? i think you had a guy come fix the door and he was coming back to install the liftmaster you already owned, but can't recall if it was installed yet. if i missed it i'm just curious if you like yours as much as i like mine?

i have an idea i'm going to GET ORGANIZED and i'm going to keep working on my FSD (flat surface disease) while you are getting your little 31 or 32 running in 2017. here's to a great 2017 and Merry Christmas to you and your family.

cheers

Opener isn't installed yet due to the rails not being secured. Once I get the rails secured, I'll have the guy come in and do the opener and the re-tensioning. I'm looking forward to it.

Want to get rid of FSD? Get rid of 50% of the FS (flat surfaces) and you'll be half-way there.

There is stuff on my bench, at the moment, but it would take less than 5 minutes to get it all put back (to where it belongs) and ready to go again.

Now, If I could stop leaving things leaned up or on the floor, I'd be great. I have NO suggestions for that! Haha.
 
Last edited:

drivesitfar

Well-known member
Joined
Oct 23, 2013
Messages
36,037
Location
Pacific Northwest
Brent: your idea for my cure for FSD is sound thinking, but i consider shelving, tops of tool boxes, floors and even exercise machines as flat surfaces. the best thing i've seen so far besides getting rid of all our STUFF which isn't an option is to find a spot for everything so that pile on a bench, shelf or floor can be put away and more importantly found later.

cheers and thanks for the laugh
 
OP
B

-Brent-

Well-known member
Joined
Dec 23, 2009
Messages
4,709
Location
Utah
Ah, I see.

I have been working on having a place for everything. For me, that's been big. As well, sometimes the best place for things is in the bin, donated or passed on to a new owner. That wasn't a hard thing for me but some really have a tough time giving up stuff.

An odd thing happens when you do things like you've never done before. It's sort-of a conflicting-yet-positive experience, at first, because it goes against your bad habits or old way of being. Now, a couple months in, not only am I used to it (re-habituated) - I actually enjoy the space.
 
Last edited:

drivesitfar

Well-known member
Joined
Oct 23, 2013
Messages
36,037
Location
Pacific Northwest
BRENT: i hear you. i actually did that with my closet last Christmas and donated 6 bags of clothes i wasn't wearing. i actually could get the clothes i washed and used back in the closet after that, but i need to do it again.

that said we are talking about tools and supplies and OUR STUFF in the garage, but maybe i'll get my brain wrapped around that idea.

thanks for the support and good words.

cheers and have a great day
 
OP
B

-Brent-

Well-known member
Joined
Dec 23, 2009
Messages
4,709
Location
Utah
Also, Drives, the tops of the boxes is now a major eye sore for me. It's a place I have too much ****, too. That's on the mental to-do list of problems to solve.

I'm not sure how to utilize that space so it doesn't collect junk.


Here's an embarrassing pic of the box tops.
 

Gerald O

Well-known member
Joined
Mar 5, 2013
Messages
1,884
Location
NC
That's why I don't like top boxes on my tall tool chests. They are too high to see into and always collect junk.
Sorry, don't have any suggestions. Mine are a mess too!
 
Last edited:

drivesitfar

Well-known member
Joined
Oct 23, 2013
Messages
36,037
Location
Pacific Northwest
Brent: i'm into maximizing space so in your case i'd build a shelf just about the open top box an inch or two and put all that misc. STUFF in clear plastic boxes or if you like the solid black or grey ones then duct tape and a sharpie to tell you what is where.

i've got an entire house built out of cement block and most of the mollies with screws can hold a lot of weight. i'll get pictures of the ones i use if you want me to.

cheers
 

krcoomer

Well-known member
Joined
Jul 22, 2016
Messages
379
Location
Bluegrass region
Brent: i'm into maximizing space so in your case i'd build a shelf just about the open top box an inch or two and put all that misc. STUFF in clear plastic boxes or if you like the solid black or grey ones then duct tape and a sharpie to tell you what is where.

i've got an entire house built out of cement block and most of the mollies with screws can hold a lot of weight. i'll get pictures of the ones i use if you want me to.

cheers

Please do share your mollies. I have used more TapCons than I care to think about and they often do not feel secure when the load is taken off of them.
 

polexican23

Banned
Joined
Jun 11, 2013
Messages
2,168
Location
burbs-Illinois
I didn't know until I just looked it up. The sheets feel so light that I was surprised to see the weight is listed at 7lb a sheet. However, they list that same weight for the 1" so it could be a tad heavier.

To answer your question, I added about 25 lb. I used roughly three and a half sheets. I can tell when lifting the door since I open the door manually, for the time being. But it's not too heavy that the balance is effected. I will have the springs re-tensioned when the opener is installed just to do things by the book.


i contacted DDM the garage door company that sold me my garage door highlift kit, if the difference is actually a full 25 lbs, you would need new springs for the door. The maximum amount you have to play with by adding or subtracting turns is probably 10 lbs, maybe 15 at the absolute max.

Guess i will have to find a lighter material.
 
To avoid these ads, REGISTER NOW!
OP
B

-Brent-

Well-known member
Joined
Dec 23, 2009
Messages
4,709
Location
Utah
i contacted DDM the garage door company that sold me my garage door highlift kit, if the difference is actually a full 25 lbs, you would need new springs for the door. The maximum amount you have to play with by adding or subtracting turns is probably 10 lbs, maybe 15 at the absolute max.

Guess i will have to find a lighter material.

What size is your door? Mine is a 16x7, if that helps.

That's interesting that a company would sell a kit that has a spring sized for the uninsulated door without the "room" to add insulation. Like I said, I was surprised to see the weight was 7lbs per sheet. I would have guessed less.
 

NedNorton

Well-known member
Joined
Jul 14, 2012
Messages
608
Location
Colorado, USA

Really? Really? You sure know how to make a guy feel like a slacker. And just before the holidays too! Here I thought I was going to spend some quality time with the Lady over the break. Now I have to revise my compressor plumbing plan. :wtf:

Any chance you could PM me the part numbers for the desiccant dryer? :D

Seriously...Great work! And, you say that I'm detail oriented? The torpedo level is just icing on the cake. :bowdown:

Brent, Hope you and the family have a great holiday and happy new year! It's been a real treat reading your thread and I can't wait to see what's to come in 2017.

Cheers,
Chris
 
OP
B

-Brent-

Well-known member
Joined
Dec 23, 2009
Messages
4,709
Location
Utah
Chris, I'll get the part numbers together and PM you. I'll post them up, as well, after I send them to you.

And, thanks, man! It's not done, yet, though. I do have all the parts to do so, so the plan is to get everything plumbed and do a leak test before I have to go back to work on Tuesday.
 

Finallygotit

ALLIANCE MEMBER
Joined
Jul 6, 2013
Messages
4,089
Location
Tucson, AZ
Awesome lamp, Brent!

And Finallygotit, thanks to your post I just figured out that my lamp is a Dazor 1102!

attachment.php

Brent, small sidetrack here as we were discussing these lights at work today. Back when I was working in a machine shop, we used to have two of these lights on every milling machine. We would take one light, leave it as seen here and take the other one and flip the lamp cover upside down to face each other to heat our lunches wrapped in aluminum foil. :thumbup:

We now return you to your regularly scheduled program, I mean thread.
 

drivesitfar

Well-known member
Joined
Oct 23, 2013
Messages
36,037
Location
Pacific Northwest
Brent: i saw on another you had a birthday Christmas Eve. true? HAPPY BIRTHDAY and even though you had to share your birthday with Christmas at least you most likely ALWAYS GET A PARTY.

CHEERS!!

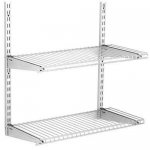
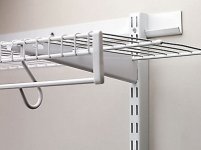
ALL: here's some of the plastic mollies i use to hang these Rubbermaid type shelving i've used on my cement block walls. I haven't used the horizontal hanging brackets to hang the vertical shelving so i use the plastic mollies with longer deck (3 inch) screws instead of the screws that come in the package if you buy mollies with screws. i've used these wire shelving in my closets, but in the garage and in my office i've used wood ones.

i've had several hundred pounds of books and stuff on shelving and not a failure yet using these in the last 20 years. i'm sure there are better ways and if you want to hang cabinets i'd suggest a FRENCH CLEAT made out of wood or steel especially if you want to load it up with a lot of weight.
 

Attachments

  • 20ec260e-f015-43ae-9a5e-7bf1721183b8_400 (1).jpg
    20ec260e-f015-43ae-9a5e-7bf1721183b8_400 (1).jpg
    10.3 KB · Views: 65
  • $_3.jpg
    $_3.jpg
    21.4 KB · Views: 62
  • adjustable-shelving-xlarge-1.jpg
    adjustable-shelving-xlarge-1.jpg
    19.8 KB · Views: 76

54earl

Well-known member
Joined
Jan 7, 2012
Messages
55
Location
Eastern Idaho
Thanks for the air dryer idea and the inspiration, now I just need to get my snow boots on to make it out to the shop.
 
OP
B

-Brent-

Well-known member
Joined
Dec 23, 2009
Messages
4,709
Location
Utah
Brent, small sidetrack here as we were discussing these lights at work today. Back when I was working in a machine shop, we used to have two of these lights on every milling machine. We would take one light, leave it as seen here and take the other one and flip the lamp cover upside down to face each other to heat our lunches wrapped in aluminum foil. :thumbup:

We now return you to your regularly scheduled program, I mean thread.

Haha, machinist ingenuity.
 
OP
B

-Brent-

Well-known member
Joined
Dec 23, 2009
Messages
4,709
Location
Utah
Thanks, Drives, I appreciate it.

Thanks for the air dryer idea and the inspiration, now I just need to get my snow boots on to make it out to the shop.

You're welcome! I still haven't had a moment to sit down and put all the part numbers together. (Sorry, Chris!) I'll get them together by tomorrow, the latest.
 
OP
B

-Brent-

Well-known member
Joined
Dec 23, 2009
Messages
4,709
Location
Utah
Re: DIY Desiccant Air Line Dryer Info

Here's the info for the DIY Desiccant Air Line Dryer (HAP Dryer):

Hard Parts:

-2" tee (black or galv)
-2" sightglass from McMaster-Carr PN: 1079K17
-3/4 x 3/8 black bushing PN: 29-0824 (or L29-0824 from Marshall's Industrial Hardware)
-2" x 3/4" bushing PN: 30-5856 (or L30-5856 from Marshall's Industrial Hardware)
-3/8 male end air couplings
-Filter washers: Do-It best PN: 725512 (come in a pack of 3)

I used a 36" piece of pipe. But, really you could use anything from 12" to 48" since those ready-cut and threaded pieces are available commonly. It gets expensive, so be warned.

Also, you will need some epoxy for the screen filters and some pipe dope.

And, for the kids that like pics, here you are:


Special thanks to HAP for posting this style build a while back.
 
Last edited:

920kip

Well-known member
Joined
Aug 11, 2011
Messages
168
Location
Titletown USA
Great job Brent

I have been following your thread since it started. So it was about time I chimed in.
Your very detail orientated. Which is very enjoyable to follow. I am always looking for a better way to do things. Threads like yours... showing the steps, is very helpful and interesting. Happy Holidays
Kip
 
OP
B

-Brent-

Well-known member
Joined
Dec 23, 2009
Messages
4,709
Location
Utah
Great job Brent

I have been following your thread since it started. So it was about time I chimed in.
Your very detail orientated. Which is very enjoyable to follow. I am always looking for a better way to do things. Threads like yours... showing the steps, is very helpful and interesting. Happy Holidays
Kip

Thanks, Kip. I appreciate it. I've been slacking for the last couple weeks with the end of year festivities and such. Now all the junk out in the yard is all covered in snow. The next couple weeks I plan to dig in and get as much done as possible.
 
OP
B

-Brent-

Well-known member
Joined
Dec 23, 2009
Messages
4,709
Location
Utah
Took a few minutes out in the cold shop (it was sub-30s out there (that's below zero for you metric folks)) and messed with a Solberg filter/silencer.


But first, I wanted to get a db reading to see if there will be any improvement.


Not horrible but being in a corner definitely amplifies the sound. I put the muffler in without and fittings and it reduced it a bit, not in db level but in the reduction of the intake "pop" sound the small filter made/allowed. Unfortunately no pic but I did get a vid (posted on IG under KungFuBowler).


Each step helped a bit.


This is the final set-up, for the evening. Even though it's not a huge drop, numbers-wise. It has a softer sound. I was hoping for a little more than I got, based on reviews I had read but there are always differing variables impacting results. I know it wasn't easy to talk with the old filter, I wonder how it will be now? I think it will be better.


There's more that I can do like run the filter into the attic, use a section of hose, buy a silencer, etc., but for now, this is it. Although it runs fine, I think I may go through the pump, down the road, and freshen it up. I'd rather save some money for that.
 

driftpin

Well-known member
Joined
Dec 22, 2016
Messages
11,289
Location
Miami-Dade/Broward Co. Florida
I'm only up to p.6 now, but I'm interested to see the second-half of the thread. Your experience and work is similar to mine. We did a complete re-model of our urban single-family detached dwelling. Part of this was a reconfiguration of the floorplan, and that involved the garage. Before it was only a car-and-a-half due to the prior owner having put a full bath where the 'other-half-car' went. My wife wanted a gourmet 'trophy kitchen,' including a pantry, we decided to combine the pantry w/a laundry room, as the house isn't that-big. So, the layout became a short hall leading to the garage, w/a laundry room/pantry on one side, and a full bath (shower, not a tub) on the opposite side. My wife says, "you can come-in from the garage, use the bath to clean-up, and step-across to the laundry to drop dirty clothes into the laundry." Actually, it does work well.

We bumped the front of the garage forward to the front property setback. The entire front of the garage is poured concrete, and it's got almost 1" rebar in it, and a lot of it. All four garage walls are CMU (block) as this is south FL, hurricane country, and termite central. Actually the Hurricane campus is a block-&-a-half down the street (U-Miami) which is the alma mater of my wife and the two kids. Mom & daughter are both EE's. Our son's undergrad degree is computer science, so he gets me the best deals when I tell him, "OK, I'm ready to upgrade my iPhone 4."

So, the garage got new single overhead doors. In the pic you can see the Liftmaster in the upper-left. The Liftmaster system I have on both doors, it's worked great, I haven't hooked up the remote lights supplied w/the units, because I have a shop light switch on the middle divider between the doors. I made good use of the install for the Liftmaster by having a high-lift track for the OH doors, and putting cleats on the side walls, and running 2 x 4's from side to side, above the OH doors, w/1/2" plywood sheets to make light-duty storage for bulky but light things.

The Liftmasters are quiet, out-of-the-way, and the installer who recommended Clopay OH doors in their highest spec because of the HVHZ (high-velocity hurricane zone) FL Building code requirements in coastal areas. They are double-walled, foam insulated, and have stout galvanized reinforcement to resist buckling and penetration (to test this, a P.E. acquaintance working for Miami-Dade County has an air cannon that fires a 2 x 4 at whatever building assembly is being tested, to check on its ability to resist penetration/failure). I don't have the time or help to try to do the install myself, and the guy did both doors, including the track, in one day. They also have OH-door-mounted solenoids that engage the track for positive locking shut. I'm including a shot of the Liftmaster, the OH door above-door lofts, and part of my workbench. I made the workbench using Craftsman framing, a lengthwise ripped 3/4" 4 x 8' sheet of plywood glued & screwed together, and topped by a 3/16 steel sheet.

Your shop round light is similar to what I came up with, I found a magnifying lamp and have it mounted on its swivel pin at one end of the workbench. I have an LED strip luminaire on the underside of a 30" Gladiator wall cabinet that provides lightiing by the bench grinder and that end of the workbench. Overhead lighting on the ceiling or suspended from it lights the rest of the workbench.

I had installed 4" sq electrical boxes, every 3' down the garage side walls, and electrical boxes on the enclosed garage end (connection to the dwelling), w/one between the OH doors, all are getting the single duplex outlets replaced w/a pair of duplex outlets. As part of a nearly-new entire home electrical upgrade (200 amp main branch circuit panel), I also got three 220 v circuits in the garage, one above the workbench for my Powermatic table saw, one above it for a new AC dedicated to the garage, and another on the common wall to the house for the compressor. You can never have too-many receptacles.

I also put in a 50' 3/8" air hose reel connected to my air compressor w/quick-disconnects, this is very useful to blow-out the shop after doing cutting or grinding, it prevents an accumulation of dust, and is quick and easy.

The Gladiator Track wall storage system works very well, the Craftsman Versa-Track I think it's called, actually has brackets that I like more-than the the Gladiator brand, the Craftsman ones have a cam-lock on one end that is much more-secure in-place on the wall. Like a 21st century pegboard, I like the stuff. It keeps stuff off the workbench yet easily accessible. Gladiator is a Whirlpool Corp. (Benton Harbor MI) brand.

Your cleaned-up space is much-more useful. Before the remodel, I could make little use of the garage space, and the wood garage door was termite-ridden, and not reliable, a danger in a hurricane zone. Now I just press the remote or use the keypad, and up it goes. It's my first door opener, yes, I've been deprived for far-too-long! A Millennial would never stand for that!

From a decision to make better use of space, to divesting myself of unneeded possessions, to building, the path my project took parallels yours. While I took some different routes to get similar results, the end result is much more-practical for my uses. I do most of the inside stuff myself, and my wife helps sometimes ("honey, hold this end") to make the 'man-cave' more practical, secure, and functional.

Now I'm gonna read the next half of your thread. You've done a great job of practical solutions.
 

Attachments

  • image.jpg
    image.jpg
    142.5 KB · Views: 239
  • 20161222_110158.jpg
    20161222_110158.jpg
    148.5 KB · Views: 264
Last edited:
OP
B

-Brent-

Well-known member
Joined
Dec 23, 2009
Messages
4,709
Location
Utah
Awesome post, Driftpin! Thanks for reading. From what I can see in your pics, I like your set-up. It looks pretty well-thought-out. I'm continually changing things around in my head before I make things final. Even with one air line up in the ceiling, not yet completed, I've thought of something I'd like to change.

As far as this building being block, it's in the wrong dang zip code!:D Man, does this thing bleed heat through the walls. Granted, the insulation has slowed loss through other areas but I'm really noticing the heat loss now that it's in the 20s or less.

Again, thanks for reading. I'm looking forward to some more time out there to get things finished.
 

Finallygotit

ALLIANCE MEMBER
Joined
Jul 6, 2013
Messages
4,089
Location
Tucson, AZ
Brent,

To stem the heat loss, have you considered putting this on your block walls?

Click here

You probably have but I thought I would throw it out there.

HTH
 
OP
B

-Brent-

Well-known member
Joined
Dec 23, 2009
Messages
4,709
Location
Utah
Brent,

To stem the heat loss, have you considered putting this on your block walls?

...

Dan, did you hear that huge sigh I made after reading your comment? :lol: Man, I crunched numbers around the time I began the demo of this place. I really REALLY considered running at least 1" polyiso on the interior and framing it out. In the end, my quest for maximizing space won (along with spending a little less, up front, and keeping the look) and now I think about it every time I see the thermometer drop.

With 2" thick walls I would have lost about 12 sq ft. of floor space. I thought that was too much, at the time.
 
OP
B

-Brent-

Well-known member
Joined
Dec 23, 2009
Messages
4,709
Location
Utah
Another small project in the shop, while the kids napped the day before Christmas I put together this gift from their uncle (my brother).


I got it all done (except for the stickers) before it was time to head over to be with family. I guess I'd be burning some midnight oil.

I didn't put the body graphics stickers on it but I did go into my stockpile and put on some sticker on the rear bumper.


And, I slapped a little gift to myself on the inside of my paint/chemical cabinet. :lol:


It was nice having some free space to work but it's still not as tidy as it will be, eventually.

Unfortunately, when I walked out of the shop, done for the night, it was snowing. We woke up to 16" of snow on Christmas so the Jeep didn't see any action but they're excited to be able to play with it. They're counting down to Saturday when we'll take them over to the church lot behind us.
 
Last edited:

Finallygotit

ALLIANCE MEMBER
Joined
Jul 6, 2013
Messages
4,089
Location
Tucson, AZ
Dan, did you hear that huge sigh I made after reading your comment? :lol:

Was that that sound I heard? :rolleyes:

Brent, I do understand.

I'm planning on starting a thread of my own and you will get to see the compromises I had to make as well.

Take care..........
 

littleviking

Well-known member
Joined
Sep 22, 2009
Messages
81
Brent

Hows it man? I havent checked in here in awhile due to holidays and traveling.

Also started really taking a hard look at all the **** thats accumulated in the time ive lived in the house.

the 3 months Ive now lived in the house. LOL

I started to remove reduce and rehome everything in my garage that needed it.

Then on Monday my wife made me buy a brand new 4 door wrangler.

So im kind of stuck working on that now instead of the garage.

I'm so upset about it. :rocker:

Nice stickering on the kids Jeep btw.

:-D
 

GJoustra

Well-known member
Joined
Jun 7, 2013
Messages
126
Location
Michigan
Awesome work Brent!! I have been switching gears myself and working in the shop to improve things. Working on my air compressor and insulating in the spring as the shop is a cool 30 degrees up here in MI
 
Last edited:
To avoid these ads, REGISTER NOW!
Top Bottom