To avoid these ads, REGISTER NOW!

Horse barn turned shop addition

dfairchild19

Active member
Joined
Nov 14, 2011
Messages
34
Location
Mid-Ohio
Hello to everyone. This is my first post after using this site for reference for quite a while. So much information here and thanks to everyone for sharing their ideas and experiences for others to learn from.

I'm looking into adding on to the back-side of my 24x32 barn. It started life as a 24x24 horse barn and an 8 foot addition was added on to the side of it maintaining/continuing the slope of the roof. The front 24x14 section and the 24x8 addition both have concrete in them.

I had planned to just throw some concrete in the back section where the horse stalls were but I got to thinking one day out in the barn. It would be nice to have an extra 12 foot of space off the back of the barn where the current lean-to is located. I thought I could just transplant the lean-to along with the existing rear doors and the rest of the rear of the barn onto the "new" rear section of the barn.

After some more thought, I think I want to add on the extra 12 foot of barn with a 12 foot covered patio off of the rear along with a larger overhead-type door and a man door all in the back. While doing all of this, I would also like to put LVLs in to replace the current posts in the middle of the barn along with the posts that are currently the back of the barn.

My ideas always seem to start very simple and usually end up more complicated than i can even follow in the end but this one, although large in size, seems very basic and straight forward with just a few major components:

- demo on the existing structure
- framing of the addition
- roofing/enclosing the addition
- replacing center posts with LVLs
- concrete
- permits

Like most guys here, I am a DIY guy at heart and will do most of the work myself with some help from my friends and family and I hope to utilize some advice and knowledge from some of you that have been there and done that.

I will post some pictures of the barn I am working with if/when I can figure it out.

Any advice or experience to share would be greatly appreciated.

Thanks and I look forward to hearing your responses.
 
To avoid these ads, REGISTER NOW!
OP
D

dfairchild19

Active member
Joined
Nov 14, 2011
Messages
34
Location
Mid-Ohio


This is the barn I am working with. My idea was to extend the barn, maintaining the existing roof geometry, out to the concrete slab (used to be a shed) that you see in this picture. Not sure if I could use that existing pad as part of the patio or if I would be more trouble than its worth to try to save the money. I think I calculated that I would need about 12 yards for both the rest of the barn and the patio.


You can see the lean-to I was going to try to transplant til I decided I want a covered patio. The concrete pad would work out nearly perfect as it is perfectly in line with the side of the barn and the space between it and the back of the current barn is right at 12 feet.


Here is the inside of the barn. It is pretty cluttered right now but you can see the structure I have to work with. It also shows why I want to add on to my barn! I would share some pictures of the front of the barn but I did not take any. I will add some later.

Feel free to share you opinions and thoughts on any area and I will be asking many questions along the way as I am very capable although not a professional contractor in any way.
 
OP
D

dfairchild19

Active member
Joined
Nov 14, 2011
Messages
34
Location
Mid-Ohio
I have decided to add on 24' with a 12' covered patio to the back of the barn instead of my original 12' with a 12' patio.

Starting to plan a bit deeper into this addition and ran into a few concerns and decisions to make:

Permits
- Do i need/want to jump through hoops to get the permits and inspections necessaryto do the work? I personally have never been through a permit process and maybe i just dont understand what all is involved in getting the required permits to do the work.
- Can I still go the diy route on this project with the permits?
- Will current code allow me to use the same structure design?

Adding height to the addition
- Maintaining the same height would be easier to just duplicate the existing structure
- Adding a couple of feet,2 or 4', to the height in the addition(Currently 8' to eaves of the existing structure) would possibly allow a 10' door and a lift

Structure Design of the addition
- Can I just duplicate the existing structure?
- Can I span 24' with the existing structure design without support posts using beams such as LVLs or steel beams?

I would like to hear any insight anyone might have with experience on the permits, design, structure, or anything else that could help me out with the planning and eventual building of this addition.

Thanks!
 

John in OH

Well-known member
Joined
Jun 2, 2007
Messages
2,444
Location
SE Ohio & Eastern Virginia
I have decided to add on 24' with a 12' covered patio to the back of the barn instead of my original 12' with a 12' patio.

Starting to plan a bit deeper into this addition and ran into a few concerns and decisions to make:

Permits
- Do i need/want to jump through hoops to get the permits and inspections necessaryto do the work? I personally have never been through a permit process and maybe i just dont understand what all is involved in getting the required permits to do the work.

No one can answer this question for you except your local village/township/county building dept. Every region of the country has different building code/permitting requirements.

I've never had any problems getting building permits in my VA county and sure wouldn't characterize the process as "jumping through hoops". Generally, the permitting and inspection process provides a reasonable function. Its intent is to assure that buildings are designed and build in a safe and durable manner for your climate and location. No one really wants their neighbor to build some POS shed in their back yard that looks like **** and isn't safe. Nor, would you want to buy a property with a detached garage and later find that it was built by an idiot that didn't know a 2x4 from cove moulding. And some of the dyi electrical work I've seen posted here on GJ is downright scary.

To help with your general questions you need to add your general location to your profile so folks can better answer your questions. Building practices are different in Florida vs. Montana.


- Can I still go the diy route on this project with the permits?

Generally, you can do the work yourself as long as your work can pass the inspections.

- Will current code allow me to use the same structure design?

Again, only your local building dept. can determine if you can use the same building technique as the current structure.

Adding height to the addition
- Maintaining the same height would be easier to just duplicate the existing structure
- Adding a couple of feet,2 or 4', to the height in the addition(Currently 8' to eaves of the existing structure) would possibly allow a 10' door and a lift

Depends on what you intend to do in this new shop. It doesn't appear to me it would be too difficult to increase the height of the new portion.

Structure Design of the addition
- Can I just duplicate the existing structure?

See above.

- Can I span 24' with the existing structure design without support posts using beams such as LVLs or steel beams?

You can easily span 24' with trusses. But, this may not match your existing structure or roof pitch. You can probably also span 24' with LVLs or steel beams, but, if you have a reasonably diligent local building dept., you'll probably need to have a structural engineer provide the beam sizing and spacing calcs. Be advised, LVLs and steel beams are MUCH MORE EXPENSIVE and more difficult to handle than simple trusses.

I would like to hear any insight anyone might have with experience on the permits, design, structure, or anything else that could help me out with the planning and eventual building of this addition.

I'd suggest that you take a bunch of pics of your existing structure and then draw up some basic drawings with dimensions and details of what you want to build and take them into your local building dept. Discuss with them what you can and cannot do. Unless they are total A-holes they should be willing to walk you through their general requirements and provide some guidelines. They won't design your building for you, but they should be willing to give a novice some guidance.


Thanks!

I can only draw on my experiences with my local (a rural VA county) building dept. but it has always been a decent experience. They have a job to do and they try to follow the county's rules, but they are good ole' boys and have always been willing to help answer my questions.
 
OP
D

dfairchild19

Active member
Joined
Nov 14, 2011
Messages
34
Location
Mid-Ohio
Thanks for your replies, John in OH.

I have never been through the permit/inspection process and I am just drawing from other experiences.

I dont think that i want to mess with trying to duplicate the existing structure. I think i will just go with a pole and truss design for the main 24' span and then add the 8' lean-to type structure so the roof line stays consistent. i think that this will be my best bet for simplicity with the permits and inspections and may even be more cost effective than going with the existing structure's design.

I would still like to increase the height by about 4 foot though if they will allow it.

I would also like to eliminate the 4x6 posts that are in the center of the gable end of the barn. Does anyone have any inclination of my options available for doing this? My original thought was an LVL. Could i just add collar ties or joists to these rafters to eliminate the support posts maybe? i was just going to wait to deal with the support posts until after the addition but i would like to do something with them before I pour the concrete so I dont end up with holes in my new concrete floor when I take them out.

Thanks again for your input and i will update as i move forward
 
OP
D

dfairchild19

Active member
Joined
Nov 14, 2011
Messages
34
Location
Mid-Ohio
The horse barn turned shop addition has finally come to reality. I've been working on it quite a bit the past couple of weeks prepping the backside of it for the addition however, I have decided to have someone else build it instead of attempting it myself. I am confident that I would have been just fine doing it but the county was asking for quite a bit of info that I was unsure how to portray on my CAD drawings that I submitted. Besides, I would like if finished yet this year.....

I did end up getting permits through the county but it proved to be fairly simple as far as obtaining the approval on the permits. We should find out late this week or early next week if we run into any issues with the inspection process but there are only two inspection points: pole footers in the dug holes and final inspection. Time will tell....

I removed the concrete pad and large posts from the ground that was behind the barn and also removed the lean-to off of the back of it all last weekend with the help of a buddy, my pops, and my neighbor. This past weekend I removed the siding and doors from the back side of the barn with the help of my other neighbor. At this point, it should be ready to go for the crew to start the addition this Friday.

I threw some simple measurements into our CAD program(definitely NOT a building CAD program to say the least) to get an idea of what that finished product would look like and this is what I came up with:

Overhead view:


Outside view:


Inside view:


The lower, asymmetrical part of the barn is the original barn and the taller, symmetrical part is the new addition.

One thing that I cannot decide on is the position of the overhead door on the rear. It will be a clear view door but I cant decide whether to center it in the new addition or line it up with the door on the other end in the original part. I like the way it looks much better with it centered in the new part but I am thinking of eventually adding a lift and would like to position it as you can see in the renderings above. The thought is to have it caddy cornered so that it doesnt obstruct or interfere with the pulling vehicles in and out of the barn. If I centered the lift in the barn along with the door, I wouldnt be able to park much next to it on either side. By isolating it to one side, I could potentially have a vehicle on the lift and still be able to get a vehicle(or at least the RZR) by it. Having the door offset to the opposite side of the barn(as shown in the renderings) would give me a better approach into the lift as well. Wouldnt mind hearing everyones thoughts on this.

Couple more pictures:

Outside view showing siding and doors removed:


Inside looking out from original barn(the loft will be removed), can also see the trusses outside:


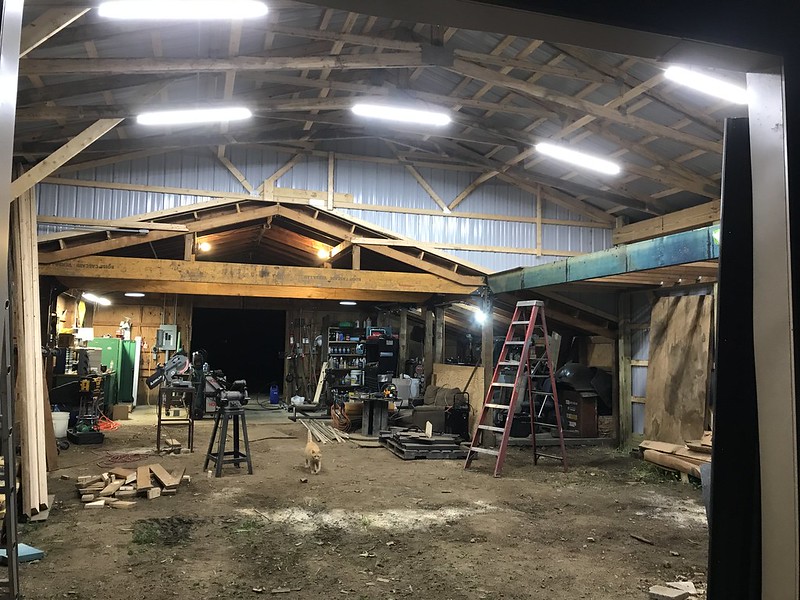
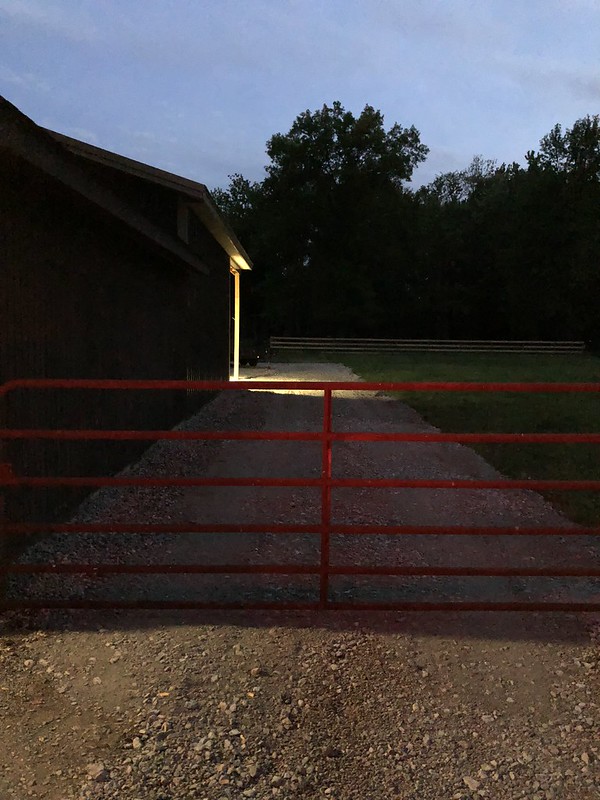
Night Shot:


Ill update more as they they make progress tomorrow, Friday, and next week.
 
OP
D

dfairchild19

Active member
Joined
Nov 14, 2011
Messages
34
Location
Mid-Ohio
Ive also been talking with the barn builders about how to go about cutting and supporting the 5 posts in the middle of the barn. As soon as the addition is up, I plan on doing this. You can see these posts in the inside picture in my previous post. The three posts that support the lean to addition to the original barn will be left in place while the 5 posts supporting the loft will be cut and supported by LVLs. I will post more on this as it progresses and I get info from the builder. I am planning on tackling this myself.
 
OP
D

dfairchild19

Active member
Joined
Nov 14, 2011
Messages
34
Location
Mid-Ohio
line up the doors. Build it to use.

Thats pretty much my thought as well at this point. I have to make a decision this morning anyway as they are punching the holes for the posts and need to know where I want the door. I did position my crew cab truck in the barn roughly where I have the lift placed in the 3D rendering above and its not too bad of a fit. Its a bit tighter than I would have liked it but there is plenty of room to get around the truck when it is on the lift and I would still be able to get by the lift post that will be furthest in the middle of the floor when coming through the overhead door.

I do still need to do some research on which lift to go with and concrete requirements as well. Since the concrete hasnt been poured yet, I should be able to mark, reinforce, and beef up the concrete where the lift will be placed.
 
OP
D

dfairchild19

Active member
Joined
Nov 14, 2011
Messages
34
Location
Mid-Ohio
Have you considered 2 doors. One for the lift and 1 drive thru?

Actually, i have come across this thread and i think that i will go with a similar lift as i think it would be absolutely perfect for my application:

In-floor Scissor Lift Install

Im not sure which one i will go with yet as it seems that the only one available that has the capacity that i need is the Atlas FM9SL and it happens to be the most expensive of the options out there. I wish that the Ever Eternal was still around and offered a 9k unit or that the other brands mentioned offered a 9k or higher unit. If it comes down to it, i will bite the bullet and go with the Atlas. On second thought, these all look nearly identical. I would be willing to bet that these are all manufactured by the same company and are one in the same. Any thoughts on this from anyone with experience?

Also, since i am strongly considering this lift, i could move the door back over to the center as it would give me more height with my scissored trusses(contractor had them from a cancelled job that ended up being same length that i needed), but i think i like it offset for more wall space both inside and outside under the overhang.
 
Last edited:

gtabasso

Well-known member
Joined
Apr 7, 2016
Messages
800
Location
Cleveland, Ohio
I need a shop turned into a horse barn! My guy is 27 years old in April. Just had to call the vet yesterday because he wasn't eating. Dehydrated.
 
OP
D

dfairchild19

Active member
Joined
Nov 14, 2011
Messages
34
Location
Mid-Ohio
Here we go. We have a fair amount of progress for the 75* February day that we had yester-Friday. It would have been much more had they not been called off of setting the trusses and sheeting the roof due to the storm that brought fairly strong winds through. Anyway, they will get back at it Monday and should finish up Monday or most likely Tuesday. Here are pics from today:

Couple of observations from today:

- The Amish are incredible to watch work. I understand that they do this every day but it is mesmerizing to watch. I can definitely appreciate craftsmanship when I see it. You can learn a lot by just watching them.

- The addition feels very small at first glance, especially from the inside of the original barn. I think that the height(12' to the eaves) and the chunky 6x6s(compared to the 4x6s in the original part) make it appear smaller than it really is. I am still very happy with it and will have plenty of room................. for now..... Im sure down the road i will have wished i had gone bigger enclosed but i feel that it is perfectly proportioned to my property.

- I absolutely love the covered 12' patio off the back of the addition and think it may be one of my favorite things that i did in this build. I dont have much, if any, covered outdoor space on my property and think it will be very nice to have.

Digging post holes with a rather large auger than im used to seeing - 24"


Posts being set


Bottom boards, purlins and headers being set


As she sits for the weekend


From inside original barn


OP
D

dfairchild19

Active member
Joined
Nov 14, 2011
Messages
34
Location
Mid-Ohio
Trusses going up!


We have cover!


They had the wall under the overhang just about covered and the walk-in door hung. I would imagine that the barn will be enclosed by the time it get home tonight. It sounds like they will have some loose ends to tie up in the morning but we should be all finished up tomorrow.

Ive got a buddy hanging the overhead door and it wont go on til the concrete is poured and the concrete wont be poured until i have the in-ground scissor lift in my possession which i would imagine will be about 6-8 weeks unfortunately.

She is coming along nicely though and i am very happy with it. In the mean time, i still have quite a bit i can be working on while waiting on the concrete:

- I have been talking with the builder about supporting the five posts in the center of the barn with LVLs and it sounds like we have these nailed down. I am hoping to get these done in the next couple of weekends to come.

- I will also get started on the electric for the addition as well. It should be fairly simple: 110 at each post, LEDs from the scissor trusses, Lights under the patio, barn light on the patio gable, barn light over the walk-in door, electric to the far corner for propane ceiling mounted heater, overhead door motor, and possibly re-wire the original lights to match all of the new wiring. Although it looks very clean, I wish i wouldnt have let my ex-father-in-law talk me in to running all of the electric in PVC conduit when we rewired the original barn when we ran the 60A service(i believe it was 60A) from the house panel. I suppose i dont have much to run but it is still costly but it will be a very clean looking install when complete. Is there any other electrical needs that i may be overlooking?
 
OP
D

dfairchild19

Active member
Joined
Nov 14, 2011
Messages
34
Location
Mid-Ohio
The addition is up and complete pending final inspection. Zoning inspection was passed this morning and I will just have to have final inspection completed and it is scheduled for Monday. Here are pictures:

From the front of the existing barn:


I think it looks like something is missing along the bottom edge of this gable end along the bottom of the truss. I think i would like to bring it down to the bottom of the LVLs that are on the ends of the patio and then trim it with some tan trim maybe but im not sure how to go about this. Any suggestions?


OP
D

dfairchild19

Active member
Joined
Nov 14, 2011
Messages
34
Location
Mid-Ohio
Thanks Dave,

I have the LVLs to replace the posts in the old part already and just have to wait until after final inspection to begin that process. I will probably try to start demo on the loft this weekend although it is supposed to be pretty cold so i may just wait and do it all next weekend possibly. Either way, the posts will be gone in the next couple of weeks.

Im also hoping to order my in-ground lift by the end of the week if I can get everything worked out. That would put me out to about 6-8 weeks on getting concrete in. Once concrete is in, the overhead door and lift will follow right after. Ill also be working on the electric in the meantime. It should all start coming together by summer if everything goes as planned.
 

matt_i

Well-known member
Joined
Mar 14, 2008
Messages
10,808
Location
SE Michigan
It looks very nice, I would think about skinning the ceiling of the roof-only area right now.

I think that birds will find it soon and some type of them will consider it perfect for nesting and you'll have the associated issues with that sooner or later. I would try to put up something to exclude them.
 
OP
D

dfairchild19

Active member
Joined
Nov 14, 2011
Messages
34
Location
Mid-Ohio
It looks very nice, I would think about skinning the ceiling of the roof-only area right now.

I think that birds will find it soon and some type of them will consider it perfect for nesting and you'll have the associated issues with that sooner or later. I would try to put up something to exclude them.

Thanks for the heads up Matt. i will try to do this early spring.

The crew came back and finished up a few odds and ends. There were a couple of things that I wasnt too thrilled about but overall, i am very happy with the addition. Where they mated the old and new siding is literally just the steel siding overlapping the wood siding of the original barn. The cut quality of the steel isnt even good. It has the cut quality of tin snips. Ill have to either re-cut it or find a piece of finishing trim to cover it. Im also not impressed with the way that they flashed the old roof to the new siding. ill have to get some pictures and throw them up for suggestions on what to do with it or if i should even change it.

I was able to order the in-ground scissor lift today. Hopefully it will be here in a month or so and i can move to the concrete work and then finally have a garage door to fill the giant hole on the back of it.
 
To avoid these ads, REGISTER NOW!
OP
D

dfairchild19

Active member
Joined
Nov 14, 2011
Messages
34
Location
Mid-Ohio
Quick Update:

Called last Thursday to schedule the final inspection with the county for this past Monday. They told me to call back Monday morning for a 2 hour window. I call back and they tell me then that the addition requires electrical inspection since the existing building has electric in it. Great, thanks for the heads up now...... They say it must have, at minimum, one receptacle inside, one switched light inside, and one switched light outside. Regulations blow my mind most of the time..... If you can see from my pictures, the existing barn is using PVC conduit to run the wiring. I want to use this same method in the addition but since i will need to add more to just the base requirements, i will install receptacles at each post along the one wall and continue on to the walk in door where i will install a light above it both inside and outside. Hopefully this will allow me to pass inspection next week.....

As soon as electrical and final inspections are complete, I will remove the existing loft and posts and install the LVLs. I cant wait to have those posts gone.

I have also decided to build a loft in the addition. My thoughts are to come off of the existing interior post from the existing barn and add a post across from it at the end of the addition and span it with an LVL or two. This would make the loft 24' x 8'. I would have it tall enough to park anything under it so at least 8', if not 9 or 10' from the concrete. I will most likely do this before the concrete is poured.
 
OP
D

dfairchild19

Active member
Joined
Nov 14, 2011
Messages
34
Location
Mid-Ohio
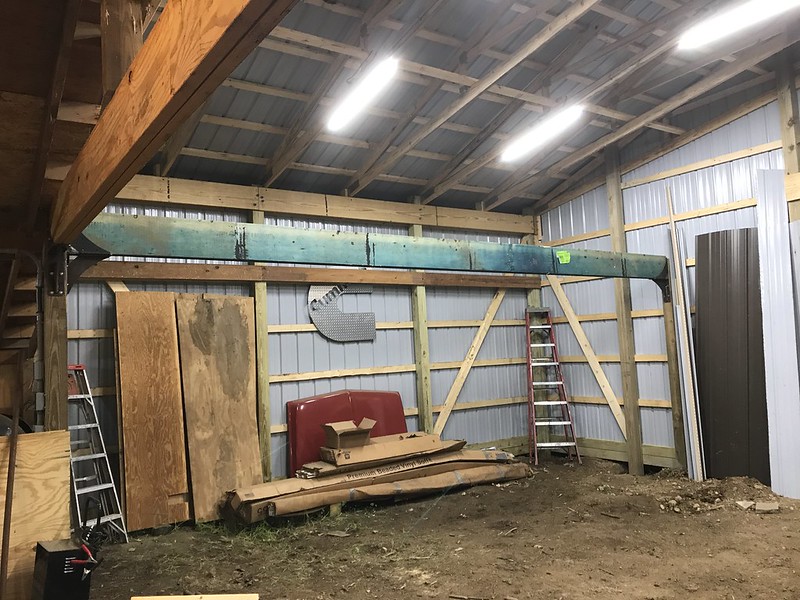
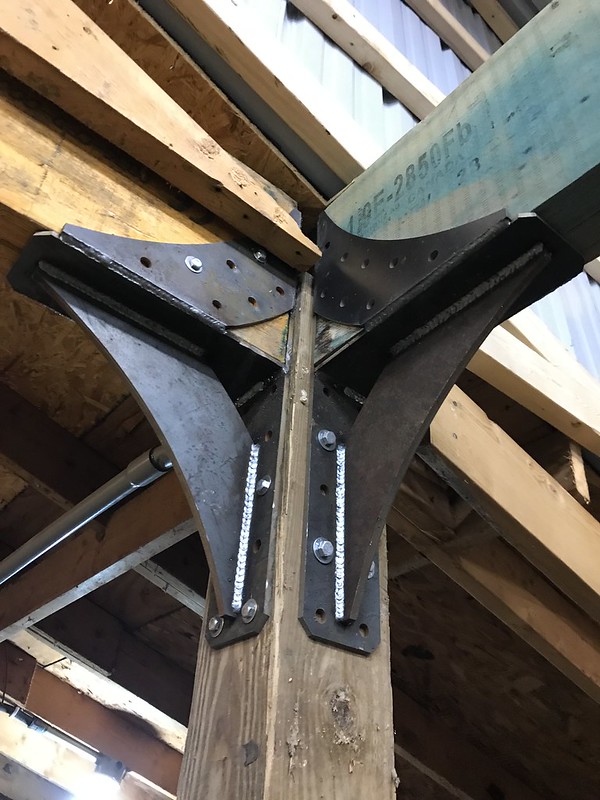
Well long story short, the LVLs are in. I fabbed up some brackets that I cut on the waterjet to make the brackets. It was the cleanest way that I knew I could get the LVLs in place where I wanted them. I bolted the brackets to the ends of the LVLs and then lifted them into place with the bobcat and the help of a couple of good friends. I still have to lag them to the posts completely, but they are up and the posts are gone!


Rear posts gone!


Front LVL in, just need to add posts to tops of front LVL for load bearing support.


All posts GONE!!!!!


I did also get the hole dug by hand(that was some real work) for the post opposite the old corner post for the loft LVLs. I have to cut a couple of pieces on the waterjet still for one of the two loft LVL brackets and then I can start on the loft construction hopefully this weekend. I still need to button up some electrical work that had to be cut to make room for the LVL brackets as well.

You can see the short post on the right that I hand dug the hole for that will support the other end of the loft LVL. If I would have thought of the loft before the construction of the barn, I could have had them line up the post next to the hole I dug with the post directly accross from where I put the new post.


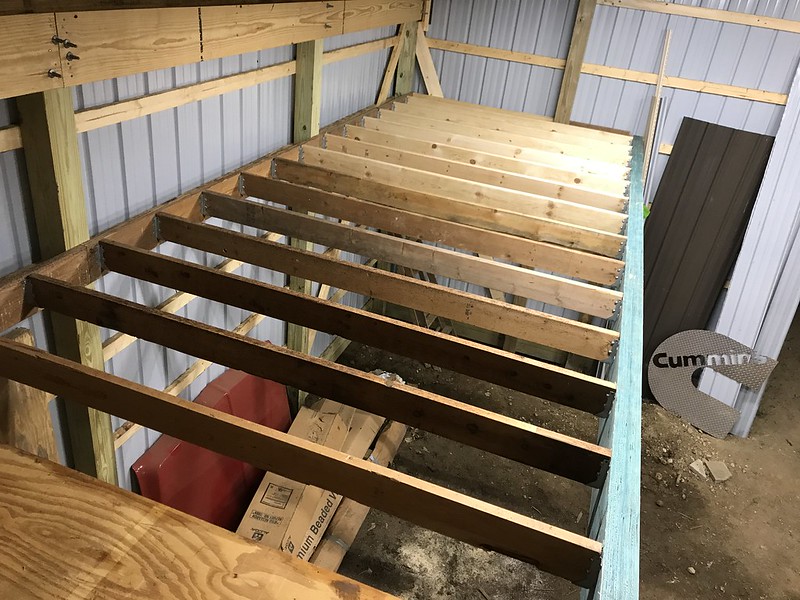
And the sketch here shows where the loft LVLs will go. I plan to install them at the same height of the two sets of LVLs that I installed already. I will install joist hangers to the LVLs and then joist hangers on some 2x8s that will be spanning between the poles of the barn. 2x6s will be used in the joist hangers for the loft joists. I should also be able to get most, if not all of the materials from the loft i tore down loft in the old barn.


Couple shots of the LVL brackets I fabbed up:


Other than that, I am just waiting on the lift to make its way over seas to me. Once it gets here, I will build the forms for them and should be able to have the concrete poured within a couple of weeks im hoping. Should be able to get the door ordered soon as well so that it will be ready once the concrete is poured.

Does anyone have any thoughts on a floor drain by chance? Have you gotten good use out of it? Whats the best way to form one up? Where should I drain it to? big hole in the ground with some heavy gravel on top of it? This is not something that I will be having inspected and will probably just fill it in when I go to sell the place years down the road, especially if it would cause any red flags or issues when selling. I would mainly use it for washing off the RZR in the winter and maybe giving my trucks baths in the colder months as well. It could come in handy for a dog bath drain in the colder months too.
 

John in OH

Well-known member
Joined
Jun 2, 2007
Messages
2,444
Location
SE Ohio & Eastern Virginia
Nice job!! You've done a swell job turning the old horse barn into a nice looking outbuilding that should give you plenty of work space.

Really like those LVL brackets ..... they've got a classy "steampunk" look to them!
 

bobruffner

New member
Joined
Mar 3, 2011
Messages
2
You've got a lot of faith (and weight) on those lag bolts. Especially with any snow load and proposed loft added in.
 
OP
D

dfairchild19

Active member
Joined
Nov 14, 2011
Messages
34
Location
Mid-Ohio
Thanks guys.

Here is another look at the brackets. I replaced the four smaller(and shorter) lag bolts that were holding the brackets to the posts with 10 larger and longer lags. The four smaller lags in each bracket were just temporary until I received the correct lags. Also, the LVLs that will be supporting the loft wont be supporting any snow load as it will be located in the addition and the addition has free-spanning trusses.
If something is going to shear or pull these lags from these posts, I'm afraid I'll have more to worry about than snow load:beer:


OP
D

dfairchild19

Active member
Joined
Nov 14, 2011
Messages
34
Location
Mid-Ohio
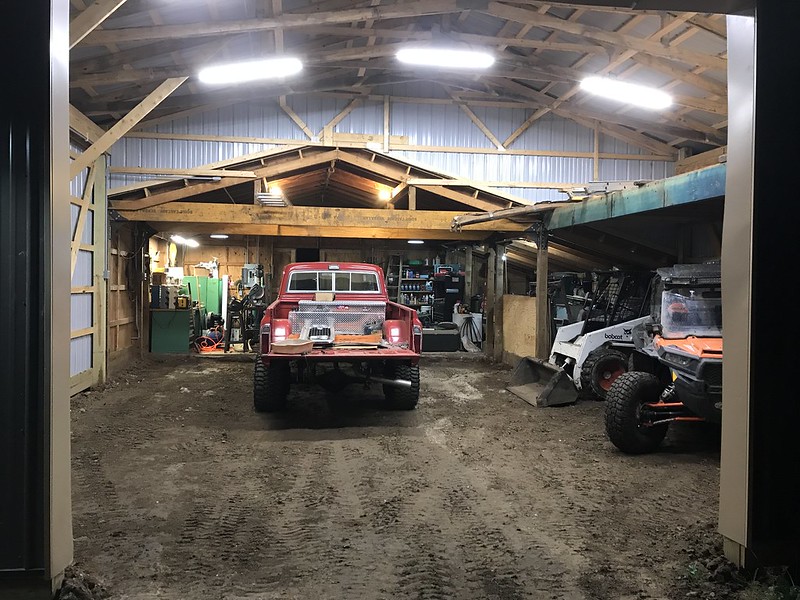
Heres an update on the barn. A lot has happened since my last update nearly 2 years ago. I got the loft built, the concrete in both inside and out, gravel spread, lifts installed, door installed, most things arranged and moved in, the old lean-to repurposed, and a lot of use so far.

Loft LVL and rear header
31948409527_a09665b6ef_c.jpg


LVL brackets at the corner post
39924932733_22578460bd_c.jpg


Loft joists
39924892773_7729694850_c.jpg


33014546208_f84161c965_c.jpg


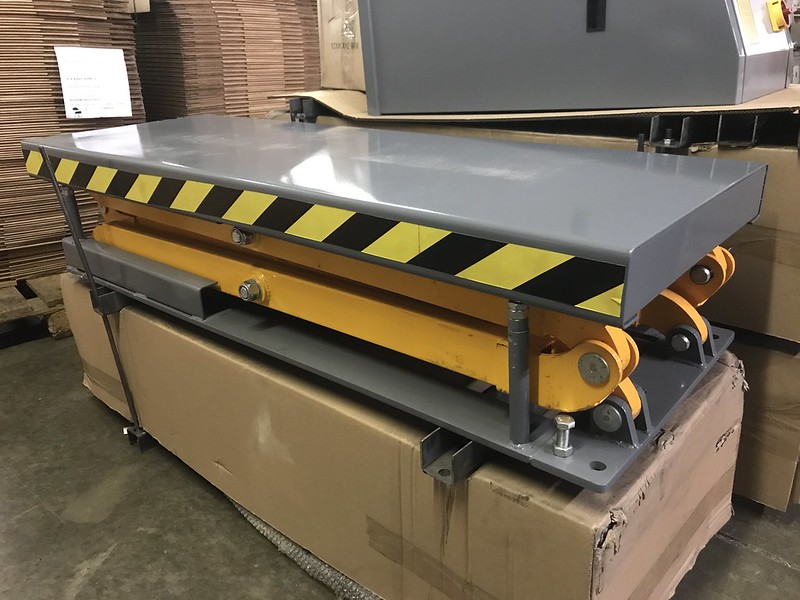
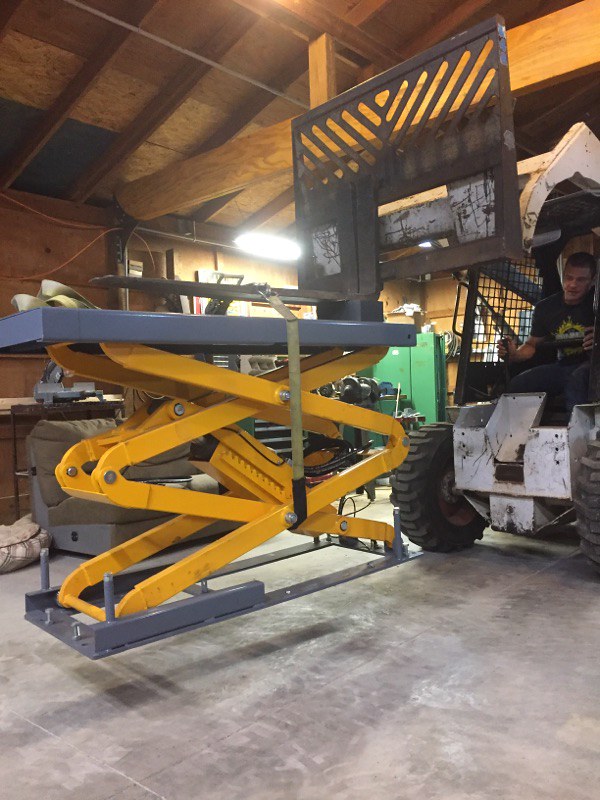
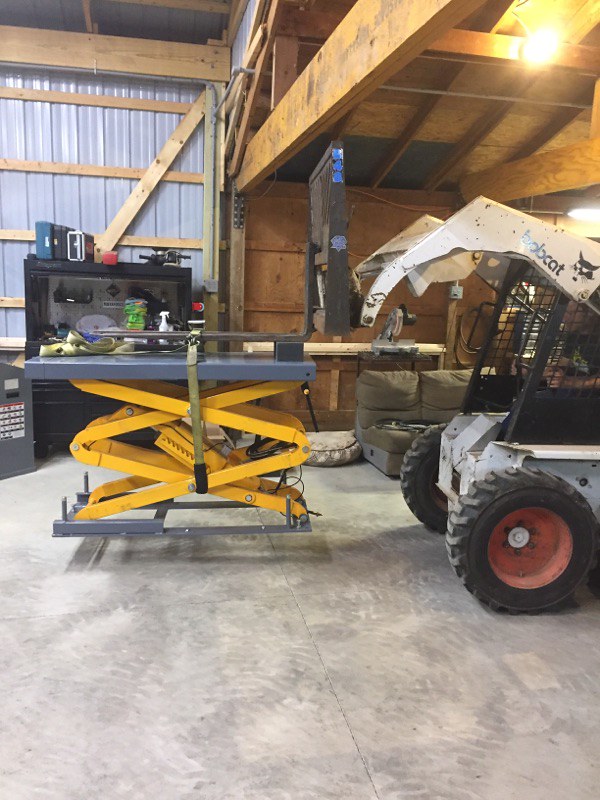
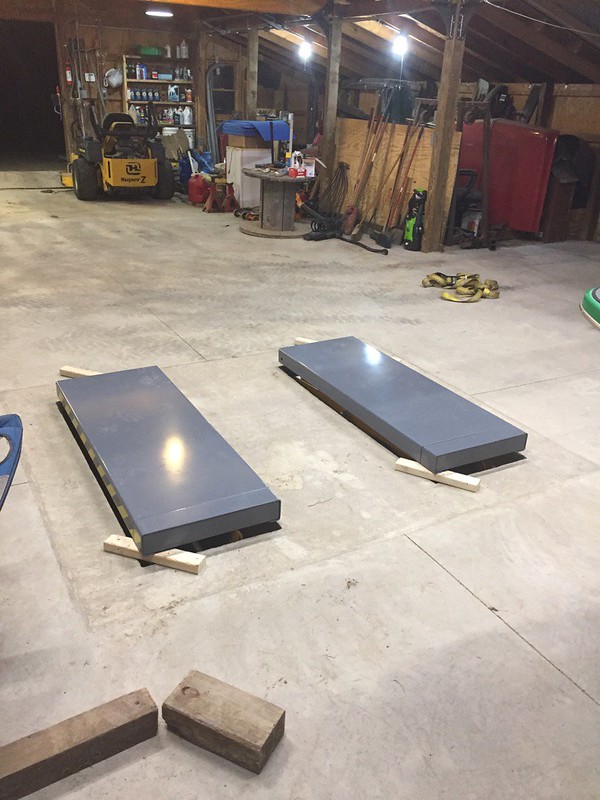
Lifts received
46837902532_7f79cd8caa_c.jpg


39924923513_a7337e725b_c.jpg


Barn cleaned out and ready for base gravel
46889865081_1cedf13b36_c.jpg


46837862492_f1fb7fe0c1_c.jpg


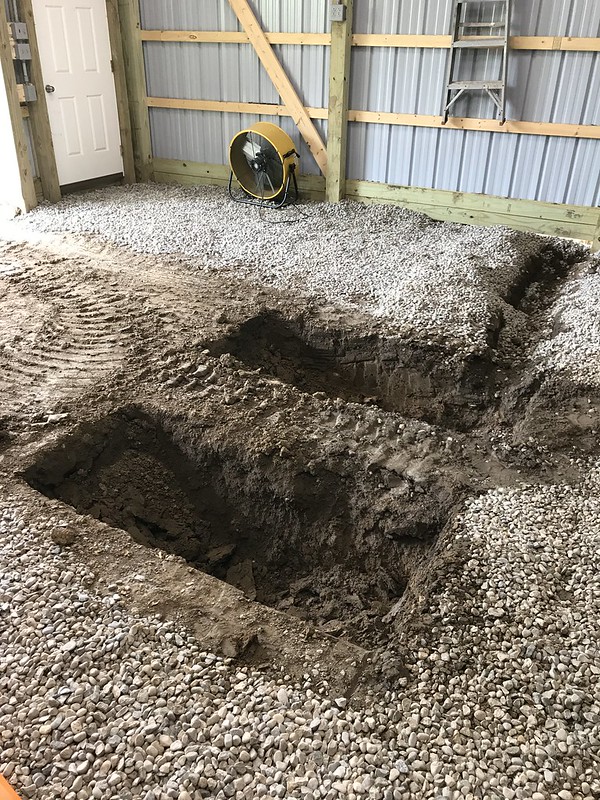
Beginning of the lift pits being dug
31948392167_c9080df469_c.jpg
 
OP
D

dfairchild19

Active member
Joined
Nov 14, 2011
Messages
34
Location
Mid-Ohio
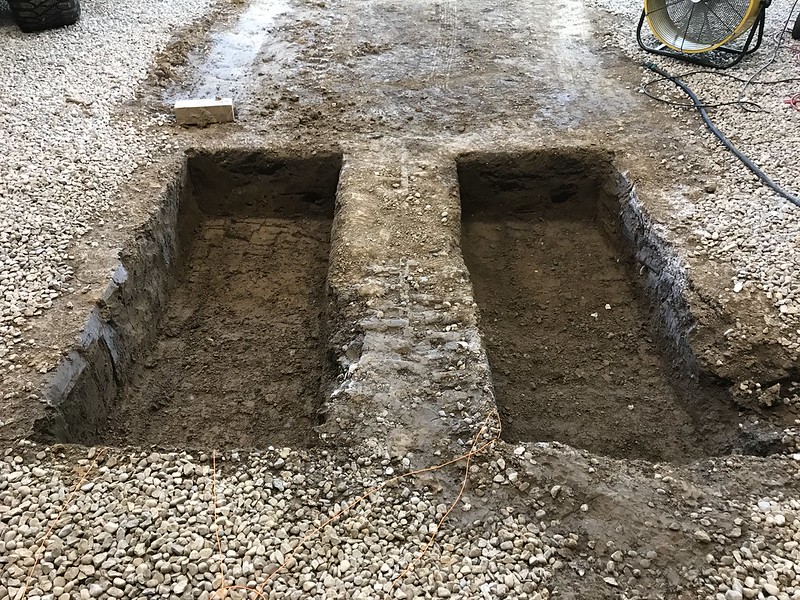
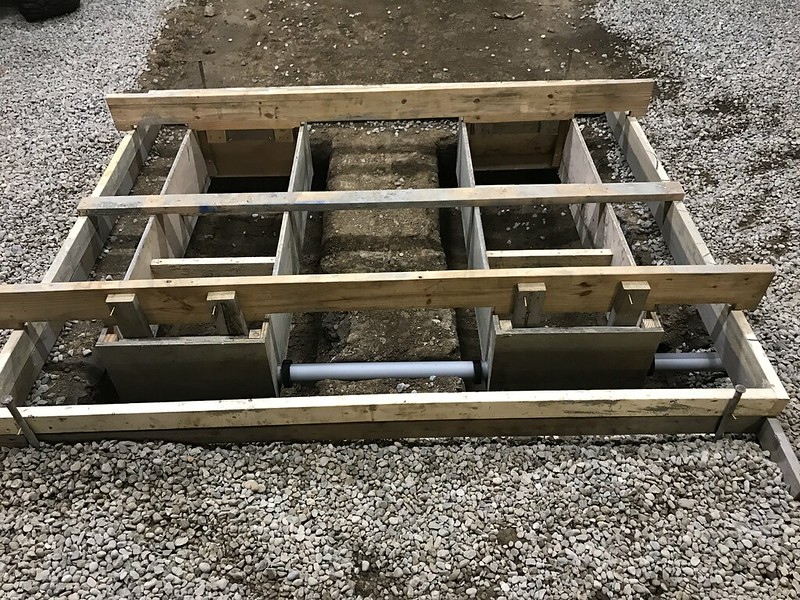
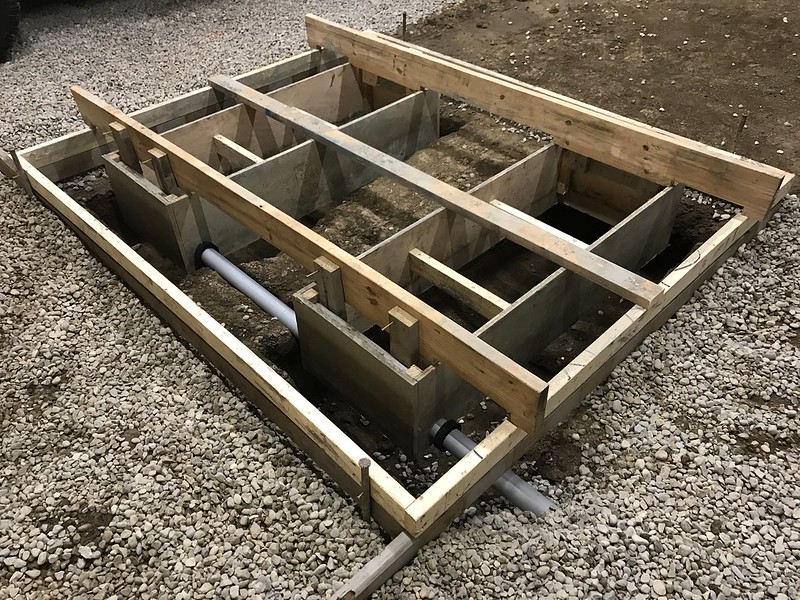
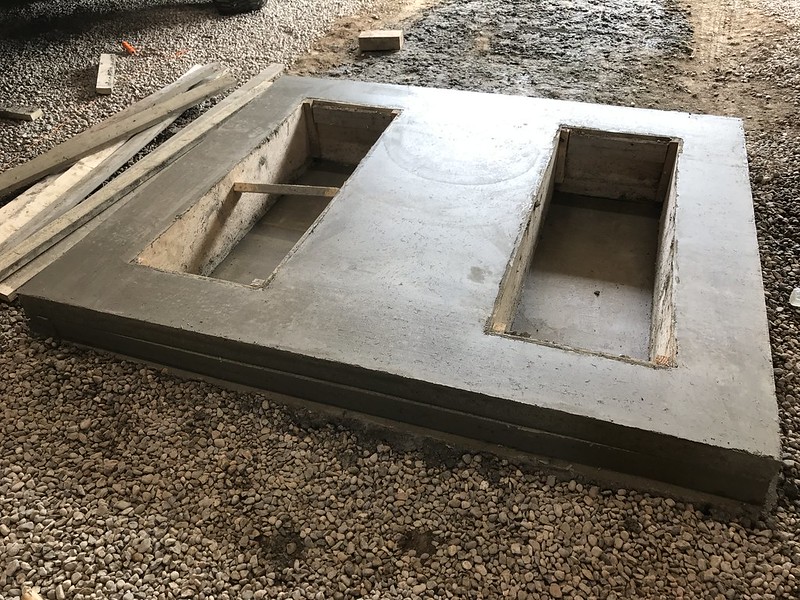
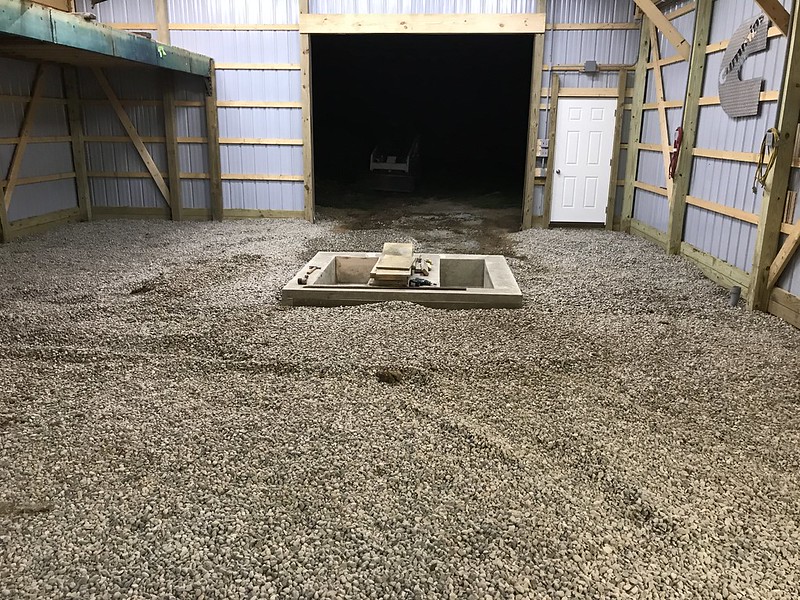
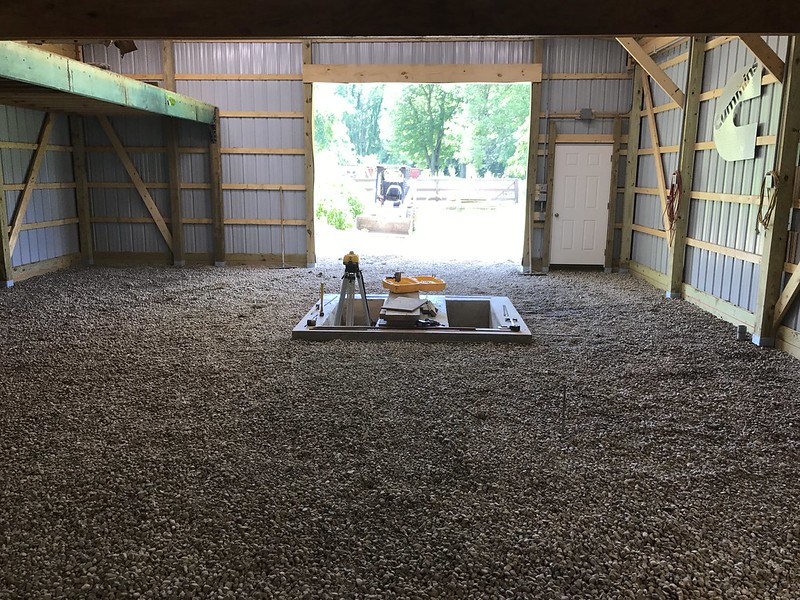
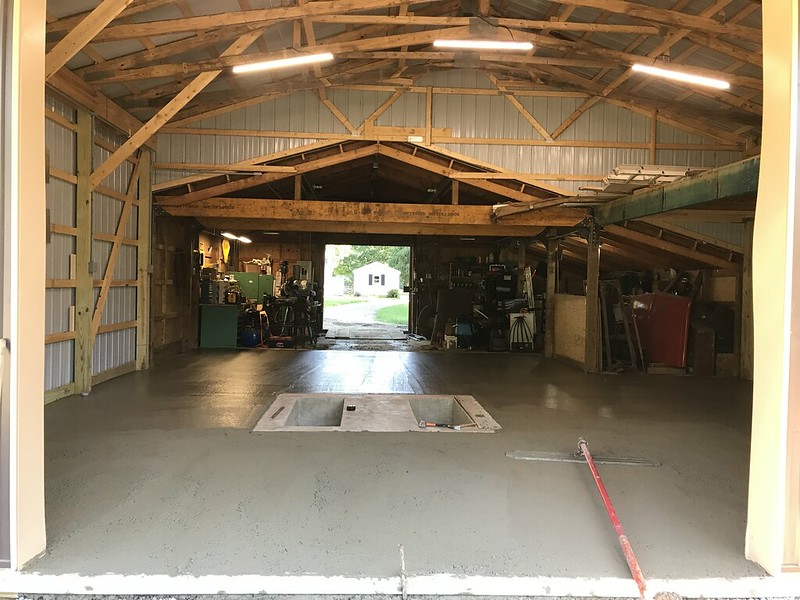
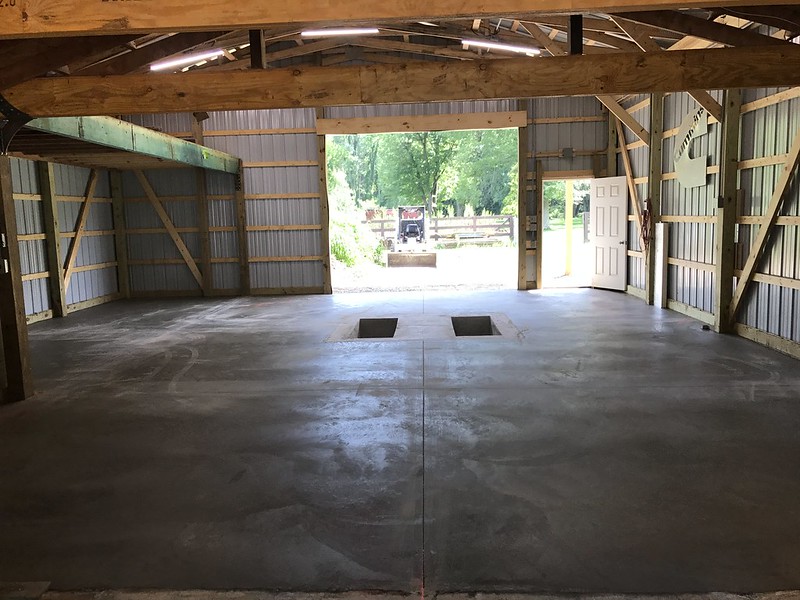
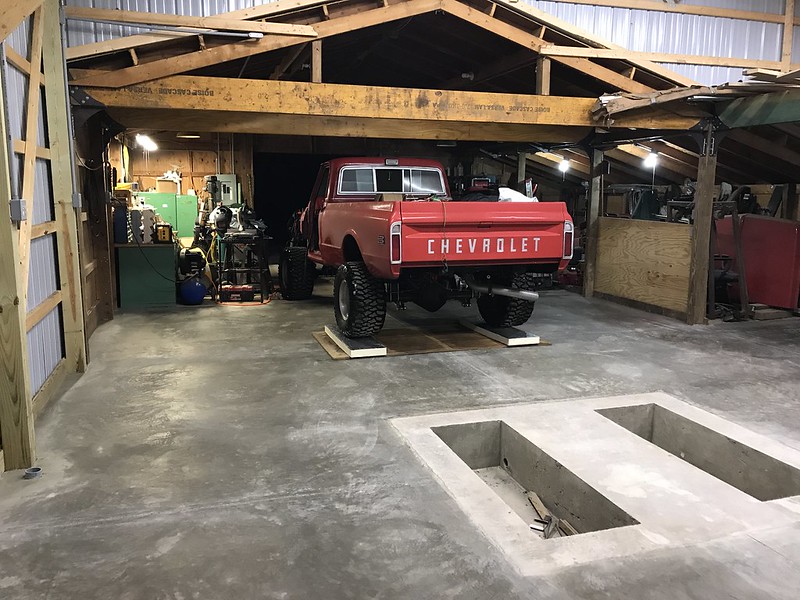
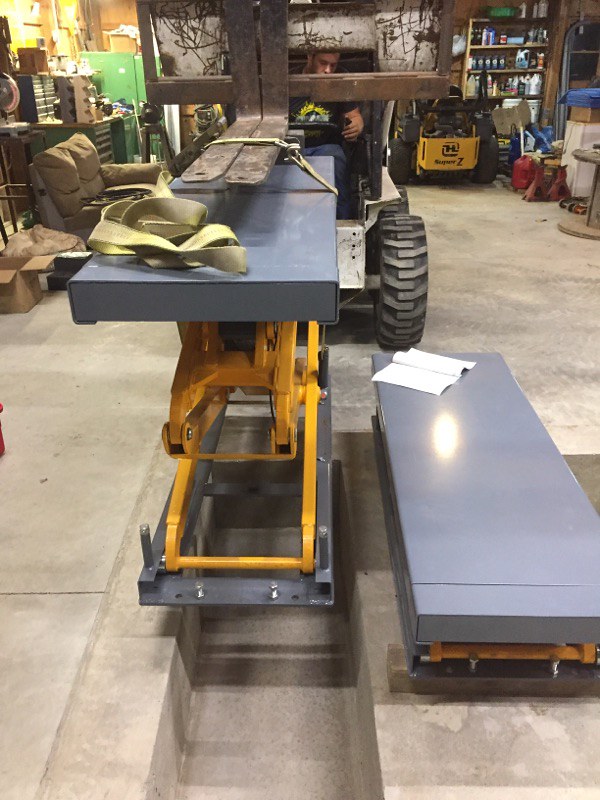
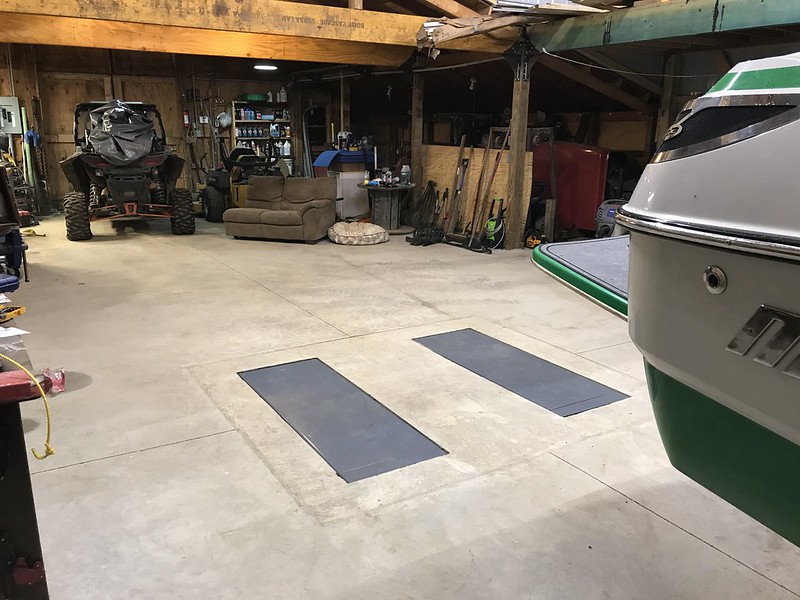
Here is most of what I have of the in ground scissor lift install. After talking about the concrete pour with the concrete guy, they decided it would be best to pour them separately from the rest of the floor. I wasnt too excited about that because I was unsure of how we would transition them to each other along with one settling separately from the other as well. Their reasoning was that they wouldnt be able to get at the pits to finish the floors of them because the would be walking on freshly poured concrete to get to them. I reluctantly agreed but both of my concerns ended up being warranted as the pits ended up settling a bit more than the floor(they drilled and installed 2 pieces of rebar along each side of the pit section) and the transition between the pit section and the main floor didnt turn out too great as it was just finished right up to the pit section.

If I could do it over, I would have just had them get the pit floor good enough as it didnt need a polished finish to it and only needed to be flat and fairly level. Im not sure how I would have suspended the forms, but surely there would have been a way. If I still needed to pour the pit section separately from the main floor, I would have at least used MANY more pieces of rebar into the sides of the pit section to try to prevent them from settling separately.

It was one hell of an install but was worth every bit of it. These lifts are super nice to have.

Forms built and ready to go
31948393277_1a7e9842ce_c.jpg


Holes dug out more for the pits
33014550988_853fd58ba1_c.jpg


Forms installed and ready for concrete
39924925433_3e0a4dd22c_c.jpg


33014526658_5a8b7e4c84_c.jpg


31948349537_a98526b6d0_c.jpg


46889863371_7edfc7d7f6_c.jpg


45975153855_2f9d48339e_c.jpg


And pits are poured
46889851241_b490679419_c.jpg


45975162025_d005a44059_c.jpg


31948403947_37ff7d1433_c.jpg
 
OP
D

dfairchild19

Active member
Joined
Nov 14, 2011
Messages
34
Location
Mid-Ohio
Concrete floor poured and being finished
46164952824_66dda25719_c.jpg


46889844451_14f2f00d21_c.jpg


33014497448_e6844560c7_c.jpg


Inside concrete complete
33014526238_7de627c4e3_c.jpg


39924928443_2be5e0eb15_c.jpg


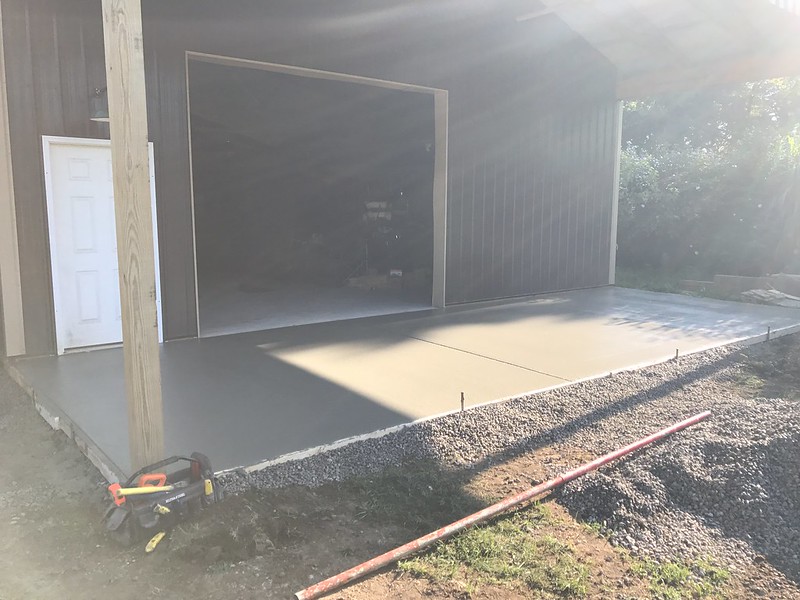
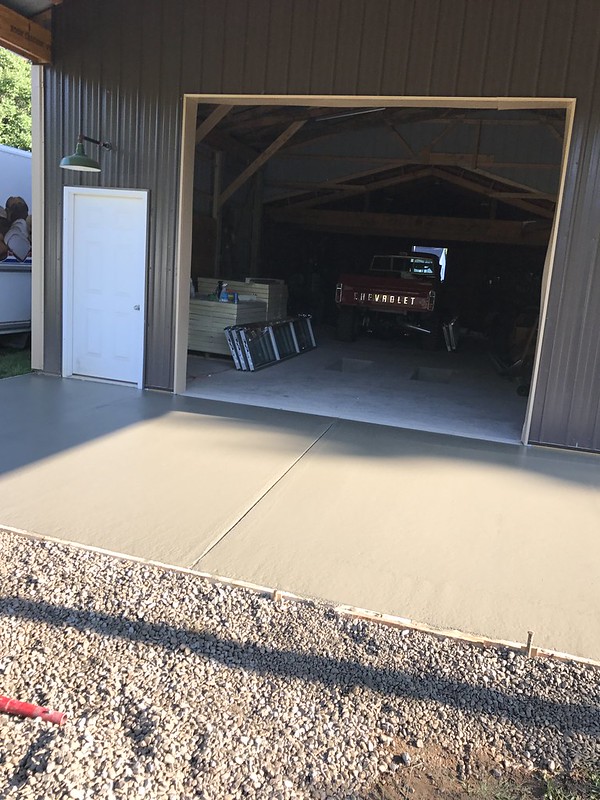
Patio concrete complete
46889802161_8ef473232c_c.jpg


39924937583_7f9d840de1_c.jpg
 
Last edited:
OP
D

dfairchild19

Active member
Joined
Nov 14, 2011
Messages
34
Location
Mid-Ohio
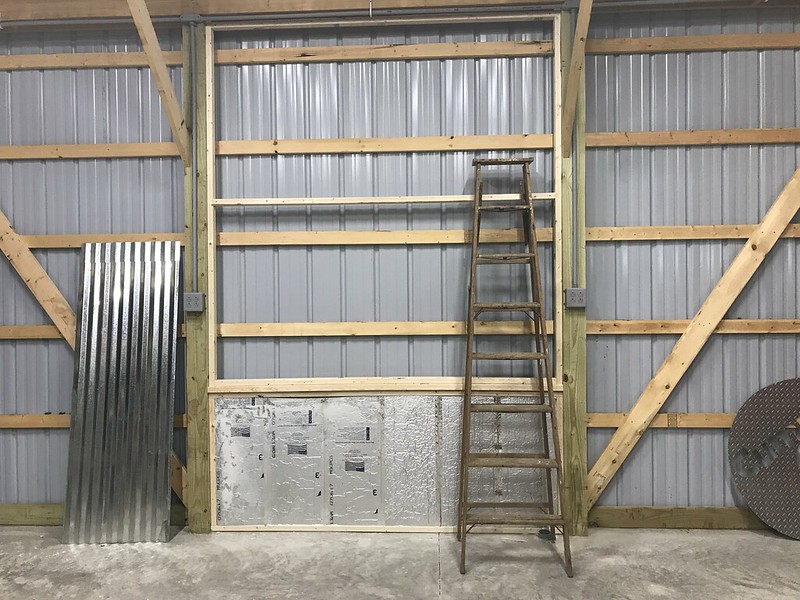
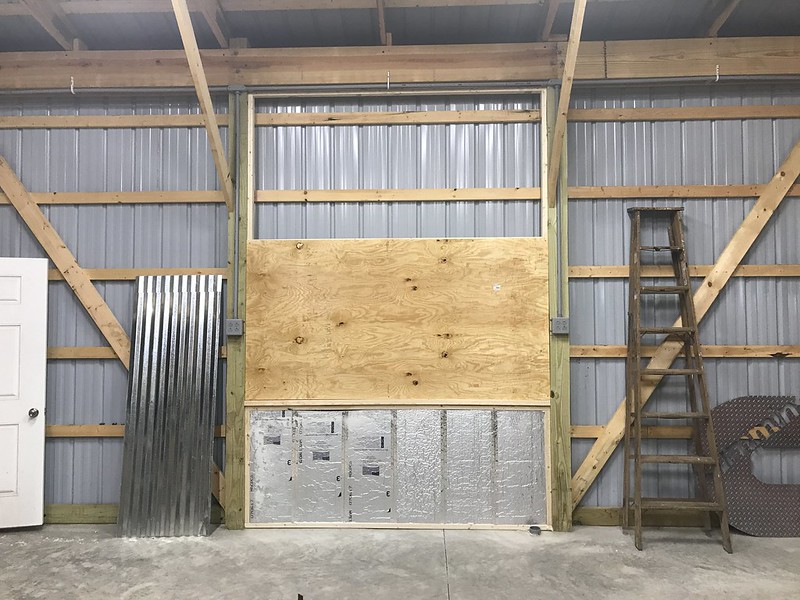
I started on some insulation but I havent been able to make much progress on it other than the ceiling in the new part which actually went fairly quickly with the help of a scissor lift rental.

46164946464_f5a11bca0d_c.jpg


46164935844_c9c3c4358f_c.jpg
 
OP
D

dfairchild19

Active member
Joined
Nov 14, 2011
Messages
34
Location
Mid-Ohio
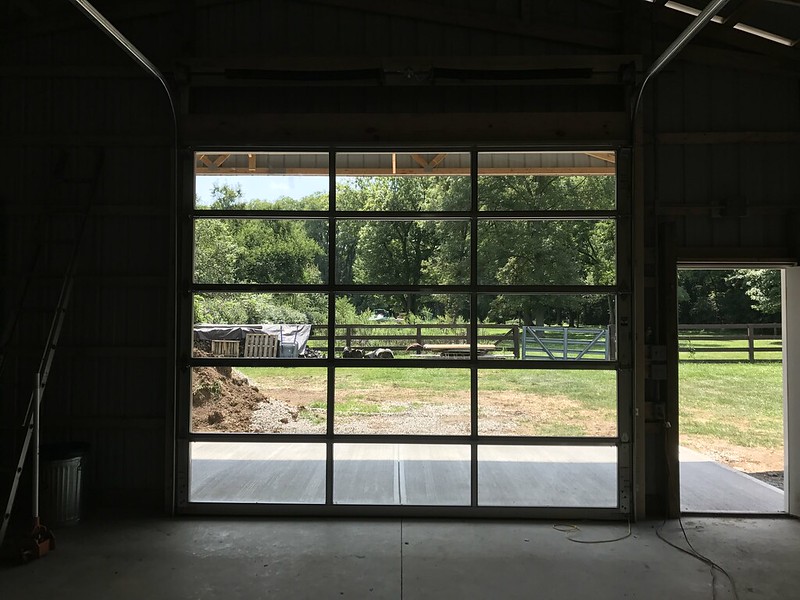
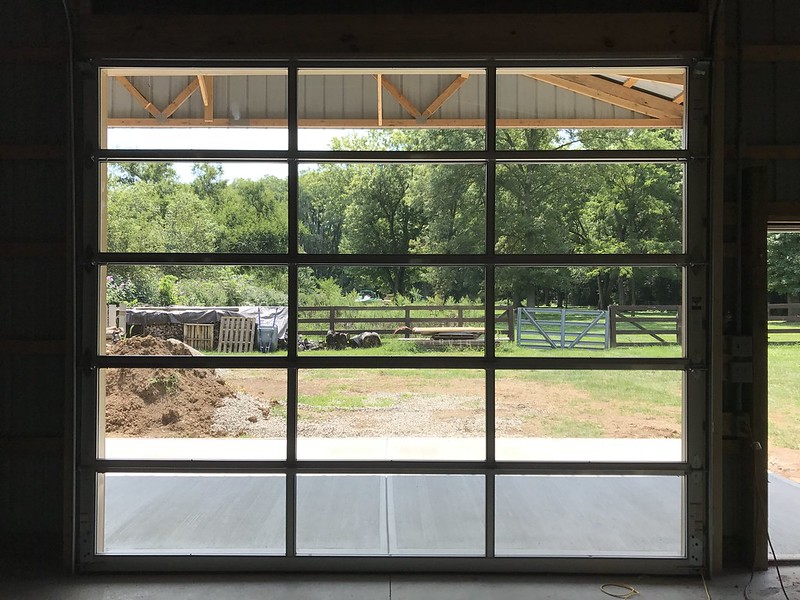
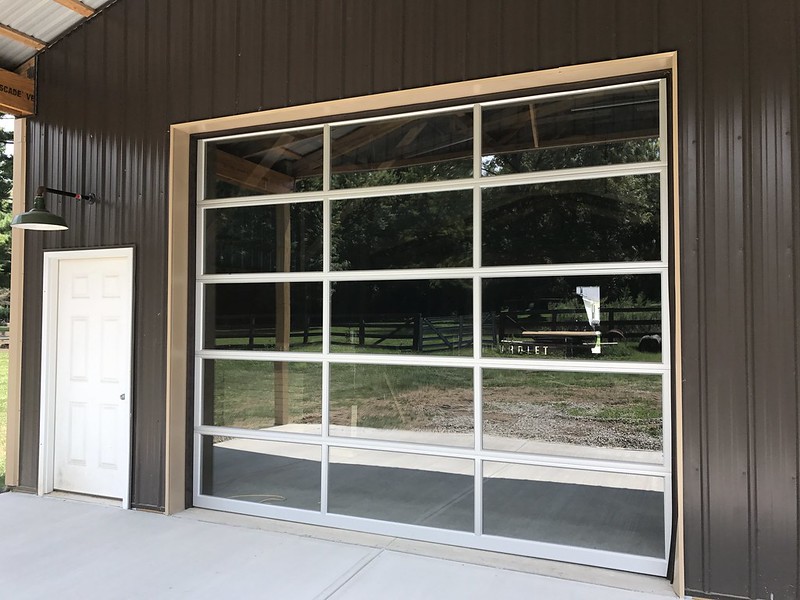
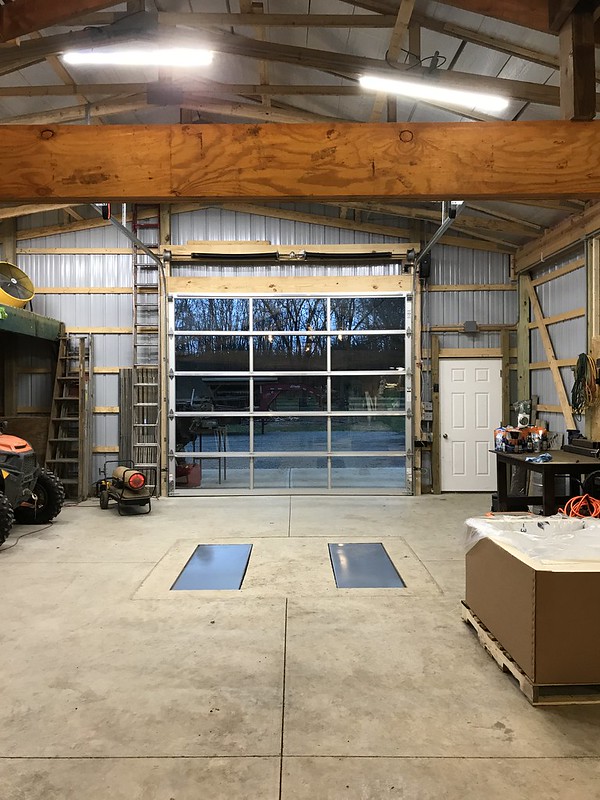
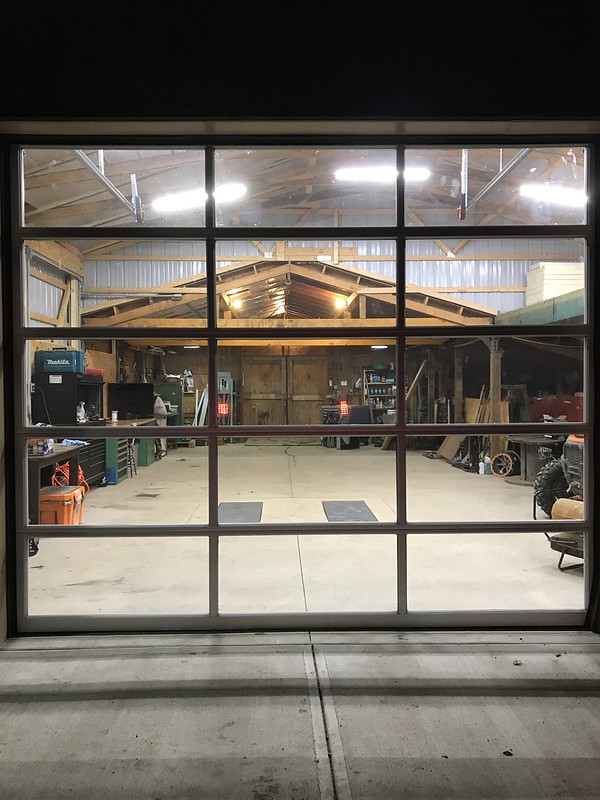
My clear view door turned out exactly how I envisioned, if not better. Probably one of my favorite parts of the barn.

39924947183_a698a123a8_c.jpg


46164941484_e98bed50bd_c.jpg


31948419957_d797895fa4_c.jpg
 
OP
D

dfairchild19

Active member
Joined
Nov 14, 2011
Messages
34
Location
Mid-Ohio
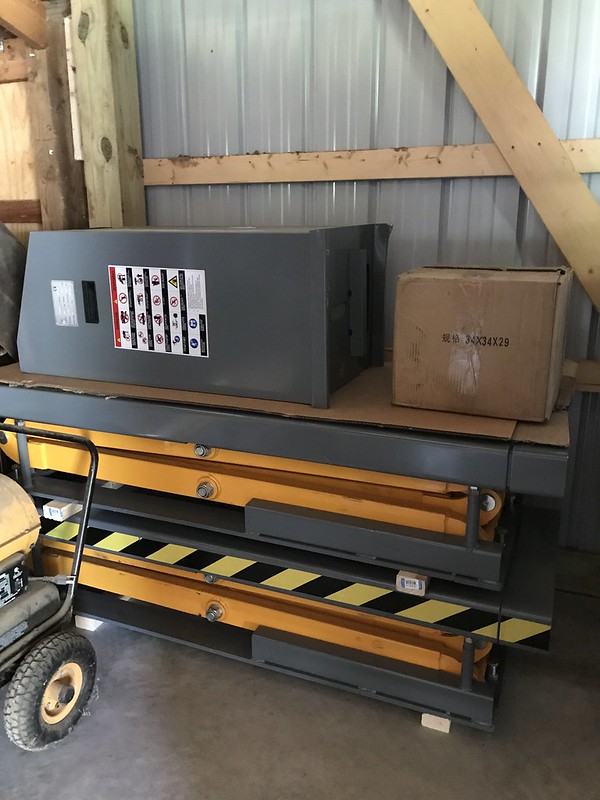
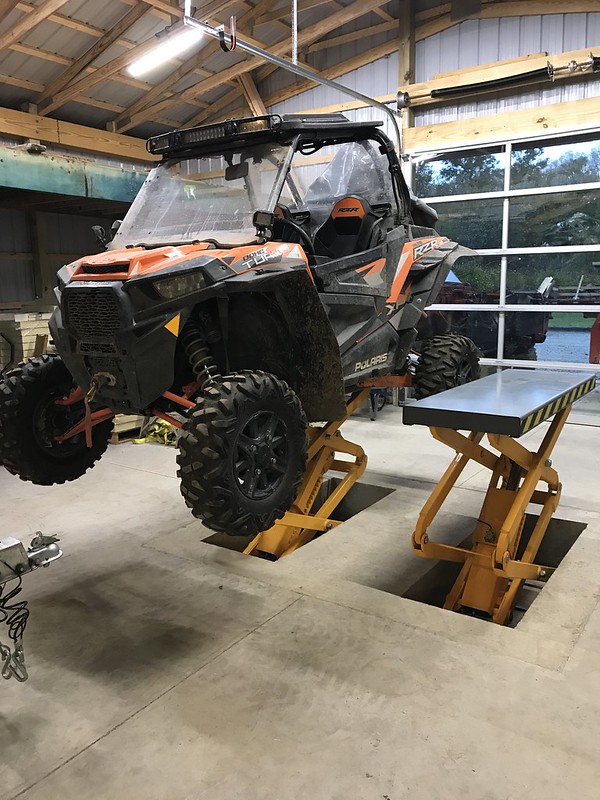
The lift install went well. Much easier than prepping, forming, and pouring the pits.

Lift in the barn awaiting install
33014536768_ba63508a21_c.jpg


46164934274_bb94702c51_c.jpg


31948392977_2d7e15c43a_c.jpg


45975131385_22722fa6a4_c.jpg


46837904572_6bc0dc78bc_c.jpg
 
OP
D

dfairchild19

Active member
Joined
Nov 14, 2011
Messages
34
Location
Mid-Ohio
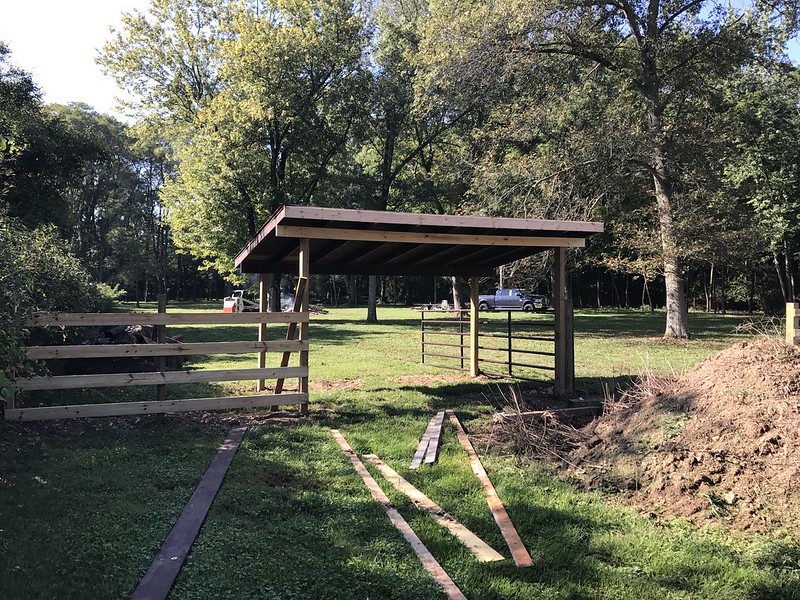
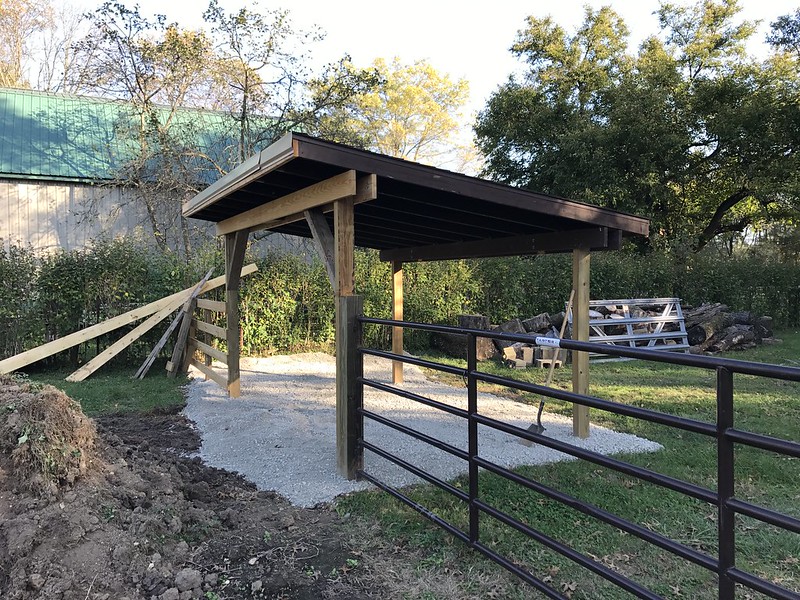
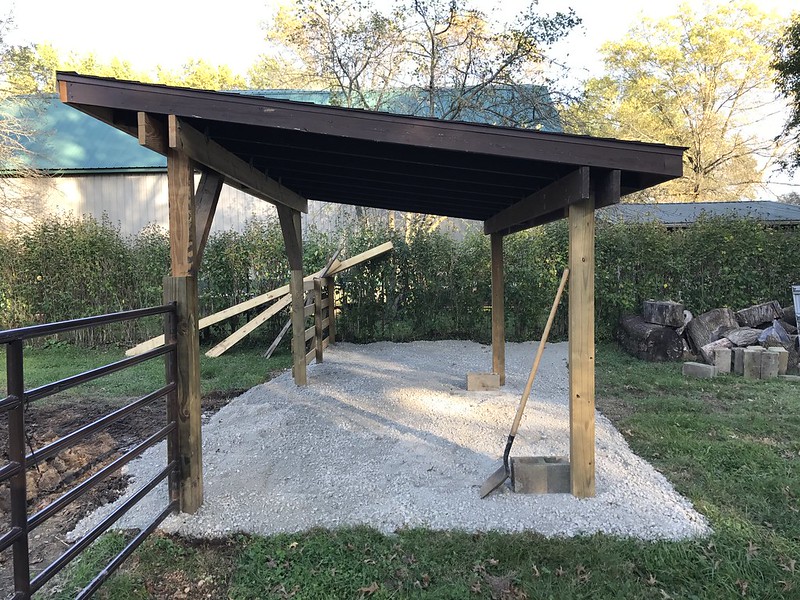
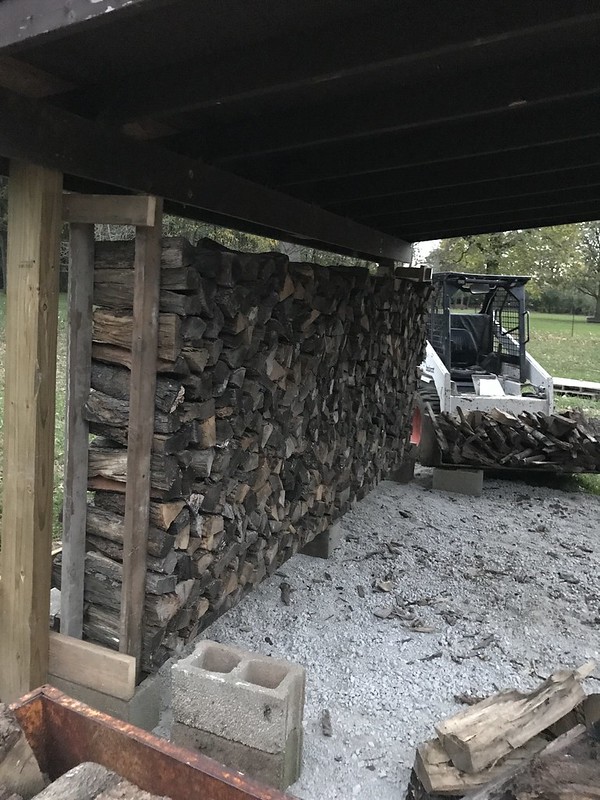
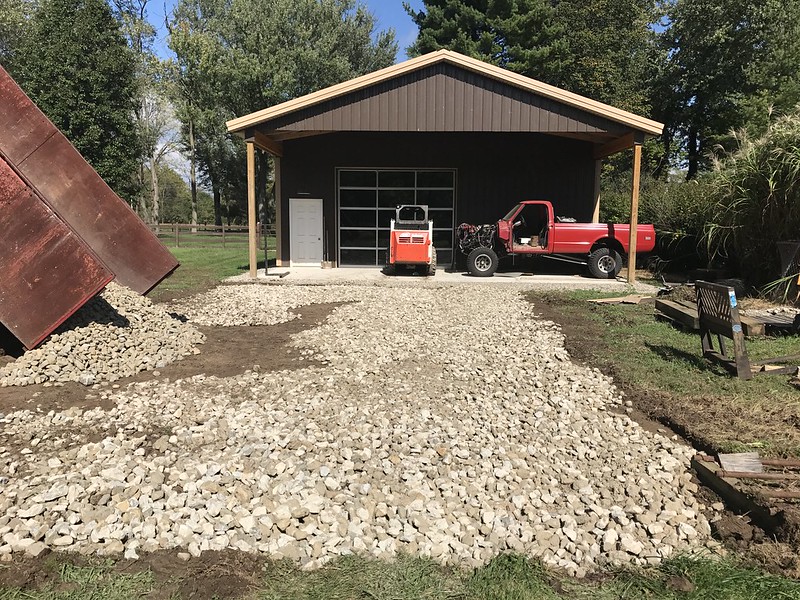
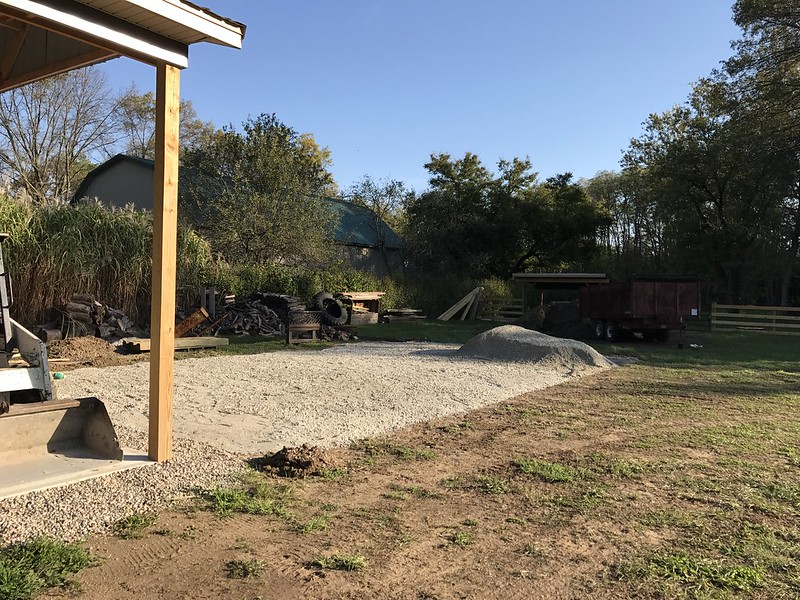
Moving outside of the barn, I finally set some posts and moved the lean-to that was on the back of the old barn to them. I had propped it up on the old fence line for a couple of months until I got around to setting the posts. This will be used as firewood storage for the most part. I also threw some gravel under it and also beside it for some misc storage as well. The old fence line was just on the other side of the little yellow wagon in the pictures which is also where I am taking the gravel to from the patio.

31948394747_36b9b99aa5_c.jpg


39924925903_84e2a510f0_c.jpg


39924924953_82d25f0479_c.jpg


411 under and next to the lean-to
33014543208_56b1cfded2_c.jpg


Getting the firewood moved from the driveway so the gravel can be spread
31948390367_4ae77d3a29_c.jpg


As it sits now. I also fenced in the lean-to posts to keep the dogs from wandering to the back of the property.
47051941951_50835c1eb7_c.jpg


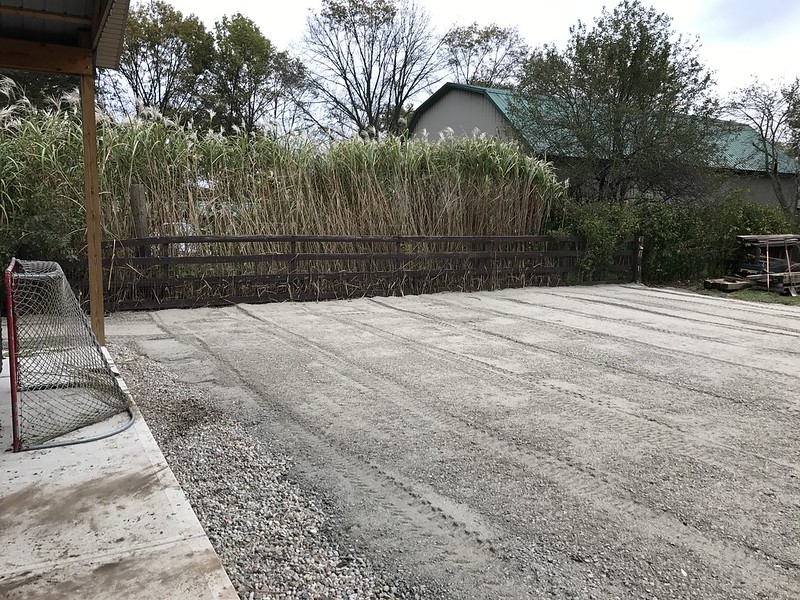
I skimmed the first 3-4" of topsoil where I was going to spread gravel except in the very low traffic areas where I just covered it with a heavy layer of 411.

Spread some #2 gravel
45975141285_2a0811163a_c.jpg


And some 411 on top of that
31948352357_1f13b7e876_c.jpg


Had to clear out some of these tall plants from the fence line
46837907942_465848c442_c.jpg


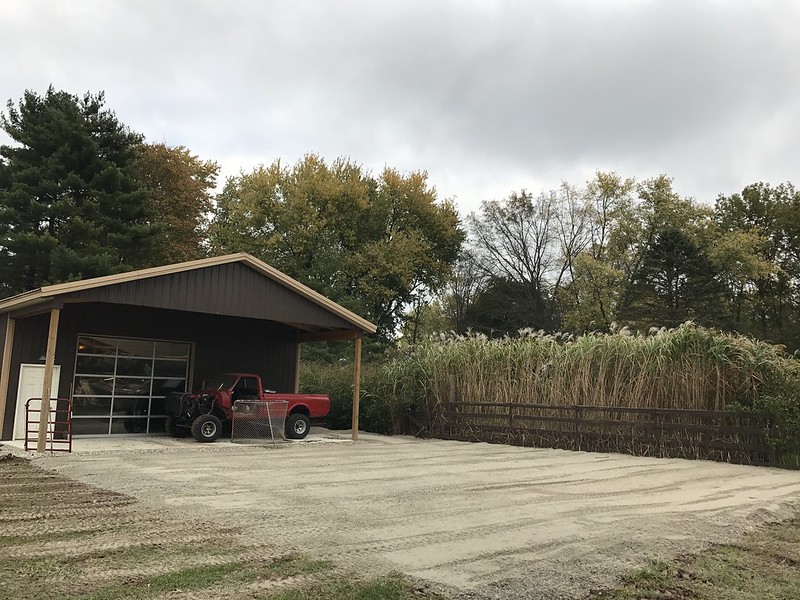
And finally the 411 cap
39924931883_3525c66d08_c.jpg


45975139555_9688bec94e_c.jpg


I brought more gravel in for beside the barn as it turned into a mud pit during a gathering in the barn while it was storming one night.
33014613438_6c317f18cd_c.jpg
 
Last edited:
OP
D

dfairchild19

Active member
Joined
Nov 14, 2011
Messages
34
Location
Mid-Ohio
And heres some miscellaneous shots from along the way

46837906522_c1714f6739_c.jpg


Putting the lift to use some
46889857341_6f917318d7_c.jpg


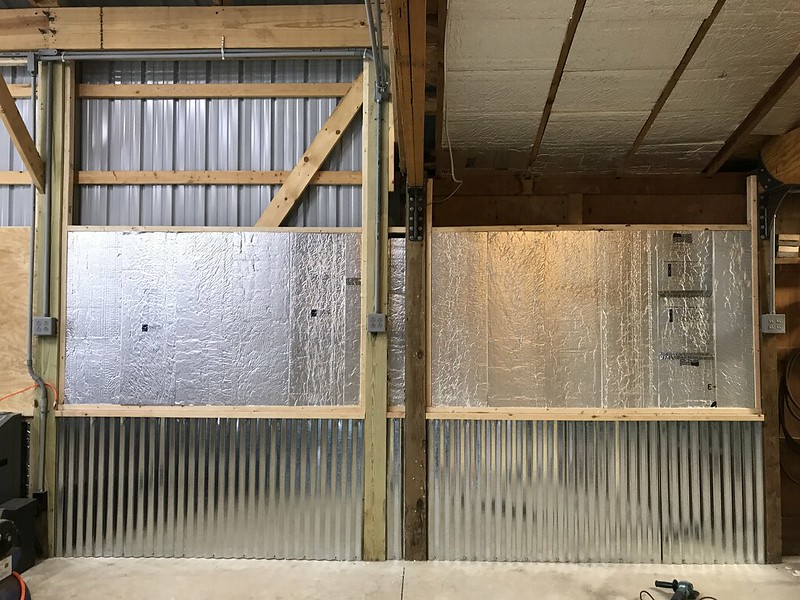
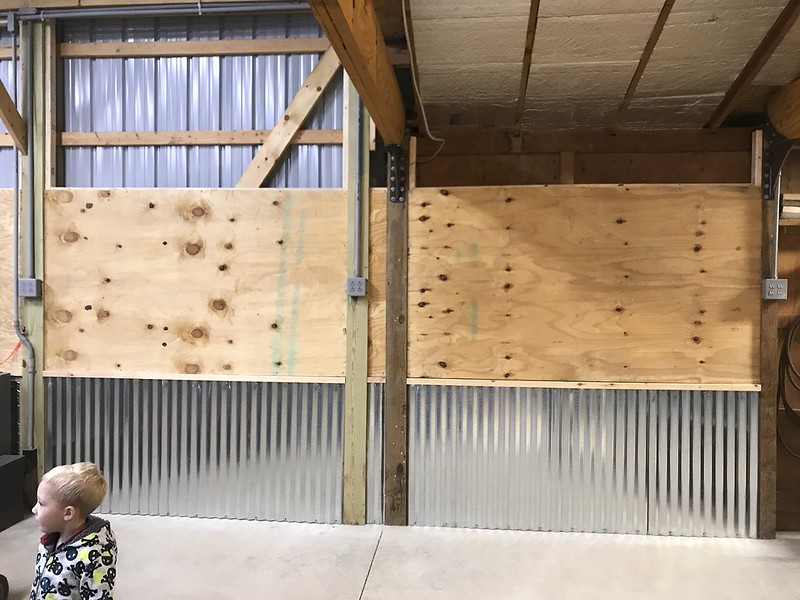
Getting a bit more insulation up and the corrugated steel up
45975148145_04ce0bfb04_c.jpg


31948389797_3981ed28ff_c.jpg


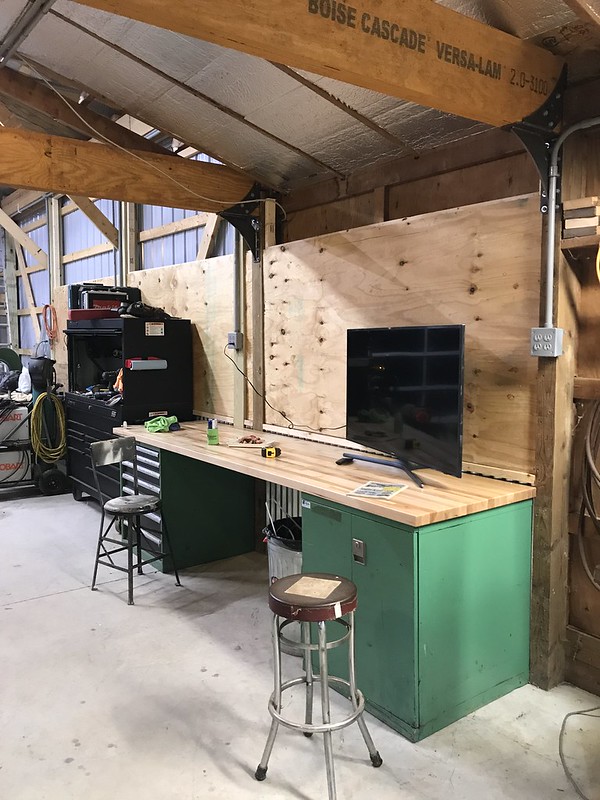
Lista cabinets in with the new 10' butcher block bench top
31948352977_a8021a4c44_c.jpg


46164951464_68f6eff19c_c.jpg


I wish it stayed this clean and open all the time
46896186151_9b572cdec6_c.jpg


39925008883_3c38f7c139_c.jpg


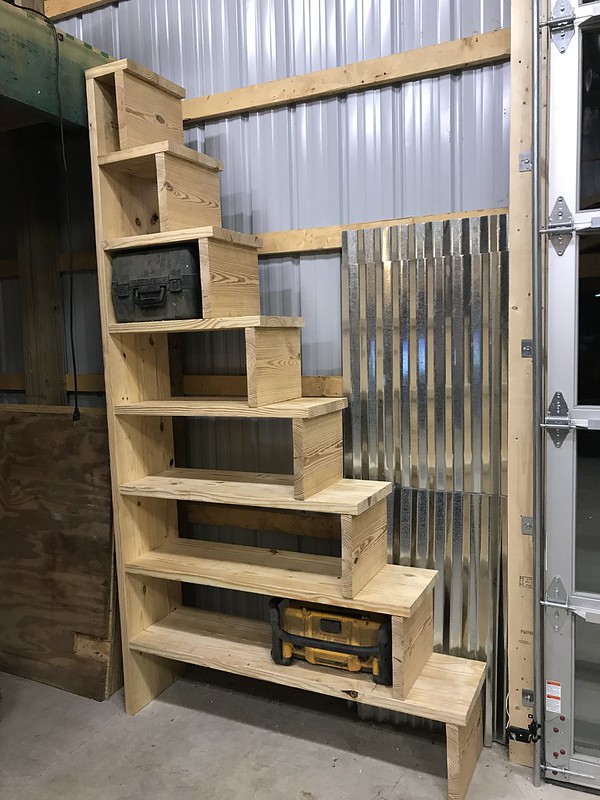
I built some steps with some built in shelving to get up to the loft. I didnt think through the shelf height as there are several bottles and jugs that dont quite fit in them. The step is a decent height but another inch or so would have helped tremendously for the usability of the shelves.
45975211705_287dd1e159_c.jpg


33014699218_6e8941cb06_c.jpg


I got the Lista shelf mounted to the bench top where I put the TV for now
39931247463_bda910a229_c.jpg


45975213005_a496dbc5b1_c.jpg


46837951222_5d076f2dfd_c.jpg


46844089152_390bd6ef71_c.jpg


46165020864_c8c9153714_c.jpg
 
OP
D

dfairchild19

Active member
Joined
Nov 14, 2011
Messages
34
Location
Mid-Ohio
Putting the lift to use on a buddy's wife's car with a brake job all around. Actually did two cars this night. Still using the torpedo heater in these colder months but once I can get more of the insulation up, Im planning on either a woodburner or a propane furnace with a couple of medium sized tanks that I can switch out to be refilled(maybe 100 gallon tanks?).
47051941601_ebb98c8458_c.jpg
 
Last edited:

jtbinvalrico

Well-known member
Joined
Jan 2, 2010
Messages
1,375
Location
Tampa FL
Looking good! I'm most envious of the space you have.... I'm trying to stuff all that into a slice of suburbia. The see-through door is a really nice touch.

Sent from my SM-G960U using Tapatalk
 

pennsylvaniaboy

Well-known member
Joined
May 28, 2014
Messages
417
just read thru this, sweet retrofit and new built....love it. do the lifts sync together for a car?
 
To avoid these ads, REGISTER NOW!
Top Bottom