To avoid these ads, REGISTER NOW!

Above 1200 Sq/FT The Lone Beech Garage (60x46x16)

Wokspaces above 1200 squarefeet.
To avoid these ads, REGISTER NOW!
OP
S

sbosecker

Well-known member
Joined
Sep 25, 2012
Messages
3,539
Location
Peachtree City, GA
Re: The Lone Beech Garage Build Thread (60x46)

Nice work with the miter station. Good to see the shop getting used after all the time and effort building and setting up!


Berwolf21,

Thanks for the kind words and for checking in!

The LBG is still a work in progress but it great to be able to use the space as I had hoped I would be able to.

Best regards,

Scott
 
OP
S

sbosecker

Well-known member
Joined
Sep 25, 2012
Messages
3,539
Location
Peachtree City, GA
Re: The Lone Beech Garage Build Thread (60x46)

Glad to see some parts coming together. Will this be the base?

shortykorte,

I had to put this project on hold for a few of days while I wait for a Pneumatic Brad Nailer I ordered to arrive.


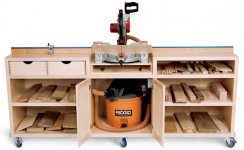
20170404-11.jpg

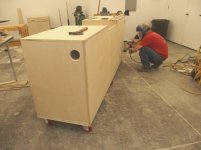
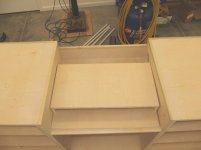
This is a picture from The Woodworker's Journal - publisher of the plans I'm using - of the finished project. In my post I've got the carcass laying on its back with the bottom of the station pointing towards me.


Best regards,

Scott
 
OP
S

sbosecker

Well-known member
Joined
Sep 25, 2012
Messages
3,539
Location
Peachtree City, GA
Re: The Lone Beech Garage Build Thread (60x46)

Tuesday - April 4, 2017

I am waiting for a couple of tools that I ordered to help with the construction of the Miter Saw Station. While these items make their way to Peachtree City, GA I decided to start work on the system I plan to use to hang the large USA flag in the Auto-Metal Working Shop.

As I think I mentioned previously, I'll be using 1/8-inch thick & 1-inch wide strips of steel mounted on the wall. The strips of steel will form a rectangle behind the edges of the flag. Several small magnets will hold the flag to the steel without marring the flag.

I have decided to position the flag on the same wall as the Lone Beech Melon Farm Sign. That sign is centered on the middle bay. I plan to hang the flag centered on the 3rd bay.

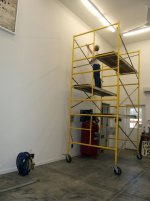
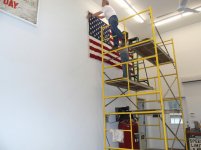
The first order of business was to remove the bracing from one side of the scaffolding. This allows the scaffolding to straddle the air compressor as the scaffolding was moved close to the wall.


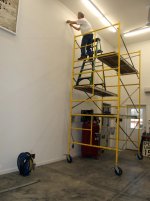
20170404-01.jpg 20170404-02.jpg 20170404-03.jpg

The next item on the agenda was to establish on the wall where the center of the garage door was. I had put a piece of tape on the floor next to the wall that represented the center of the garage bay. In the first picture I'm using a plumb bob over that tape to mark the centerline on the wall.

In the second picture I've come down about 20 inches from the ceiling (the same as the top of the Lone Beech Melon Farm Sign) and used a level to draw a horizontal line 4-1/2 feet either side of the centerline.

In the third line I'm marking out the location of the studs behind the drywall. After this was accomplished I dropped down 5 feet from this horizontal line and preformed these tasks again to mark out the position of the bottom of the 9 foot by 5 foot flag.


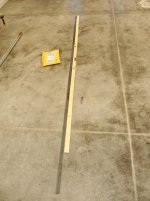
20170404-04.jpg

I then used a thin piece of wood that had been ripped from an 8 foot long 2x4 to make a story-stick. While the 8-foot story stick isn't long enough to lay out the entire 9-foot long pieces of steel I'll be using, it is long enough to do what I need it to do. I've marked the location of the studs on the story-stick and I'll use those locations to drill holes in the steel.


While I was on the scaffolding, I heard something that sounded like scratching on one of the garage doors. When I heard this I assumed it was one of the neighbor's dogs. They have several and one is the size of a small pony. I imagined this large animal pawing at the garage door for some reason.

I came roaring down the scaffolding and out the man-door to scare whatever was making the noise off my property. As it turned out it wasn't a dog ...or any other animal.

It was the County Tax Appraiser. He seemed a little startled by my aggressive pace as I emerged from the LBG looking to chase off the imaginary animal.

We chatted a bit about my new building and he indicated it seemed to be the same as the plans they had on file. He took a picture and departed.


Scott
 
Last edited:
OP
S

sbosecker

Well-known member
Joined
Sep 25, 2012
Messages
3,539
Location
Peachtree City, GA
Re: The Lone Beech Garage Build Thread (60x46)

Wednesday - April 5, 2017

Most of today was spent with one eye on the television and ears listening for tornado sirens. We had 3 tornado warnings, 2 inches of rain (no hail!) and gusty winds. It didn't seem like a good day to put on ear protection and get head down on a project in the LBG.


20170405-01.jpg

This was the first real rain-with-wind we've had since late last summer when we were getting leaks into the building around the center bay garage door. Looks like we didn't get it entirely fixed then.


Scott
 
OP
S

sbosecker

Well-known member
Joined
Sep 25, 2012
Messages
3,539
Location
Peachtree City, GA
Re: The Lone Beech Garage Build Thread (60x46)

Thursday - April 6, 2017

I got a bit of work done on the Miter Saw Station today before I had to break away to wait on a person that responded to a Craigslist ad I had.

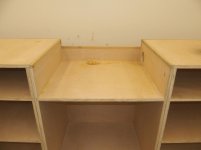
I needed to modify the plans a bit to accommodate my Makita LS1011 Compound Miter Saw. I calculated that removing 2-1/2 inches of plywood behind the saw would do the trick.


20170406-01.jpg 20170406-02.jpg 20170406-03.jpg

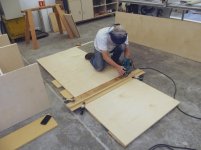
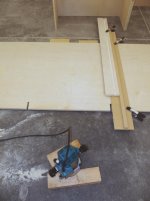
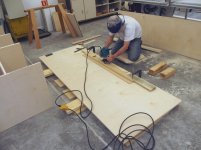
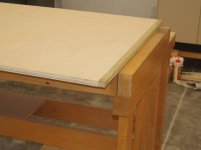
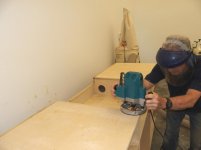
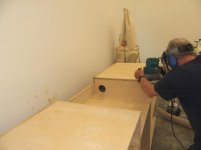
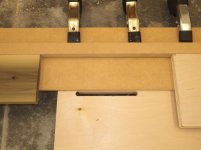
I used the router to cut a couple of grooves 2-1/2 inches into the top of the plywood.


20170406-04.jpg 20170406-05.jpg 20170406-06.jpg

I then repositioned my guide and made a few passes with the router to remove the section that would interfere with my miter saw.


I hope to work more on this project tomorrow.


Scott
 
Last edited:

drivesitfar

Well-known member
Joined
Oct 23, 2013
Messages
36,082
Location
Pacific Northwest
Re: The Lone Beech Garage Build Thread (60x46)

SB: i love the miter saw workbench and hope it works as good as it looks. :thumbup:

one of our members was having issues with rain coming in under his garage door and he put down a little rubber (or maybe it was plastic) strip and problem solved. here's the link to his thread which has some other pretty good things going on in it as he restores an old shop.

http://www.garagejournal.com/forum/showthread.php?p=6432870#post6432870

i also just asked him if his fix was still holding out the rain which i think it is and it might have rained more up here last month than it has in years.

hope the storm doesn't have any other ill effects and hope the tax man isn't too mean with his #'s on what you'll need to pay for IMPROVING YOUR OWN PROPERTY. i've never understood that and always considered it a penalty. i think you should have to pay more if you DON'T IMPROVE or at least keep up your property.

cheers
 
OP
S

sbosecker

Well-known member
Joined
Sep 25, 2012
Messages
3,539
Location
Peachtree City, GA
Re: The Lone Beech Garage Build Thread (60x46)

SB: i love the miter saw workbench and hope it works as good as it looks. :thumbup:

one of our members was having issues with rain coming in under his garage door and he put down a little rubber (or maybe it was plastic) strip and problem solved. here's the link to his thread which has some other pretty good things going on in it as he restores an old shop.

http://www.garagejournal.com/forum/showthread.php?p=6432870#post6432870

i also just asked him if his fix was still holding out the rain which i think it is and it might have rained more up here last month than it has in years.

hope the storm doesn't have any other ill effects and hope the tax man isn't too mean with his #'s on what you'll need to pay for IMPROVING YOUR OWN PROPERTY. i've never understood that and always considered it a penalty. i think you should have to pay more if you DON'T IMPROVE or at least keep up your property.

cheers

DrivesItFar,

I hope I'll be able to assemble the carcass of the Miter Saw Station next week but we'll see. There's usually "stuff" I hadn't counted on that gets inserted into my plans. Ha!

I looked at the garage door today. I found there was a small gap in the sealant the garage installers put between the bottom door segment and the weather stripping that seals the door to the floor. I'll attempt to touch that up with some additional sealant soon.

Storms weren't too bad at our place but there were 3 waves that kept me frozen in position watching in case something bad started to happen.

Taxes... the price of civilization. The assessor said a few things that soothed my concerns. He's probably has found that saying that stuff helps to keep property owners from reaching for a fire arm - or releasing the Rottweiler.

Best regards,

Scott
 
OP
S

sbosecker

Well-known member
Joined
Sep 25, 2012
Messages
3,539
Location
Peachtree City, GA
Re: The Lone Beech Garage Build Thread (60x46)

Friday - April 7, 2017


Today's plan was to get the USA Flag mounting steel prepped and primed and then return to work on the Miter Saw Station.

This did not happen.


20170407-01.jpg

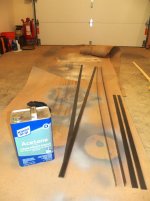
I rolled out one of my pedestal grinders to work on the steel. I got this stuff from Tractor Supply and some of it was apparently stored where the weather could get to it. I spent about an hour cleaning these flats up.


20170407-02.jpg

With the rust removed, I wiped down the steel with some acetone to get the oil (and whatever) cleaned off.


20170407-03.jpg 20170407-04.jpg

I used the story stick to locate the holes for the screws that would attach the steel to the studs in the wall. With those positions marked, I drilled the holes.
Oh, by the way, those aren't quarters lying on the floor. Those are the magnets that will hold the flag to the steel. I wiped them off with the Acetone as well to get them as clean as possible.


20170407-05.jpg

After wiping down the steel again, I put some primer on one side. It is supposed to dry for 24 hours. Due to social engagements this weekend, additional work on this project will have to wait until Monday.

At this point I was hoping it would be early afternoon and I'd be able to do some work on the miter saw station. Alas, it was late afternoon and any additional work will have to wait until next week.


Scott
 
Last edited:

250

Well-known member
Joined
Oct 16, 2014
Messages
537
Location
West of the Sierras
Re: The Lone Beech Garage Build Thread (60x46)

I was wondering how you fared with the storms. Good to see there wasn't any mandatory remodeling/landscaping added to the to-do list.

I have a very similar grinder stand. I'm looking forward to seeing how this piece of the ensemble turns out.
 
OP
S

sbosecker

Well-known member
Joined
Sep 25, 2012
Messages
3,539
Location
Peachtree City, GA
Re: The Lone Beech Garage Build Thread (60x46)

I was wondering how you fared with the storms. Good to see there wasn't any mandatory remodeling/landscaping added to the to-do list.

I have a very similar grinder stand. I'm looking forward to seeing how this piece of the ensemble turns out.

250,

I purchased this grinder & stand from a retired Delta Airlines Mechanic that was downsizing. I've found it useful.

We shall learn together how the flag mounting scheme will work out.


Best regards,

Scott
 
OP
S

sbosecker

Well-known member
Joined
Sep 25, 2012
Messages
3,539
Location
Peachtree City, GA
Re: The Lone Beech Garage Build Thread (60x46)

Wednesday - April 12, 2017


I returned to home from visiting my folks in Indiana on Sunday night. I flipped over the steel flats and painted primer on that side.


20170411-01.jpg

Yesterday I spray-painted the first side of the steel with white paint. This morning I flipped the steel over and painted the other side. While that paint dried I moved to the LBG Woodshop to work some more on the Miter Saw Station.


20170412-01.jpg

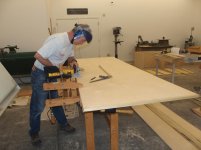
In order for the edging to work out on the back of the Miter Saw Station, I needed to cut some that was 3/4 inch wide.


20170412-02.jpg

I then used my Biscuit Joiner to cut grooves for the biscuits.


20170412-03.jpg 20170412-04.jpg 20170412-05.jpg

Glue up followed: After the first side dried enough, I did the same procedure on the opposite side.

I hope to continue working on this project tomorrow.


Continued in next post...
 
Last edited:
OP
S

sbosecker

Well-known member
Joined
Sep 25, 2012
Messages
3,539
Location
Peachtree City, GA
Re: The Lone Beech Garage Build Thread (60x46)

Continued...

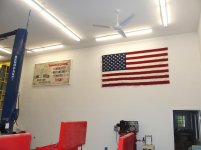
With the paint sufficiently dried on the steel, this evening I asked my wife to help me attempt to hang the flag in the Lone Beech Garage.

I needed her help to stabilize the steel while I fastened it to the wall. With that task behind us, we started hanging the flag.


20170412-11.jpg 20170412-12.jpg

I thought I had purchased too many magnets (25) but in order to keep the flag from sliding down on the steel I had to space the magnets more closely than I expected.


20170412-13.jpg 20170412-14.jpg

With the top of the flag secured to the steel, we rolled the scaffolding away and checked out how Old Glory looked on the wall.

Pretty good I think.

There's more work to be done on this project but I'm hoping that the magnet scheme will work. While we were working on hanging the flag, my wife pointed out that when I operate the ceiling fans they might cause problems with my magnetic flag hanging plan. I hadn't thought about that so we'll see how that works out after the rest of the steel is mounted on the wall and the flag is secured with magnets around its perimeter.


Scott
 
Last edited:
OP
S

sbosecker

Well-known member
Joined
Sep 25, 2012
Messages
3,539
Location
Peachtree City, GA
Re: The Lone Beech Garage Build Thread (60x46)

Thursday - April 13, 2017


Work on the Miter Saw Station continued today.


20170413-01.jpg

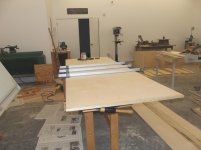
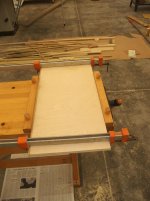
There's still a considerable amount of Edge Banding to glue to what will become the back of the Miter Saw Station. I'm using the Biscuit Joiner again to help attach the Edge Banding to the plywood.


20170413-02.jpg 20170413-03.jpg 20170413-04.jpg

Glue & clamp a section then leave for a while the glue sets.

Repeat.

Tomorrow I need to cut some holes in the plywood and then I should be able to start putting this thing together.


Scott
 

250

Well-known member
Joined
Oct 16, 2014
Messages
537
Location
West of the Sierras
Re: The Lone Beech Garage Build Thread (60x46)

Did you pick the magnet scheme because you could go 'frameless' without hanging it?
 
OP
S

sbosecker

Well-known member
Joined
Sep 25, 2012
Messages
3,539
Location
Peachtree City, GA
Re: The Lone Beech Garage Build Thread (60x46)

Did you pick the magnet scheme because you could go 'frameless' without hanging it?
250,

I am assuming that the flag might require a "dusting" periodically. I hope this approach will allow that maintenance to be accomplished without damaging the flag.

Best regards,

Scott
 
Last edited:
OP
S

sbosecker

Well-known member
Joined
Sep 25, 2012
Messages
3,539
Location
Peachtree City, GA
Re: The Lone Beech Garage Build Thread (60x46)

Friday - April 14, 2017

20170414-01.jpg 20170414-02.jpg 20170414-03.jpg

The construction of the Miter Saw Station required the purchase of a Pneumatic Brad Nailer. It had arrived last week and today I tried to use it for the first time.

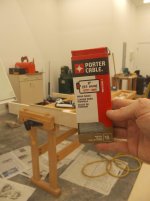
I had purchased some Porter-Cable 2-Inch Brads to use on this project and attempted to load and use them in my Makita AF505N Nailer. They wouldn't fit into the nailer without pushing pretty hard and they wouldn't feed. I ran over to Home Depot and picked up some DeWalt 1-3/4 inch brads. These worked fine.

I've seen reports that some 2-inch brads don't feed in some nailers. The Porter-Cable package indicates that they 2-inch/51 mm long. I saw other packages of 2-inch brads at Home Depot that indicated they were 2-inch/50 mm. Maybe this is part of the issue.

With functional, if somewhat shorter, brads now loaded in my nailer I could start assembling the Miter Saw Station.


20170414-04.jpg 20170414-05.jpg

Before the actual assembly could start I needed to cut a couple of 3-1/2 inch holes for dust collection.


20170414-06.jpg 20170414-07.jpg

After the hole was cut I used a router with a 1/4 -inch round-over bit to relieve the edges of the hole.


Continued in next post...
 
Last edited:
OP
S

sbosecker

Well-known member
Joined
Sep 25, 2012
Messages
3,539
Location
Peachtree City, GA
Re: The Lone Beech Garage Build Thread (60x46)

Continued...


20170414-11.jpg 20170414-12.jpg

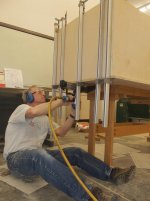
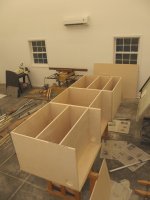
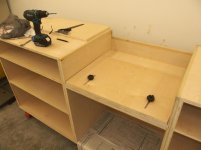
I set up the parts of the Miter Saw Station's carcass onto my bench to see how the assembly process would work. After some tweaking I was ready to begin.


20170414-13.jpg 20170414-14.jpg

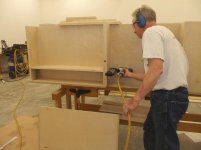
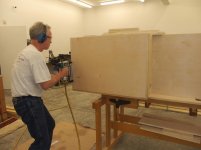
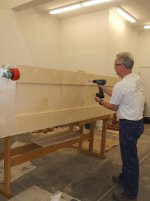
I clamped the end panel, shelves, dividers & bottom into place,tThen I started nailing. With one end completed, I did the same on the opposite end.


20170414-15.jpg

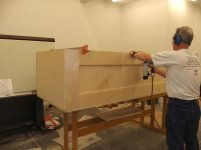
When I left the Woodshop for the evening, the basic outline of the Miter Saw Station was fastened together. I need to complete making the duct for the dust extraction scheme and adding the casters onto the bottom before I solicit help to get this big rig off the bench and onto the floor.


Scott
 
Last edited:
To avoid these ads, REGISTER NOW!
OP
S

sbosecker

Well-known member
Joined
Sep 25, 2012
Messages
3,539
Location
Peachtree City, GA
Re: The Lone Beech Garage Build Thread (60x46)

Saturday - April 15, 2017

The plans for the Miter Saw Station call for two forms of dust collection.

1. A shop vac is directly attached to the Miter Saw's dust port.
2. An internal duct is available to be attached to a dust collection system to periodically handle sawdust missed by the shop vac.


20170415-01.jpg 20170415-02.jpg

Today I started by working on the "internal duct". Temporary spacers were used to locate the duct wall. Then the duct wall was nailed into place.


20170415-03.jpg 20170415-04.jpg

Some caulking was used to seal around the duct wall to improve the efficiency of this dust collection system.


20170415-05.jpg

With the duct wall in place the top on this side of the Miter Saw station could be nailed into position.


Continued in next post...
 
Last edited:
OP
S

sbosecker

Well-known member
Joined
Sep 25, 2012
Messages
3,539
Location
Peachtree City, GA
Re: The Lone Beech Garage Build Thread (60x46)

Continued...

With the final part of the "top" attached, I turned my attention to the "bottom" of the cabinet.


20170415-11.jpg 20170415-12.jpg

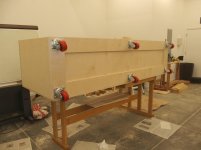
Cleats were glued & nailed to the bottom to give additional "meat" for the caster's lag screws to grab hold of.


20170415-13.jpg 20170415-14.jpg 20170415-15.jpg

Attaching the casters consisted of drilling 1/4-inch holes and then wrenching four 3/8-inch Lag Screw (with washer) into the bottom of the carcass through the caster's mounting hole.


20170415-16.jpg 20170415-17.jpg

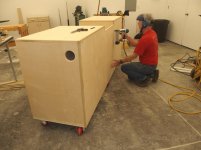
My son came out to the Woodshop to help me get the Miter Saw Station off the bench and onto the floor. This thing has quite a bit of mass! I got my shop vac out and positioned it into the "shop vac hole" to see how it fit. My current shop vac might be a bit tight for this application but it would work. I may acquire a different shop vac for the Miter Saw Station.

Getting this behemoth onto the floor this evening almost completed phase 1 of this project. I need to modify/replace the center shelf as it was a bit small due to the different thickness plywood I used. I also need to nail the back panel (generally inaccessible for nailing while on the bench) to the vertical structures and the horizontal shelves. This will improve the strength & rigidity of the carcass. If I can get these tasks completed, Phase 1 will be behind me. I'll try to do this tomorrow afternoon.

Once that's accomplished I'll have to leave the LBG for about a week. I've got some "pilot testing" coming up next weekend and I need to get "head down" into the books for a while to prepare.


Scott
 
Last edited:

1949 caddyman

Well-known member
Joined
Oct 5, 2010
Messages
1,778
Location
Arizona
Re: The Lone Beech Garage Build Thread (60x46)

Lookin good! That will work nice with a chop saw. I also have six casters on my moveable work bench. I found the floor was not dead level & needed thin shims to support each leg.
 
OP
S

sbosecker

Well-known member
Joined
Sep 25, 2012
Messages
3,539
Location
Peachtree City, GA
Re: The Lone Beech Garage Build Thread (60x46)

Looking good!!!! Planning and precursor sure made assembly quick. :thumbup:

Lookin good! That will work nice with a chop saw. I also have six casters on my moveable work bench. I found the floor was not dead level & needed thin shims to support each leg.

shortykorte & 1949 caddyman,

Thanks!

I got the last of Phase 1 work done today and then it's going to have wait for a while. It's pretty close to where it could be used as is and mounting the compound miter saw onto this thing might assist in the construction of the face frame... we'll see.

I hope my floor is level enough to not need shims but we'll soon find out.


Best regards,

Scott
 
OP
S

sbosecker

Well-known member
Joined
Sep 25, 2012
Messages
3,539
Location
Peachtree City, GA
Re: The Lone Beech Garage Build Thread (60x46)

Easter Sunday - April 16, 2017


20170416-01.jpg 20170416-02.jpg

As I mentioned in yesterday's post, the center shelf of the Miter Saw Station was a bit short of the width required to fully fill in the slots that had been cut for it. Today I removed the original shelf and cut a replacement that was at least a 1/4 inch wider.

The new shelf was a very close fit and I started pushing it into the dados. It hadn't gone too far when it started resisting my efforts. My Y-chromosome kicked in and I kept forcing it forward. I was within about 3 inches of the rear of the cabinet when it wouldn't move anymore. Worse, I couldn't get it out!

I realized I had blundered and tried to hammer it out as I had a little room to bang on the back of the shelf. No joy. After a bit of thought I realized there really wasn't a quick & elegant solution to this issue ...but there was a quick, brute-force solution.

I walked from the Woodshop to the house basement and retrieved my ancient Craftsman circular saw. In the state of Georgia this thing could have an antique license plate if it were a automobile.

I returned to the Woodshop and cut right down the middle of the stuck shelf. Then I was able to remove the pieces and begin again.

Another shelf was cut with looser tolerances. I also took the time to sand the edges of the shelf a bit to allow it to move more easily into the dados. That worked. There's more gap than I would like but it is structurally sound and the face frame, when constructed and attached to the front, will cover the offensive gaps.


20170416-03.jpg 20170416-04.jpg

With the shelf in place, I carefully measured and marked where the shelves and vertical supports should be. With that accomplished I nailed the back to the shelves and supports.

I did mistake one natural mark on the plywood as a pencil mark and badly missed a shelf when I shot the brad. These things don't want to drive out with a hammer so I used a wire cutter to trim it off flush with the surface of the plywood.


20170416-05.jpg 20170416-06.jpg 20170416-07.jpg

The plans call for the Miter Saw to be mounted on a platform. I have the pieces for that platform cut out so I set it up in the correct position to see what it looked like. I may need to trim or add slightly bigger pieces to accommodate my Makita LS1011.

I wish I could take this project to completion this week but a higher priority calls. We'll see how it goes in May.


Scott
 
Last edited:

drivesitfar

Well-known member
Joined
Oct 23, 2013
Messages
36,082
Location
Pacific Northwest
Re: The Lone Beech Garage Build Thread (60x46)

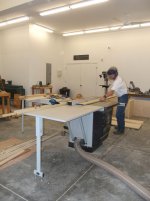
SB: i can relate to the cutting the shelf. i had to remove a top to a bench or take off a door frame which the owner would have let me do to retrieve some nice oak flat files. so you guessed it i cut the 11 foot plywood top in half after lifting it above the cabinets and putting my carts in the gap so i could cut it. i would have liked the 12 foot piece of plywood that was 3 foot wide, but it would have had to be strapped to the roof rack for a 2+ hour drive back home.

anyway i wanted to say i approved of your quick thinking to ruin one board and not take a chance of damaging your nice table/bench.

keep up the great work. also did you solve all the water issues at the garage door and the grease/oil pit?

cheers
 
OP
S

sbosecker

Well-known member
Joined
Sep 25, 2012
Messages
3,539
Location
Peachtree City, GA
Re: The Lone Beech Garage Build Thread (60x46)

SB: i can relate to the cutting the shelf. i had to remove a top to a bench or take off a door frame which the owner would have let me do to retrieve some nice oak flat files. so you guessed it i cut the 11 foot plywood top in half after lifting it above the cabinets and putting my carts in the gap so i could cut it. i would have liked the 12 foot piece of plywood that was 3 foot wide, but it would have had to be strapped to the roof rack for a 2+ hour drive back home.

anyway i wanted to say i approved of your quick thinking to ruin one board and not take a chance of damaging your nice table/bench.

keep up the great work. also did you solve all the water issues at the garage door and the grease/oil pit?

cheers

DrivesItFar,

Thanks!

Had I been thinking, I probably should have put a slight taper on the original shelf piece, making it just a bit smaller in the back than in the front. A little bees wax in "shelf slots" and on the ends of the shelf piece might have helped as well.

Next time. Ha!

The water issues in the pit and garage door haven't returned but we really haven't been tested with spring-summer thunderstorms yet.

I'm just getting back into the garage/woodshop after my time in the books preparing for my parade-of-horribles simulator sessions. Glad to have that behind me as we had 5 people in the simulator on my second day:

Myself
My Co-Pilot
The Simulator Instructor
A Check Instructor - checking the Simulator Instructor checking us.
A FAA Inspector - checking the Check Instructor checking the Simulator Instructor checking us.

Whew!

Who knew a simulator could lift that many people. That's what I get for having a session during normal work hours on a Monday. Everybody shows up!

It all went well but it is SO GOOD to be back in the Lone Beech Garage!

Best regards,

Scott
 
OP
S

sbosecker

Well-known member
Joined
Sep 25, 2012
Messages
3,539
Location
Peachtree City, GA
Re: The Lone Beech Garage Build Thread (60x46)

Saturday - April 29, 2017


After a week or so of study & preparation for a couple of Simulator sessions and then catching up on routine home chores & maintenance, it was good to get back into the Woodshop and begin to pick up where I had left off a week and half ago.


20170429-01.jpg

Today a fellow showed up to buy the extra drafting table/drafting machine I acquired some time ago. It had been sitting in the Woodshop for a while and I started actively trying to sell it on Craigslist about 3 weeks ago. A couple of no-shows during that time but today a guy drove about an hour and a half to buy it. I helped him load it and then off he went. The picture shows where the drafting table had been sitting. Before you wouldn't have been able to see the Jointer on the other side of the room because the drafting table would have been in the way.

It's good to have the floor space back.


20170429-02.jpg

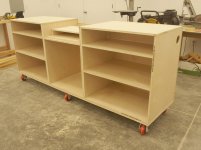
Although the Miter Saw Station isn't ready for prime time yet, I moved some stuff around in the Woodshop and then positioned the MSS where it will be living in the future. The floor seems to be flat enough that no shimming will be necessary. With the Station on casters, if desired I can move it from the wall to access any electrical outlets blocked by its 8-foot length. All in all the location seems to work with the rest of the Woodshop's layout.


20170429-03.jpg 20170429-04.jpg

Time to remove the Makita LS1011 Compound Miter Saw from its old home in the house basement. In the basement I had used 3 old restaurant Wall-Tables as my Miter Saw Station.


20170429-05.jpg 20170429-06.jpg 20170429-07.jpg

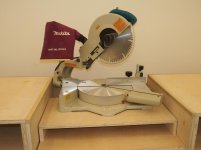
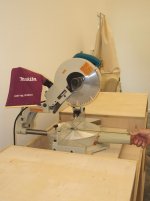
The moment of truth. I was pleased to see that the modifications I had made to the plans for the Miter Saw Station had worked. The Miter Saw wasn't bolted down but I was able to manipulate it successfully throughout its range of motion without any interference.


Continued in next post...
 
Last edited:
OP
S

sbosecker

Well-known member
Joined
Sep 25, 2012
Messages
3,539
Location
Peachtree City, GA
Re: The Lone Beech Garage Build Thread (60x46)

Continued...


20170429-11.jpg 20170429-12.jpg

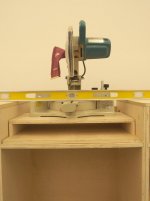
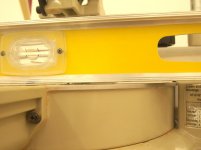
I pulled out a level and checked to see how the Miter Saw sat on the cabinet. Looks like I need to add just about a 1/16 on an inch or so to bring the saw right up to the top of the cabinet.


20170429-13.jpg

I moved all the saw paraphernalia out of the way so I could use my router with a rabbiting bit set up for a flush cut. The wood trim on the tops of the cabinet needed to be trimmed flush with the vertical plywood.


20170429-14.jpg 20170429-15.jpg

The rabbiting bit doesn't have as much cutting surface as a dedicated flush trim bit so I had to make a couple of passes to clean up the wood trim.


20170429-16.jpg 20170429-17.jpg

Both sides got the same treatment. After this work was completed, the wood trim was flush with the vertical sides.

That's all I accomplished today. I hope to continue to make good progress on this project this week.


Scott
 
Last edited:
OP
S

sbosecker

Well-known member
Joined
Sep 25, 2012
Messages
3,539
Location
Peachtree City, GA
Re: The Lone Beech Garage Build Thread (60x46)

Sunday - April 30, 2017

Last week I attended an Estate Sale that was very close to my home. I saw a couple of things of interest.


20170430-01.jpg 20170430-02.jpg

A couple of well stocked First Aid Kits. I purchased both of them. The red fabric kit will stay in my pickup truck. The Johnson & Johnson 8162 was destined for the Lone Beech Garage.


20170430-03.jpg

Although I had quickly inspected the contents of both kits at the sale, today I did a complete inventory of the Johnson & Johnson kit. It was remarkably complete and, although probably 30 years old, most of the contents were in useable condition.


20170430-04.jpg

I mounted the kit near the Shop Sink in the Auto-Metal Shop area of the building. Hopefully I'll never have to reach for it.


Scott
 
Last edited:

shortykorte

Well-known member
Joined
Sep 1, 2014
Messages
8,039
Location
Tallahassee, Fl
Re: The Lone Beech Garage Build Thread (60x46)

Congrats on placing the miter saw. Onward and upward.

First Aid kit unfortunately is a when not if, so good find.
 
OP
S

sbosecker

Well-known member
Joined
Sep 25, 2012
Messages
3,539
Location
Peachtree City, GA
Re: The Lone Beech Garage Build Thread (60x46)

Congrats on placing the miter saw. Onward and upward.

First Aid kit unfortunately is a when not if, so good find.
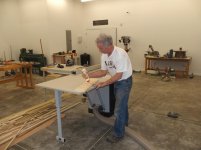
shortykorte,

Thanks. The Miter Saw Station project is similar to building a house. The framing stage of home construction is the most impressive in terms of appearances of progress as is the assembly of the Miter Saw Station's carcass. There's still considerable work to be done after those milestones but it doesn't look like much is happening. Ha!

I'm sure I'll need something out of the First Aid Kit at some point. Hopefully it will be one of the small band aids that gets used and no additional medical attention will be required.

Best regards,

Scott
 
OP
S

sbosecker

Well-known member
Joined
Sep 25, 2012
Messages
3,539
Location
Peachtree City, GA
Re: The Lone Beech Garage Build Thread (60x46)

Wednesday - May 8, 2017


Yesterday I made a little progress on the Miter Saw Station project.


20170502-01.jpg 20170502-02.jpg 20170502-03.jpg

The movable "sled" that the Miter Saw is mounted to has the ability to slide in and out. A couple of Hanger Bolts will be screwed into the Miter Saw Station's carcass and the "sled", via some slots & hardware, will be secured with those Hanger Bolts. To give the carcass more "meat" for the Hanger Bolts to bite into, I cut a piece of plywood and glued it into place.


20170502-04.jpg

While that glue was drying, I cut some 1/4-inch wide strips of poplar to act as some trim for the "sled".
Another small task accomplished was cutting some slightly wider strips of plywood to raise the height of the Miter Saw Station's "sled". This makes the top of my Makita LS1011 exactly even with the top of the carcass.

That ended yesterday's work.


20170503-01.jpg 20170503-02.jpg 20170503-03.jpg

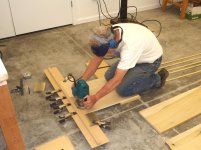
Today I went to the house basement and pulled some rough sawn poplar out of the lumber rack. I then planed a couple of 12-foot planks 3/4 inch thick. This material will be used for the Face Frame of the Miter Saw Station.


Continued in next post...
 
Last edited:
OP
S

sbosecker

Well-known member
Joined
Sep 25, 2012
Messages
3,539
Location
Peachtree City, GA
Re: The Lone Beech Garage Build Thread (60x46)

Continued...

After preparing the poplar planks, I turned my attention to constructing the Miter Saw's "sled".


20170503-11.jpg 20170503-12.jpg

I set up a crude jig to help me cut two 3/8-inch slots through the bottom piece of the "sled" assembly.


20170503-13.jpg 20170503-14.jpg 20170503-15.jpg

Using that piece as a guide, I marked the location for two holes to be drilled. I then screwed in the Hanger Bolts and placed the bottom part of the "sled" assembly onto the bolts.
It should be noted that the plans called for 3-inch long - 5/16-inch Hanger Bolts. With the thinner plywood that I used, 3-inch Hanger Bolts seemed too long. I used 2-1/2 inch Hanger Bolts instead.


20170503-16.jpg 20170503-17.jpg

Next I threaded a couple of knobs onto the Hanger Bolts. Tightening these knobs will allow the sled to be secured to the Miter Saw Station.
I placed the rest of the pieces of the "sled" assembly into position to check for fit.
All seemed well.


Continued in next post...
 
Last edited:
OP
S

sbosecker

Well-known member
Joined
Sep 25, 2012
Messages
3,539
Location
Peachtree City, GA
Re: The Lone Beech Garage Build Thread (60x46)

Continued...


20170503-21.jpg 20170503-22.jpg

It was now time to add the 1/4-inch poplar trim pieces to the various parts of the "sled" assembly. The glue will dry on these items over night and tomorrow I'll continue the project.


Once I get the "sled" finished, I should be able to mount my compound miter saw to the "sled". With that accomplished, I think I can use the miter saw station as a tool. Having an operational, if incomplete, miter saw station will help me complete the Face Frame.


Scott
 
Last edited:
OP
S

sbosecker

Well-known member
Joined
Sep 25, 2012
Messages
3,539
Location
Peachtree City, GA
Re: The Lone Beech Garage Build Thread (60x46)

Thursday - May 4, 2017


The glue on the trim pieces had dried overnight. This morning it was time to start assembling the Miter Saw Station "sled".


20170504-01.jpg 20170504-02.jpg

Today there was a lot of gluing and then leaving while the glue cured. First the sides of the "sled" were glued then, later, the back was glued onto the base.


20170504-03.jpg 20170504-04.jpg

After the side's glue had dried, I glued the top of the "sled" to the vertical sides.


20170504-05.jpg

It would have been difficult to get clamps on all the parts with glue so I used brads to hold everything together while the glue dried.


20170504-06.jpg 20170504-07.jpg

Last detail was cutting a couple of small lengths of poplar trim and gluing them to the vertical faces of the "sled". The poplar trim pieces really do give a more finished look to the piece.


Continued in next post...
 
Last edited:
OP
S

sbosecker

Well-known member
Joined
Sep 25, 2012
Messages
3,539
Location
Peachtree City, GA
Re: The Lone Beech Garage Build Thread (60x46)

Continued...


After the glue on the "sled" had cured, I positioned the "sled" onto the Miter Saw Station. I positioned the Miter Saw on top of the "sled", made a few final measurements, and then drilled two 1/4-inch holes into the top of the "sled". I used a couple of 2-1/2 inch bolts to mount my compound miter saw to the "sled". I've got small hands and it was still pretty difficult to get my hand into the innards of the "sled" to get the nut started onto the mounting bolt. After a minor struggle, I managed to get the saw mounted securely to the "sled".


20170504-11.jpg

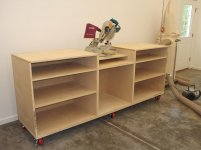
So now I have an operational, if still unfinished, Miter Saw Station.


Scott
 
Last edited:

drivesitfar

Well-known member
Joined
Oct 23, 2013
Messages
36,082
Location
Pacific Northwest
Re: The Lone Beech Garage Build Thread (60x46)

SB: well now that you have it functioning would you change anything if you built another one? congrats on sticking with the build all the way through it and i bet leaving it sit while you head out for a few days to work really tests your memory which maybe is a good thing?

how are you able to take pictures of yourself working on these projects? is it your wife or son or do you have your cell or camera mounted with a timer option on it?

since your miter station might get loaded down with materials and stuff pretty good I'm wondering if you might need to add 2 or 4 more casters since it's so wide to keep the plywood from cracking or bowing?

congrats and how do you like it?

cheers
 
OP
S

sbosecker

Well-known member
Joined
Sep 25, 2012
Messages
3,539
Location
Peachtree City, GA
Re: The Lone Beech Garage Build Thread (60x46)

SB: well now that you have it functioning would you change anything if you built another one? congrats on sticking with the build all the way through it and i bet leaving it sit while you head out for a few days to work really tests your memory which maybe is a good thing?

how are you able to take pictures of yourself working on these projects? is it your wife or son or do you have your cell or camera mounted with a timer option on it?

since your miter station might get loaded down with materials and stuff pretty good I'm wondering if you might need to add 2 or 4 more casters since it's so wide to keep the plywood from cracking or bowing?

congrats and how do you like it?

cheers

DrivesItFar,

Would I change anything?
It's pretty early in the game to make any operational observations. However, I will say that using the 18mm thick plywood vs. 3/4 inch thickness called for by the plans would be something I would avoid if I were doing this for the first time. It all worked out OK but I was constantly having to stop and ponder how that change in thickness might affect the outcome of my saw cuts vs. what the plan indicated would occur.

I would prefer to work on projects without being interrupted but that rarely happens. Once I leave a project for a few days it's pretty easy for me to get distracted by some other issue and then, by the time I get back to it, completely forget what the heck the plan was.

Most of the pictures taken with me in the frame are achieved with a camera on a tripod. My camera has the option of using a 12 second delay after the shutter button is pushed. I use that feature quite a bit. I also have an app on my smartphone that can act as a remote shutter release.

The station is pretty rigid so I think the 6 casters will be adequate but I'll keep an eye on things and see if that needs to be revisited.

How do I like it?

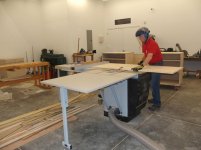
Late last evening I used it to trim one of those 12 foot poplar planks down to about 8 feet. That plank was about 12 inches wide and that is very close to the max capacity of the saw. The Station itself worked great! All that horizontal real estate made dealing with the long piece of lumber a non-event.

I like it a lot!


Best regards,

Scott
 
To avoid these ads, REGISTER NOW!
Top Bottom