To avoid these ads, REGISTER NOW!

VISE REPAIR 101 all vise repairs, lubricants, sources for parts and the tricks to fix

OP
D

drivesitfar

Well-known member
Joined
Oct 23, 2013
Messages
36,222
Location
Pacific Northwest
Bill: keep working at it and you'll figure it out. as you can see in the picture I posted the Athol's dynamic jaw in that picture is out of the static jaw. it's ExMaxima's vise in case you might like to PM him to see if he has more pictures. do you know how to use the PM (private messaging sort of like emails between members)?

good luck
 
To avoid these ads, REGISTER NOW!

454ragtop

Well-known member
Joined
Mar 24, 2008
Messages
5,012
Location
Carver, MA
Bill, the steel machine bushings are fine, no real advantage to going bronze there. If you wanted to, you could add a bronze thrust washer on the outside of the dynamic jaw, between the meatball and the jaw, for easier tightening and to cut down on wear.
 

jimreed2160

Well-known member
Joined
Aug 7, 2016
Messages
3,589
Location
Tallahassee FL
Parker #22 vise rehab

I have been tinkering with this vise since sometime in January. It arrived frozen and without a base. I worked a bit off and on with Liquid Wrench and tapping for a few months to soften it up. It also got some outside sun treatments and then I was ready to get medieval on it.

DSCN2935.jpg


Well, all of that trouble paid off and it came apart for cleaning.

DSCN3166.jpg


DSCN3167.jpg


DSCN3168.jpg


DSCN3169.jpg


I like to leave a little patina on these old characters to show a bit of age. Now it will be fitted with a wooden base for mounting and presented to my buddy who is vise-less.
 

ALLFAST

Well-known member
Joined
Feb 20, 2017
Messages
1,233
Location
Northern California
JimReed,

That is well done ! And a good gesture on your part. Did you make your own rubber interchangeable faced mallet with a CI pipe fitting there ?!
 

jimreed2160

Well-known member
Joined
Aug 7, 2016
Messages
3,589
Location
Tallahassee FL
All--Thanks for your kind words. The mallets are a matched (in size) set and are in for rehab. #2 has olive drab plastic/rubber. The other two will probably get hickory. Check out Woodworking 101 for how to make hickory faces.
 

ALLFAST

Well-known member
Joined
Feb 20, 2017
Messages
1,233
Location
Northern California
Drives,
I read of this fishmouthed pipe apparatus some weeks ago here...and couldn't find it and could have used it BADLY when trying to reinstall the spring and clip back into our vise I refurbed at work ...what a minor PITA that is with 2 pairs of hands and needle nose pliers in the mix !

So thanks for posting this ingenious tip....I won't forget it, and thanks to EM1 !

Keep persisting with an eye towards caution Bill, and good discretion on holding off on destroying the 2 nibs until confirmed information comes along....you will have it freed in no time.

Shawn
 

Carla

MEMBER EMERITUS
Joined
Nov 27, 2010
Messages
672
Yep. Main screw came right out as the cotter pin was already sheared off. The spring and thrust washers were all jammed up in there though. As the cotter pin was missing, the main screw did not take out the dynamic jaw with it :lol_hitti
The dynamic jaw will not move by hand at all, but it also doesn't need a real hard beating with the hammer either. It just needs mild tapping/persuasion with the dead blow to move it along. It appears to get tighter the closer it gets to the end of the slide however.
I spent some time last night with a file dressing the edges and eliminating the mushrooming at the end of the slide. Ive been hitting it PB Blaster daily for a couple days now and it is moving smoother and smoother each day. I still haven't gotten as far as the little detents in the slide though. I still question whether they will slide past the main vise nut assembly :dunno:.

I have read no mention of these slide detents on any Athol discussion, nor have I seen pictures of an Athol slide with these features on then either.. So I really don't know if these are typical to all Athol's, or just 624 1/2's.... or just mine specifically. I can easily grind them off, but I'd rather not, if they exist for a purpose.

Also, I am not sure how to remove the main vise nut on this Athol. I suspect if its pinned, I will first need to separate the swivel base from the static jaw first, to gain access. To remove that big *** screw I am going to need something like a draglink socket and an impact I suspect. I have the air tools, but need to track down a suitable drag link socket.

Hi, Bill,

There aren't any 'detents' in the end of that Athol beam, just a little bit or 're-enforcement' thickening in the end of the casting. The movable jaw will slide out easily past the main nut, once any swelling or burrs have been dressed down. You might take some fairly accurate measurements of the width and depth of the front portion of the movable jaw beam, and scrape or draw-file the battered back area to the same dimensions, as needed.

(cast iron will deform to some extent, with the battering shown on that part, and you may be surprised as to how many thou you'll need to scrape/file down to get the part back to its original dimensions)

Getting the swivel base screw out should be fairly easy. Having the vise upside down, flood the screw with Kroil oil (or equivalent penetrant), and have it sit awhile, then give the screw a few good raps with a 2 or 3lb. hammer and a copper drift, to 'shake it loose'.

A 'quick, cheap, and dirty' improvisation, which will work, would be to mill or grind down a scrap of flat steel to a firm-ish drive fit in the screw slot, then clamp the vise to anything which will keep it from rotating, and use a suitably long monkey or pipe wrench for good leverage on the imitation screw driver.

After the swivel base is removed, you'll see the retaining-pin for the main nut. Just drive it up from the bottom with a suitable punch....it may be rather firmly fit, and need a 'good whack'. Take care that the punch tip is clean and close to pin dia., so as not to mushroom the pin.

cheers

Carla
 

Bill C

Well-known member
Joined
Sep 17, 2006
Messages
144
Location
Portland, OR
Bill: keep working at it and you'll figure it out. as you can see in the picture I posted the Athol's dynamic jaw in that picture is out of the static jaw. it's ExMaxima's vise in case you might like to PM him to see if he has more pictures. do you know how to use the PM (private messaging sort of like emails between members)?

good luck

Bill, the steel machine bushings are fine, no real advantage to going bronze there. If you wanted to, you could add a bronze thrust washer on the outside of the dynamic jaw, between the meatball and the jaw, for easier tightening and to cut down on wear.

Thanks everybody for the help so far! I got it apart yesterday. I degreased it and pressure washed it really well first, then lubed up the slide with oil and used a block of wood and hammer to tap the slide free. All that is left for disassembly is to remove the swivel base screw and drive out the main nut retaining pin.

34736825181_6196b1fb2f_c.jpg


34736826821_7aceedd7f4_c.jpg


What is this small screw on the corner of the main body of the vise? it was covered in grime and was only visible now after I have degreased the whole thing.

34736827161_f4f2c07075_c.jpg


34024930354_66cb750551_c.jpg


34024932474_20c684bdeb_c.jpg
 
OP
D

drivesitfar

Well-known member
Joined
Oct 23, 2013
Messages
36,222
Location
Pacific Northwest
BILL: i know it is some guy's goal or maybe a challenge to take a vise or anything apart all the way, but that vise nut looks pretty damn clean and if it were mine i'd probably leave it there.

i'm guessing the screw on the side at the base of the static is sort of a set screw for the vise nut, but like i said i might leave it there if you are happy how the vise nut looks especially if the main screw turned in and out nicely.

great work getting the dynamic jaw out of the vise.

good luck and keep taking pictures and telling us how you are doing or feel free to ask for more help if you need some.

cheers

AF: i'm happy to help and do you need another bench to hold all those old vises you are gathering up?
 

Bill C

Well-known member
Joined
Sep 17, 2006
Messages
144
Location
Portland, OR
Hi, Bill,

There aren't any 'detents' in the end of that Athol beam, just a little bit or 're-enforcement' thickening in the end of the casting. The movable jaw will slide out easily past the main nut, once any swelling or burrs have been dressed down. You might take some fairly accurate measurements of the width and depth of the front portion of the movable jaw beam, and scrape or draw-file the battered back area to the same dimensions, as needed.

(cast iron will deform to some extent, with the battering shown on that part, and you may be surprised as to how many thou you'll need to scrape/file down to get the part back to its original dimensions)

Carla, thanks for the insight.

I read this after I got it apart... but yes you are very correct. It is pretty clear that the previous owner (once the cotter pin sheared off on the main screw) used the vise for some time simply whacking the slide with a hammer to open the jaws. I took some measurements after getting the dynamic jaw removed.. Take a look at these measurements:
On the slide width - the smooth operating portion of the slide measures 1.933 and the deformed end measures 1.9435. So it gains a 1/100th of an inch...

34024927544_77d469631a_c.jpg


34024927704_1790ae58cc_c.jpg


Similar story on the height. The non-deformed portion measures 2.856 and the fat end measures 2.864.. So it gained 8 thou from all the beating it received.

34024924634_141c861f5b_c.jpg


34024925274_e4b429a77d_c.jpg


I have not ever really done any precision filing in my life so it looks like I will need to develop a new skill. I have actually been wanting to purchase a nice file or two for the toolbox, so this can be the excuse to do that. I have never draw-filed anything. Perhaps you can suggest a file type that would work best for draw-filing these large flat cast iron surfaces based on the amount of material I will need to remove. Would a standard mill ******* cut file be the way to go? Is a double-cut ******* flat or hand file too aggressive?
Maybe a double-cut second cut flat file?

Getting the swivel base screw out should be fairly easy. Having the vise upside down, flood the screw with Kroil oil (or equivalent penetrant), and have it sit awhile, then give the screw a few good raps with a 2 or 3lb. hammer and a copper drift, to 'shake it loose'.

A 'quick, cheap, and dirty' improvisation, which will work, would be to mill or grind down a scrap of flat steel to a firm-ish drive fit in the screw slot, then clamp the vise to anything which will keep it from rotating, and use a suitably long monkey or pipe wrench for good leverage on the imitation screw driver.

After the swivel base is removed, you'll see the retaining-pin for the main nut. Just drive it up from the bottom with a suitable punch....it may be rather firmly fit, and need a 'good whack'. Take care that the punch tip is clean and close to pin dia., so as not to mushroom the pin.

cheers

Carla

I am going to borrow a friends draglink socket and see if that does the trick. If he doesn't have one that fits well, I will go the DIY home-made tool method you describe. I am sure once the swivel base is remove, it will be pretty clear how to get the main nut removed from the dove-tail. Now that I have the vise apart, I can see there is some play in the main-nut, which I assume is normal? Or should these be a very snug fit inside the dovetail?
 

jimreed2160

Well-known member
Joined
Aug 7, 2016
Messages
3,589
Location
Tallahassee FL
Bill--Good work on your Athol. That is a very good vise--keep up your good work. You are making good progress. For encouragement, here is a picture of mine.

DSCN0663.jpg
 

Sunset_Z28

Well-known member
Joined
Dec 27, 2014
Messages
331
Location
Harrah, OK
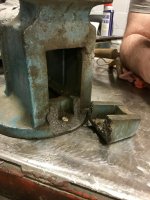
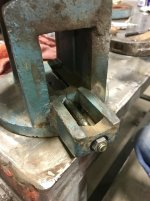
Several months ago I decided to paint an old Jet vise that belonged to my grandpa. It worked great but was pretty ugly looking. I soon realized it had a crack on the bottom (not sure what the actual name of this area is) I'm really surprised it hadn't fallen off prior. Being attached to it, I decided to repair it. I jb welded the piece back on to hold it in place and set the vise in a drill press to run a hole through to the inside. It was then bolted down locking it in place. A thin headed bolt was needed for this to work properly. I've considered filling the cavity where the bolt is with epoxy or jb weld. Time will tell if it holds.
 

Attachments

  • IMG_0118.jpg
    IMG_0118.jpg
    143 KB · Views: 41
  • IMG_0119.jpg
    IMG_0119.jpg
    137.8 KB · Views: 42
  • IMG_0122.jpg
    IMG_0122.jpg
    137 KB · Views: 44

Bill C

Well-known member
Joined
Sep 17, 2006
Messages
144
Location
Portland, OR
Several months ago I decided to paint an old Jet vise that belonged to my grandpa. It worked great but was pretty ugly looking. I soon realized it had a crack on the bottom (not sure what the actual name of this area is) I'm really surprised it hadn't fallen off prior. Being attached to it, I decided to repair it. I jb welded the piece back on to hold it in place and set the vise in a drill press to run a hole through to the inside. It was then bolted down locking it in place. A thin headed bolt was needed for this to work properly. I've considered filling the cavity where the bolt is with epoxy or jb weld. Time will tell if it holds.

I would call it the "Dynamic Jaw Support" Somebody was probably beating something into submission which caused .it to crack. The JB-Weld and screw will probably hold together well as long as you are not pounding heavily downward on something held within the jaws of the vise. I'd imagine it will work just fine under normal use. Which is a good thing, because it looks real sharp all re-finished.
 

Outlawmws

Well-known member
Joined
Aug 9, 2011
Messages
39,645
Location
The Badlands
Sunset. I will predict that the JB will fail, but you may not notice it until the bolt or the threads in the base for the bolt begin to fail.

The bolt is a good partial fix. You need to get that crack V ground and brazed back in place. Preferably with the bolt holding it in.
 

Carla

MEMBER EMERITUS
Joined
Nov 27, 2010
Messages
672
Carla, thanks for the insight.

I read this after I got it apart... but yes you are very correct. It is pretty clear that the previous owner (once the cotter pin sheared off on the main screw) used the vise for some time simply whacking the slide with a hammer to open the jaws. I took some measurements after getting the dynamic jaw removed.. Take a look at these measurements:
On the slide width - the smooth operating portion of the slide measures 1.933 and the deformed end measures 1.9435. So it gains a 1/100th of an inch...


Similar story on the height. The non-deformed portion measures 2.856 and the fat end measures 2.864.. So it gained 8 thou from all the beating it received.


I have not ever really done any precision filing in my life so it looks like I will need to develop a new skill. I have actually been wanting to purchase a nice file or two for the toolbox, so this can be the excuse to do that. I have never draw-filed anything. Perhaps you can suggest a file type that would work best for draw-filing these large flat cast iron surfaces based on the amount of material I will need to remove. Would a standard mill ******* cut file be the way to go? Is a double-cut ******* flat or hand file too aggressive?
Maybe a double-cut second cut flat file?


I am going to borrow a friends draglink socket and see if that does the trick. If he doesn't have one that fits well, I will go the DIY home-made tool method you describe. I am sure once the swivel base is remove, it will be pretty clear how to get the main nut removed from the dove-tail. Now that I have the vise apart, I can see there is some play in the main-nut, which I assume is normal? Or should these be a very snug fit inside the dovetail?

Hi, Bill,

I totally forgot to mention, earlier, the little grub-screw on the side of the vise does have to come out before you can remove the swivel base screw.......sorry about that...... : )

Its usual for the main nut to have some play in its dovetail. Those vises were assembled 'as cast', which is a 'scale measurement' level of not-very-precise fitup. Like as not, if you shimmed the nut tightly into the back jaw casting, the main screw might bind. A little bit of play in the fitup of the nut allows the nut to find its own centre when load is applied by the main screw.

You can find lots of information about files and filing on the internet. Read, invest in a few best quality files, and go through some learning-curve. It really is easy, and straight-forward work.....albeit tedious as all hell if you've more than a few thou to bring down.

I'd use a small disc-sander to rough down, but ever so carefully, as a disc will do really ugly gouges in the proverbial micro-second, if ever so slightly mis-handled......you can easily guess how I know this......you're safer to accept some tedium, and file the part.

After filing nearly to dimension, use a med. coarse, then fine, emery paper with a flat block to bring up a bit of a finish.

Now, if you feel motivated to 'make a nice job of it', you could consider investing in an Anderson or Coromant carboloy-tipped scraper, and do an ornamental flaking pattern on those flats, in the 'old toolmakers' tradition. All you need is a good scraper, a cushioned hammer (soft plastic tip), and a bit of patience. You can find demonstrations of the technique on the Youtube internet video programme.

This class of flaking is primarily used for oil-holding on machine ways, but works well for making cast flats 'look pretty', as an 'ornamental pattern'.....and, with some practice, is surprisingly quick and easy to do. It is a bit of 'optical illusion', to be sure, which makes most of the old scars and scratches seem to disappear.

Another option, to make old scarred casting flats look nicer, is to do so-called 'engine-turning' or 'damascening', with a rotary pad and abrasive slurry.....this, again, is a bit tedious, but can be a rather elegant 'pride-in-ownership' aesthetic detail. (years ago, I found that details such as this.....trivia as they may be.....would really impress some clients, some of the time)

cheers

Carla
 
OP
D

drivesitfar

Well-known member
Joined
Oct 23, 2013
Messages
36,222
Location
Pacific Northwest
CARLA: again another informative post laiden with great tips from yours (and our) past.

thanks again for sharing with us some of your knowledge!!

Bill: good luck with the spiffing up and if you hadn't heard i like BLO (boiled linseed oil) finish on bare old cast iron, but it's your vise and your color. also if you do decide to use BLO make sure to dispose of the rags or paper towels properly cause they can self ignite.

Sunset: thanks for posting up your Jet's ledge repair and keep us posted on how long it lasts if you use Gramp's vise much.

cheers
 

Bill C

Well-known member
Joined
Sep 17, 2006
Messages
144
Location
Portland, OR
Hi, Bill,

I totally forgot to mention, earlier, the little grub-screw on the side of the vise does have to come out before you can remove the swivel base screw.......sorry about that...... : )

Its usual for the main nut to have some play in its dovetail. Those vises were assembled 'as cast', which is a 'scale measurement' level of not-very-precise fitup. Like as not, if you shimmed the nut tightly into the back jaw casting, the main screw might bind. A little bit of play in the fitup of the nut allows the nut to find its own centre when load is applied by the main screw.

You can find lots of information about files and filing on the internet. Read, invest in a few best quality files, and go through some learning-curve. It really is easy, and straight-forward work.....albeit tedious as all hell if you've more than a few thou to bring down.

I'd use a small disc-sander to rough down, but ever so carefully, as a disc will do really ugly gouges in the proverbial micro-second, if ever so slightly mis-handled......you can easily guess how I know this......you're safer to accept some tedium, and file the part.

After filing nearly to dimension, use a med. coarse, then fine, emery paper with a flat block to bring up a bit of a finish.

Now, if you feel motivated to 'make a nice job of it', you could consider investing in an Anderson or Coromant carboloy-tipped scraper, and do an ornamental flaking pattern on those flats, in the 'old toolmakers' tradition. All you need is a good scraper, a cushioned hammer (soft plastic tip), and a bit of patience. You can find demonstrations of the technique on the Youtube internet video programme.

This class of flaking is primarily used for oil-holding on machine ways, but works well for making cast flats 'look pretty', as an 'ornamental pattern'.....and, with some practice, is surprisingly quick and easy to do. It is a bit of 'optical illusion', to be sure, which makes most of the old scars and scratches seem to disappear.

Another option, to make old scarred casting flats look nicer, is to do so-called 'engine-turning' or 'damascening', with a rotary pad and abrasive slurry.....this, again, is a bit tedious, but can be a rather elegant 'pride-in-ownership' aesthetic detail. (years ago, I found that details such as this.....trivia as they may be.....would really impress some clients, some of the time)

cheers

Carla

Amazingly informative and very helpful! I think I will stick with the draw-filing method. Then clean it up with emery.

Also good to know about that small set-screw on the side of the vise. I am glad I didn't go right into removing the swivel base screw without removing that little screw first!
 

Bill C

Well-known member
Joined
Sep 17, 2006
Messages
144
Location
Portland, OR
Bill: good luck with the spiffing up and if you hadn't heard i like BLO (boiled linseed oil) finish on bare old cast iron, but it's your vise and your color. also if you do decide to use BLO make sure to dispose of the rags or paper towels properly cause they can self ignite.

cheers

I prefer a patina on these old tools. It tells the story of the hard years of service the vise has had. I also intend to use the vise and I certainly do not want to be afraid of chipping/scratching the perfect paint job. I will likely finish with BLO or gun-blue or possibly just spray it down with light oil and wax.
 
To avoid these ads, REGISTER NOW!

jimreed2160

Well-known member
Joined
Aug 7, 2016
Messages
3,589
Location
Tallahassee FL
Parker #22 base

OK, here is the last photo of the Parker #22. Restoration is complete. It was missing its attachment bolt but I found one that fit and cut it down. I mounted the vise on a wooden base sandwich of very old SYP and 2x construction lumber. It is held by the bolt at the center of the base and by a bolt on each side.

DSCN3202.jpg


It is for my just retired work buddy who is currently vise-less. He works on his cars and does a little woodworking. He can mount this one to his bench and use it for light work. Maybe this old Parker can see more action.
 
OP
D

drivesitfar

Well-known member
Joined
Oct 23, 2013
Messages
36,222
Location
Pacific Northwest
Shift: i recall reading a member's post here when i first joined that had a small one car garage and he didn't own a vise. that said he used his workmate as his workbench and his vise and if he had something heavy to hold he'd put it on the gravel floor in his garage and use a pipe wrench and holding it in a position with his feet. SOME GUYS KNOW HOW TO GET R DONE.

i hope somebody gave him a vise and i can't recall who it was at the moment.

A VISE is a very versatile tool and not surprising some use it as a press and an anvil which it was never meant to be used that way.

ALL: i could maybe have a movie made about me if i went VISELESS IN SEATTLE don't you think after all the ones i've bought? :evil: :beer:

anybody else own a steel bench like this that UNCLE SAM and other big companies had built for them? what a great vise stand these are, but be prepared to muscle up to move them cause they are not light.
 

Attachments

  • WP_20170527_017[33210].jpg
    WP_20170527_017[33210].jpg
    148.6 KB · Views: 29
  • WP_20170527_004[33245].jpg
    WP_20170527_004[33245].jpg
    151 KB · Views: 35
  • WP_20170527_003[33244].jpg
    WP_20170527_003[33244].jpg
    150.3 KB · Views: 38
  • WP_20170527_001[33242].jpg
    WP_20170527_001[33242].jpg
    147.4 KB · Views: 37

Bill C

Well-known member
Joined
Sep 17, 2006
Messages
144
Location
Portland, OR
Just an update on my progress.
I draw filed the slide (as per Carla's suggestion) on my Athol 924 1/2 and the dynamic jaw now moves beautifully through the static jaw. Next steps for the vise is a dunk in the electrolysis tank and then I will put it all back together.

Another big win for me was the great folks at Century Spring (http://www.centuryspring.com) have a spring that seems to be a perfect match (wire diameter, # of coils, etc) to the original Athol main screw spring. The best part is they are sending it to me free of charge as they typically have a $50 minimum online order requirement. They are just billing my UPS account directly for the shipping costs. So that is really awesome of them :beer:
 

jimreed2160

Well-known member
Joined
Aug 7, 2016
Messages
3,589
Location
Tallahassee FL
Parker vise finds a new home.

Here is a picture of my buddy with his new toy. Turns out the blue was a good choice as he can see that color. And the metallic blue was the color of his first car. He was tickled with the vise and I am tickled that he is no longer vise-less.

IMG_4784.jpg
 
OP
D

drivesitfar

Well-known member
Joined
Oct 23, 2013
Messages
36,222
Location
Pacific Northwest
JIM: a great gesture that is for certain. WELL DONE!! :bowdown:

i hope he doesn't think it's too nice to use now or he'll still be VISE-LESS. :D

ALL: how many of you actually have E tanks set up in your garages/shops to use any day you want to? also i hear some of you use them 24/7 and are they all outside tanks or can you do that inside your garage/shop too?

for those of you new to E tanks here's a great thread that tells you quite a bit and if you don't find the answer you are looking for just ask a question on the thread like i did.

http://www.garagejournal.com/forum/showthread.php?t=237752
 

G-ManBart

Well-known member
Joined
Jan 24, 2015
Messages
2,059
Location
Michigan
I've posted on this in the past, but think I skipped some of the steps, or didn't cover everything well, so here's a new writeup on how to fix your Wilton if the pin supports in the tail cap assembly are damaged.

You can substitute brazing for the TIG I did and get similar results.

This C0 was in great shape, but it looks like somebody disassembled it and messed up when they put the pins back in, and cracked the pin supports completely on one side, and partially on the other side. There was no evidence it was dropped, which is the usual cause, but I guess that's also possible.

I used a grinder and belt sander to remove material from the tail cap and then TIG welded a washer over the pin holes after opening the ID with a die grinder. If you don't remove material from the tail cap there's a big gap between the washer and the pins, and while the vise will work, the handle will move a bunch before the jaw moves.

If you look at the tail cap, the hole isn't centered, so I opened up the ID of the washer enough that I could use the overlap on the inside to tack the washer in place before running a bead all the way around the outside edge, skipping right around the pin holes. I used Inconel filler rod because it's nickel-based and works well with cast/ductile iron.

After I got the tail cap sorted out, I put the tail cap in the body along with the nut, found an appropriately sized socket for the end of the nut, a piece of flat stock for the front, and clamped the whole thing in the vise and drilled oversized holes (1/4") for new pins to make sure everything fits tightly.

As you can see in the "after" pic the tail cap assembly lines up properly and I'm confident it's stronger than it was when the vise was manufactured. It's not the prettiest fix in the world, but I wasn't worried about that since it's not visible.

You can see just a sliver of the casting left on the right side:


All welded up and smoothed with a flap disc:


Columbian eating a Wilton:


Ready to be reassembled:


Bill C

Well-known member
Joined
Sep 17, 2006
Messages
144
Location
Portland, OR
ALL: how many of you actually have E tanks set up in your garages/shops to use any day you want to? also i hear some of you use them 24/7 and are they all outside tanks or can you do that inside your garage/shop too?
for those of you new to E tanks here's a great thread that tells you quite a bit and if you don't find the answer you are looking for just ask a question on the thread like i did.

http://www.garagejournal.com/forum/showthread.php?t=237752
I do not keep mine set-up all the time, but it breaks down easy and I set it up when needed. Here it is getting some use cleaning up the Athol.

34244695143_14b23c0aff_c.jpg
 

thejudges69

Well-known member
Joined
Jun 1, 2012
Messages
4,454
Location
youngstown, ohio
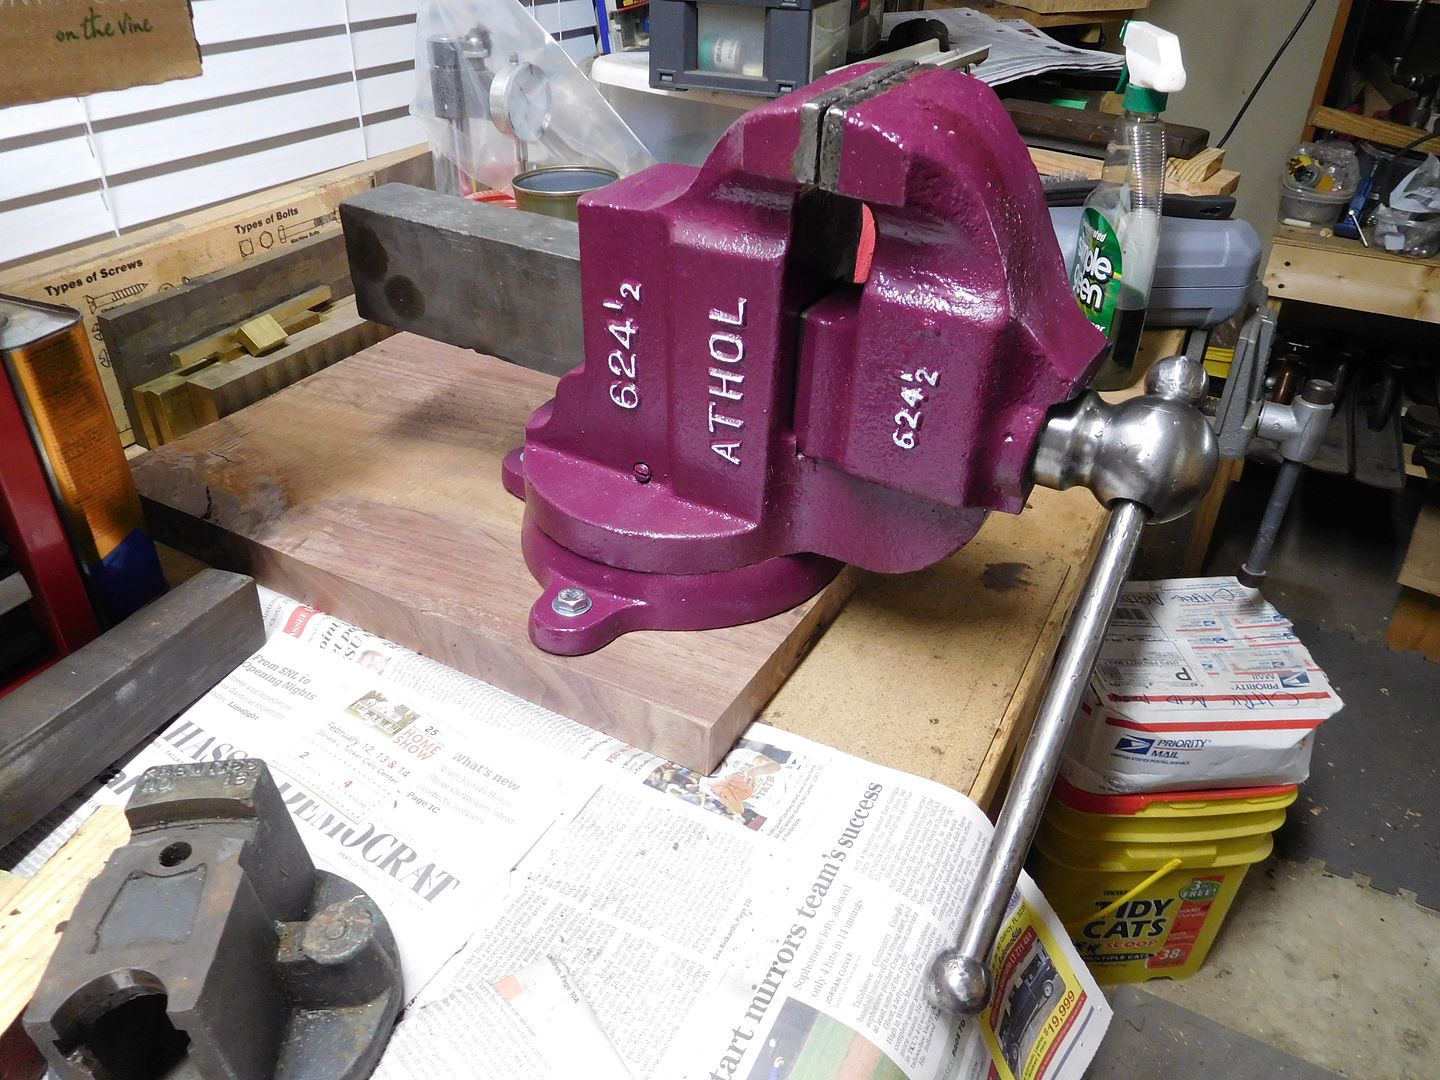
Well, here we go. Had some black laying around so I wiped it down and sprayed it. Got a couple cans. I forgot to tape off the top of the swivel, so I may have to redo that part.


G-ManBart

Well-known member
Joined
Jan 24, 2015
Messages
2,059
Location
Michigan
Well, here we go. Had some black laying around so I wiped it down and sprayed it. Got a couple cans. I forgot to tape off the top of the swivel, so I may have to redo that part.

Swiveling the vise will wear off that paint in no time...no need to redo it. I can't tell if it was taped off, but there's no need to paint the anvil, and it sort of looks odd.
 

Bill C

Well-known member
Joined
Sep 17, 2006
Messages
144
Location
Portland, OR
Finished up the Athol 624 1/2 yesterday. I think it came out pretty good. I am happy to have saved this one from the neighbors scrap heap.

Here is a summary/recap

This poor old Athol had been sitting outside in the Pacific NW Rain for number of years. After the cotter pin on the lead screw sheared off, the previous owner tossed it outside in his scrap metal pile and replaced the vise with a "nice" shiny Harbor Freight unit.
Luckily I was able to take it off his hands for a whopping ZERO dollars.

Here is what the thing looked like when I picked it up:

34015128723_17e753924a_c.jpg


I got the whole thing torn apart which took some work as the end slide on the dynamic jaw had suffered much abuse at the hand of the neighbors hammer. Making the whole thing jam up when trying to separate the two. Rust had also seized up the swivel base locking handle and the set-screw that retains the main swivel base nut. Lots of penetrating oil and MAPP torch heating finally resulted it in the whole thing coming apart:

34736825181_6196b1fb2f_c.jpg


After the cotter pin failed it looked like the spring & washers that retained the lead screw in the dynamic jaw had been completely chewed up.

34015127033_251c134123_c.jpg


I was able to source a suitable spring from Century Spring Co (which they kindly sent me free of charge) and thick metal washers of the appropriate size from the local Hardware store.

I then soaked all the pieces in my DIY electrolysis tank to get them rust free. I spent some time draw-filing the slide back into proper spec. A little tedious, but not too terrible. I then polished up the slide with emery and finishing pads. The swivel base mating parts along with the vise handle got similar treatment.
At that point it was time to get it painted. I was going to go the BLO route, but ultimately decided I wanted a painted finish. I chose Duplicolor Ceramic Engine paint in "Detroit Diesel" Alpine Green. I sprayed the parts and then baked 'em to help cure the paint.

34953368372_e049e295a7_c.jpg


Then it was just a matter of putting the whole thing back together. I used anti-seize on all the nuts/bolts as well as the lead screw/main nut and swivel base mating surfaces. I then used a paste wax and sealant on the dynamic jaw slide and vise jaws. I also rubbed a light oil on the slide contact surfaces for a little extra lubricant.

Here is the final product:

35107902136_c585335409_c.jpg


34761298480_5fba8404de_c.jpg


34337903683_dd57e6273c_c.jpg


35107793316_d893a17f5e_c.jpg


Not too shabby for a FREE vise. I only had to spend a few bucks on some metal washers & paint and consumed some basic shop supplies (brake cleaner, penetrating oil, sanding discs and what not for the angle grinder and die grinder). I also *HAD* to buy some nice Bahco metal files to do the draw-filing work, of course :rocker:
 
OP
D

drivesitfar

Well-known member
Joined
Oct 23, 2013
Messages
36,222
Location
Pacific Northwest
BILL: thanks for the recap of your FREE ATHOL VISE. great story and great result.

also the pictures in the background aren't too shabby either. is that a 69 Chevelle and what do you have on top of the engine? what's under the CAR COVER??

cheers and good find and save!! :beer:
 

I8AWRENCH

Well-known member
Joined
Aug 10, 2016
Messages
81
Location
South carolina
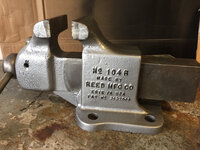
So I got around to finishing up my reed 104r. We will see if the fix holds or by some chance I can get another split nut for it. I started asking questions about the split nut back on page 215 as mine was completely missing. After trying a lot of different avenues it was clear that making this part would have to be done by myself with the tools available. Machine shops and machinists friends just didn't want to mess with it. So I found these parts that I'd thought would work best. A shaft collar clamp SP-23-F (eBay $7.35) was a very close match.
b45291c0c70b92ef64f2ef8c69fb77d8.jpg
I knew I would have to shave the OD a few mm but figuerd I'd still be able to screw in the 2 bolts holding it together. I actually had to cut the whole head of the bolts and could only get enough meat on one to stay in the collar after belt sanding. Well I figure it will still work as a post to hold the other collar side in (aesthetics) and it's load is really only the slide pulling out.
385ba239f82b6f34911165cbaa7f179c.jpg
I drilled a hole that would line up with the set screw and made a longer set screw with a 3/8-24x1 hex head bolt(cutting head of and sawing flat head slot).
70bc932582e468bfbd20101fac8eb24c.jpg
Found a thrust bearing NTA-1423 with a good ID for the screw (eBay $5). Cleaned everything up and lubed. Painted some leftover hammered pewter on body. The vise now works great has no slop in the action. ea0240d795a2f8abc8a662d17f34f255.jpg
525a47d72d98df757ca038b349d5a123.jpg
788ba249970d3552d9b71baf57663f95.jpg
1e0753eb7b10566d236f8d897f673973.jpg
I'll still be on the look out for a real split nut but this hopefully will be a good cheap fix for a vise I spent $25 on in the first place. I know there are better jobs done making these but it just wasn't feasible or possible for me to do it.


Sent from my iPhone using Tapatalk
 

Attachments

  • 1e0753eb7b10566d236f8d897f673973.jpg
    1e0753eb7b10566d236f8d897f673973.jpg
    772.7 KB · Views: 1
  • 788ba249970d3552d9b71baf57663f95.jpg
    788ba249970d3552d9b71baf57663f95.jpg
    636.3 KB · Views: 2
  • 525a47d72d98df757ca038b349d5a123.jpg
    525a47d72d98df757ca038b349d5a123.jpg
    772.7 KB · Views: 2
  • ea0240d795a2f8abc8a662d17f34f255.jpg
    ea0240d795a2f8abc8a662d17f34f255.jpg
    767.1 KB · Views: 2
  • 70bc932582e468bfbd20101fac8eb24c.jpg
    70bc932582e468bfbd20101fac8eb24c.jpg
    726.7 KB · Views: 1
  • 385ba239f82b6f34911165cbaa7f179c.jpg
    385ba239f82b6f34911165cbaa7f179c.jpg
    795.9 KB · Views: 2
  • b45291c0c70b92ef64f2ef8c69fb77d8.jpg
    b45291c0c70b92ef64f2ef8c69fb77d8.jpg
    679.3 KB · Views: 2
To avoid these ads, REGISTER NOW!
Top Bottom