To avoid these ads, REGISTER NOW!

Raising ceiling on garage for lift - need a structural engineer

To avoid these ads, REGISTER NOW!
OP
J

JackAndy

Well-known member
Joined
Apr 4, 2017
Messages
130
Location
Minneapolis
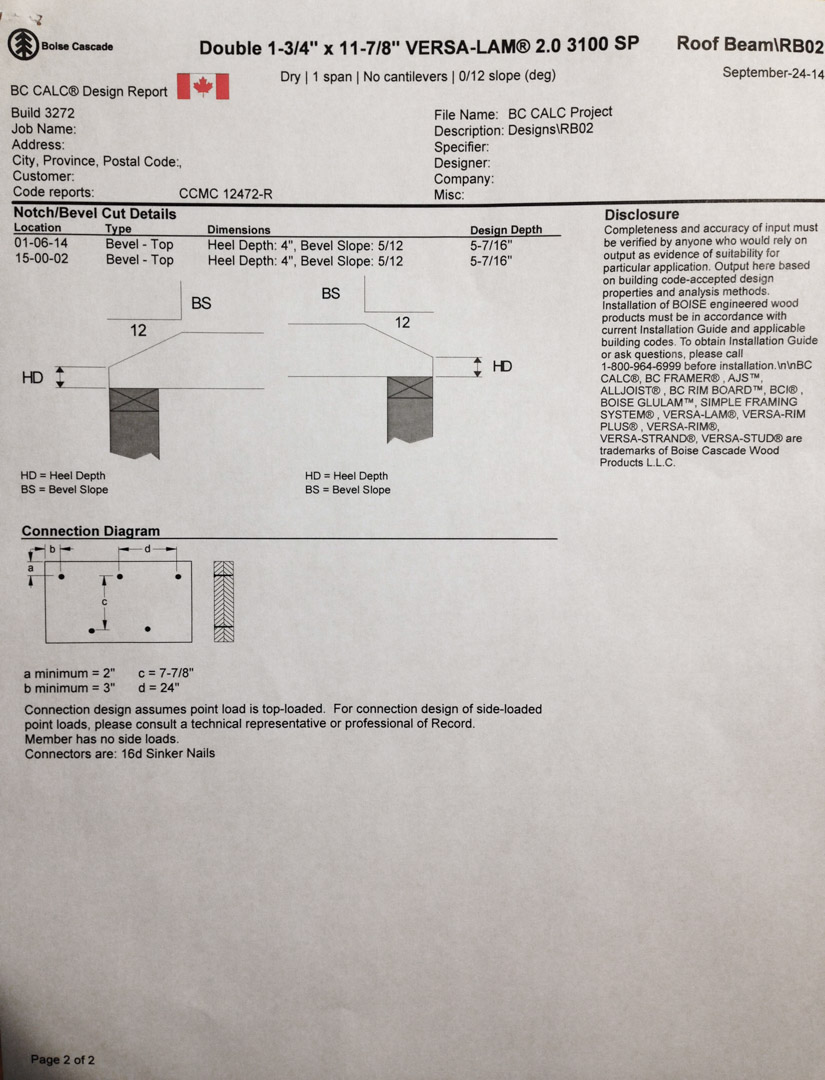
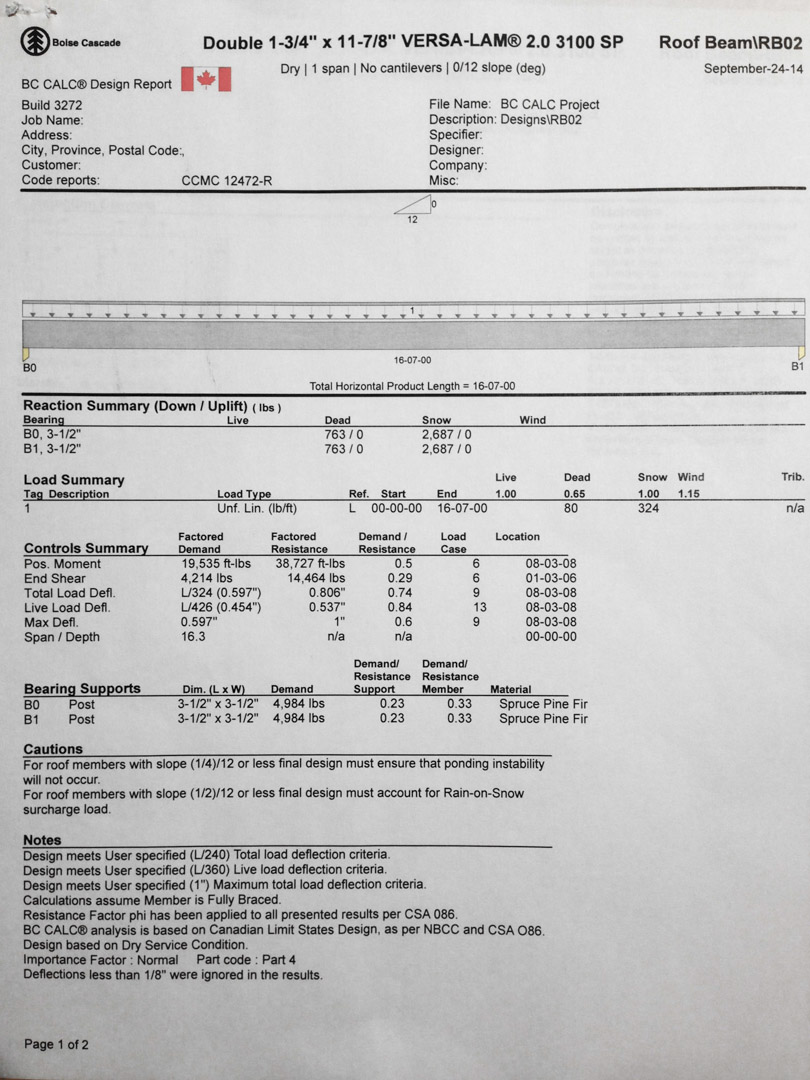
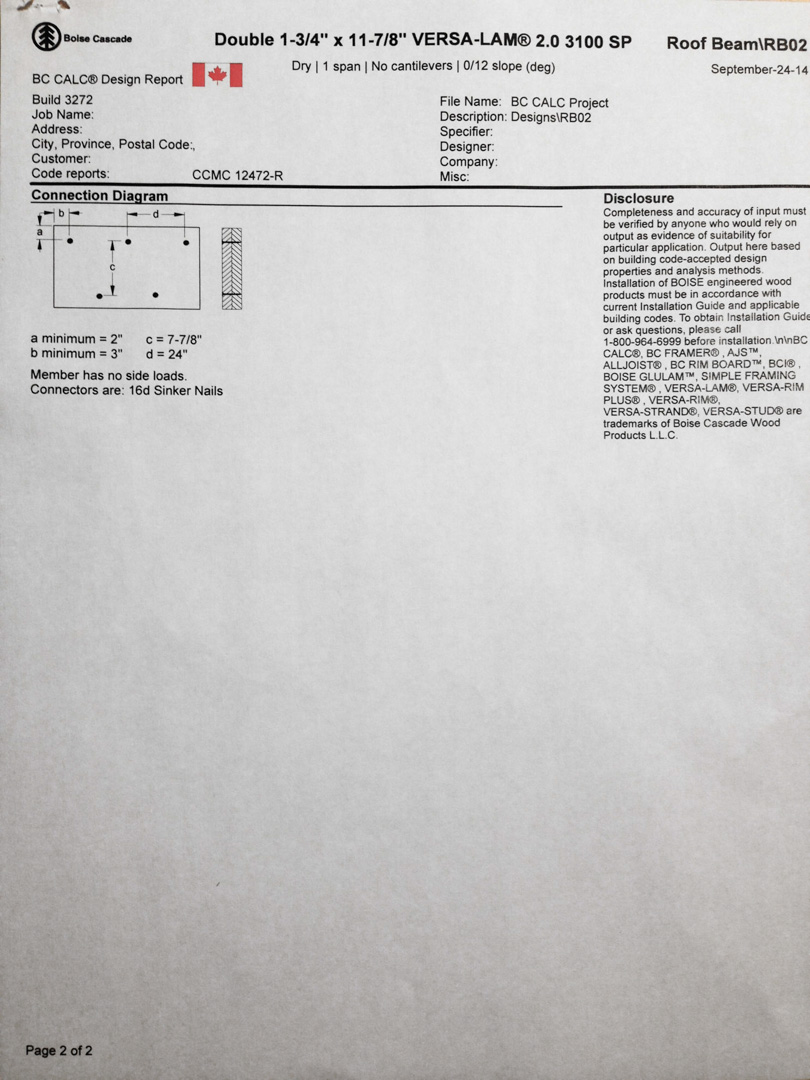
Some pictures of the plans here. I'm not an engineer but the one Stuart recommended drew these up for me. I'm not really sure what this is going to look like exactly but it'll meet or exceed the requirement apparently. These cost me $1500.
 

Attachments

  • garage 1.jpg
    garage 1.jpg
    103.6 KB · Views: 714
  • garage 2.jpg
    garage 2.jpg
    112.3 KB · Views: 718
  • garage 3.jpg
    garage 3.jpg
    31 KB · Views: 614
Last edited:

garagelogician

Well-known member
Joined
Jan 27, 2016
Messages
453
Location
Blaine, MN
Some pictures of the plans here. I'm not an engineer but the one Stuart recommended drew these up for me. I'm not really sure what this is going to look like exactly but it'll meet or exceed the requirement apparently.

I'm curious to know who did the engineering and how much they charged, I'll also be watching this to see how it turns out and how the construction quotes come in. Definitely keep us updated, send me a PM if you prefer.

Good luck! :beer:
 
OP
J

JackAndy

Well-known member
Joined
Apr 4, 2017
Messages
130
Location
Minneapolis
I'm curious to know who did the engineering and how much they charged, I'll also be watching this to see how it turns out and how the construction quotes come in. Definitely keep us updated, send me a PM if you prefer.

Good luck! :beer:

The mods might take issue with me advertising for their firm so I'll PM you. I didn't get the bill yet.
 

Huxley

Well-known member
Joined
Mar 4, 2008
Messages
210
Location
Colorado
GJ user Denwood has done what you are talking about & documented it all pretty well. His was a smaller scale but he worked with a beam manufacturer to get it done right. I don't recall it being very costly.

His thread
 

lakeroadster

Well-known member
Joined
Jan 19, 2015
Messages
5,166
Location
Central Colorado
I'm not really sure what this is going to look like exactly but it'll meet or exceed the requirement apparently.

That's a free span truss design... only instead of adding new multi-ply trusses he's adding lvl's to the modified existing trusses lower chord, and adding (3) lvl's as purlins.

Neat design. It'll look something like this... but, again, with (3) lvl's, instead of a bunch of purlins.

Some questions come to mind:
  • Did he discuss how he / you are going to locate the 16" tall lvl's into place with the wall double top plates and trusses there in the way?
  • Will the new 7-1/4" lvl's clear the existing truss webbing during installation?
 

Attachments

  • Truss Modification to Free Span.jpg
    Truss Modification to Free Span.jpg
    135.7 KB · Views: 524
  • Truss Modification to Free Span 002.jpg
    Truss Modification to Free Span 002.jpg
    146.3 KB · Views: 475
Last edited:
OP
J

JackAndy

Well-known member
Joined
Apr 4, 2017
Messages
130
Location
Minneapolis
Thanks for explaining a bit and that visual Lake Roadster. The engineer didn't explain how to actually build it out but those are good questions.
 

Denwood

Well-known member
Joined
Sep 22, 2014
Messages
4,192
Location
Thunder Bay, Ontario, Canada
Mine was a bit simpler...just 3 LVLs, installed in place. They were spec'd by the truss company supplying them..so free design work :) Shop is 24x16. 16ft of ceiling ties were cut out. Two LVL beams going across the shop support the new ridge beam, which sits directly under (and strapped to) the original ridge board.

From what I can see, your engineer has proposed more or less the same solution, except adding two extra beams instead of reinforcing your roof stringers in place. That's a lot less work and gives you the room to raise a vehicle too. It looks like you are opening up a 10ft x 10ft lift window? I'd strongly suggest a 10x18ft raised area to give more flexibility with vans and trucks etc going forward on your lift. A 16ft long "slot" in my case works, but some rear hatch glass (like on our CRV) gets very close to the LVL cross beams while lifted on the hoist. Going 18' won't cost much more, but it will give a lot more flexibility on what you lift, and also which direction it sits on the hoist (front or back)

A copy/paste from page 1 of my thread:

Edit: This thread was originally just a ceiling raise project. Thanks to this forum (damn you all!) the project has, well, morphed into a six month and counting project :)

I was inspired by a build found here on the journal, so am returning the favor for anyone looking to follow a similar path.

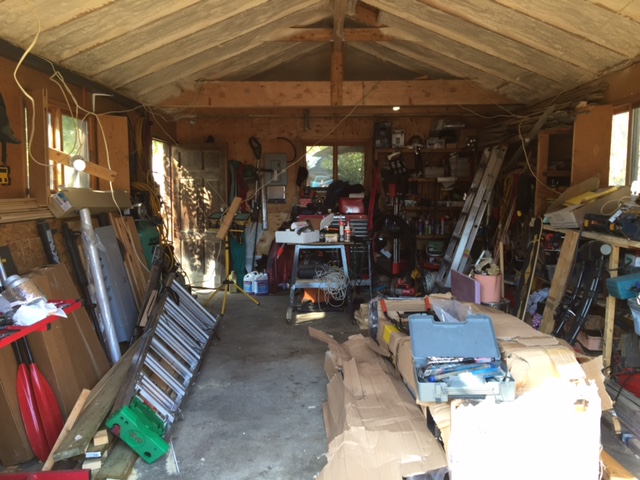
I have a rather pedestrian garage, at 16 x 24 which came with our house. Other than converting over to natural gas heat, I've done nothing to it. After reading some of the MaxJax lift posts I decided to order one, which is enroute. My problem, like many with a smaller shop, is the 8ft ceiling. The roof is stick framed, with the required truss ties in place. With high snow loads here, cutting these truss ties is a guaranteed collapsed roof (as they keep the walls from bulging out under load), and raising them to collar tie configurations will not pass code. Scissor trusses would have only got me to a useable 8ft six, unless I entirely replaced the roof. This might have been ok if I only lifted cars, but I have a 90 Westfalia that needs to work in the space. The shop is used for automotive work, wood work, and has also been a paint booth (auto) from time to time. It's in desperate need of a major clean up and re-organization to maximize usable space.

Enter the load bearing beam ridge design. After a few visits to Unitized manufacturing (local truss design/manufacture guys), we came up with a simple in place retrofit.

The roof is 5/12 slope. In case it helps, I've also included the beam specs.

September 2014 at the beginning of the renovation:
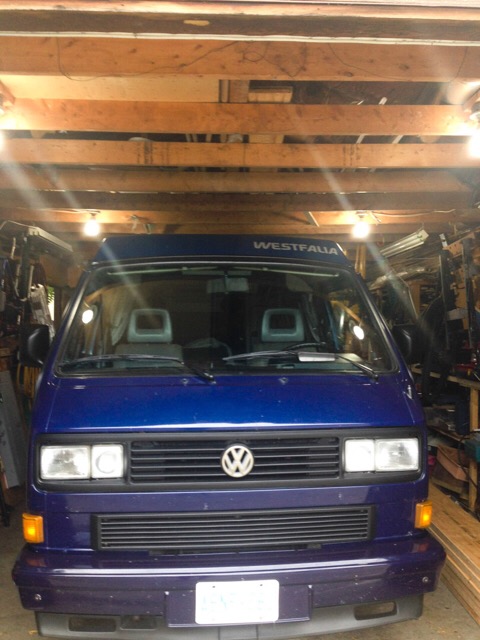
8ftceiling.jpg


October 2014:
mess.jpg


A sneak peak 5 months forward showing the shop at February 2015.

final2.jpg


November 2015:

rd5.jpg


And now, back to the beginning with beam data..
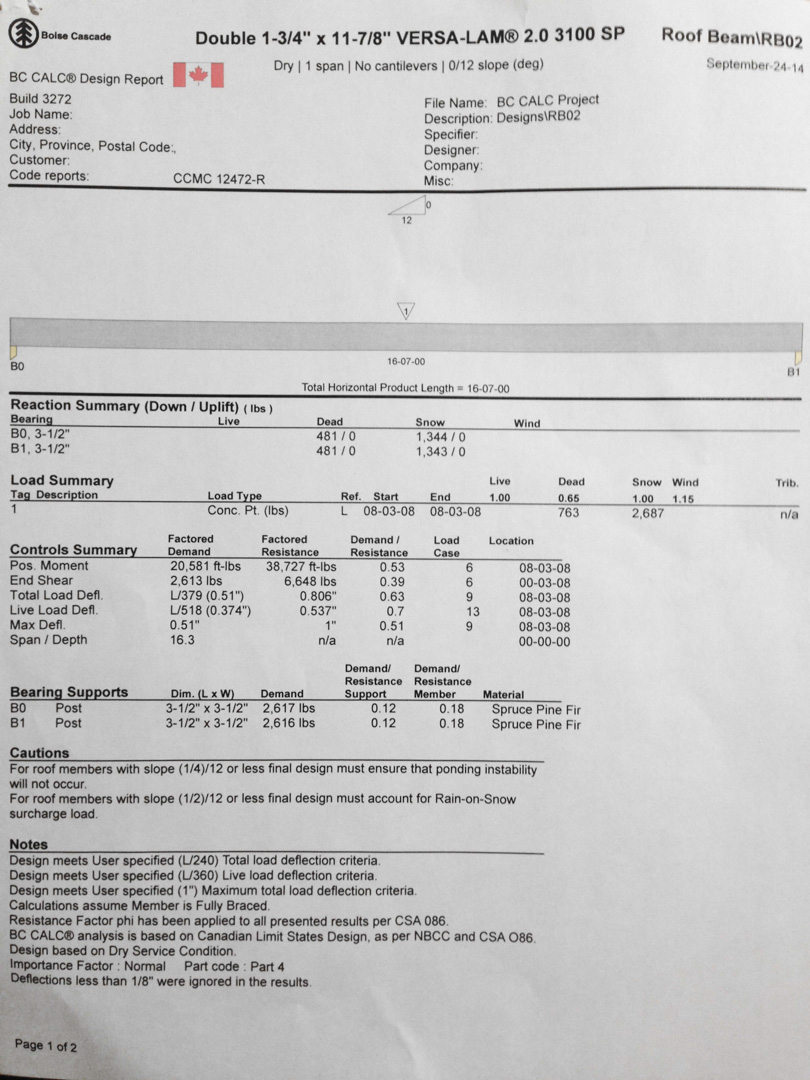
beam1.jpg


beam2.jpg


beam3.jpg


beam4.jpg


Here's the micro-lam delivered:

microlam.jpg


The mess of improperly installed/ventilated insulation has to go, spray foam to come:
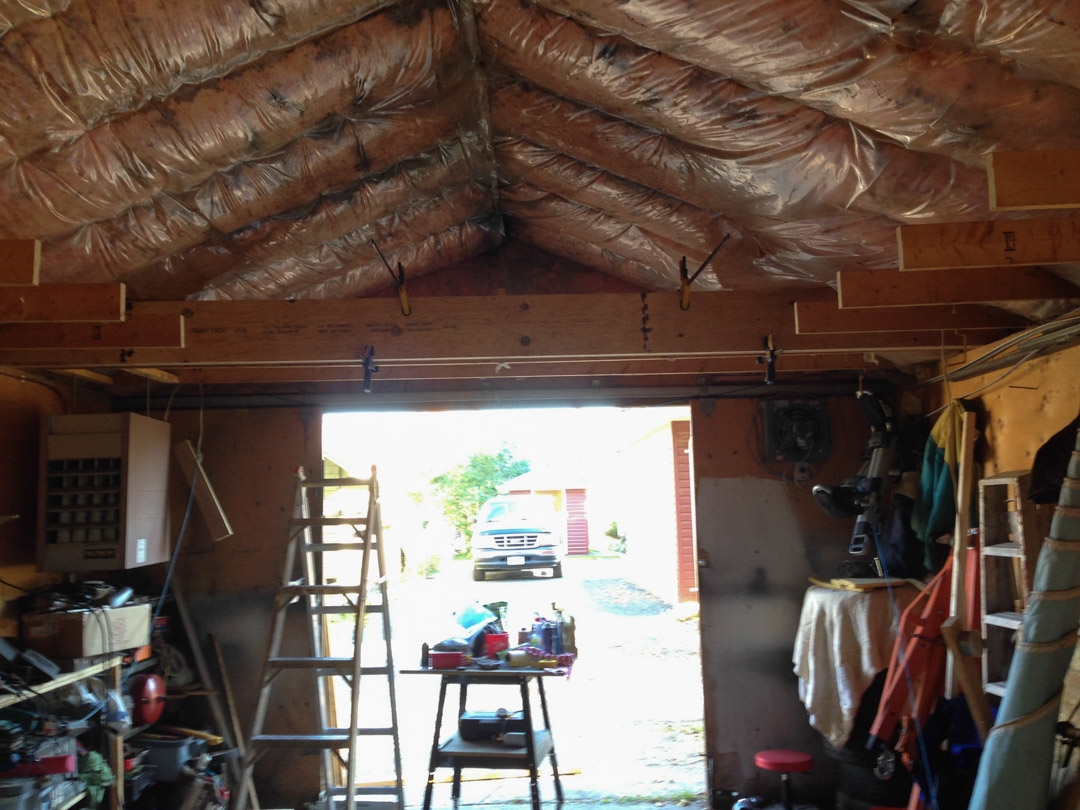
ridge1.jpg


About eight hours later, we got to this. I was able to do everything except the top beam by myself. For the top beam, my brother, a few beer and 2 hours did the trick. Although glue was not called for in the spec, I used PL Premium construction adhesive as well as the 6d ardox nails and laminated the beams in place. This made it a lot easier to lift them. I now have 10'2" of clearance across a "window" of 6ft x 16ft. This should allow approx. 40" of lift on the MaxJax for the Westfalia.
ridge2.jpg


ridge3.jpg


Cheers,
Dennis.
 
Last edited:
OP
J

JackAndy

Well-known member
Joined
Apr 4, 2017
Messages
130
Location
Minneapolis
Mine was a bit simpler...just 3 LVLs, installed in place. They were spec'd by the truss company supplying them..so free design work :) Shop is 24x16. 16ft of ceiling ties were cut out. Two LVL beams going across the shop support the new ridge beam, which sits directly under (and strapped to) the original ridge board.

From what I can see, your engineer has proposed more or less the same solution, except adding two extra beams instead of reinforcing your roof stringers in place. That's a lot less work and gives you the room to raise a vehicle too. It looks like you are opening up a 10ft x 10ft lift window? I'd strongly suggest a 10x18ft raised area to give more flexibility with vans and trucks etc going forward on your lift. A 16ft long "slot" in my case works, but some rear hatch glass (like on our CRV) gets very close to the LVL cross beams while lifted on the hoist. Going 18' won't cost much more, but it will give a lot more flexibility on what you lift, and also which direction it sits on the hoist (front or back)

A copy/paste from page 1 of my thread:

Wow Dennis those beams are pretty strong looking at the specs! It looks like a good clean install. Now what was wrong with your insulation?

As far as the 10'x10' opening, its actually 10'x24'. The engineered beams that are 7' from the walls are actually at the top of the roof. So the bottom of those will be just under 11'. And then its open from wall to wall from there. So my car is 17' long for example and I think if I wanted to walk under it, I'd need the roof to be at about 12' up. The trunk and hood slope down at least a foot so I'd have plenty of room.

Something like a van or truck might be harder to work with in that configuration but I found out that my entire garage is 14'6" tall instead of the 16' like I thought. So this might be the best I can do without tearing off the roof. I think I can still work on trucks and vans but I might not be able to get them high enough to walk under. The garage door is pretty low anyway, like 7' or so and a new Chevy 2500 Silverado barely clears it. So if we wanted to really work on Super Duties, we'd have to modify the door too. As is, if they have a light bar, we'd have to take it off or deflate the tires just to get it inside.
 

Denwood

Well-known member
Joined
Sep 22, 2014
Messages
4,192
Location
Thunder Bay, Ontario, Canada
J, the insulation was never covered, so there were cuts in the poly, and a lot of air leakage..hence the black dirt infused Fiberglas :)

I've been hiring out spray foam for all my renos of late and am a convert for many applications where air sealing and moisture control is important.

10' x 24' is great. Based on your plans, looks perfect. You'll be surprised how fast this work goes!
 

lakeroadster

Well-known member
Joined
Jan 19, 2015
Messages
5,166
Location
Central Colorado
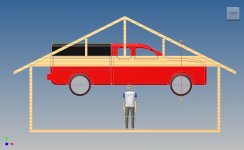
I made some quick CAD models of your garage with various vehicles in the lifted position.

A couple questions came to mind:
  1. What type of lift, 2 post or 4 post?
    A 4 post that does not require floor anchoring allows you to move the lift around to position the vehicle, for and aft, for optimal lift height, -vs- a conventional 2 post lift that is anchored to the floor.
  2. What kind of garage doors do you have?
    As is often the case your garage door is going to play a role in vehicle lift height. Even a door that follows the contour of the roof will still be in play when lifting a vehicle

Vehicles shown are:
  • 2015 Silverado Extended Cab
  • 2002 Tacoma Extended Cab
  • 2007 Jeep Wrangler

Today's trucks are just huge... I can remember when a 24 ft garage depth was plenty deep.
 

Attachments

  • Jack Andy Garage Silverado.jpg
    Jack Andy Garage Silverado.jpg
    94.4 KB · Views: 123
  • Jack Andy Garage Silverado No Cap.jpg
    Jack Andy Garage Silverado No Cap.jpg
    95.8 KB · Views: 101
  • Jack Andy Garage Tacoma No Cap.jpg
    Jack Andy Garage Tacoma No Cap.jpg
    89.3 KB · Views: 95
  • Jack Andy Garage Jeep.jpg
    Jack Andy Garage Jeep.jpg
    87.1 KB · Views: 100
Last edited:
OP
J

JackAndy

Well-known member
Joined
Apr 4, 2017
Messages
130
Location
Minneapolis
I made some quick CAD models of your garage with various vehicles in the lifted position.

A couple questions came to mind:
  1. What type of lift, 2 post or 4 post?
    A 4 post that does not require floor anchoring allows you to move the lift around to position the vehicle, for and aft, for optimal lift height, -vs- a conventional 2 post lift that is anchored to the floor.


  1. I'm actually going to use a single post pallet jack lift such as this.

    [*]What kind of garage doors do you have?
    As is often the case your garage door is going to play a role in vehicle lift height. Even a door that follows the contour of the roof will still be in play when lifting a vehicle

The door is a 7 foot rolling door. The door shouldn't be an issue for the lift however. The garage is 24 feet wide and 38 feet deep. We're only raising a 10 foot long section of the ceiling near the back of the garage. So from the rolling door we have about 26 feet until the ceiling opens up. The first 26 feet would be just an 8' ceiling unless we change things. Then from 26 to 36 I suppose you would get a taller ceiling. The last joist which is 2 feet from the back wall is going to be replaced or strengthened by an engineered beam so the last 2 feet of the garage would also have a 8 foot ceiling. I guess a bench or something might go there.

Vehicles shown are:
  • 2015 Silverado Extended Cab
  • 2002 Tacoma Extended Cab
  • 2007 Jeep Wrangler

Today's trucks are just huge... I can remember when a 24 ft garage depth was plenty deep.

Yeah it basically looks like if we get a truck such as a Silverado 2500 in there, assuming the lift is strong enough to lift it, we could only get it high enough to work under on a rolling chair maybe. The advantage here is my best friend is the one who works on the medium heavy duty trucks and he's 5'2" tall. I only work on cars and I'm 5'11" tall. So if we do this carefully, he might be able to work on a truck and walk under it and I can definitely work on most cars and walk under them.
 

lakeroadster

Well-known member
Joined
Jan 19, 2015
Messages
5,166
Location
Central Colorado
So there aren't doors on the sides of the building where the new high bay will be?

You drive the vehicle back to where the lift location is... and then how do you turn / position a long vehicle to get it under the new free span area?
 
OP
J

JackAndy

Well-known member
Joined
Apr 4, 2017
Messages
130
Location
Minneapolis
So there aren't doors on the sides of the building where the new high bay will be?

You drive the vehicle back to where the lift location is... and then how do you turn / position a long vehicle to get it under the new free span area?

Yes. There's only one door. You drive in and you parallel park it or as some have demonstrated, you can actually turn a vehicle on that pallet jack lift to rotate it 90 degrees. There's a video of another owner doing that with an older Ford F250. On youtube, there are some promotional videos and they lifted a Yukon and a Jeep Wrangler with that lift.

Check this post out.
 
Last edited:

lakeroadster

Well-known member
Joined
Jan 19, 2015
Messages
5,166
Location
Central Colorado

I've followed glmron's adventure, and he's certainly proven that lift is capable. Sadly, I however don't have the cajones to use one of those lifts :scared: but I can see where it would be very useful.

That's why I got a Frontier. It fit in my garage.

Even that's big compared to my 2002 Tacoma. But it and our 5' x 10' tilt bed utility trailer has suited us quite well over the years.
 

Denwood

Well-known member
Joined
Sep 22, 2014
Messages
4,192
Location
Thunder Bay, Ontario, Canada
At least with that lift you can just raise it a few inches, move, then fully raise it. That said, you should definitely be sorting a few jack stands and use them religiously with the relatively narrow footprint. In your position, I'd really try and sort the roof raise in line with your door. It will save a ton of hassle and also make a 2 or 4 post lift doable.

A vehicle on a hoist is a potentially life ending situation. I'm with John on the cajones / pallet jack situation. How do you lower a vehicle if say you've dropped the engine? The imbalance means you need the jack stands in..but if you were to drop the engine, removing the jack stands means a potential scary imbalance/tipping situation. Raising and lowering a vehicle with bits missing is something I do a lot. One of my high school jobs was servicing Bell Telephone trucks after hours which meant literally hundreds of lifts, 90% on trucks, in the evenings, alone. Needless to say, I have a profound respect for lifts and their capability. One of the issues I raised with MaxJax (which they have now addressed with new models) is the risk associated with their lift requiring manual safety bars. This is the one regret I have using it. Doing it again, I'd definitely make ALI cert mandatory.

If you raise 18'-20 feet or so, at least you have the option of other lifts...and the expense would not be much more for longer LVLS...a few hundred bucks.

When you raise the roof you'll be shocked by the feeling of space you've created. You'd never regret a longer raise..regardless of lift choice :) I did two engineered roof truss mod's on our business site (30x30 studio from 8ft to 11ft and a 2nd area from 8ft to 17ft peak) which remain the favourite areas in our business building. One is a film studio, the other our R&D area. One of these mods removed 3 trusses, but left 3 reinforced. The other area were trusses mod'd in place by glue/screw 3/4" plywood to both sides of existing truss in the new profile, then cutting away the lower webbing. This plywood method was much more expensive than ridge beams labour wise, but the trusses also spanned 60'. It's been about 5 yrs now with serous snow loads at times..no issues.

These may give you a few ideas. The first image is the clerestory mod which vaults to about 17ft, the 2nd for our studio ceiling raise where you can see the plywood re-skin depicted.

Btw, the first response I got from the truss company on all three mods was that the roof had to be removed and new trusses installed. The engineer we worked with proved otherwise :) The roof deck was never touched and all were done in place, albeit summer with no snow load.

truss.jpg
 
Last edited:
To avoid these ads, REGISTER NOW!
OP
J

JackAndy

Well-known member
Joined
Apr 4, 2017
Messages
130
Location
Minneapolis
At least with that lift you can just raise it a few inches, move, then fully raise it. That said, you should definitely be sorting a few jack stands and use them religiously with the relatively narrow footprint. In your position, I'd really try and sort the roof raise in line with your door. It will save a ton of hassle and also make a 2 or 4 post lift doable.

That wouldn't be a problem actually. I could put a rolling door on that side of the garage. There's 90" between the house and detached garage, wide enough to fit even a large truck through. So I'd have to drive into the backyard but then I could drive into the lift bay without parallel parking into it or turning anything around on the lift.

How do you lower a vehicle if say you've dropped the engine? The imbalance means you need the jack stands in..but if you were to drop the engine, removing the jack stands means a potential scary imbalance/tipping situation. Raising and lowering a vehicle with bits missing is something I do a lot.

Good point. I guess I never considered the balance of the car changing on the lift. Part of the problem with installing a two post lift I suppose is that I would lose parking spots. So right now, I can easily fit 4 full size cars in my garage and 6 if I park them close together.

If I put a two post lift in the middle of the garage, I wouldn't be able to park on either side of it. I could park one car on the lift and one under it though so I'd only lose 1 spot max while gaining some workshop space on either side of the lift.

With the single post lift, I actually get to keep all of my parking spots plus gaining one on the lift itself. So if I wanted, I could fit 7 cars in there. In addition to that, the lift is mobile so it doesn't need to be inspected. If the inspector comes, the lift can be taken down.

Ultimately, I guess to answer your concern, I either couldn't remove an engine and then lower a car on the lift or I'd have to remove the engine, add counter balance weights to replace the engine's weight and then lower the car. That sounds tedious so I would probably try to do what I normally do and just use a cherry pick from the car on the ground. I realize you have to drop some engines out from the bottom though so thats not going to work on a van for example.

So yes, this lift might not be the best but I guess luckily I can sell it and get a 2 post later if I want. I don't think I would want to remodify the roof though and that would be required to accomodate a 2 post to raise the cars in line with the roof. So I'll ask the engineer if he could tell me if it would be possible to raise 21' (Ford Super Duty full size length) of the ceiling instead of just 10'.
 
OP
J

JackAndy

Well-known member
Joined
Apr 4, 2017
Messages
130
Location
Minneapolis
Denwood I asked the engineer and if I wanted the lift bay to be 21' long instead of 10', it would require 16" LVL's and that would lower the headroom 8". So if we did that, you could probably only lift cars in the middle along the roof line unless you were just lifting a Miata. So it sounds like I can either lift cars parallel to or perpendicular to the roof line but only one or the other, not both at once.
 

firebirdparts

Well-known member
Joined
Jun 8, 2016
Messages
10,644
Location
Kingsport, TN
You could also consider a fixed one-poster. That said, there might be a way to hold the pallet jack lift still that would make it a lot safer. I would certainly use a lot of jack stands if I was going to do any hard wrench pulling (which is where a lift is so handy).
 
OP
J

JackAndy

Well-known member
Joined
Apr 4, 2017
Messages
130
Location
Minneapolis
Have you considered a four post? That would be mobile as well, you just can't move it with a car on it.

I haven't really seen mobile ones that'll lift high enough to walk under but I'd consider it. Got any suggestions? There's also scissor lifts too. Lots of options but I guess the pallet jack lift just stuck out because it allows the most flexibility with least modifications to the garage from what I've seen so far. I'm still open to ideas though.
 
OP
J

JackAndy

Well-known member
Joined
Apr 4, 2017
Messages
130
Location
Minneapolis
You could also consider a fixed one-poster. That said, there might be a way to hold the pallet jack lift still that would make it a lot safer. I would certainly use a lot of jack stands if I was going to do any hard wrench pulling (which is where a lift is so handy).

Bendpak used to make one and it looked great but I guess they stopped selling it because someone got hurt and they were sued. Do you know if anyone still makes one thats more than just for parking? The ones still sold today have a plate on the bottom instead of arms so you can't really work under it.

Yeah I might be able to put anchors in so that I could put a plate on to hold the single post lift legs in place while using it. Or I guess I could get a cable to hold the main beam steady as well. A cable between that beam and the wall to keep it from bending in. There should be ways to make this better with a little engineering.
 

garagelogician

Well-known member
Joined
Jan 27, 2016
Messages
453
Location
Blaine, MN
I haven't really seen mobile ones that'll lift high enough to walk under but I'd consider it. Got any suggestions? There's also scissor lifts too. Lots of options but I guess the pallet jack lift just stuck out because it allows the most flexibility with least modifications to the garage from what I've seen so far. I'm still open to ideas though.
BendPak four posts are moveable (with caster kits) and they have several that lift high enough to walk under. Other brands do as well.

Sent from my Pixel XL using Tapatalk
 
OP
J

JackAndy

Well-known member
Joined
Apr 4, 2017
Messages
130
Location
Minneapolis
The contractor got back to me. He estimated it at $5,300 to build it out. $1,563 for the LVL's alone and $3,250 for the carpentry.
 

lakeroadster

Well-known member
Joined
Jan 19, 2015
Messages
5,166
Location
Central Colorado
Nice. That should get you where you wanted to be. :thumbup:

Is the cut out in the top wall plate from the modifications?

Regardless, make sure you splice and reinforce that area.
 

Attachments

  • Cut Upper Top Plate.jpg
    Cut Upper Top Plate.jpg
    20.1 KB · Views: 124
OP
J

JackAndy

Well-known member
Joined
Apr 4, 2017
Messages
130
Location
Minneapolis
Nice. That should get you where you wanted to be. :thumbup:

Is the cut out in the top wall plate from the modifications?

Regardless, make sure you splice and reinforce that area.

Whoever originally build the garage had a wall there to separate a machine shop from the cars. I guess they tore it out and apparently chunked out the 2x4 top sill.

I don't know how to splice and reinforce the area. I'm not a carpenter. I actually just hired a construction company to do all this for me. I might be getting a table saw to build a few basic things though like a bench.
 
OP
J

JackAndy

Well-known member
Joined
Apr 4, 2017
Messages
130
Location
Minneapolis
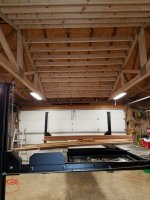
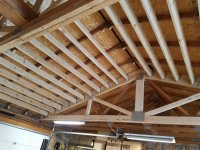
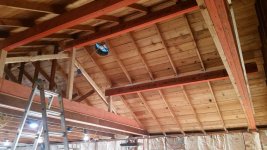
Do these pictures work better?

attachment.php

attachment.php

attachment.php

attachment.php

attachment.php

attachment.php

attachment.php
 

Attachments

  • bAK13zP.jpg
    bAK13zP.jpg
    77.7 KB · Views: 674
  • 1Ep7mYN.jpg
    1Ep7mYN.jpg
    87.4 KB · Views: 676
  • 3zFup0G.jpg
    3zFup0G.jpg
    73.2 KB · Views: 669
  • v2Tjhza.jpg
    v2Tjhza.jpg
    91.5 KB · Views: 668
  • PxtGtFq.jpg
    PxtGtFq.jpg
    68.8 KB · Views: 663
  • OzxAhd1.jpg
    OzxAhd1.jpg
    98.8 KB · Views: 667
  • Auiy3Eg.jpg
    Auiy3Eg.jpg
    90.6 KB · Views: 688

lakeroadster

Well-known member
Joined
Jan 19, 2015
Messages
5,166
Location
Central Colorado
Since you have a double top plate, it's not as big of a deal (unless the lower 2x4 has a splice really close to the cut out.

I'd still follow through and close it up with a heavy duty splice plate on the top and inside wall face, using some 1-1/2" structural Simpson screws.

Home Depot carries various versions of the plates.

http://www.uspconnectors.com/us/products/connectors/general-hardware/plates/NP
 
OP
J

JackAndy

Well-known member
Joined
Apr 4, 2017
Messages
130
Location
Minneapolis
Since you have a double top plate, it's not as big of a deal (unless the lower 2x4 has a splice really close to the cut out.

I'd still follow through and close it up with a heavy duty splice plate on the top and inside wall face, using some 1-1/2" structural Simpson screws.

Home Depot carries various versions of the plates.

http://www.uspconnectors.com/us/products/connectors/general-hardware/plates/NP

Oh now I get it. I just need to cut a small chunk of 2x4 to fill that gap on the top sill then use the nail plate to splice the two sections together, with screws though. Sadly, I don't have a table saw yet but I can probably manage to cut a section of 2x4 with my sawzall.
 

Stuart in MN

Well-known member
Joined
Sep 8, 2005
Messages
23,140
Location
Minneapolis
Looks good! So, were you satisfied with the structural engineer I put you on to? I've always had good relations with him, hopefully he provided everything you needed.
 
OP
J

JackAndy

Well-known member
Joined
Apr 4, 2017
Messages
130
Location
Minneapolis
Looks good! So, were you satisfied with the structural engineer I put you on to? I've always had good relations with him, hopefully he provided everything you needed.

The structural engineer you recommended was able to provide a plan that met the minimum requirements. All of the necessary measurements were made in one trip and were accurate as far as I can tell. The accounting was detailed, communication was good and there was a high level of professionalism. The firm charged me for 21 hours of labor total. I have a hard time believing it took that much labor however. This was spread across 4 people and the engineer himself spent less than an hour on it total.

The construction company I used did a sloppy rush job in my opinion. The communication was poor, the accounting is sketchy. They were unprofessional and made excuses. Pushed the data back a couple times, didn't show up on time etc.

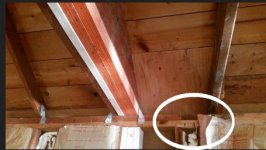
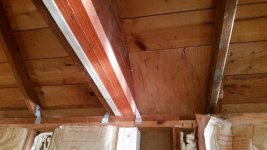
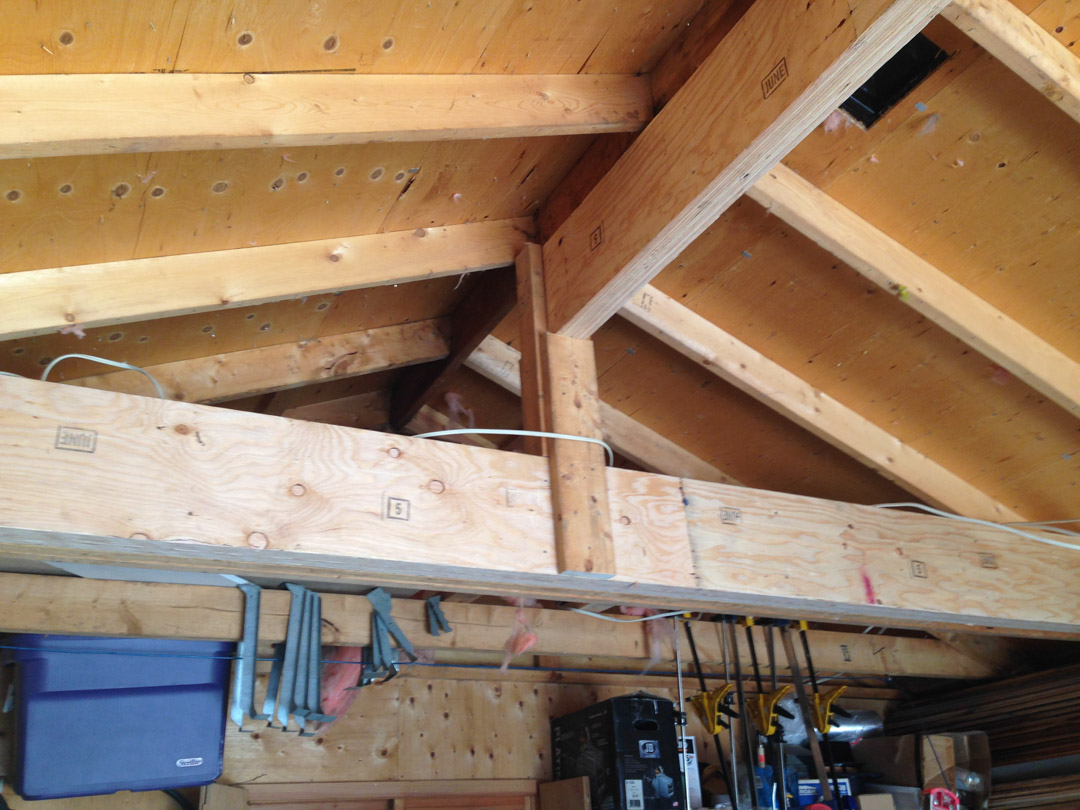
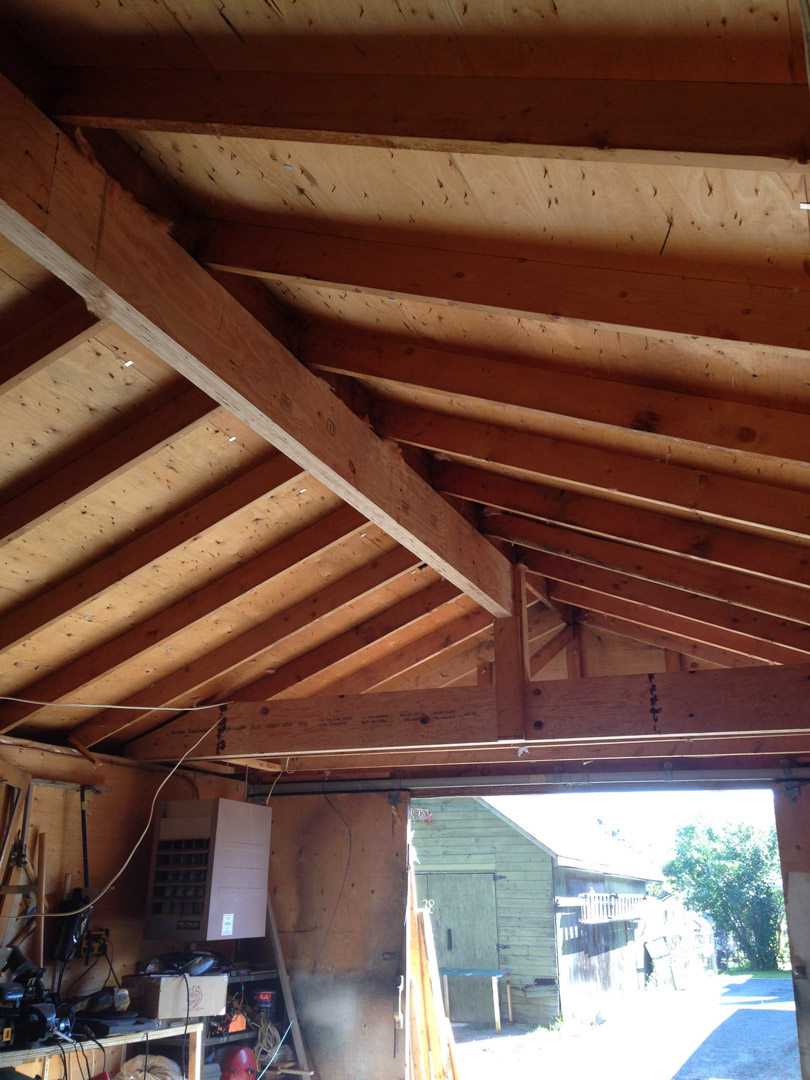
You can see in this picture that the LVL furthest from the point of view is crooked. It isn't in line with the roof boards:
attachment.php

The blue line is the line of the roof boards. The red line is the beveled 2x4 on the top of the LVL. If you look at the red circled area, you'll see that the LVL isn't even straight up and down. The top leans towards the outside of the garage by a substantial amount, enough to see in the picture. As a consequence, the 2x4's on either end that bear the weight on the main LVL's aren't equal lengths. One side is higher than the other. It actually doesn't look very strong, like it would fold in and buckle if enough weight were put on it. The weight isn't evenly distributed and it isn't going straight down.

They were also supposed to replace the 1x6 roof boards they cut out with the same ones but instead they used plywood. The carpenter claims its the same thickness, but I can see the roof is sunken in where they made holes to insert the LVL's. The contractor said its just a visual phenomenon but if I put a flat board across the top, I'm pretty sure that the middle wouldn't touch. There also wasn't supposed to be a stack of 2x4's sandwiched between the existing trusses and the LVL's. The list goes on and on.

Overall, I think I didn't get my money's worth. Some people would say I'm a perfectionist, these things don't matter, they're just details. I paid a lot of money for them to do this in my opinion so I expect a lot.

TLDR: The structural engineer met my expectations but didn't exceed them, especially considering how much he charged. The construction company didn't meet my expectations in any way although they got the job done.

In summary, this entire experience was kind of unpleasant and if I had to do it again, I might even consider a 'home brew' solution using steel beams. Sometimes if you want something done right, you have to do it yourself.
 

Attachments

  • crooked.jpg
    crooked.jpg
    14.9 KB · Views: 699

Orionrising

Well-known member
Joined
Nov 16, 2012
Messages
960
Location
Western Maine
The structural engineer you recommended was able to provide a plan that met the minimum requirements. All of the necessary measurements were made in one trip and were accurate as far as I can tell. The accounting was detailed, communication was good and there was a high level of professionalism. The firm charged me for 21 hours of labor total. I have a hard time believing it took that much labor however. This was spread across 4 people and the engineer himself spent less than an hour on it total.

The construction company I used did a sloppy rush job in my opinion. The communication was poor, the accounting is sketchy. They were unprofessional and made excuses. Pushed the data back a couple times, didn't show up on time etc.

You can see in this picture that the LVL furthest from the point of view is crooked. It isn't in line with the roof boards:
attachment.php

The blue line is the line of the roof boards. The red line is the beveled 2x4 on the top of the LVL. If you look at the red circled area, you'll see that the LVL isn't even straight up and down. The top leans towards the outside of the garage by a substantial amount, enough to see in the picture. As a consequence, the 2x4's on either end that bear the weight on the main LVL's aren't equal lengths. One side is higher than the other. It actually doesn't look very strong, like it would fold in and buckle if enough weight were put on it. The weight isn't evenly distributed and it isn't going straight down.

They were also supposed to replace the 1x6 roof boards they cut out with the same ones but instead they used plywood. The carpenter claims its the same thickness, but I can see the roof is sunken in where they made holes to insert the LVL's. The contractor said its just a visual phenomenon but if I put a flat board across the top, I'm pretty sure that the middle wouldn't touch. There also wasn't supposed to be a stack of 2x4's sandwiched between the existing trusses and the LVL's. The list goes on and on.

Overall, I think I didn't get my money's worth. Some people would say I'm a perfectionist, these things don't matter, they're just details. I paid a lot of money for them to do this in my opinion so I expect a lot.

TLDR: The structural engineer met my expectations but didn't exceed them, especially considering how much he charged. The construction company didn't meet my expectations in any way although they got the job done.

In summary, this entire experience was kind of unpleasant and if I had to do it again, I might even consider a 'home brew' solution using steel beams. Sometimes if you want something done right, you have to do it yourself.
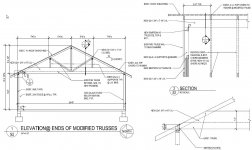
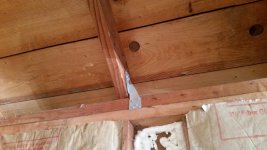
The hurricane straps they used on the posts are probably not rated for that use...

Sent from my Moto G (4) using Tapatalk
 
To avoid these ads, REGISTER NOW!
Top Bottom