Chris, you and Thomas have figured out how to squeeze several years of work into just one. Every time you or Thomas post an update I just sigh. The best part is that you help us all realize what is possible if you have the drive and the passion. Thank you for stopping by and I promise not to say a word about wood planes. I assume the flying kind are not as much of a distraction.I haven't checked in here for awhile because of us being so busy with the house build. Great work with doing maintenance on those planes. I won't show BB767 this thread update - he's got enough on his plate and he'd just get distracted. LOL
Chris

You are using an out of date browser. It may not display this or other websites correctly.
You should upgrade or use an alternative browser.
You should upgrade or use an alternative browser.
Between 485 & 705 SQ/FT Bob Heine's Auto Emporium
- Thread starter Bob Heine
- Start date
Workspaces between 485 and 705 squarefeet.
bolensboneyard
Well-known member
Nice job Bob. You made them look like the trophies that they are.
shortykorte
Well-known member
Very nice Bob. I need a holder for the planes that Jim tuned up for me. I'm thinking you need name plates, one would be Marilyn, the other (plain) Jane.
Sent from my iPhone using Tapatalk
Sent from my iPhone using Tapatalk
oldironfarmer
Well-known member
Very Nice shelf Bob. When you say down in the shop do you mean basement? I don't recall seeing any photos of this shop.
Bret
Bob has a fantastic shop out back, but he rarely gives us glimpses. We can only dream. His basement shop flooded

Great way to store the planes Bob! Did you rabbet for the front blade position for the rabbet plane as well? I think your blade protection scheme is groovy.
Have you tried a cardboard wheel and rouge to polish your cutting edges? Not very traditional, but quick.
Keep up the good work big brother.
jon72vega
Well-known member
Excellent work Bob!Every time I walked past the planes laying on their side on the workbench, I felt guilty. If I put them back in the shop they'll be out of sight and I'll forget to use them. I remembered my collection of wood scraps and decided to look through the boxes for something that would work. I found a piece that had obviously been through a planer because it was smooth but a bit thicker than standard one-by stuff.

I ripped the piece so I have one piece the width of the rabbet plane and a second wider piece just right for the other plane. I made a small rabbet in each shelf where the blade would sit without touching. Used the table saw to rip and the radial arm saw to make the rabbet. A little work with a file and the rabbets were clean and neat. While I was down in the shop I used the drill press to drill mounting holes and a hole for storing the centering fence on the rabbet plane shelf.

I stuck strips of 120- and 400-grit paper to the bench and sanded the shelving along with the vertical support. You can see some faint drill press vise marks in the narrow shelf that helped with that decision. I also countersunk the mounting holes -- I'm just using 3-inch drywall screws to mount it to the wall. The vertical support is attached to the shelves with stainless trim screws (you can see one of them in the photo below).

I aligned the vertical support with the metal stud in the wall so it is a solid mount at that end. The other ends of the shelves are screwed into plastic anchors in the drywall. I gave the shelf unit a quick coat of Tung Oil before mounting it. You can see the large hole for the centering fence mounting post.

I know the shelf is pretty low on the wall (it doesn't touch the backsplash but it's real close). If my piece of scrap had been a half-inch longer, the planes would have fit perfect but I didn't want to cut one of my longer scraps just for this. It's two pieces of wood and 8 screws. Here's how the Stanley rabbet plane stores with the centering fence installed on the plane...

And here it is mounted on the shelf. I am going to put a stud on the shelf to hang the depth stop. It needs to have a threaded hole for the knurled knob that will be arriving shortly.

I don't expect anyone to notice but my phone/tablet charging station was mounted in this spot so I HAD to move it. Of course, when I did that the wall outlet with the USB charging ports had to be switched to the other side of the box. It also meant I had to tape and mud the mess around that box. Now it needs a coat of paint. Maybe I can get Gerard to help.

For those keeping track, The above photo shows my ability to ignore proper screw clocking but this was "before" enlightenment. The previous photo shows that I really am trying.

[FONT="]Thanks Bobby. Most of the time I can walk past them just fine. Then I see the Stanley and think "that would really polish up nice" and I remember how many projects are just sitting and waiting patiently.[/FONT]Nice job Bob. You made them look like the trophies that they are.
[FONT="]Stewart[/FONT][FONT="], you really know how to get me in trouble. I'm lucky to have as much QGT as I do but when I start naming my tools after women, there's a chance I (or more likely a part of me) could be cut off. Been there, done that, have the T-shirt.Very nice Bob. I need a holder for the planes that Jim tuned up for me. I'm thinking you need name plates, one would be Marilyn, the other (plain) Jane.
Sent from my iPhone using Tapatalk

[/FONT]
[FONT="]Thank you Bret. I have a 18' x 12' shop at a back corner of the yard. I made the mistake of building workbenches on all four walls with a Radial Arm Saw in the longest one. Every time my garage gets messy I move the mess to the shop.Very Nice shelf Bob. When you say down in the shop do you mean basement? I don't recall seeing any photos of this shop.
Bret
I took some pictures this evening. Np cleaning up or moving stuff. All the warts and scars are on display.
[/FONT]
I didn't rabbet the front blade position but it's easy enough to disassemble and fix if I ever use the iron in the front position.Bob has a fantastic shop out back, but he rarely gives us glimpses. We can only dream. His basement shop flooded
Andy, hard as I try, I can't get the basement dried out.

Great way to store the planes Bob! Did you rabbet for the front blade position for the rabbet plane as well? I think your blade protection scheme is groovy.
Have you tried a cardboard wheel and rouge to polish your cutting edges? Not very traditional, but quick.
Keep up the good work big brother.
I haven't tried a cardboard wheel and rouge to polish anything but that sounds like a great idea (Amazon provides a continuous supply of cardboard).
You keep up the good work too little brother.
Excellent work Bob!
Attachments

Last edited:
Yes, I have a shop in addition to the garage (much like Bret's [bj383ss]. I should probably take everything on the floor out of the shop (most of the stuff is on wheels) and take pictures but I'm not feeling that energetic today (more on why in the next post).
The 18' x 12' shop (shed?) is in the corner of the back yard. The previous owner built the shell and one workbench. I finished it, got it through final inspection and closed out the building permit. It contains an amazing number of bad techniques and poor construction but 2x6 walls make up for the shoddy details.

I insulated it and added an A/C unit, followed by a suspended ceiling. Two 4-bulb troffers in the ceiling for general lighting and some outlets in the walls. The PO covered the wall over his bench with some clear tongue and groove boards. He left additional boards so I used them as termite bait on the other walls.
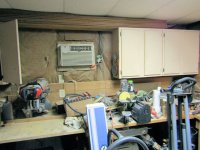
Here's the PO's bench and wall. That's my 30-year old high tech sound system on the shelf.

The long bench on the back wall has an opening for my 40-years old Radial Arm Saw, along with some free kitchen cabinets. Leaning against the bench is a box of T8 bulbs (4 left) that will go into the second troffer when I get around to converting the sockets from T12s.

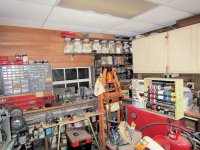
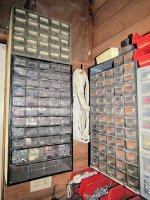
The left side of the room is storage along with a couple of bench grinders. I changed from coffee cans to clear plastic containers with lids. It has been a while since I had to go to the big box stores to buy PVC and copper fittings as well as screws. Having this stuff behind doors like the stuff in my garage would be a good thing but none of my friends are renovating their kitchens. The sandblast cabinet in the lower right is on a flatbed wagon, along with the pressure pot blaster and the two spot blasters. I use the blast cabinet outside in the shade next to the garage man-door. Whatever glass bead falls out of the seams ends up in the rock garden acting to choke out weeds. The 12-ton press is on wheels as well.

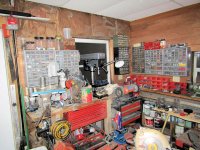
Continuing around the shop there is another bench with the buffer mounted with a 2" receiver. It moves the wheels off the bench so I can use their bottom front quadrant to shine stuff up. Under the buffer is my first tool chest. I mentioned needing one to my wife so she got it for me for my birthday. I probably should have mentioned that Sears had a better selection than JC Penney. Beggars can't be choosers so I just smiled and gushed over it. The drill press, arbor press and Portaband saw fill the rest of the bench with more hardware bins above. The Portaband is on a Swag Offroad table mounted in a Chinese vise. On the floor is a 25-gallon reserve air tank (I couldn't throw out the tank when the compressor blew up. Next to the door hangs the gas pole chainsaw extension.

The final picture is back to the doorway with 5-gallon buckets full of wood, steel and hardwood scraps. The big polesaws hang over the door and the black bag contains the near-useless Black & Decker battery-powered pole chainsaw. This is also the corner where the planes used to live and is still where the newer Disston saw, a couple of backsaws and my hand hacksaw.

The 18' x 12' shop (shed?) is in the corner of the back yard. The previous owner built the shell and one workbench. I finished it, got it through final inspection and closed out the building permit. It contains an amazing number of bad techniques and poor construction but 2x6 walls make up for the shoddy details.
I insulated it and added an A/C unit, followed by a suspended ceiling. Two 4-bulb troffers in the ceiling for general lighting and some outlets in the walls. The PO covered the wall over his bench with some clear tongue and groove boards. He left additional boards so I used them as termite bait on the other walls.
Here's the PO's bench and wall. That's my 30-year old high tech sound system on the shelf.
The long bench on the back wall has an opening for my 40-years old Radial Arm Saw, along with some free kitchen cabinets. Leaning against the bench is a box of T8 bulbs (4 left) that will go into the second troffer when I get around to converting the sockets from T12s.
The left side of the room is storage along with a couple of bench grinders. I changed from coffee cans to clear plastic containers with lids. It has been a while since I had to go to the big box stores to buy PVC and copper fittings as well as screws. Having this stuff behind doors like the stuff in my garage would be a good thing but none of my friends are renovating their kitchens. The sandblast cabinet in the lower right is on a flatbed wagon, along with the pressure pot blaster and the two spot blasters. I use the blast cabinet outside in the shade next to the garage man-door. Whatever glass bead falls out of the seams ends up in the rock garden acting to choke out weeds. The 12-ton press is on wheels as well.
Continuing around the shop there is another bench with the buffer mounted with a 2" receiver. It moves the wheels off the bench so I can use their bottom front quadrant to shine stuff up. Under the buffer is my first tool chest. I mentioned needing one to my wife so she got it for me for my birthday. I probably should have mentioned that Sears had a better selection than JC Penney. Beggars can't be choosers so I just smiled and gushed over it. The drill press, arbor press and Portaband saw fill the rest of the bench with more hardware bins above. The Portaband is on a Swag Offroad table mounted in a Chinese vise. On the floor is a 25-gallon reserve air tank (I couldn't throw out the tank when the compressor blew up. Next to the door hangs the gas pole chainsaw extension.
The final picture is back to the doorway with 5-gallon buckets full of wood, steel and hardwood scraps. The big polesaws hang over the door and the black bag contains the near-useless Black & Decker battery-powered pole chainsaw. This is also the corner where the planes used to live and is still where the newer Disston saw, a couple of backsaws and my hand hacksaw.
Attachments



shortykorte
Well-known member
Thanks for the tour.
Ok no girlfriends even if they are a bunch of tools.
Sent from my iPhone using Tapatalk
Ok no girlfriends even if they are a bunch of tools.
Sent from my iPhone using Tapatalk
Last edited:
The carport arrived Wednesday but with it came lots of rain and showers. Perfect time for my wife and I to go to see our doctors.
I unpacked the carport Friday night and pre-assembled a few sections of pipe.

I had plans to get started erecting it Saturday morning but an e-mail from one of my few childhood friends postponed that. He has been battling something for 15 years and it finally turned out to be cancer. One of the side effects of the disease (or treatment) was damage to his liver so he is waiting for a transplant. We're going to get together in a couple of weeks to have as much fun as possible for a couple of mentally deficient septuagenarians.
As proof of my deficiency I began assembling the carport at 2:00 PM when it was hot enough to cook food on the driveway. It goes together with very little effort but I am not sure the instructions are meant for one person. I put the frame together as much as I could in the shade.

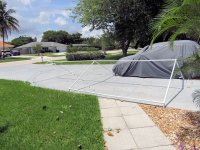
The instructions call for erecting just the top of the frame on the ground. It went quickly, probably 15 minutes to get the pieces arranged and connected in the driveway (after the pre-assembly in the shade). Those clouds are to the west and never came any closer. It's now in the mid-90s in the shade. Probably 7,000 degrees in the sun.

The next step is to stretch the tarp over the frame and it also went well but because it is white I am suffering a mild case of blindness, with sweat streaming across my sunglasses doing nothing to help. Once the tarp is on, all you have to do is lift one side to install the three legs. Then you raise the other side to install the other three legs.

I kinda followed the instructions but getting one side lifted when there are 6 joints on each side trying to turn the whole thing into a balloon animal, it wasn't working for me. Instead I took one section apart and erected the front half. Then I tried adding the remaining section to the rear. It wasn't working so I tried setting the thing up in the center of the driveway with the PT Cruiser underneath. It didn't go smoothly but I kept going until I began to feel a little faint. I quit before I passed out and before I could install the ridge pole on the rear half. I had spent an hour and 15 minutes to get to this point.

Because this temporary structure has to be take down, I was interested in seeing how long that would take. By 8:00 in the evening the temperature had dropped to 87*F and my eyesight and brain temperature was back to normal. Taking it down took a half hour.

Calling this a success is a stretch but I'm not going to call it a fail either. I learned a bit and I'm hoping it goes smoother the next time.
I unpacked the carport Friday night and pre-assembled a few sections of pipe.
I had plans to get started erecting it Saturday morning but an e-mail from one of my few childhood friends postponed that. He has been battling something for 15 years and it finally turned out to be cancer. One of the side effects of the disease (or treatment) was damage to his liver so he is waiting for a transplant. We're going to get together in a couple of weeks to have as much fun as possible for a couple of mentally deficient septuagenarians.
As proof of my deficiency I began assembling the carport at 2:00 PM when it was hot enough to cook food on the driveway. It goes together with very little effort but I am not sure the instructions are meant for one person. I put the frame together as much as I could in the shade.
The instructions call for erecting just the top of the frame on the ground. It went quickly, probably 15 minutes to get the pieces arranged and connected in the driveway (after the pre-assembly in the shade). Those clouds are to the west and never came any closer. It's now in the mid-90s in the shade. Probably 7,000 degrees in the sun.
The next step is to stretch the tarp over the frame and it also went well but because it is white I am suffering a mild case of blindness, with sweat streaming across my sunglasses doing nothing to help. Once the tarp is on, all you have to do is lift one side to install the three legs. Then you raise the other side to install the other three legs.
I kinda followed the instructions but getting one side lifted when there are 6 joints on each side trying to turn the whole thing into a balloon animal, it wasn't working for me. Instead I took one section apart and erected the front half. Then I tried adding the remaining section to the rear. It wasn't working so I tried setting the thing up in the center of the driveway with the PT Cruiser underneath. It didn't go smoothly but I kept going until I began to feel a little faint. I quit before I passed out and before I could install the ridge pole on the rear half. I had spent an hour and 15 minutes to get to this point.
Because this temporary structure has to be take down, I was interested in seeing how long that would take. By 8:00 in the evening the temperature had dropped to 87*F and my eyesight and brain temperature was back to normal. Taking it down took a half hour.
Calling this a success is a stretch but I'm not going to call it a fail either. I learned a bit and I'm hoping it goes smoother the next time.
Attachments




BBChevro
Well-known member
Hey Bob, I still have nightmares about the 10x10 gazebo that my wife bought me (a thoughtful well-meaning gesture to keep the hot sun off me while I built the deck in the back yard) - I struggled with a structure half the size of yours and I have twice as many arms. 
A sudden gust of wind sent my temporary shade gazebo flying towards the lake one day, unfortunately it could not be salvaged () - I still have a good supply of thin-walled tubing "garden stakes" though.
Nice work on the plane storage.
A sudden gust of wind sent my temporary shade gazebo flying towards the lake one day, unfortunately it could not be salvaged (
) - I still have a good supply of thin-walled tubing "garden stakes" though.Nice work on the plane storage.
Grizz1963
Well-known member
Thanks for the shop tour.
You certainly have a lot in there, mine is kind of spread between my wood shop and the garage.
I certainly do not have the inclination to sort it all into separate buildings.
The planes do look like they are trophies as mentioned, but it is very nice when they are of functional use too.
I love some of my special vintage tools.
And of course the gazebo/carport, again a great addition as long as it stays there, which I am sure it will, as long as the canvas comes off if you do have a serious wind storm.
Have a good weekend.
You certainly have a lot in there, mine is kind of spread between my wood shop and the garage.
I certainly do not have the inclination to sort it all into separate buildings.
The planes do look like they are trophies as mentioned, but it is very nice when they are of functional use too.
I love some of my special vintage tools.
And of course the gazebo/carport, again a great addition as long as it stays there, which I am sure it will, as long as the canvas comes off if you do have a serious wind storm.
Have a good weekend.
shortykorte
Well-known member
Bob
I have a dining tent with the same frame. My tubing has a small diameter and plastic joints. It's definitely better with two people.
I did figure out the one person process and can have it up in 30-45 minutes. I build the roof frame and put the material on. My has Velcro to attach material to roof frame.
Next, I install the first vertical pipe sections on one, than do the other side. Then install the second section on one side then the other. Basically walk the sides up one level at a time.
I have lose joints so painters tape helps and a dip in the pool every 5 minutes doesn't hurt.
Sent from my iPhone using Tapatalk
I have a dining tent with the same frame. My tubing has a small diameter and plastic joints. It's definitely better with two people.
I did figure out the one person process and can have it up in 30-45 minutes. I build the roof frame and put the material on. My has Velcro to attach material to roof frame.
Next, I install the first vertical pipe sections on one, than do the other side. Then install the second section on one side then the other. Basically walk the sides up one level at a time.
I have lose joints so painters tape helps and a dip in the pool every 5 minutes doesn't hurt.
Sent from my iPhone using Tapatalk
oldironfarmer
Well-known member
Great shop tour, so neat and well organized (I have a poor comparison, you know).
The temporary carport is looking good, are you really going to take it down each day? Or ask forgiveness? If you do take it down and back up you'll get a lot better. At that one task, that is, the rest of your deficiencies are terminal, I fear.
I have to take you to task on one misstatement, however. You said it was 90F in the shade and like 7,000 degrees in the sun. Sorry, you're way off, it's more like 15,000,000F in the sun.
You're really cooking now
The temporary carport is looking good, are you really going to take it down each day? Or ask forgiveness? If you do take it down and back up you'll get a lot better. At that one task, that is, the rest of your deficiencies are terminal, I fear.
I have to take you to task on one misstatement, however. You said it was 90F in the shade and like 7,000 degrees in the sun. Sorry, you're way off, it's more like 15,000,000F in the sun.
You're really cooking now
RickP
Well-known member
Hey there Bob, I have to give you props for getting that carport up in the blazing sun! I've assembled mine several times and it's never easy...
If you're using it for shade several days in a row, could a portion of it be stored in the garage, already assembled? It looks too wide for your garage door, but maybe right half/left half or something like that? Securing the joints would definitely help -- I liked Shorty's blue tape suggestion, or else sheet metal screws if you use it often. Maybe assemble it upside down and then flip the entire thing over?
Thanks for the shed tour -- you really figured out how to get the most out of a small space!
If you're using it for shade several days in a row, could a portion of it be stored in the garage, already assembled? It looks too wide for your garage door, but maybe right half/left half or something like that? Securing the joints would definitely help -- I liked Shorty's blue tape suggestion, or else sheet metal screws if you use it often. Maybe assemble it upside down and then flip the entire thing over?
Thanks for the shed tour -- you really figured out how to get the most out of a small space!
Morning Bob,
Thanks so much for the shop tour. Loved the shop out back. I think mine is nearly as full as yours and I am only half your age.(that is kinda scary). I feel your pain on the gazebo. I have a 10x10 Ez-up brand that I erect in backyard in front of the shed when I am doing bodywork on the 64'. It takes about 5 minutes to put up and take down and I don't even like doing that after a hard day's work outside.
I did have a cheaper put together pole type like BBCHevro mentioned he ha but mine had the same fate. It was erected for an entire week in my backyard and then on the last day I came outside and it was folded over into my neighbor's backyard. I didn't save any part of it as some one at work gave it to me. I then ordered the EZ-up.
Bret
Thanks so much for the shop tour. Loved the shop out back. I think mine is nearly as full as yours and I am only half your age.(that is kinda scary). I feel your pain on the gazebo. I have a 10x10 Ez-up brand that I erect in backyard in front of the shed when I am doing bodywork on the 64'. It takes about 5 minutes to put up and take down and I don't even like doing that after a hard day's work outside.
I did have a cheaper put together pole type like BBCHevro mentioned he ha but mine had the same fate. It was erected for an entire week in my backyard and then on the last day I came outside and it was folded over into my neighbor's backyard. I didn't save any part of it as some one at work gave it to me. I then ordered the EZ-up.
Bret
jimreed2160
Well-known member
Bob--Great work on the handplane cradles. Of course as a wordsmith you know that a cross grained rabbet is a dado. Enjoyed the shop tour. And I admire your work on the temp carport. I am hiding inside until the cool front comes in September.
oldironfarmer
Well-known member
And I always thought a rabbet had only two sides where a dado had three sides. Regardless, I would never question Bob's use of the language at my own peril. If he wants to make a dado for a rabbet plane and call it a rabbet I'm on board. Or I'm bored.
jimreed2160
Well-known member
And I always thought a rabbet had only two sides where a dado had three sides. Regardless, I would never question Bob's use of the language at my own peril. If he wants to make a dado for a rabbet plane and call it a rabbet I'm on board. Or I'm bored.
Bob has a free pass during August in Boca, which in the daytime is like the surface of the sun, only hotter. I am surprised that any of us in Florida can join our phonemes into anything beyond a guttural, BAH! But that cool front will zip through any day now...
As for slots, here is the way I was taught:
1. Rabbet (rebate)-- A two edge ledge cut on the side of a board.
2. Groove--A three sided slot cut into the wood along the grain.
3. Dado--A three sided slot cut into the wood across the grain.
There are many more, of course. Like the finger joint and the related but unfortunate Missing Finger Joint (!). More later...
shortykorte
Well-known member
So what's a slot? LOL!
Interesting https://www.canadianwoodworking.com/tipstechniques/rabbets-dados-and-grooves
Sent from my iPhone using Tapatalk
Interesting https://www.canadianwoodworking.com/tipstechniques/rabbets-dados-and-grooves
Sent from my iPhone using Tapatalk
Last edited:
shortykorte
Well-known member
Stewart, that's what they call a loose woman.
In more ways than one, LOL!
Sent from my iPhone using Tapatalk
jimreed2160
Well-known member
So what's a slot? LOL!
Stewart, that's what they call a loose woman.
oldironfarmer
Well-known member
Bob has a free pass during August in Boca, which in the daytime is like the surface of the sun, only hotter. I am surprised that any of us in Florida can join our phonemes into anything beyond a guttural, BAH! But that cool front will zip through any day now...
As for slots, here is the way I was taught:
1. Rabbet (rebate)-- A two edge ledge cut on the side of a board.
2. Groove--A three sided slot cut into the wood along the grain.
3. Dado--A three sided slot cut into the wood across the grain.
There are many more, of course. Like the finger joint and the related but unfortunate Missing Finger Joint (!). More later...
thanks! That's groovy.
Stewart, I think tool girlfriends are better than slot girlfriends.Thanks for the tour.
Ok no girlfriends even if they are a bunch of tools.
Sent from my iPhone using Tapatalk
Mark, I completely understand and even a tiny breeze can lift these things. If it turns out to be useful I am willing to put some anchors in the driveway (it has many cracks already) and leave the pan-head screws in the anchors when not holding down the carport.Hey Bob, I still have nightmares about the 10x10 gazebo that my wife bought me (a thoughtful well-meaning gesture to keep the hot sun off me while I built the deck in the back yard) - I struggled with a structure half the size of yours and I have twice as many arms.
A sudden gust of wind sent my temporary shade gazebo flying towards the lake one day, unfortunately it could not be salvaged (
Nice work on the plane storage.
Thank you for the compliment -- Iit wasn't a lot of work but a I'm real happy with the result.
Rian, thanks so much for stopping by. Compared to my younger days I have more disposable income but the frugality lingers. I may never use any of those rusty pieces of hardware, scraps of wire and wood scraps but it is hard to throw them away.Thanks for the shop tour.
You certainly have a lot in there, mine is kind of spread between my wood shop and the garage.
I certainly do not have the inclination to sort it all into separate buildings.
The planes do look like they are trophies as mentioned, but it is very nice when they are of functional use too.
I love some of my special vintage tools.
And of course the gazebo/carport, again a great addition as long as it stays there, which I am sure it will, as long as the canvas comes off if you do have a serious wind storm.
Have a good weekend.
You are very kind to describe my planes that way and I plan to take care of them like they are trophies.
I'm pretty sure my flimsy carport will suffer the usual fate but I do intend to take it down each day and absolutely will take the sail rigging down even if the pipes stay up.
Stewart, this particular carport frame is 1-3/8" tubing and all of the roof support pieces snap together with spring buttons. Part of the flexing problem is that the horizontal side and center tubes are in two pieces. I think it may be easier to erect a 10-foot section, add the 5-foot horizontal pieces to that section and to the third A-frame and then join them to their full upright and locked positions (are we landing already?).Bob
I have a dining tent with the same frame. My tubing has a small diameter and plastic joints. It's definitely better with two people.
I did figure out the one person process and can have it up in 30-45 minutes. I build the roof frame and put the material on. My has Velcro to attach material to roof frame.
Next, I install the first vertical pipe sections on one, than do the other side. Then install the second section on one side then the other. Basically walk the sides up one level at a time.
I have lose joints so painters tape helps and a dip in the pool every 5 minutes doesn't hurt.
Sent from my iPhone using Tapatalk
The real problem seems to be the vertical legs. They don't have the snap buttons so they can drop out of the truss. The hole near the top is to hook the tarp to the legs.
I am going to somehow attach the legs securely to the top frame but it has to be something easy to remove. Maybe something like a Cleco.
Dearest Andy, when I first saw your shop I thought WOW, if only I had that to start with -- then I could start cleaning up my shop. You have not made it look easy.Great shop tour, so neat and well organized (I have a poor comparison, you know).
The temporary carport is looking good, are you really going to take it down each day? Or ask forgiveness? If you do take it down and back up you'll get a lot better. At that one task, that is, the rest of your deficiencies are terminal, I fear.
I have to take you to task on one misstatement, however. You said it was 90F in the shade and like 7,000 degrees in the sun. Sorry, you're way off, it's more like 15,000,000F in the sun.
You're really cooking now
If I practice, I might get better but I love my deficiencies. Being better than everyone else is too much work. Not being the worst is just fine by me.
You'll have to forgive me on the temperature -- I was reading the thermometer from 90,000,000 miles away and my eyesight isn't what it used to be.
Cooking is right! Good thing I just saw my dermatologist -- my crust should be healed by next year.
Rick, thanks for the props. In the years right after I lost my arm we vacationed in tents so it feels like the good old days but better because now I don't have to pitch it in lousy weather. Unfortunately even if I could fit sections in the garage, I would have to park one of the cars outside and I already feel bad about the fourth car parked outside under a cover. Man, that really sounds terrible whining about four cars. I grew up thinking one nice car was a luxury.Hey there Bob, I have to give you props for getting that carport up in the blazing sun! I've assembled mine several times and it's never easy...
If you're using it for shade several days in a row, could a portion of it be stored in the garage, already assembled? It looks too wide for your garage door, but maybe right half/left half or something like that? Securing the joints would definitely help -- I liked Shorty's blue tape suggestion, or else sheet metal screws if you use it often. Maybe assemble it upside down and then flip the entire thing over?
Thanks for the shed tour -- you really figured out how to get the most out of a small space!
Trust me when I say I'm going to be refining the process of putting that thing up. Failing that, I may end up working on the car parked on the lawn under the trees with the tarp on the ground.
Maybe my walk of shame will inspire me to straighten some of the mess.
Bret, I don't think the phenomenon of "stuff" expanding to fill available space has much to do with age. I wouldn't be hanging on to little scraps of hardwood if I didn't have the extra room. Things will change the day I can't walk into and around the shop.Morning Bob,
Thanks so much for the shop tour. Loved the shop out back. I think mine is nearly as full as yours and I am only half your age.(that is kinda scary). I feel your pain on the gazebo. I have a 10x10 Ez-up brand that I erect in backyard in front of the shed when I am doing bodywork on the 64'. It takes about 5 minutes to put up and take down and I don't even like doing that after a hard day's work outside.
I did have a cheaper put together pole type like BBCHevro mentioned he ha but mine had the same fate. It was erected for an entire week in my backyard and then on the last day I came outside and it was folded over into my neighbor's backyard. I didn't save any part of it as some one at work gave it to me. I then ordered the EZ-up.
Bret
It would have been smarter to buy an EZ-Up canopy but at four times the price I would feel terrible if a thunderstorm turned it into a pile of garden stakes. If I find it a frequently used (or at least needed) structure, the fancier and easier to erect EZ-Up will be an upgrade. If my wife sees me struggle and I leave a photoshopped EZ-Up brochure lying around (one small child putting it up) it will be her brilliant (and "who are we saving it for") idea.
Andy, my repertoire of words comes from my Follett Vest-Pocket 50,000 Words [Spelled - Stressed - Divided] so I don't actually know what they mean.And I always thought a rabbet had only two sides where a dado had three sides. Regardless, I would never question Bob's use of the language at my own peril. If he wants to make a dado for a rabbet plane and call it a rabbet I'm on board. Or I'm bored.
Jim, I enjoy living in Florida, especially at night with the top down cruising down A1A next to the ocean. I have adapted to the heat as much as a child of Scandinavians can. My childhood barefoot walks in the snow probably wouldn't be as much fun with my old bones.Bob has a free pass during August in Boca, which in the daytime is like the surface of the sun, only hotter. I am surprised that any of us in Florida can join our phonemes into anything beyond a guttural, BAH! But that cool front will zip through any day now...
As for slots, here is the way I was taught:
1. Rabbet (rebate)-- A two edge ledge cut on the side of a board.
2. Groove--A three sided slot cut into the wood along the grain.
3. Dado--A three sided slot cut into the wood across the grain.
There are many more, of course. Like the finger joint and the related but unfortunate Missing Finger Joint (!). More later...
It's just a paper cutIn more ways than one, LOL!
Sent from my iPhone using Tapatalk
~~
Always Groovy!thanks! That's groovy.
Attachments


Last edited:
I liked this idea. Perhaps I'll steal it from you. Hope you don't mind
I started cleaning up the shop. My problem is that each step forward creates a mess. I had a wall cabinet with one shelf filled with hanks of rope, which seemed like a waste. I took the rope out and piled it up so I could move all the sprinkler heads and related parts in the cabinet, mostly sorted into clear plastic containers. A box in the cabinet had wire scraps as well so those came out and got piled on the workbench.
I started with a pile of ropes and a pile of wire. The ropes were on top of the gas chainsaw, which is sitting on a box full of exhaust tubing scrap, which is on a small hand truck. I tied a bunch of pieces of 3/8 poly rope together and coiled them. Walked around the shop with the coil of rope on my arm and discovered an empty, useless corner where I could put one of those vinyl covered hooks. Hung up four or five coils of small rope in the corner.

Whenever I need to cut down a tree or large branch I tie a 50-foot length of 1/2-inch nylon rope to it and put a little pressure on the rope to guide the fall to the ground where I want it. I loaned my rope to my neighbor and he snapped it pulling down a not-quite ready palm tree with his van. He bought me another 50-foot rope and I made eye splices on the ends just like the original (which he returned over my protests). Now I have three eye-spliced 1/2-inch ropes: a 50-foot, a 42-foot and an 8-foot to store. There is no way those ropes are gonna fit in that corner.
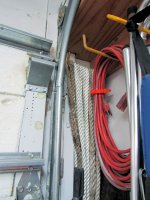
I took the three ropes up to the garage and checked each of the four corners of the garage. I found a nearly full corner where one of the outdoor timers and a wall-mount vacuum cleaner reside next to the garage door. Screwed in another vinyl covered hook and hung the rope with 7-foot loops.

That tiny spot in the corner contains 100-feet of rope that I hope I don't forget is there (two more coiled extension cords hang on the next hook and hide the rope pretty well). I'm sure one of my friends on the GJ will remind me.

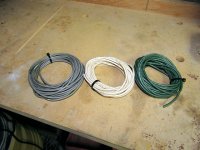
The former (and original) owner of the house bought a small emergency generator for the house and made a cable to connect it to the house. I never saw the generator but he left the cable behind. I didn't care for the three stranded insulated wires that made up the cable so I cut the plugs off and used them to repair an extension cord. The wires were taped together every foot or so and at first I was just going to coil it up and hang it somewhere. The tape was already falling off so I separated the wires. Now I have three small coils of wire to put away.

As I was taking the cable apart, I noticed the gray wire was 14 gauge, which seemed awful small for a generator cable. The green and white wires are only 16 gauge so I'm feeling real good about not using that cable for my generator (for my little 5,500-watt generator I made up a 30-foot 10/4 cable). I threw out a bunch of wire that had nicks in the insulation and coiled the rest to fit in my cable scrap plastic jug. The jug went back u on the shelf and I threw out some of the stuff on the workbench so I could see some of its surface.

This is not the tastiest elephant I've ever eaten but like everyone says, one bite at a time.
I started with a pile of ropes and a pile of wire. The ropes were on top of the gas chainsaw, which is sitting on a box full of exhaust tubing scrap, which is on a small hand truck. I tied a bunch of pieces of 3/8 poly rope together and coiled them. Walked around the shop with the coil of rope on my arm and discovered an empty, useless corner where I could put one of those vinyl covered hooks. Hung up four or five coils of small rope in the corner.
Whenever I need to cut down a tree or large branch I tie a 50-foot length of 1/2-inch nylon rope to it and put a little pressure on the rope to guide the fall to the ground where I want it. I loaned my rope to my neighbor and he snapped it pulling down a not-quite ready palm tree with his van. He bought me another 50-foot rope and I made eye splices on the ends just like the original (which he returned over my protests). Now I have three eye-spliced 1/2-inch ropes: a 50-foot, a 42-foot and an 8-foot to store. There is no way those ropes are gonna fit in that corner.
I took the three ropes up to the garage and checked each of the four corners of the garage. I found a nearly full corner where one of the outdoor timers and a wall-mount vacuum cleaner reside next to the garage door. Screwed in another vinyl covered hook and hung the rope with 7-foot loops.
That tiny spot in the corner contains 100-feet of rope that I hope I don't forget is there (two more coiled extension cords hang on the next hook and hide the rope pretty well). I'm sure one of my friends on the GJ will remind me.
The former (and original) owner of the house bought a small emergency generator for the house and made a cable to connect it to the house. I never saw the generator but he left the cable behind. I didn't care for the three stranded insulated wires that made up the cable so I cut the plugs off and used them to repair an extension cord. The wires were taped together every foot or so and at first I was just going to coil it up and hang it somewhere. The tape was already falling off so I separated the wires. Now I have three small coils of wire to put away.
As I was taking the cable apart, I noticed the gray wire was 14 gauge, which seemed awful small for a generator cable. The green and white wires are only 16 gauge so I'm feeling real good about not using that cable for my generator (for my little 5,500-watt generator I made up a 30-foot 10/4 cable). I threw out a bunch of wire that had nicks in the insulation and coiled the rest to fit in my cable scrap plastic jug. The jug went back u on the shelf and I threw out some of the stuff on the workbench so I could see some of its surface.
This is not the tastiest elephant I've ever eaten but like everyone says, one bite at a time.
Attachments


Last edited:
oldironfarmer
Well-known member
Hey Bob! How are things going? fine here.
By the way, you've got some rope stored next to your garage door.
Thought you'd want to know.
By the way, you've got some rope stored next to your garage door.
Thought you'd want to know.
Lyndon
Well-known member
Bob
Andy beat me to it......
But I've made a diary note to remind you again in 6 months time......
And good start on the shed cleaning up.
Lyndon
Yep I'm still here!
Andy beat me to it......
But I've made a diary note to remind you again in 6 months time......
And good start on the shed cleaning up.
Lyndon
Yep I'm still here!
shortykorte
Well-known member
I'm glad those projects didn't tie up your time.
Sent from my iPhone using Tapatalk
Sent from my iPhone using Tapatalk
jimreed2160
Well-known member
Sometimes you can get so ******* in a knotty problem like where to store things that you feel like you are just whizzing up a rope.
Guster
Well-known member
I'd also be ropeable if I forgot where I kept things! Do you splice your own loops on the ends?
Great way of storing little pieces of wire. I've just recently ripped into a tote with a 40kg tangle of wire shorts. Biffed half f it that was either dirty, perished or just not worth keeping. Rolled the rest up nicely, held together with masking tape. Your way you can even see what you have at a glance.
Great way of storing little pieces of wire. I've just recently ripped into a tote with a 40kg tangle of wire shorts. Biffed half f it that was either dirty, perished or just not worth keeping. Rolled the rest up nicely, held together with masking tape. Your way you can even see what you have at a glance.
Hi Andy, things are going great here. I was depressed because I couldn't find the rope I needed to hang myself. Your reminder cheered me up so I feel no need to use it now.Hey Bob! How are things going? fine here.
By the way, you've got some rope stored next to your garage door.
Thought you'd want to know.
Lyndon, it's always an honor to have you stop in. I am trying to go to the shop every day even if I don't have a need. Just taking something off the bench and finding a place for it (including the trash) and it may get better.Bob
Andy beat me to it......
But I've made a diary note to remind you again in 6 months time......
And good start on the shed cleaning up.
Lyndon
Yep I'm still here!
Six months sounds about right. If you happen to see an A/C hose assembly for a 1972 Corvette, please let me know. I bought it about ten years ago and put it away in a safe place. Wish I knew where that "safe place" was.
Jim, I am at the age where whizzing up a rope is too too difficult and counterproductive -- gravity keeps making a fool of me. Thanks for stopping by, I really do appreciate it.Sometimes you can get so ******* in a knotty problem like where to store things that you feel like you are just whizzing up a rope.
Guster, I used to have a pretty good memory and could return to a project months or years later and still remember how it went back together. Now I need photos and manuals just to figure out what the project is. When I lived in upstate New York I wove eye splices on all the lines I kept on the boat. It was something to do on those dark days in winter. Now I do them on the scorching hot bright sunny days in the summer.I'd also be ropeable if I forgot where I kept things! Do you splice your own loops on the ends?
Great way of storing little pieces of wire. I've just recently ripped into a tote with a 40kg tangle of wire shorts. Biffed half f it that was either dirty, perished or just not worth keeping. Rolled the rest up nicely, held together with masking tape. Your way you can even see what you have at a glance.
I like the clear containers for just that reason. I have all kinds of stuff in them although I still have to search for the back containers on my double-deep shelves. I'm a big fan of shallow shelves so I can see everything at a glance.
oldironfarmer
Well-known member
See, I knew we were alike.
You like shallow shelves and I like shallow friends.
You like shallow shelves and I like shallow friends.
The new 10-24 knurled screw for the Stanley plane arrived in the mail and I used it right away to attach the depth stop. Then I thought I needed to buy a brass insert for the shelf with a 10-24 thread. When I saw that they are sold by the dozens, hundreds and thousands, I had a brainstorm. The shelf is made of very dense wood so I should be able to drill and thread a hole with a 10-24 tap. I was surprised how tight the knurled screw held. Done and dusted.

Attachments

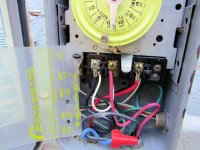
A few days ago the pool filter failed to turn on in the morning. I don't know if it was the first day it failed to start but it turned out to be the timer motor in the Intermatic control. I could trip the mechanical power switch manually but the clock was dead. On most of these timer motors I take them out, clean and oil them and they work fine for several more years. As far as I know this is the original timer motor installed in 1988. I feel like 29 years is a good run so I bought a new 208/277V motor and gearbox. I felt like I would be pushing my luck to make up a 220V cable setup to test the old motor.
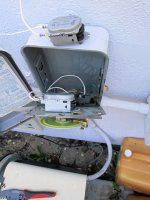
The timer motor came out with two screws after pulling the frame out of the box (held in by one spring clip).

I thought I brought out all the necessary tools for the job. Screwdrivers (phillips and straight) pliers and diagonal cutters. I then discovered the two mounting screws for the motor were Torx so I went back to the garage and got T-15, T-20 and T-25 drivers. So it's one more trip back to the garage to get the T-10 driver that actually fits the screw head. At the same time I brought the Knipex mini bolt/cable cutter and the Pertronix crimper.

Florida Power and Light provides monthly credits if you allow them to put a power interrupter on the major Florida appliances (A/C compressor, water heater and pool pump). A service tech comes out and installs the controllers and apparently they are told to use stranded cable with nothing but the screw clamping it in place. In my youth this would have been OK but now I can do better. Here's one of the connecting wires:

The stranded red wire is from FPL, the black solid wire is the original pump wire and the thin white wire with round terminal powers the timer motor. I plan to put an un-insulated 10-12 gauge crimp connector on the end. but first I need to cut the excess bare wire. I almost forgot I had that fabulous Knipex cutter -- it worked perfectly to cut all the wires cleanly.

I cleaned up the messy insulation on the wire, slipped the crimp connector on and used the Pertronix crimper to make a solid connection. It doesn't look all that solid from this side...

...but this side shows how strong the crimp is (I gave it a double crimp just in case).

I did a dry run on the black cable on the left side first before I took the pictures (rehearsals always help). This didn't take long, I was working in the shade on the north side of the house and everything went as planned. Oh yeah, except that I not only turned off the breaker on the main panel in the garage, I also turned off the master switch at the pool pump. Flipped the breaker back on, came out to find the pump not running and had that momentary AH-$HIT before remembering the master switch. Working as designed again!

The timer motor came out with two screws after pulling the frame out of the box (held in by one spring clip).
I thought I brought out all the necessary tools for the job. Screwdrivers (phillips and straight) pliers and diagonal cutters. I then discovered the two mounting screws for the motor were Torx so I went back to the garage and got T-15, T-20 and T-25 drivers. So it's one more trip back to the garage to get the T-10 driver that actually fits the screw head. At the same time I brought the Knipex mini bolt/cable cutter and the Pertronix crimper.
Florida Power and Light provides monthly credits if you allow them to put a power interrupter on the major Florida appliances (A/C compressor, water heater and pool pump). A service tech comes out and installs the controllers and apparently they are told to use stranded cable with nothing but the screw clamping it in place. In my youth this would have been OK but now I can do better. Here's one of the connecting wires:
The stranded red wire is from FPL, the black solid wire is the original pump wire and the thin white wire with round terminal powers the timer motor. I plan to put an un-insulated 10-12 gauge crimp connector on the end. but first I need to cut the excess bare wire. I almost forgot I had that fabulous Knipex cutter -- it worked perfectly to cut all the wires cleanly.
I cleaned up the messy insulation on the wire, slipped the crimp connector on and used the Pertronix crimper to make a solid connection. It doesn't look all that solid from this side...
...but this side shows how strong the crimp is (I gave it a double crimp just in case).
I did a dry run on the black cable on the left side first before I took the pictures (rehearsals always help). This didn't take long, I was working in the shade on the north side of the house and everything went as planned. Oh yeah, except that I not only turned off the breaker on the main panel in the garage, I also turned off the master switch at the pool pump. Flipped the breaker back on, came out to find the pump not running and had that momentary AH-$HIT before remembering the master switch. Working as designed again!
Attachments



xtremek
Well-known member
Dang dude, you've been busy. Can I borrow some of your energy?