To avoid these ads, REGISTER NOW!

The VISES of Garage Journal

GETRIDAONE

Well-known member
Joined
May 21, 2013
Messages
1,549
Location
Auburn, GA
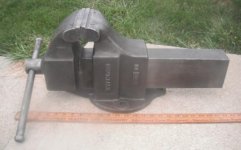
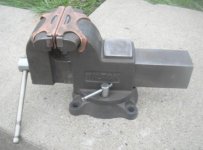
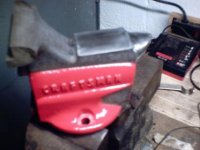
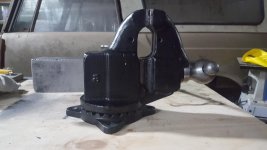
Your vise, your choice. If going for originality, I suspect it was originally painted. Most thing made of cast iron are painted all over, then machined, hence only the machined areas don't have paint on them.


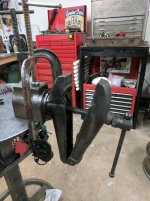
I agree in that it would one less step to paint and mask after machining. They must have blocked each end of the housing because I have never noticed any finish on the inside of the housing on Parker vises.

Mark, It will be awhile before I get done, leaving on a two week trip and out of time to finish.
I will have plenty of time to think about it while camping and :beer::beer:
 
To avoid these ads, REGISTER NOW!

GETRIDAONE

Well-known member
Joined
May 21, 2013
Messages
1,549
Location
Auburn, GA
I'd polish it up a bit and leave bare metal.

Very interesting for me to see all the other parts, I have a No 23 here in the UK which makes it pretty rare but I'm missing some of the bolt through parts and a collar. If anyone has parts for one and are prepared toship to the Uk please let me know. I'd near kill for the toggle spanner :D

I feel fortunate to have one with all the parts. I agree the swivel wrench is a nice touch. Most through the bench mounts came with various styles of wing nuts.
 

Attachments

  • 20170908_145952.jpg
    20170908_145952.jpg
    135.3 KB · Views: 34

mike_paxton

Well-known member
Joined
Dec 15, 2013
Messages
905
Picked up a few vises.

Pic 1--USA made Columbian No. 606M3 vise with 6" Jaws. Max opening 11 inches. Weight of 90 pounds. Came with pair of copper jaw caps but not pictured with them on. No swivel base.

Pic 2--Wilton 6" vise with anvil & double clamped swivel base. 43 pounds. Believe to be foreign made. Came with pair of Wilton copper jaw caps #341-J-327.

Pic 3--Columbian No. 3040 with 4" jaws and pictured on left side. Anvil and Swivel Base. 28 pounds. Believe to be foreign made.

On right side of pic 3, a little Columbian No. 53 USA made vise with 3" jaws and Red Arrow marked on one side.

Mike
 

Attachments

  • DSCF5812.jpg
    DSCF5812.jpg
    30 KB · Views: 29
  • DSCF5809.jpg
    DSCF5809.jpg
    28.8 KB · Views: 33
  • DSCF5797.JPG
    DSCF5797.JPG
    115.4 KB · Views: 31

zoomieport

Well-known member
Joined
Nov 21, 2011
Messages
1,803
Location
The Mall City
Hello All,

I hope you are well!

I picked the up on eBay for $21.00, shipped.
It's not typically my style of vise, but I bought it for a few reasons...

I don't recall seeing a Blue Devil vise on here...
It was made in Oakland, Ca...
Its aluminum...

And I thought the coolest feature was the 2" smooth "Offset Jaws" (think Dawn), 3/4" on the right side of center, 1-1/4" to the left of center...

Take care All!
Mike
 

Attachments

  • BDV10.jpg
    BDV10.jpg
    75.1 KB · Views: 23
  • BDV9.jpg
    BDV9.jpg
    142.8 KB · Views: 27
  • BDV8.jpg
    BDV8.jpg
    101.6 KB · Views: 29
  • BDV7.jpg
    BDV7.jpg
    112.4 KB · Views: 31
  • BDV6.jpg
    BDV6.jpg
    137.8 KB · Views: 32
Last edited:

jimreed2160

Well-known member
Joined
Aug 7, 2016
Messages
3,589
Location
Tallahassee FL
Hi All
Does anyone know why Prentiss vises seem to have gap (please see photo below) between the jaws and jaw inserts (the gap is only right at the outer edge of jaws and is not all the way through which would be really a bad idea)?

The reason I am asking is that even after I removed the jaw insert screws, the inserts would not come off the jaws. I am not sure if the inserts are just stuck because of rust/paint or something else.

I did gently tap them on the side with a hammer to no avail. I did not use too much force as I was not sure if there is some kind of secondary latching mechanism that is holding them in place. The inserts appear to be U shaped. Are the gaps to be used to pry them off or slide them off side ways or something else?

Any advise will be greatly appreciated.
007

My guess is that the roundover was easier to machine without breaking those sharp corners. Anyway, your jaws are probably rusted in place. Use a good solvent and tap them lightly with a hammer. A day in the sun would help. Given enough time and gentle treatment they will eventually give up the ghost. Good luck.
 

Shiftless

Well-known member
Joined
Mar 9, 2014
Messages
14,553
Location
East Bay SFO
My guess is that the roundover was easier to machine without breaking those sharp corners. Anyway, your jaws are probably rusted in place. Use a good solvent and tap them lightly with a hammer. A day in the sun would help. Given enough time and gentle treatment they will eventually give up the ghost. Good luck.

I agree with Jim
When he said "solvent" I bet he was thinking penetrating oil. I like Kroil or a 50-50 mix of ATF and acetone. I also keep a squirt can oiler full of marvel mystery oil handy. It works too.
 

gman007

Well-known member
Joined
May 17, 2017
Messages
2,739
Location
West Michigan
I agree with Jim
When he said "solvent" I bet he was thinking penetrating oil. I like Kroil or a 50-50 mix of ATF and acetone. I also keep a squirt can oiler full of marvel mystery oil handy. It works too.

jim and shift
Thank you for the advice , I applied Kroil to the jaws and will wait a while.
I just want to make sure that there are no surprises when I try applying a bit of Persuasion
Cheers
Ed
 

akasrick

Well-known member
Joined
Apr 10, 2017
Messages
795
Location
south jersey
Should the horn be painted or left bare metal ?
Any opinions on why or why not :confused:

I thought it would be different to high lite the whole back. If I don't like can always redo the horn. Partially finished pictures.

akasrick
 

Attachments

  • SUNP0025.jpg
    SUNP0025.jpg
    15.2 KB · Views: 50
  • SUNP0026.jpg
    SUNP0026.jpg
    12.6 KB · Views: 40

chrisnazzy

Well-known member
Joined
Apr 20, 2013
Messages
1,671
Location
Arizona
Got this little guy today. It was just too cool to pass up! A quick clean and what looks like the original green paint is coming through....really digging the patina!daad9a4e37bc593b0e6c0936a4458eb2.jpgaf6f7b12be440528830b4a1bcf94e02d.jpg

Sent from my SM-G930P using Tapatalk
 

Attachments

  • daad9a4e37bc593b0e6c0936a4458eb2.jpg
    daad9a4e37bc593b0e6c0936a4458eb2.jpg
    64 KB · Views: 1
  • af6f7b12be440528830b4a1bcf94e02d.jpg
    af6f7b12be440528830b4a1bcf94e02d.jpg
    74.5 KB · Views: 1

RagTopTA

Well-known member
Joined
Feb 26, 2015
Messages
1,892
Location
Wichita Falls , Texas
so, I have been working on my old Cole Swivel, copy cat vise. Getting it closer to where it needs to be. But, the spring that goes on the main shaft that pushes the jaws back open is broken in the middle. I have looked all over and cant find another one to replace it with. So, I'm looking at repairing this spring. what are yall thoughts on this ? I can try to weld it back where it broke.. Or lay it over lapping and get a better small bead on it. which I think would make it a lot stronger. Ideas? thoughts ? I have Mig, Tig, and ducktape available.
 

Attachments

  • IMG_20170908_215337-01.jpg
    IMG_20170908_215337-01.jpg
    145.2 KB · Views: 23
  • IMG_20170908_215318-01.jpg
    IMG_20170908_215318-01.jpg
    135.7 KB · Views: 25
  • IMG_20170908_215330.jpg
    IMG_20170908_215330.jpg
    147.1 KB · Views: 29
  • IMG_20170908_215938.jpg
    IMG_20170908_215938.jpg
    146.7 KB · Views: 38

va.grouseman

Well-known member
Joined
Mar 26, 2011
Messages
4,965
Location
Southern-Central VA.
Lap it like in the last pic, heat it cherry red and hammer fuse it together, then quick dip it in water to restore some temper.

Edit---Better yet, take your torch with a brazing/welding tip and melt them together.
 
Last edited:

damnesia

Well-known member
Joined
Jan 16, 2014
Messages
221
Location
Northern MN
so, I have been working on my old Cole Swivel, copy cat vise. Getting it closer to where it needs to be. But, the spring that goes on the main shaft that pushes the jaws back open is broken in the middle. I have looked all over and cant find another one to replace it with. So, I'm looking at repairing this spring. what are yall thoughts on this ? I can try to weld it back where it broke.. Or lay it over lapping and get a better small bead on it. which I think would make it a lot stronger. Ideas? thoughts ? I have Mig, Tig, and ducktape available.

I would try to modify another spring before I'd attempt to fix that one.
 

RagTopTA

Well-known member
Joined
Feb 26, 2015
Messages
1,892
Location
Wichita Falls , Texas
Lap it like in the last pic, heat it cherry red and hammer fuse it together, then quick dip it in water to restore some temper.

Edit---Better yet, take your torch with a brazing/welding tip and melt them together.

that sounds like a goodplan, got that set up out in the shop as well...

Dont have another choice.. this spring is pretty rare im thinking.
 

Shiftless

Well-known member
Joined
Mar 9, 2014
Messages
14,553
Location
East Bay SFO
Like damnesia just said, I would try to find a similar new spring rather than patching up an old spring by welding and losing the temper. Try different springs and see which one works the best.
 

lis2323

Well-known member
Joined
Dec 25, 2016
Messages
3,234
Try using just a regular spring with slightly larger diameter than the screw with a heavy washer on each end.

Terry
 

RagTopTA

Well-known member
Joined
Feb 26, 2015
Messages
1,892
Location
Wichita Falls , Texas
Like damnesia just said, I would try to find a similar new spring rather than patching up an old spring by welding and losing the temper. Try different springs and see which one works the best.[/QUOTE

I'll have to do some looking around more then, not sure where to find something built the same but I guess its just gotta work. I'll do some measuring on it tomorrow and see if I can find something close online...
 

Outlawmws

Well-known member
Joined
Aug 9, 2011
Messages
39,284
Location
The Badlands
Instead of applying heat, make a tight fitting sleeve, pre-bend it slightly; heat THAT up and press fit together?

Does it get fully compressed? I don't imagine a lot of tension is required to open the jaws...
 

RagTopTA

Well-known member
Joined
Feb 26, 2015
Messages
1,892
Location
Wichita Falls , Texas
Instead of applying heat, make a tight fitting sleeve, pre-bend it slightly; heat THAT up and press fit together?

Does it get fully compressed? I don't imagine a lot of tension is required to open the jaws...

not sure how much it takes when the hinge is fully freed up.. It was frozen, but I have it woring now.. just not freely just yet... a sleeve might do the trick good idea Outlaw! i think it would be about halfway compressed when the vise is closed al the way
 
To avoid these ads, REGISTER NOW!

damnesia

Well-known member
Joined
Jan 16, 2014
Messages
221
Location
Northern MN
Finished this one up tonight. I tried a new paint and in hindsight I should have thinned it ( or used a different paint ). With that said, I'm not thrilled with the paint job. This one will get mounted to my workbench and see active duty. I was pretty happy with how the handle turned out. It's not perfectly straight, but close enough for a vise handle. Anyway, some before and after shots.
 

Attachments

  • 20170825_193714.jpg
    20170825_193714.jpg
    146.1 KB · Views: 74
  • 20170908_235832.jpg
    20170908_235832.jpg
    140.2 KB · Views: 74
  • 20170908_235926.jpg
    20170908_235926.jpg
    137.6 KB · Views: 74

gman007

Well-known member
Joined
May 17, 2017
Messages
2,739
Location
West Michigan
Finished this one up tonight. I tried a new paint and in hindsight I should have thinned it ( or used a different paint ). With that said, I'm not thrilled with the paint job. This one will get mounted to my workbench and see active duty. I was pretty happy with how the handle turned out. It's not perfectly straight, but close enough for a vise handle. Anyway, some before and after shots.

damnesia
While the paint as you said might have been a bit thick, the raised lettering were already a bit worn out so overall it does not look too bad and you did a great job with the handle. This baby should server you well for years to come. Great job :beer:
007
 

GETRIDAONE

Well-known member
Joined
May 21, 2013
Messages
1,549
Location
Auburn, GA
Got this little guy today. It was just too cool to pass up! A quick clean and what looks like the original green paint is coming through....really digging the patina!daad9a4e37bc593b0e6c0936a4458eb2.jpgaf6f7b12be440528830b4a1bcf94e02d.jpg

Sent from my SM-G930P using Tapatalk

That oval label looks like a Walker Turner label .
I think it was made by Luther Grinder and relabeled.
 

Attachments

  • daad9a4e37bc593b0e6c0936a4458eb2.jpg
    daad9a4e37bc593b0e6c0936a4458eb2.jpg
    62.9 KB · Views: 0
  • af6f7b12be440528830b4a1bcf94e02d.jpg
    af6f7b12be440528830b4a1bcf94e02d.jpg
    72.3 KB · Views: 2
Last edited:

mrcrawfish

Member
Joined
Sep 1, 2017
Messages
21
Location
Oklahoma, USA
Lap it like in the last pic, heat it cherry red and hammer fuse it together, then quick dip it in water to restore some temper.

Edit---Better yet, take your torch with a brazing/welding tip and melt them together.


Forge welding that without smashing up the spring would be incredibly difficult.


Sent from my iPhone using Tapatalk
 

Shiftless

Well-known member
Joined
Mar 9, 2014
Messages
14,553
Location
East Bay SFO
ganymede:
Could you please share with us the brand and name of that color. I too am diggin' the burgundy.
 
Last edited:

lis2323

Well-known member
Joined
Dec 25, 2016
Messages
3,234
so, I have been working on my old Cole Swivel, copy cat vise. Getting it closer to where it needs to be. But, the spring that goes on the main shaft that pushes the jaws back open is broken in the middle. I have looked all over and cant find another one to replace it with. So, I'm looking at repairing this spring. what are yall thoughts on this ? I can try to weld it back where it broke.. Or lay it over lapping and get a better small bead on it. which I think would make it a lot stronger. Ideas? thoughts ? I have Mig, Tig, and ducktape available.


Another suggestion. Locate a new spring slightly shorter than the OEM and same diameter as the large ENDS of your OEM.

Then slip each half of your broken spring into each end of the new one.

Terry
 

ganymede

Well-known member
Joined
Nov 29, 2012
Messages
2,332
Location
New England
ganymede:
Could you please share with us the brand and name of that color. I too am diggin' the burgundy.

I'm guessing it's Rust-Oleum hammered red. Hopefully Ganymede will tell us?

Thanks guys.
It wasn't stock. I mixed some rust oleum and some krylon .
Can't remember off hand but it's some where in this thread a zillion pages back.
I'll try n find it and post.
 

mgmlvks

Well-known member
Joined
Jul 28, 2017
Messages
200
Location
Leavenworth, KS
New arrival today - can't win if you don't play - garage sale of general household cr*p - asked the owner if he had any vises - said yes! $25

4-1/2" jaws. Seized up. Reworking will be a LOT easier and less stressful on this one due to learning curve kicking in from the first one.

37123570295_ebe869bb7b_z.jpg


--------- UPDATE 9-10-2017 ----------------
All apart except removing pins and nut. Slide dated 11-83. Very little abuse. Odd thing is that sliding handle bar is absolutely frozen in the center part. More PBB and some patience!
 
Last edited:

ganymede

Well-known member
Joined
Nov 29, 2012
Messages
2,332
Location
New England
Mixed like maybe 50-50 or what? Do you recall?
That surprises me to see red and green mix to make that beautiful color.:dunno:

I don't remember the ratio but it definitely was mostly the Regal Red.
I just got an empty container that when filled with enough paint to cover a vise still had plenty of space extra. Dumped in the red and then I kept adding green until it looked close to the original color. At least I thought it did at the time.
After it dried I could see the original had more of a brownish purple sort of look to it. Oh well :)
Snap Mom has one with it's original color.
 

Iconoclast

Member
Joined
Aug 28, 2017
Messages
6
Hi all learning a lot reading all these posts about to start restoration on my Wilton 450sj
 

Attachments

  • IMG_0275.jpg
    IMG_0275.jpg
    143 KB · Views: 56
  • IMG_0274.jpg
    IMG_0274.jpg
    135.7 KB · Views: 64
  • IMG_0273.jpg
    IMG_0273.jpg
    134.4 KB · Views: 60

gman007

Well-known member
Joined
May 17, 2017
Messages
2,739
Location
West Michigan
Mixed like maybe 50-50 or what? Do you recall?
That surprises me to see red and green mix to make that beautiful color.:dunno:

Shift
The color is a shade darker than the Rustoleum hammered bright red (which turned out to be really burgundy and not bright red at all) that I used on my Parker 204. So may be by adding just a bit of green you can get a darker burgundy.

007
 

Attachments

  • Chas Parker 204 avatar.jpg
    Chas Parker 204 avatar.jpg
    141.7 KB · Views: 50
  • RI red.jpg
    RI red.jpg
    69.8 KB · Views: 40

chrisnazzy

Well-known member
Joined
Apr 20, 2013
Messages
1,671
Location
Arizona
That oval label looks like a Walker Turner label .
I think it was made by Luther Grinder and relabeled.
Thank you for the tips. When I first looked at this I was a little bummed because there were no maker marks and the label was illegible but I quickly got past that because this little 1 3/4" jaw vise is just a cool little conversation piece.

Sent from my SM-G930P using Tapatalk
 
To avoid these ads, REGISTER NOW!
Top Bottom