To avoid these ads, REGISTER NOW!

VISE REPAIR 101 all vise repairs, lubricants, sources for parts and the tricks to fix

mike_paxton

Well-known member
Joined
Dec 15, 2013
Messages
905
drivesitfar; [B said:
Mike:[/B] do you have any pictures to post of you taking apart your blacksmith vises? I can't say i've seen any pictures of one taken apart yet and i'm sure not only this old guy would like to see how they are put together. i'm guessing just a screw on the back of the screw or is that just a cover?

do you take the bolt off where the legs meet cause i'm probably going to leave mine alone?

thanks


cheers

Driveitfar:

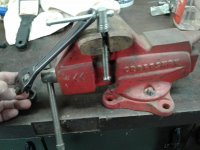
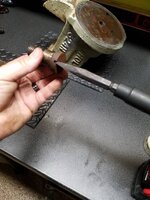
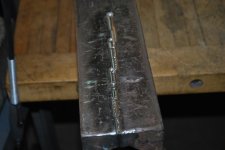
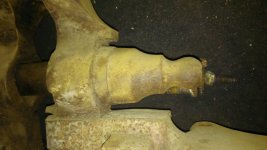
It seems when I get a blacksmith vise, they are usually froze up with rust.

However, found that if I take everything apart which includes bolt where legs meet, that I can get rust off and everything moving easily.

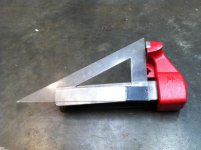
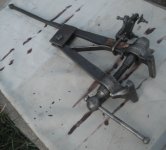
Attached is the last Blacksmith Vise I picked up at end of July, which was a Columbian with 5" jaws. Not a big one.

That vise is now at a Blacksmith teaching center in Southern Ohio.

Mike
 

Attachments

  • DSCF5597.JPG
    DSCF5597.JPG
    144.3 KB · Views: 36
  • DSCF5592.JPG
    DSCF5592.JPG
    143.4 KB · Views: 34
To avoid these ads, REGISTER NOW!

BMR24

Well-known member
Joined
Oct 2, 2017
Messages
234
Location
Rocky Mountains Colorado
DRIVES
I finally got around to taking some photos of that post vise.
This is how my spring is held in place
image.jpg
Pretty simple design really and I think if you are missing pieces you can make some out of an old leaf spring. For some reason I can only add one picture per post with this device.
 

BMR24

Well-known member
Joined
Oct 2, 2017
Messages
234
Location
Rocky Mountains Colorado
Drives
Here is how I got the spring out as I described in a previous post.
image.jpg
A picture is worth a thousand words, I open the jaws until the spring no longer had tension and the whole mechanism will slide on the post
 
OP
D

drivesitfar

Well-known member
Joined
Oct 23, 2013
Messages
36,034
Location
Pacific Northwest
Mike: thanks for the 411 and the pictures. i think i'm going to leave my bolt in place that holds the 2 jaws together cause mine looks like it's threads are beat on the end and i like the patina/look. that might change as i get more into this so i'll post up pictures when that happens which might be a while cause still doing outside stuff around my house while weather is still somewhat ok to do so.

BMR: thank you for the picture and yes my spring is welded at the bottom so hoping it still works and performs as it should.

ALL: so just unscrew the vise and the back piece comes off so I can clean up the screw? i have an old Rubbermaid horse trough that i'm going to use for a E tank so i might just set the entire blacksmith vise in it when i get that set up.

thank you both for your pictures and help and i'll see if my existing steel stand that had a blacksmith vise on it before i bought it will work for this vise or if i need to find or build another one.

cheers
 

Attachments

  • WP_20171017_001.jpg
    WP_20171017_001.jpg
    123.2 KB · Views: 38
  • WP_20171017_002.jpg
    WP_20171017_002.jpg
    154.5 KB · Views: 39
  • WP_20171017_003.jpg
    WP_20171017_003.jpg
    149.5 KB · Views: 41

Shiftless

Well-known member
Joined
Mar 9, 2014
Messages
14,553
Location
East Bay SFO
Home made vise jaw spreader tool:

This is used to be a turnbuckle. Cut off the eyes leaving threaded rod on each end. Fab up some wooden blocks from 2x2 or scraps you have laying around. You could use metal blocks of course. Drill appropriate holes in the blocks and epoxy the threaded rods in.

This worked fine for me tonight when I was trying to disassemble the Morgan Chicago 40 I picked up off of eBay last month. The action was sticky so I filed down the usual nicks at the corners of the slide and greased it up. That helped some but after the screw was out of the nut, the slide was stuck in the main body. I tried hammering from the back with a punch but that didn't work.

This tool between the jaws and turned with a 10 inch Crescent wrench saved the day.

Does Snap On sell this tool? :evil:
 

Attachments

  • image.jpg
    image.jpg
    146.6 KB · Views: 40
Last edited:

Fretters

Well-known member
Joined
Jan 25, 2014
Messages
4,217
Location
South Yorkshire, England
Similar to a tool I made for removing a crank from a tapered shaft. I used a bolt with a nut on it, and then the threaded end of the bolt goes into a metal sleeve/spacer, so that as you turn the nut, it pushes the sleeve down the bolt. Simple yet effective method, akin to a more robust version of a machinist's jack.
 

Fretters

Well-known member
Joined
Jan 25, 2014
Messages
4,217
Location
South Yorkshire, England
BMR: thank you for the picture and yes my spring is welded at the bottom so hoping it still works and performs as it should.

ALL: so just unscrew the vise and the back piece comes off so I can clean up the screw? i have an old Rubbermaid horse trough that i'm going to use for a E tank so i might just set the entire blacksmith vise in it when i get that set up.

Spring should still work fine, and yup, just pull out the nut once the screw is out.
 
OP
D

drivesitfar

Well-known member
Joined
Oct 23, 2013
Messages
36,034
Location
Pacific Northwest
Shift: yep it's a SMALL HORSE TROUGH though. :D i own about 5 or more old chargers so if i need more power i'll have plenty available and then i can dunk the big ones in one piece if they are stuck or at least put their 24+ inch jaws in and have plenty of room.

stay tuned

nice work on the POS vise. breaking a REED really does show abuse and using the wrong tool for the job. Mark's re purposing really does instill lots of ideas for us doesn't he?

nice looking and effective new tool you made. if Snappy doesn't sell it maybe they should.

Fretters: thanks and i'm feeling better about my find knowing that it should work at least. I still wish i'd have bought the 6 inch wide jaw attached to a welding table with 1/2 inch plate on top from a friend closing their business, but i'll keep looking for another i'm pretty sure of that.
 

Shiftless

Well-known member
Joined
Mar 9, 2014
Messages
14,553
Location
East Bay SFO
Can this be fixed?

I picked up this Craftsman 391.5188 (made in Japan and about 40 years old) for $10. It had already been repainted, with the jaw tops polished. Obviously a low mileage vise. The first few turns of the handle were one finger smooth and then it got tight. There was no lube on the screw and it looked like the slide was binding. I was wrong.

WORSE PROBLEM!

After I got the slide out (using lots of force), I saw that the tightness was due to a misalignment that put more force on the spindle as the jaws moved further apart.

As you can see in this pic, the dynamic jaw support is misaligned by 3 or 4 degrees which is not good. The spindle now sits too high and won't engage with the nut. The spindle needs to be near the center of the slide and not almost touching the top of the slide.

Any ideas? I already tried a BFH and holding the dynamic jaw support in my hands and slamming the end of the slide down into my workbench.

Maybe I should just give up and make it into a pair of bookends. :lol_hitti

(all the painting is already done)

(Anybody need a like new pair of jaw inserts, or a handle/spindle, or a swivel base, for $10?)
.
.
 

Attachments

  • image.jpg
    image.jpg
    143.6 KB · Views: 51
Last edited:

Outlawmws

Well-known member
Joined
Aug 9, 2011
Messages
39,277
Location
The Badlands
Shift, the trick with straightening that slide will be Where it is bent...

Hard to figure How they manage that without breaking it though...

Get a straight edge on the slide itself, and try to take any swoop out there first, and see where you are. If the bend, or what is left of it, is at the D-Jaw juncture, make sure the jaw base is supported, well for that part.
 

Shiftless

Well-known member
Joined
Mar 9, 2014
Messages
14,553
Location
East Bay SFO
Thanks for the quick responses guys...

Before I even noticed the angle problem I suspected a bent slide so I put a straight edge on it. Both bottom edges and the top are fine. Somehow the entire slide is not seating properly in the dynamic jaw support.
Reaming out the passage hole where the spindle goes through the dynamic jaw tower would enable the vise to work, but that seems to me like a pretty crude fix.
Needless to say, this is not destined for my workbench, but it might make a good user for somebody starting out.
 
OP
D

drivesitfar

Well-known member
Joined
Oct 23, 2013
Messages
36,034
Location
Pacific Northwest
Shift: if you have a press and some heat (maybe a plumber's torch with MAPP gas) it might do the job. at the worst case you can make another book ends holder out of that vise.

or if you don't own a little press or have one to borrow how about heating it up and putting it in one of your big vise's jaws with maybe some wood in between the jaws and the dynamic jaw you are trying to straighten out.

good luck
 
OP
D

drivesitfar

Well-known member
Joined
Oct 23, 2013
Messages
36,034
Location
Pacific Northwest
ALL: for those of you that noticed I mentioned using a vise as a PRESS i also said use HEAT so the metal is fairly soft (or at least bendable) cause why break a better vise to try to fix a smaller one.

i still don't recommend using a vise as a press, but a metal bender is ok if used correctly where you don't beat on your vise.
 
To avoid these ads, REGISTER NOW!

Hiatt1991

Well-known member
Joined
Jul 16, 2017
Messages
180
Location
Prescott, AZ
Hiatt: i saw you picked an Avatar and put in your location. :beer:

i also saw you posted your little Craftsman over on the vise thread and you've painted the letters and the little chevrons too so post them up here and tell us how you did it which i think was with a little paint brush?

Brett:
fantastic job making a new nut for your Morgan's missing one. nice that you had a similar Morgan vise's nut to copy, but still a great thought out and well done job making a new one.

ALL: back to this Blacksmith post vise of mine. is this weld at the bottom of the spring standard or did it break and it was welded as a repair? or is a holding piece missing and therefore welded?

also does the end piece at the back just screw off and if the vise has been sitting in a barn for 100 years will just Kroil work or does it need a vinegar soak or E bath?

thanks and any pictures you have of blacksmith and post vises apart or restored with you comments will be welcome not only by me, but by others in the future cause this thread is used a lot.

You are correct. I just used some white model paint and a small paint brush to paint the letters. It's a little sloppy but not too bad from a distance. I'm still trying to figure out a god way to straighten then swivel lock lever.

<a href='http://i.imgur.com/PVoux7l' title=''><img src='http://i.imgur.com/PVoux7l.jpg' alt='' title='Hosted by imgur.com' /></a>

<a href='http://i.imgur.com/uUndogc' title=''><img src='http://i.imgur.com/uUndogc.jpg' alt='' title='Hosted by imgur.com' /></a>

Here's the before...

<a href='http://i.imgur.com/UaTTNFK' title=''><img src='http://i.imgur.com/UaTTNFK.jpg' alt='' title='Hosted by imgur.com' /></a>
 
OP
D

drivesitfar

Well-known member
Joined
Oct 23, 2013
Messages
36,034
Location
Pacific Northwest
Hiatt: several good or not so good ways to straighten that little handle if you choose to do so. first of all you can unscrew that nut holding it off so you don't damage your newly painted vise.

then if you own a press you can maybe put the handle in between some hardwood blocks or even maybe use your Craftsman vise to squeeze it straight. some guys just take their body or regular hammers and pound it a little at a time until it's straight maybe on a piece of RR track which you should have and use instead of the little "want to be" anvils on the vises.

if you still need help just ask cause there are guys here that check this thread that make a new one almost as fast as i can to hammer a little bent one straight that might have other options. heat is always a good thing if you are careful when bending metal and do you own a plumber's torch with Mapp gas that might heat it up just enough. it's not like it needs to be tempered cause overtightening the swivel base leads to other issues besides a bent handle.

good luck
 

Shiftless

Well-known member
Joined
Mar 9, 2014
Messages
14,553
Location
East Bay SFO
re: polishing vise handles and "noses"

Handles, ball ends, and the front surface of the nose aren't too hard to clean up or even polish with a scotchbrite flap wheel. My question is about what tool you guys use to get into the awkward areas close to where the handle goes through the nose.
I have tried 3/4 inch SS wire wheels on my Dremel tool which works well but the wheels wear down to nothing after only a few minutes work. I don't press down hard.
Is that the best we can do?

Does anybody use one inch felt wheels with compound?
 

Outlawmws

Well-known member
Joined
Aug 9, 2011
Messages
39,277
Location
The Badlands
Shift, I usually use a 6" fine steel wire wheel for that. if it's heavily worn, (like my current wheel) its tough, but one in decent shape I can get in there fairly easily.
 

Shiftless

Well-known member
Joined
Mar 9, 2014
Messages
14,553
Location
East Bay SFO
Thanks, outlaw.
I can imagine the greater flexibility of the fine wire wheel would conform and wrap around the obstructions and get the dirt and corrosion off.
 

chrisnazzy

Well-known member
Joined
Apr 20, 2013
Messages
1,671
Location
Arizona
Taking apart my newly acquired Athol 624N tonight after work. I know the round slotted shoulder bolts being troublesome to remove sometimes has been discussed in detail here. Not sure if my solution was original or not but thought I'd share. A short chisel from a Mac set with a corresponding sized impact socket plus some brute Milwaukee impact strength made quick work of it.

c660d1edc3a677154fb02bcbb68ca66c.jpg896ea545b6c83cd9a1110888ff721c51.jpg

Sent from my SM-G930P using Tapatalk
 

Attachments

  • 896ea545b6c83cd9a1110888ff721c51.jpg
    896ea545b6c83cd9a1110888ff721c51.jpg
    146 KB · Views: 1
  • c660d1edc3a677154fb02bcbb68ca66c.jpg
    c660d1edc3a677154fb02bcbb68ca66c.jpg
    159.7 KB · Views: 0

Hiatt1991

Well-known member
Joined
Jul 16, 2017
Messages
180
Location
Prescott, AZ
What's the best way to clean up the slide on a Wilton C-1 vise? Doesn't need to be a mirror finish but I'd like it to be somewhat nice looking. Unfortunately I only have access to an angle grinder with a wire wheel, scotch bright and some various wire brushes. Looking to do the same finish on the lead screw as well.
 

Carla

MEMBER EMERITUS
Joined
Nov 27, 2010
Messages
672
Taking apart my newly acquired Athol 624N tonight after work. I know the round slotted shoulder bolts being troublesome to remove sometimes has been discussed in detail here. Not sure if my solution was original or not but thought I'd share. A short chisel from a Mac set with a corresponding sized impact socket plus some brute Milwaukee impact strength made quick work of it.

Well done, Chris, that's an excellent improvisation....... : )

cheers

Carla
 

Shiftless

Well-known member
Joined
Mar 9, 2014
Messages
14,553
Location
East Bay SFO
What's the best way to clean up the slide on a Wilton C-1 vise? Doesn't need to be a mirror finish but I'd like it to be somewhat nice looking. Unfortunately I only have access to an angle grinder with a wire wheel, scotch bright and some various wire brushes. Looking to do the same finish on the lead screw as well.


The slide is inside the tube and not seen once you put it back together. My Wilton machinist vises have a machined surface there that helps retain lubricant. I wouldn't change that. Unless there is a binding problem, those clearances are crucial to proper operation and shouldn't be altered.

Just clean and relubricate. I like this stuff.

For the short section that shows when the vise is closed all the way, you could use a fine wire wheel to remove old corrosion and dried up crud.
 

Attachments

  • image.jpg
    image.jpg
    21.2 KB · Views: 21
Last edited:

BMR24

Well-known member
Joined
Oct 2, 2017
Messages
234
Location
Rocky Mountains Colorado
I've been searching this thread and haven't found much on the topic of repairing cracked slides, I have several ideas, but I'd like everyone's input on the BEST way to repair the cracks. If I don't have the tools I can figure that out one way or another. I know this is a common problem, and rather than recruiting others all the time I'd like to do some myself. Don't worry, the nice vises will be done by experienced guys, but I want to try my hand on some that are pretty far gone and see if I can bring em back to life. I don't have much tolerance for mediocre work, especially on tools which represent American history and craftsmanship. Thanks everyone for your suggestions.
image.jpg
 
OP
D

drivesitfar

Well-known member
Joined
Oct 23, 2013
Messages
36,034
Location
Pacific Northwest
Hiatt: if your Wilton C1 is damaged then that's one thing if it's just dirty, rusty or oily i think Shift said it pretty good. you are always welcome to post up pictures too and it's a great vise so hope it's not too beat up.

BMR: Mark probably said it in his thread he posted a link for, but since i don't weld or braze much yet all i can do is quote what the experts have said over the years.

drill a hole just a bit bigger than the crack at the end of the hold so the crack doesn't keep running. then clean it up so it's ready to braze or weld. some use clamps to hold the slide in a good square position which is up to you. then heat up the part either in a BBQ, with a torch or in a shop oven, braze then cool it down very slowly in a BBQ, oven or even putting it in sand or wrapping it with a fireproof pad.

good luck and take a lot of pictures and post them when you have time or take a video if you have a hands free method.
 

Hiatt1991

Well-known member
Joined
Jul 16, 2017
Messages
180
Location
Prescott, AZ
Hiatt: if your Wilton C1 is damaged then that's one thing if it's just dirty, rusty or oily i think Shift said it pretty good. you are always welcome to post up pictures too and it's a great vise so hope it's not too beat up.

BMR: Mark probably said it in his thread he posted a link for, but since i don't weld or braze much yet all i can do is quote what the experts have said over the years.

drill a hole just a bit bigger than the crack at the end of the hold so the crack doesn't keep running. then clean it up so it's ready to braze or weld. some use clamps to hold the slide in a good square position which is up to you. then heat up the part either in a BBQ, with a torch or in a shop oven, braze then cool it down very slowly in a BBQ, oven or even putting it in sand or wrapping it with a fireproof pad.

good luck and take a lot of pictures and post them when you have time or take a video if you have a hands free method.

Cool. That's what I ended up going with. The slide is in really nice shape but just a little dirty. The old grease in there was starting to get crusty and the vise wasn't as smooth as I wanted it to be.

Here's where I'm at so far.

When I got it-
<a href='http://i.imgur.com/HiLjvnf' title=''><img src='http://i.imgur.com/HiLjvnf.jpg' alt='' title='Hosted by imgur.com' /></a>

Paint removal-
<a href='http://i.imgur.com/JcrW0QF' title=''><img src='http://i.imgur.com/JcrW0QF.jpg' alt='' title='Hosted by imgur.com' /></a>
<a href='http://i.imgur.com/mSX6Jh8' title=''><img src='http://i.imgur.com/mSX6Jh8.jpg' alt='' title='Hosted by imgur.com' /></a>

Primer-
<a href='http://i.imgur.com/z4aTSDA' title=''><img src='http://i.imgur.com/z4aTSDA.jpg' alt='' title='Hosted by imgur.com' /></a>

Next is paint!
 

Mark in Indiana

Well-known member
Joined
Aug 11, 2010
Messages
3,057
Location
Southern Indiana
Hiatt: if your Wilton C1 is damaged then that's one thing if it's just dirty, rusty or oily i think Shift said it pretty good. you are always welcome to post up pictures too and it's a great vise so hope it's not too beat up.

BMR: Mark probably said it in his thread he posted a link for, but since i don't weld or braze much yet all i can do is quote what the experts have said over the years.

drill a hole just a bit bigger than the crack at the end of the hold so the crack doesn't keep running. then clean it up so it's ready to braze or weld. some use clamps to hold the slide in a good square position which is up to you. then heat up the part either in a BBQ, with a torch or in a shop oven, braze then cool it down very slowly in a BBQ, oven or even putting it in sand or wrapping it with a fireproof pad.


good luck and take a lot of pictures and post them when you have time or take a video if you have a hands free method.


Drives & All:

The main fix on the slide crack is to drill a hole at the end of the crack to keep it from growing, then drill, tap & counter sink a hole in the side of end of the slide. Insert a socket head cap screw in the tapped hole and draw the crack together. After that, you can grind out the crack, braze & sand it down.
Although the brazing helps hold the crack together, it's more for aesthetics.

Maybe it's a good tip to do so, but I've never had to pre-heat or post-heat a braze repair. Just for welding cast iron.

Good luck on your repair. Along with Drive's request, please show lots of pictures on your repair.


Cheers
 
Last edited:

BMR24

Well-known member
Joined
Oct 2, 2017
Messages
234
Location
Rocky Mountains Colorado
mark thanks for posting the link to that thread, very informative. I like how you used the cap screw as a mechanical joint before silver soldering.
Drivesthanks for your input as well, all I could find in my reserch was repairing exhaust manifolds and I figured the process would be the same.
AllNot sure if my silvaloy 115 rod is ideal or if I need another type. Most of my vises require machinists tools that I don't have for the repairs, I'd like to do what I can on my own so when finally have time for a trip up to Kevin's I don't come across as completely incapable
 

KMScott

Well-known member
Joined
Feb 14, 2012
Messages
4,642
Location
Daufuskie Island, South Carolina
I thought I posted this Tail Split Repair here but I guess not. This is how I did it on a Reed 109.

First ya need a good drill press or even better a milling machine when doing repairs like this. Yes you can do it by hand but your failure goes up. You also need a long series tap, reamer, long series drill bit for the tap size and a cap screw long enough.

First clean the split and grove out the crack first. I use heat to burn the oil crud and stuff that is in the crack, I have a small wire brush and kept scrubbing top and bottom, blowing air to remove the crud, reheating and keep doing it till I was happy that it was as clean as I could get it.

Find the thickest section that can accept a cap screw. Drill the tap size past the center of the square slider and close to the other side without breaking through. Drill a 1/64 over for the screw body size at least a 1/2 inch before the slider center and tap the hole, I do not like using oil since it will contaminate the weld/braze joint. I then pull the chips out with a magnet. Clamp the square slider as tight as you can, (I use my milling machine clamping method) Then cut a counter-bore hole for the plug, use a reamer so maybe you can get a light press fit. Tighten the cap screw TIGHT, then pound the plug in. I peen the edges of the plug so it is tight. Finish off the leveling of the plug and it is ready for weld/braze. If welding then be sure to peen the weld edges wit a rounded ***** punch to relieve some stress. This is how I do it but like everything else there is other ways of skinning a cat. Good luck.
 

Attachments

  • Repairing a cracked tail on a Reed 109-2017 (9).jpg
    Repairing a cracked tail on a Reed 109-2017 (9).jpg
    128.1 KB · Views: 80
  • Repairing a cracked tail on a Reed 109-2017 (8).jpg
    Repairing a cracked tail on a Reed 109-2017 (8).jpg
    136.9 KB · Views: 78
  • Repairing a cracked tail on a Reed 109-2017 (6).jpg
    Repairing a cracked tail on a Reed 109-2017 (6).jpg
    129.4 KB · Views: 77
  • Repairing a cracked tail on a Reed 109-2017 (5).jpg
    Repairing a cracked tail on a Reed 109-2017 (5).jpg
    128.8 KB · Views: 79
  • Repairing a cracked tail on a Reed 109-2017 (4).jpg
    Repairing a cracked tail on a Reed 109-2017 (4).jpg
    130.5 KB · Views: 80
  • Repairing a cracked tail on a Reed 109-2017 (3).jpg
    Repairing a cracked tail on a Reed 109-2017 (3).jpg
    130.7 KB · Views: 83
  • Repairing a cracked tail on a Reed 109-2017 (16).jpg
    Repairing a cracked tail on a Reed 109-2017 (16).jpg
    141.4 KB · Views: 82
To avoid these ads, REGISTER NOW!
Top Bottom