To avoid these ads, REGISTER NOW!

The Pressteel company tool box thread

OP
S

Smokeshow69

Well-known member
Joined
Dec 7, 2012
Messages
8,395
Location
Pacific Northwest
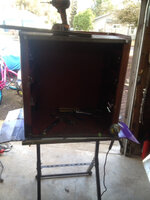
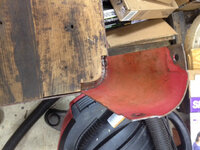
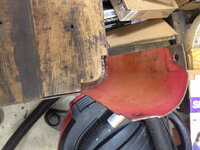
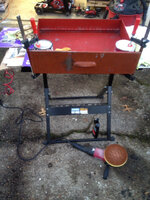
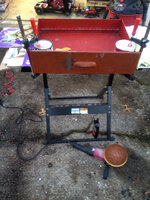
I had some time to work on the toolmobile this weekend and I was able to fix the broken spot welds and start the paint restoration process ! I started out by marking all the broken spot welds with bits of green masking tape ! As you can see this had a rough life earlier on but no worries, I am the Sara mclachlan of pressteel tool boxes [emoji51] . I told my wife that and she rolled her eyes [emoji1] I
a0498c94939fce24a5ae8118fcdb161d.jpg
f2763e3686b05399498e1de5c2c7bdab.jpg
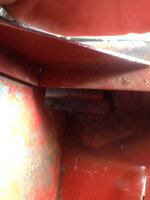
As you can see it had broken spot welds on either side
4e81212c8293d14df0e3bb3c92eb8fd9.jpg
17b8bdec361d3f0619f853aab5e02ed4.jpg
e69ac143da650309786639b2e4daffcd.jpg
I then figured out how close I could get it to plumb while still being close to how it left from the factory ! It did not leave the factory completely plomb... It sits level on the ground but if you measure the openings you can find some variance ! I got the lower corners close to 90 degrees and burned them in !
6ba2eaf6ad8da9ea3ac98caf751aa7da.jpg
91c45bc77137e1458e1203c9252bc099.jpg
Thank goodness for the harbor freight welding table! It was a back saver !

I then got out the trusty welding vise grips and clamped everything before finishing the lower welds !
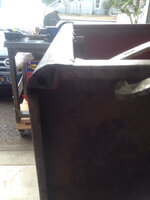
6dfe504eb9ed1cb00306055522aa19f9.jpg

The left side has a slight variance as opposed to the left side but as you can see , that is how it was made! If you look at the paint line you can see how it was formed and painted
c9edf92ddfa6cff1e1f26930446d71ca.jpg
All my pressteel boxes have down turned corners which are formed by hand as they are all slightly different in each box ! I am wondering if this was done on purpose in order to drain fluids if something spilled on top ?

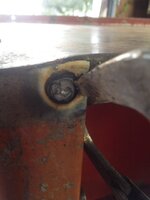
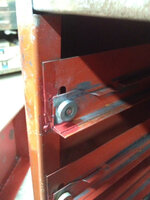
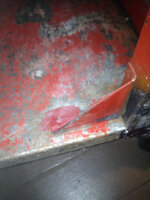
Here is a shot of the broken spot welds on the lower corners near the castors where I drilled them out with my napa spot weld cutter ! This thing is worth it's weight in gold ! It makes nice holes that you can actually weld in and build up some heat !
1e24d4e4ff8f419fa1dcd455f0b30ba5.jpg
In this picture you can also see the factory welded bracket that is not fully in the corner! It was installed crooked but if you look at the intact welds and paint, you can see it is in it's original spot ! I debated moving it and installing it correctly but since I am trying to preserve the originality of the box ... I opted to leave it !
5a606d9edcc6b4156ce8e6e607ba88e2.jpg
fb272f92c411c60cbace9c04e74f0b1a.jpg
Right side corner which is installed correctly
7823bfc298c9d44d97b2ebc1b7ac1db0.jpg
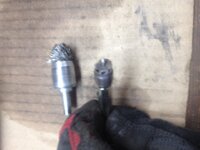
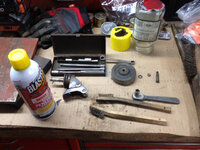
Spot weld cutter which chucks up in a drill and the little brush I use in cleaning the spot weld
b9d7615e7309bc4866a442678020de9c.jpg
Left upper corner done!
10e278035662b3cff97e21d9c9ff7f8b.jpg
a2842ededd2a48ea5cf3ab4e513bd37f.jpg5de19d3de21e2850481c454bd6ecbcfa.jpg

I finished all the spot welds and then buzzed them down with a flap disc and an angle grinder! I will post some pictures of the finished welds and the paint polishing later! The box is now structurally sound and will not continue to break more welds from flexing !


Sent from my iPhone using Tapatalk Pro
 

Attachments

  • f2763e3686b05399498e1de5c2c7bdab.jpg
    f2763e3686b05399498e1de5c2c7bdab.jpg
    315.6 KB · Views: 13
  • 4e81212c8293d14df0e3bb3c92eb8fd9.jpg
    4e81212c8293d14df0e3bb3c92eb8fd9.jpg
    248.4 KB · Views: 9
  • a0498c94939fce24a5ae8118fcdb161d.jpg
    a0498c94939fce24a5ae8118fcdb161d.jpg
    295.7 KB · Views: 7
  • 5de19d3de21e2850481c454bd6ecbcfa.jpg
    5de19d3de21e2850481c454bd6ecbcfa.jpg
    260 KB · Views: 5
  • 17b8bdec361d3f0619f853aab5e02ed4.jpg
    17b8bdec361d3f0619f853aab5e02ed4.jpg
    46.5 KB · Views: 5
  • e69ac143da650309786639b2e4daffcd.jpg
    e69ac143da650309786639b2e4daffcd.jpg
    29.7 KB · Views: 5
  • 6ba2eaf6ad8da9ea3ac98caf751aa7da.jpg
    6ba2eaf6ad8da9ea3ac98caf751aa7da.jpg
    289.3 KB · Views: 6
  • 91c45bc77137e1458e1203c9252bc099.jpg
    91c45bc77137e1458e1203c9252bc099.jpg
    51.4 KB · Views: 6
  • 6dfe504eb9ed1cb00306055522aa19f9.jpg
    6dfe504eb9ed1cb00306055522aa19f9.jpg
    37 KB · Views: 4
  • c9edf92ddfa6cff1e1f26930446d71ca.jpg
    c9edf92ddfa6cff1e1f26930446d71ca.jpg
    236.4 KB · Views: 5
  • 1e24d4e4ff8f419fa1dcd455f0b30ba5.jpg
    1e24d4e4ff8f419fa1dcd455f0b30ba5.jpg
    335.7 KB · Views: 3
  • 5a606d9edcc6b4156ce8e6e607ba88e2.jpg
    5a606d9edcc6b4156ce8e6e607ba88e2.jpg
    291.6 KB · Views: 3
  • fb272f92c411c60cbace9c04e74f0b1a.jpg
    fb272f92c411c60cbace9c04e74f0b1a.jpg
    38.7 KB · Views: 3
  • 7823bfc298c9d44d97b2ebc1b7ac1db0.jpg
    7823bfc298c9d44d97b2ebc1b7ac1db0.jpg
    37.7 KB · Views: 3
  • b9d7615e7309bc4866a442678020de9c.jpg
    b9d7615e7309bc4866a442678020de9c.jpg
    298.3 KB · Views: 3
  • 10e278035662b3cff97e21d9c9ff7f8b.jpg
    10e278035662b3cff97e21d9c9ff7f8b.jpg
    31.8 KB · Views: 6
  • a2842ededd2a48ea5cf3ab4e513bd37f.jpg
    a2842ededd2a48ea5cf3ab4e513bd37f.jpg
    51.8 KB · Views: 22
Last edited:
To avoid these ads, REGISTER NOW!

RagTopTA

Well-known member
Joined
Feb 26, 2015
Messages
1,892
Location
Wichita Falls , Texas
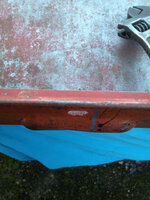
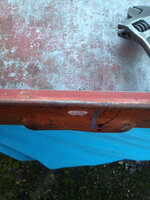
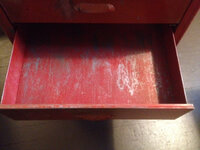
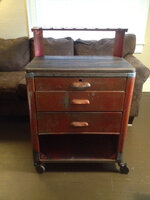
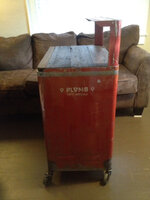
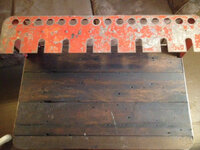
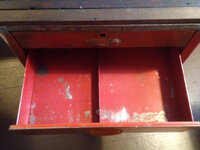
So, heres my ToolMobile! A nice fella here on GJ, messaged me to let me know about a Plomb box in his area. In Los Angeles Cali, It was posted to Let Go for $30! I, of course, wanted to get my hands on it. We made a deal and he had gone ahead and got the box. Had it shipped by Fastenal freight. Took about 2 weeks to get here but well worth the wait! The box seems in good shape. Some places look as though a repaint had happened at some point. I did a little clean up on it and found a Serial number on the left side of the top panel. I will be deciding what to do with it soon. I am so far thinking about having it and the top box re-done together and matching. therefore having a full Plomb stack to hold all my Plomb tools. I'll post more as I start messing with it. two of the drawers do have mess bottoms in theme. I am wondering if they were bought after the main box was purchased. Happy to finally have it! Thanks to Don for helping a Texas Plomb collector out! So now to try and figure out how old it is, why I don't see the stripes at top and bottom, and why there seems to be silver paint under the red..... oh, and its got a Serial number as shown in the picture.
 

Attachments

  • IMG_20180108_133543.jpg
    IMG_20180108_133543.jpg
    146.2 KB · Views: 114
  • IMG_20180108_132106.jpg
    IMG_20180108_132106.jpg
    144 KB · Views: 108
  • 20171201_153605.jpg
    20171201_153605.jpg
    143.9 KB · Views: 100
  • IMG_20180108_130408.jpg
    IMG_20180108_130408.jpg
    143.4 KB · Views: 97
  • 20171201_153645.jpg
    20171201_153645.jpg
    150.9 KB · Views: 105
  • IMG_20180108_131201.jpg
    IMG_20180108_131201.jpg
    146.6 KB · Views: 104

drivesitfar

Well-known member
Joined
Oct 23, 2013
Messages
36,079
Location
Pacific Northwest
Rag: i've used Fastenal a lot for shipping vises across the USA, but i've only shipped one tool box. can you PM me and let me know what that charge was and since your seller probably had to build a crate how much did you maybe give him to prepare it since it doesn't sound like you paid him that much for the box?

VERY NICE FIND and congrats on figuring out how to get it to you.
 
OP
S

Smokeshow69

Well-known member
Joined
Dec 7, 2012
Messages
8,395
Location
Pacific Northwest
I had some time to be able to update this thread of the progress I have made on the old girl ! I worked over the paint a bit to shine it up by removing the oxidation and bring back the paint color to it's original "Chinese red" ! I did not go as far as I would have on the paint if it had been a newer car because I wanted to not over-restore the paint since it has nicks and dings... All in all it did not come out to bad for its age and hard life !

After I had fully degreased the box and had completely dried it for a few days, I started out by using a meguires clay bar on the paint. Rubbing the paint down with a clay bar that has lubricant on it is the first step to paint care/ abuse correction. I used meguires instant detailer as the lubricant as that is what I use on my cars. I worked on one side of the box at a time when clay barring it.
63f558979655ec8f8e1bdfcb26506721.jpg

I would spray one side of the box down, wipe an area of the paint down and keep rubbing the box until the clay bar surface was dirty as pictured below.
2adc4400611d0b8d3fa6fbd1a31eb5ca.jpg
Once the clay bar surface was dirty, I would roll the clay up in my hand , kneed the clay up into a flat surface and then repeat the process around the whole box. When using a clay bar, you know you are done with an area when you can rub your hand on the surface of the paint and it feels smoothie like wet glass . If you feel little bumps or your clay bar keeps picking up black junk like the stuff above, you just repeat that section until it is smooth. You must clay bar paint before you polish it other wise you grind surface contaminants into the paint and scratch it. One the section is done, wipe it down with a nice microfiber towel to dry any remaining instant detailer.

The clay bar got some of the paint drip marks off but not many so I had to resort to more intense methods... Here is a picture of the side of the box with grey paint drips and also very oxidized paint. 074d0cef38c5ed9de7541be504cfb2d2.jpg
I began by pouring some lacquer thinner onto the tip of a rag and rubbing them but no dice. Then I sprayed brake cleaner onto the rag and rubbed the drips and they began to come off ! I had to follow each drip by hand as brake cleaner is very aggressive and you can't just spray the box and expect to have any original paint left . I did manage to get about 90% of the drips off. I got all the grey off and there is only a little bit of red on it but I can't get any more off without taking off original paint so I stopped! Below is a picture of no grey paint drips! ( the black came off after the picture !)
28da47421eee8934297e6180ea3c30d3.jpg

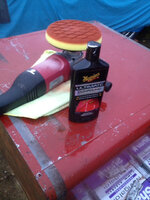
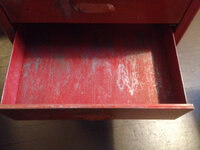
Once the box was clay barred and the drips removed, I began the paint polishing / abuse correction. I used this meguires 1 step compound that cuts oxidization and polishes out light scratches all in one! It is not a super aggressive cutting compound but that is exactly why I chose it! It can be purchased at any car parts store but I got this at Walmart .
a44206e3be7380ea638cae3fb716b72c.jpg
Here you can see the harbor freight 7" buffer I used with a meguires foam polishing disc. This picture also shows the back of it after it was polished! You can see the reflections much better now!

To polish the paint I would squirt a light. X shape of compound onto the foam disc and then turn the polisher back over. Without turning the polisher on, I would use it spread the compound around on the area I was polishing before I turned the buffer on. This helps to minimize splatter! This is a picture in the middle of polishing a side of the toolmobile . To the left of the rag is oxidized / non buffed paint and to the right of the rag is polished paint that is now presentable!
c2eb17bbd9c0024f004d266f33c944c7.jpg
Here is a closeup of the red drips that remain, the oxidized paint and the surrounding polished paint
2d924d5977459b51bafc4f77bdadfc68.jpg

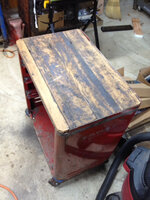
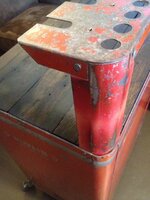
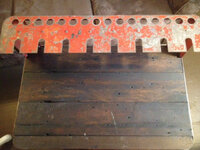
Once it was polished, I started to make the wood top like I made for my other red roller. I again used old wood from my roof as it has a weathered look that matches the box ! I removed all nail and lightly sanded it to get rid of slivers
e31389764ec0e85a10a8d07aa7933e34.jpg
I then made cut outs in the corners for the piston rack hardware
f101586812d302d13f3c0d62d1d86aa4.jpg

After the shape was satisfactory I stained it a dark color to match my other box and my floors ! I don't have pictures of the stained wood yet but should be able to get some this weekend . To complete the box I need to still buff the drawer faces and lock at and piston rack. I will also touch up the paint over the spot welds I fixed . Then I will wax the whole box and post final pictures!

Sent from my iPhone using Tapatalk Pro
 

Attachments

  • c2eb17bbd9c0024f004d266f33c944c7.jpg
    c2eb17bbd9c0024f004d266f33c944c7.jpg
    323.1 KB · Views: 20
  • a44206e3be7380ea638cae3fb716b72c.jpg
    a44206e3be7380ea638cae3fb716b72c.jpg
    329.9 KB · Views: 15
  • 28da47421eee8934297e6180ea3c30d3.jpg
    28da47421eee8934297e6180ea3c30d3.jpg
    346.4 KB · Views: 10
  • 074d0cef38c5ed9de7541be504cfb2d2.jpg
    074d0cef38c5ed9de7541be504cfb2d2.jpg
    405.9 KB · Views: 10
  • 63f558979655ec8f8e1bdfcb26506721.jpg
    63f558979655ec8f8e1bdfcb26506721.jpg
    289.3 KB · Views: 10
  • 2d924d5977459b51bafc4f77bdadfc68.jpg
    2d924d5977459b51bafc4f77bdadfc68.jpg
    304 KB · Views: 8
  • f101586812d302d13f3c0d62d1d86aa4.jpg
    f101586812d302d13f3c0d62d1d86aa4.jpg
    322 KB · Views: 6
  • e31389764ec0e85a10a8d07aa7933e34.jpg
    e31389764ec0e85a10a8d07aa7933e34.jpg
    339.2 KB · Views: 7
  • 2adc4400611d0b8d3fa6fbd1a31eb5ca.jpg
    2adc4400611d0b8d3fa6fbd1a31eb5ca.jpg
    45 KB · Views: 23
Last edited:

Rileysan

Well-known member
Joined
Sep 11, 2015
Messages
4,298
Location
Milwaukie, Oregon
Amazing work, Smoke! I really enjoy seeing the progress you've made on that box and I'm looking forward to the next one!

Sent from my LGL41C using Tapatalk
 
OP
S

Smokeshow69

Well-known member
Joined
Dec 7, 2012
Messages
8,395
Location
Pacific Northwest
that thing is looking good! How do the drawers come out?


You have to pull the bottom drawer out all the way until the 2 rollers touch. Then tilt the drawer assembly down and it will come out. You don't have to take the cover out before drawer removal... To reinstall the drawers you have to reverse the order and do the bottom drawer last !


Sent from my iPhone using Tapatalk Pro
 

FJ 432

Well-known member
Joined
Aug 2, 2010
Messages
3,739
Location
Littleton Colorado
Smokeshow,

Thanks for the detailed write up on the cleaning/claybar and the products you used. I can appreciate the time you have invested in the write up.

Trying the clay bar this weekend.
 

RagTopTA

Well-known member
Joined
Feb 26, 2015
Messages
1,892
Location
Wichita Falls , Texas
You have to pull the bottom drawer out all the way until the 2 rollers touch. Then tilt the drawer assembly down and it will come out. You don't have to take the cover out before drawer removal... To reinstall the drawers you have to reverse the order and do the bottom drawer last !


Sent from my iPhone using Tapatalk Pro

Thanks Smoke ill do that when I get to messing with mine !!
 
OP
S

Smokeshow69

Well-known member
Joined
Dec 7, 2012
Messages
8,395
Location
Pacific Northwest
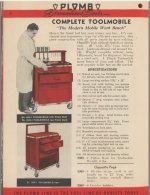
I went to Twertsy's web site and found a few plomb catalogue pages with tool mobile ads in them!


I attached them but can't figure out how to make them bigger? They are from the 1942 catalogue!( they may show on a pc as a file attachment but now I am looking at them on my phone and the are showing just fine)
 

Attachments

  • big toolmobile.jpg
    big toolmobile.jpg
    20 KB · Views: 86
  • Capture.PNG car.jpg
    Capture.PNG car.jpg
    10.4 KB · Views: 76
Last edited:

drivesitfar

Well-known member
Joined
Oct 23, 2013
Messages
36,079
Location
Pacific Northwest
Smoke: thanks for all the pictures and the lessons about Clay bar and paint polishing. i agree ACETONE can be pretty tough on even original paint that is usually pretty tough.

I've had some luck using Simple Green and sometimes on paint stains like that i'd put a few paper towels on the box or project and keep them damp with SG for a few days. SG doesn't seem to eat into original paint if it was applied correctly.

good luck and i like the wood top you made too!!
 
OP
S

Smokeshow69

Well-known member
Joined
Dec 7, 2012
Messages
8,395
Location
Pacific Northwest
Smoke: thanks for all the pictures and the lessons about Clay bar and paint polishing. i agree ACETONE can be pretty tough on even original paint that is usually pretty tough.


I've had some luck using Simple Green and sometimes on paint stains like that i'd put a few paper towels on the box or project and keep them damp with SG for a few days. SG doesn't seem to eat into original paint if it was applied correctly.


good luck and i like the wood top you made too!!


Thanks for the kind words ! I can't wait to finish this one so I can start on your old box ! I can't really polish wrinkle paint but I will be cleaning it and fixing the damaged / missing slides ! I will have my work cut out for me but it will be worth it [emoji16]


Sent from my iPhone using Tapatalk Pro
 
OP
S

Smokeshow69

Well-known member
Joined
Dec 7, 2012
Messages
8,395
Location
Pacific Northwest
So I was able to spend more time on the toolmobile this past weekend and turned my attentions to the drawer faces and fixing the inward dented handles on the drawers. 2 out of the 3 drawer dimple handles needed some love! I buffed all the drawer faces after I clay barred them. They did not come out as nicely as the box itself but still a big improvement! Pictured is how I made the drawers hold still while I buffed them ! My Bessey clamps where not deep clamps so I improvised by putting quart size paint cans in the drawers and fastening them to my hf welding table. It was not pretty but it worked !
c63dbc07bdd84fe1f20978f62cd9669f.jpg

What does one use to straighten a bent handle on their plomb toolmobile? Why a proto Los Angeles adjustable wrench of course !
08ed6d1b538e3541717f16e995f06814.jpg

Before shot of the offending dent
d75d8f7581c06d55429a565f656fb804.jpg
After shot of fixed handle! I just eyeballed it and pulled up and out on the wrench a little each time while checking it to make sure I did not pull out too far
203254602f3f6471fe804865a5c2f8da.jpg

Sent from my iPhone using Tapatalk Pro
 

Attachments

  • 203254602f3f6471fe804865a5c2f8da.jpg
    203254602f3f6471fe804865a5c2f8da.jpg
    334.5 KB · Views: 24
  • d75d8f7581c06d55429a565f656fb804.jpg
    d75d8f7581c06d55429a565f656fb804.jpg
    385.7 KB · Views: 16
  • 08ed6d1b538e3541717f16e995f06814.jpg
    08ed6d1b538e3541717f16e995f06814.jpg
    48.7 KB · Views: 16
  • c63dbc07bdd84fe1f20978f62cd9669f.jpg
    c63dbc07bdd84fe1f20978f62cd9669f.jpg
    352.7 KB · Views: 17
Last edited:
OP
S

Smokeshow69

Well-known member
Joined
Dec 7, 2012
Messages
8,395
Location
Pacific Northwest
So I was able to spend more time on the toolmobile this past weekend and turned my attentions to the drawer faces and fixing the inward dented handles on the drawers. 2 out of the 3 drawer dimple handles needed some love! I buffed all the drawer faces after I clay barred them. They did not come out as nicely as the box itself but still a big improvement! Pictured is how I made the drawers hold still while I buffed them ! My Bessey clamps where not deep clamps so I improvised by putting quart size paint cans in the drawers and fastening them to my hf welding table. It was not pretty but it worked !
c63dbc07bdd84fe1f20978f62cd9669f.jpg

What does one use to straighten a bent handle on their plomb toolmobile? Why a proto Los Angeles adjustable wrench of course !
08ed6d1b538e3541717f16e995f06814.jpg

Before shot of the offending dent
d75d8f7581c06d55429a565f656fb804.jpg
After shot of fixed handle! I just eyeballed it and pulled up and out on the wrench a little each time while checking it to make sure I did not pull out too far
203254602f3f6471fe804865a5c2f8da.jpg

I also had time to think about hardware for the piston rack that this toolmobile came with ! It was an option that a lot of them did not come with so I wanted to make sure to put it back on the toolmobile! I initially bought some 1/4 size hardware from Home Depot but really hated the idea of new hardware that was on an older aged tool box. It would have stuck out miserably and it would have not worked for my tread lightly/ look like it was always there theme! I thought about it and decided to check my nos fasteners stash to see if I had something that would work!

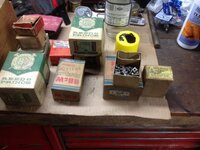
I literally paid $5 for what you see here plus more at a g sale a few years ago! It is new old stock screws and bolts in their original boxes! I checked and found some 3/16 sheet metal screws and square nuts that will work perfectly and they also are aged/ not new looking! I believe the difference is in the details on a project like this and since this box is my unicorn I want to do right by it !
cf84a4e81c51ecad8a93c4927d1d1348.jpg
acaf3f48156e923b26fde0d08e25e1b2.jpg
People thought I was nuts for buying old hardware at the time but I have used the screws and bolts half a dozen times on vintage or vintage appearing projects so far and there is still tons left!


Sent from my iPhone using Tapatalk Pro


Stay tuned for this weekend when I clean and lube the casters and final wax it and touch up my spot welds with paint ! I hope to also get it in the house on Sunday as well !


Sent from my iPhone using Tapatalk Pro
 

Attachments

  • acaf3f48156e923b26fde0d08e25e1b2.jpg
    acaf3f48156e923b26fde0d08e25e1b2.jpg
    328.1 KB · Views: 20
  • cf84a4e81c51ecad8a93c4927d1d1348.jpg
    cf84a4e81c51ecad8a93c4927d1d1348.jpg
    352.7 KB · Views: 19
  • 203254602f3f6471fe804865a5c2f8da.jpg
    203254602f3f6471fe804865a5c2f8da.jpg
    49.8 KB · Views: 19
  • d75d8f7581c06d55429a565f656fb804.jpg
    d75d8f7581c06d55429a565f656fb804.jpg
    64.6 KB · Views: 16
  • 08ed6d1b538e3541717f16e995f06814.jpg
    08ed6d1b538e3541717f16e995f06814.jpg
    48.7 KB · Views: 15
  • c63dbc07bdd84fe1f20978f62cd9669f.jpg
    c63dbc07bdd84fe1f20978f62cd9669f.jpg
    72.1 KB · Views: 12
Last edited:

drivesitfar

Well-known member
Joined
Oct 23, 2013
Messages
36,079
Location
Pacific Northwest
Smoke: great pics and write up on the Plvmb box restoration. you won't get a sideways look from me if you are picking up old boxes of screws and hardware unless i was trying to buy them myself.

that is maybe the main reason i'm GETTING ORGANIZED cause i've got boxes and buckets full of old cool stuff and i'd like to be able to find it when i'm working on an old cabinet or project.

keep up the great work and even if you can't fill up the toolbox or little rack above it now give it time and you'll find the right stuff that will make you smile and us all jealous.

WELL DONE!!
 
OP
S

Smokeshow69

Well-known member
Joined
Dec 7, 2012
Messages
8,395
Location
Pacific Northwest
Smoke: great pics and write up on the Plvmb box restoration. you won't get a sideways look from me if you are picking up old boxes of screws and hardware unless i was trying to buy them myself.


that is maybe the main reason i'm GETTING ORGANIZED cause i've got boxes and buckets full of old cool stuff and i'd like to be able to find it when i'm working on an old cabinet or project.


keep up the great work and even if you can't fill up the toolbox or little rack above it now give it time and you'll find the right stuff that will make you smile and us all jealous.


WELL DONE!!


Drives : these all came from your backyard [emoji1] got them when I was visiting family !


Sent from my iPhone using Tapatalk Pro
 
OP
S

Smokeshow69

Well-known member
Joined
Dec 7, 2012
Messages
8,395
Location
Pacific Northwest
I wanted to update the thread ! I was able to finish the toolmobile and it is now living the easy life in the house [emoji1]

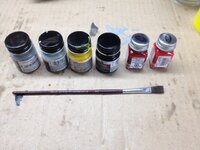
To pick up where I left off - I touched up the areas where I welded the top and bottom with model paint ! I chose model paint because they are small quantities of colors so I can mix different shades on the curved bottom of a glass jar until I get a color that is a close to the original ! This thing was hard to match to because there are so many different shades of red on this box but I got pretty close !
d3320493948b39b76e0030bde9e9f0ac.jpg
These are the colors used in making the magic !

9e937df6ec6004c445202b6be59319c2.jpg
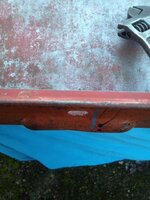
Shot of the touch up spot welds on the drawer run ! The paint touch up matches much closer than in the pictures because I sanded the touched up areas to closer match the faded original !
23940c5965b4e81cc5f2652888dc358f.jpg
Again this is much better in person as I knocked the high gloss off it !


Sent from my iPhone using Tapatalk Pro
 

Attachments

  • d3320493948b39b76e0030bde9e9f0ac.jpg
    d3320493948b39b76e0030bde9e9f0ac.jpg
    309.7 KB · Views: 10
  • 9e937df6ec6004c445202b6be59319c2.jpg
    9e937df6ec6004c445202b6be59319c2.jpg
    294.3 KB · Views: 6
  • 23940c5965b4e81cc5f2652888dc358f.jpg
    23940c5965b4e81cc5f2652888dc358f.jpg
    304.9 KB · Views: 7
Last edited:
To avoid these ads, REGISTER NOW!
OP
S

Smokeshow69

Well-known member
Joined
Dec 7, 2012
Messages
8,395
Location
Pacific Northwest
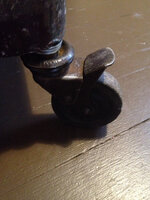
Next I took apart the castors and cleaned , lubed and derided the castors and freed up the lock mechanisms on the front mechanisms ! What would you use to take apart castors on a plomb toolmobile ? Why plomb tools of course !
66440db7bf2d443111850c23a4c44115.jpg
731c023789823cfd35f4f04ccb3c89c1.jpg
To quote the American picker guys , I left the castors "sweaty" as I wanted to preserve the original finish that was left ! I reinstalled them when done and then I put a coat of surface wax on the box and drawers! Then I moved it into the house [emoji23]
ef181dc19f22c10934ea9723db94094d.jpg
f599558baa23d1d4d3fc32f86af1cff8.jpg
As you can see the paint has wear over the years but at least it is somewhat shiny and is not rusty !
f83c8efba17f0ba74fa423f108f767a2.jpg
8e0c23cbce9dbfbd0e1f71ddaec190a6.jpg
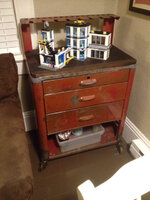
You can see the wood top I made for the box and also the piston rack!
876e2f2db4d4f003d7411d479231ec11.jpg
45133205f3bfee4c57db59f23cb1e72a.jpg
01bd206ad0a888576714651a8b737573.jpg
a150978cde9a6c7241b801c142d7d085.jpg
acc3afdbf21eadf9687f7d0f1f2f740a.jpg
283e97a732bbf365a45a48fc3390adf6.jpg
c1f2cb26506e55b0679ae73d5aeb50ee.jpg
6fe0ff5161c63fdd682dbcc1452d0dff.jpg
810f46e38e9651718e3f8a8386e21c60.jpg
e200a531fc9e1c13901064e937b38842.jpg
974abb9aa2effd7c24d5042b3ca56f71.jpg
Currently holding a Lego police station and coloring supplies [emoji23]
dc5e820a5ed19d8f0003b565c4841bd6.jpg


Sent from my iPhone using Tapatalk Pro
 

Attachments

  • 731c023789823cfd35f4f04ccb3c89c1.jpg
    731c023789823cfd35f4f04ccb3c89c1.jpg
    301.3 KB · Views: 9
  • 6fe0ff5161c63fdd682dbcc1452d0dff.jpg
    6fe0ff5161c63fdd682dbcc1452d0dff.jpg
    303.5 KB · Views: 8
  • 810f46e38e9651718e3f8a8386e21c60.jpg
    810f46e38e9651718e3f8a8386e21c60.jpg
    280.1 KB · Views: 8
  • e200a531fc9e1c13901064e937b38842.jpg
    e200a531fc9e1c13901064e937b38842.jpg
    300.5 KB · Views: 8
  • 974abb9aa2effd7c24d5042b3ca56f71.jpg
    974abb9aa2effd7c24d5042b3ca56f71.jpg
    297.1 KB · Views: 10
  • dc5e820a5ed19d8f0003b565c4841bd6.jpg
    dc5e820a5ed19d8f0003b565c4841bd6.jpg
    301.6 KB · Views: 10
  • c1f2cb26506e55b0679ae73d5aeb50ee.jpg
    c1f2cb26506e55b0679ae73d5aeb50ee.jpg
    269.9 KB · Views: 9
  • 283e97a732bbf365a45a48fc3390adf6.jpg
    283e97a732bbf365a45a48fc3390adf6.jpg
    301.3 KB · Views: 7
  • ef181dc19f22c10934ea9723db94094d.jpg
    ef181dc19f22c10934ea9723db94094d.jpg
    256.3 KB · Views: 7
  • f599558baa23d1d4d3fc32f86af1cff8.jpg
    f599558baa23d1d4d3fc32f86af1cff8.jpg
    248.8 KB · Views: 6
  • f83c8efba17f0ba74fa423f108f767a2.jpg
    f83c8efba17f0ba74fa423f108f767a2.jpg
    250.7 KB · Views: 6
  • 8e0c23cbce9dbfbd0e1f71ddaec190a6.jpg
    8e0c23cbce9dbfbd0e1f71ddaec190a6.jpg
    252.1 KB · Views: 5
  • 876e2f2db4d4f003d7411d479231ec11.jpg
    876e2f2db4d4f003d7411d479231ec11.jpg
    297.8 KB · Views: 5
  • 45133205f3bfee4c57db59f23cb1e72a.jpg
    45133205f3bfee4c57db59f23cb1e72a.jpg
    350.8 KB · Views: 5
  • 01bd206ad0a888576714651a8b737573.jpg
    01bd206ad0a888576714651a8b737573.jpg
    350 KB · Views: 5
  • a150978cde9a6c7241b801c142d7d085.jpg
    a150978cde9a6c7241b801c142d7d085.jpg
    314.4 KB · Views: 8
  • acc3afdbf21eadf9687f7d0f1f2f740a.jpg
    acc3afdbf21eadf9687f7d0f1f2f740a.jpg
    309.8 KB · Views: 11
  • 66440db7bf2d443111850c23a4c44115.jpg
    66440db7bf2d443111850c23a4c44115.jpg
    339.2 KB · Views: 22
Last edited:
OP
S

Smokeshow69

Well-known member
Joined
Dec 7, 2012
Messages
8,395
Location
Pacific Northwest
Drives: the next box on the agenda is your old top box ! That one will be less work than this one was !


Sent from my iPhone using Tapatalk Pro
 

drivesitfar

Well-known member
Joined
Oct 23, 2013
Messages
36,079
Location
Pacific Northwest
Smoke: well done. i'll make some popcorn (easy on the butter for Riley and I) and we're here to enjoy the show as you put up more stuff from Plvmb heaven.

cheers and nice work!!
 

RagTopTA

Well-known member
Joined
Feb 26, 2015
Messages
1,892
Location
Wichita Falls , Texas
awesome job Smoke. Mines sitting in my extra room for the time being waiting for me to get some extra time. I see where mine has the same holes for a piston rack as yours. and none of your drawers bottoms are perforated.
 
OP
S

Smokeshow69

Well-known member
Joined
Dec 7, 2012
Messages
8,395
Location
Pacific Northwest
awesome job Smoke. Mines sitting in my extra room for the time being waiting for me to get some extra time. I see where mine has the same holes for a piston rack as yours. and none of your drawers bottoms are perforated.


Yes correct on the no drawer perforations! I need to spend some time researching catalogues to see when those perforations where in place and also find out about the plomb logo stampings on the sides. Mine is simply painted but I know some where stamped ! My p&c toolmobile does not have stampings or perforations either. I am just trying to pin down production changes based on the catalogues.


Sent from my iPhone using Tapatalk Pro
 

RagTopTA

Well-known member
Joined
Feb 26, 2015
Messages
1,892
Location
Wichita Falls , Texas
Yes correct on the no drawer perforations! I need to spend some time researching catalogues to see when those perforations where in place and also find out about the plomb logo stampings on the sides. Mine is simply painted but I know some where stamped ! My p&c toolmobile does not have stampings or perforations either. I am just trying to pin down production changes based on the catalogues.


Sent from my iPhone using Tapatalk Pro

when I was looking at several catalogs researching a bit I noticed you could get the base model with only the top drawer as a roll around workbench as they called it. then the other drawers could be ordered when ever they were needed. The extra drawers were shown with perf bottoms like the two bottom drawers in mine. The one I have has the Logo stamped in the lower drawer front face, then both sides. Im still wondering about the serial number on the top of mine. unlikely an individual would have done that, maybe if it were company owned.... I dunno... wonder if anyone else has a serial on their model.
 

Rileysan

Well-known member
Joined
Sep 11, 2015
Messages
4,298
Location
Milwaukie, Oregon
Smoke, you might be interested to know I had a dream last night in which a kid told me where to find the date codes on your Toolmobiles (yes, I really had a dream about Toolmobiles). He also revealed to me that Pressteel didn't make those for Plomb/P&C.

Unfortunately, I woke before he revealed the maker and I forgot where to find date codes.

Sorry about the completely worthless post!

Brian

Sent from my LGL41C using Tapatalk
 

Oldtuleguy

Well-known member
Joined
Nov 4, 2017
Messages
10,461
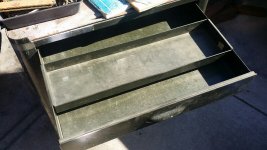
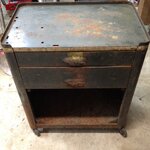
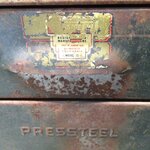
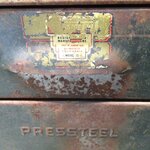
Here is a pressteel roller I found today. Not sure of age. Has a nice tray in one drawer. I can see where the pressteel sticker was, but long gone.
 

Attachments

  • 20180211_150158-800x450.jpg
    20180211_150158-800x450.jpg
    115.3 KB · Views: 107
  • 20180211_150012-1280x720.jpg
    20180211_150012-1280x720.jpg
    117.4 KB · Views: 123
OP
S

Smokeshow69

Well-known member
Joined
Dec 7, 2012
Messages
8,395
Location
Pacific Northwest
Here is a pressteel roller I found today. Not sure of age. Has a nice tray in one drawer. I can see where the pressteel sticker was, but long gone.


I have that same exact one minus the missing front cover [emoji51]
72b2feea0208e3a1783e843c29928660.jpg
The stickers are in surprisingly good shape !
e006dcdb44771488e230122b8c8fbfa2.jpg

What is the box sitting on top of yours ? It looks like a plomb ?


Sent from my iPhone using Tapatalk Pro
 

Attachments

  • e006dcdb44771488e230122b8c8fbfa2.jpg
    e006dcdb44771488e230122b8c8fbfa2.jpg
    404.3 KB · Views: 16
  • 72b2feea0208e3a1783e843c29928660.jpg
    72b2feea0208e3a1783e843c29928660.jpg
    274.7 KB · Views: 13
OP
S

Smokeshow69

Well-known member
Joined
Dec 7, 2012
Messages
8,395
Location
Pacific Northwest
I have that same exact one minus the missing front cover [emoji51]
72b2feea0208e3a1783e843c29928660.jpg
The stickers are in surprisingly good shape !
e006dcdb44771488e230122b8c8fbfa2.jpg

What is the box sitting on top of yours ? It looks like a plomb ?


Sent from my iPhone using Tapatalk Pro


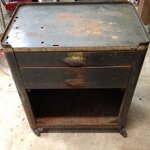
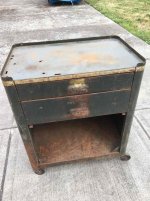
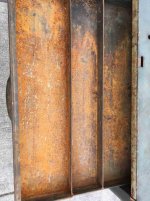
Speaking of this old box, I was moving this old roller to be stored in my basement because I live in an old house and my garage is not huge. I put it on my dolly and started to wheel it to the stairs to the basement. My wife stopped me and said she wanted it in the house for storage . I have asked her about this box before but she has never been receptive to it before because it is green. She wants it for our laundry room for additional storage which I am totally good with [emoji51] I started in on it today by degreasing it, buzzing down the heavy surface rust on the lower portion and also getting a few of the large dents out of it! Here are some before pictures
IMG_0217.jpg
IMG_0219.jpg
IMG_0218.jpg
IMG_0221.jpg
IMG_0222.jpg
This is the generic corporate 2 drawer model not made for any company in particular and includes the model#75 on the sticker on the top drawer


Sent from my iPhone using The Garage Journal mobile app
 

Attachments

  • IMG_0217.jpg
    IMG_0217.jpg
    126.6 KB · Views: 50
  • IMG_0219.jpg
    IMG_0219.jpg
    138.9 KB · Views: 50
  • IMG_0218.jpg
    IMG_0218.jpg
    153 KB · Views: 50
  • IMG_0221.jpg
    IMG_0221.jpg
    105.8 KB · Views: 47
  • IMG_0222.jpg
    IMG_0222.jpg
    134.5 KB · Views: 47
  • 72b2feea0208e3a1783e843c29928660.jpg
    72b2feea0208e3a1783e843c29928660.jpg
    130.6 KB · Views: 8
  • e006dcdb44771488e230122b8c8fbfa2.jpg
    e006dcdb44771488e230122b8c8fbfa2.jpg
    192.5 KB · Views: 29

drivesitfar

Well-known member
Joined
Oct 23, 2013
Messages
36,079
Location
Pacific Northwest
Smoke: nice looking box and really nice to hear that your bride might allow it inside her (your) home as an accessory or piece of furniture.

I'm still wondering if you are going to spiff up that old Plvmb top box you were so kind to move from my shop. I know you have the skills and hoping you have some time cause the bones of that box seemed pretty good.

since you and Riley have the monopoly on those I'd like to say that I can use one of them in case you find one up here you don't want to drive up and retrieve or local to you cause i need another excuse to drive to the Oregon Coast to watch the waves for a while.

cheers
 
OP
S

Smokeshow69

Well-known member
Joined
Dec 7, 2012
Messages
8,395
Location
Pacific Northwest
Smoke: nice looking box and really nice to hear that your bride might allow it inside her (your) home as an accessory or piece of furniture.


I'm still wondering if you are going to spiff up that old Plvmb top box you were so kind to move from my shop. I know you have the skills and hoping you have some time cause the bones of that box seemed pretty good.


since you and Riley have the monopoly on those I'd like to say that I can use one of them in case you find one up here you don't want to drive up and retrieve or local to you cause i need another excuse to drive to the Oregon Coast to watch the waves for a while.


cheers


Drives- I will be getting to that box! I am building up some courage/ fabricating skills as I need to make 2 slides for the box. It has very good bones and is a highlight of my plvmb collection for sure. I will keep an eye out for you for one of these boxes. I have 4 and rileysan had a part in 3 of them so he is definitely good to know [emoji23]


Sent from my iPhone using The Garage Journal mobile app
 

drivesitfar

Well-known member
Joined
Oct 23, 2013
Messages
36,079
Location
Pacific Northwest
Smoke: really no hurry on my account and i'm sure you'll fix up that old Plvmb box when you are ready.

I need to GET ORGANIZED or at least more Organized before I buy any more toolboxes, but I really haven't seen an old Plvmb or Pressteel box to buy since i sold you mine.

good luck with spiffing up the one for your wife's dining room or whereever she wants it inside your home. i'm still not allowed to bring in anything, but at least she (my bride) smiles more now when we go on road trips to buy some of this old stuff i like.

cheers
 

Oldtuleguy

Well-known member
Joined
Nov 4, 2017
Messages
10,461
Mine has now made its way into my tv room. Gf is not crazy about it but is putting up with it
 

Attachments

  • 20180701_195500-1200x2133.jpg
    20180701_195500-1200x2133.jpg
    54.4 KB · Views: 115

Oregon rock crusher

Well-known member
Joined
Jun 28, 2016
Messages
1,916
Location
West of Salem
when I was looking at several catalogs researching a bit I noticed you could get the base model with only the top drawer as a roll around workbench as they called it. then the other drawers could be ordered when ever they were needed. The extra drawers were shown with perf bottoms like the two bottom drawers in mine. The one I have has the Logo stamped in the lower drawer front face, then both sides. Im still wondering about the serial number on the top of mine. unlikely an individual would have done that, maybe if it were company owned.... I dunno... wonder if anyone else has a serial on their model.

I just checked the top of my new to me box for a S/N RagTop and sure enough it is stamped right where yours was on top near where the left piston rack leg bolts on. Mine is just a plain stamp without saying it's the serial # like yours has and probably done by hand as they double hit the 8 in S/N 4780. A pic. Ed.
 

Attachments

  • IMG_0605.jpg
    IMG_0605.jpg
    139.3 KB · Views: 80
  • IMG_0590.jpg
    IMG_0590.jpg
    149.2 KB · Views: 74
To avoid these ads, REGISTER NOW!
Top Bottom