evintho
Well-known member
Well it's Christmas day and I'm just sitting around the house recouperating from last nights festivities. Figured I'd use the time to be productive, so I strolled out to the garage (against the wifes wishes) and started tearing down the DP head unit. Snapped some pics as I went along and threw this together.
I know a lot of you guys have these old Craftsman 150 benchtops and floorstanding models. I'm doing a light resto on mine and thought I'd do a small write-up on disassembly of the head unit. Some think it's a daunting task but it really was quite simple. Follow along and you can disassemble yours just as easily.
I referenced this parts list in the write-up. The numbers in parenthesis correspond to the parts list and photo captions. You'll figure it out!
Craftsman 150 Operating Instructions/Parts List/Exploded Photos
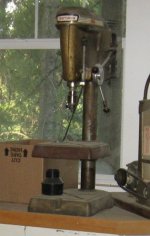
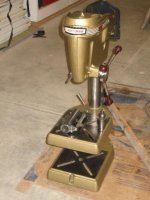
Here's the beast in question.
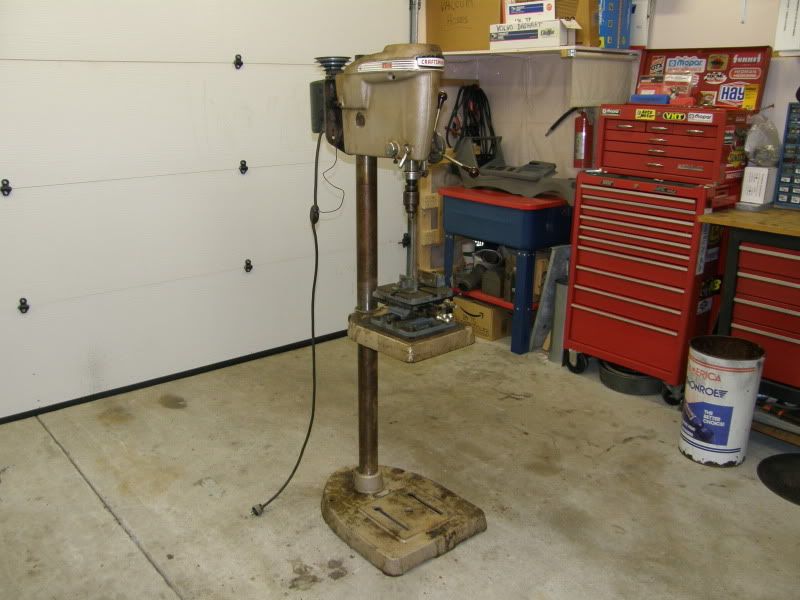
No pics of the base and tray removal. Suffice to say with 60 years of rust and accumulated gunk you'll need to soak the pole joints with PB Blaster, pound on the cast iron pieces with a deadblow hammer, soak 'em again and let it sit overnight, come back the next day, soak and pound on them again and they should come off!
The pole was covered with rust and gunk. I simply clamped it to a 2x4, used my DA sander and sanded it with 150 grit followed by 240 to remove some of the scratches. Came out great! Here it is half done..............

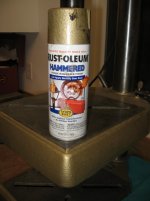
Finished and covered with a light coat of oil for rust prevention................

On to head disassembly!
Head removed from pole.............

Flip the head upside down and remove these 2 bolts (1 on each side) to remove the motor support base (43)...............

Use a 3/32" allen wrench to remove the setscrew and pull off the lock handle (15)...........

Remove the quill lock screw (11)..................

Drive out the rear quill lock sleeve (10) from the front then drive out the front sleeve from the rear.................


Next, loosen the knob lock screw (17) and remove the hand knob (9)..............

Unscrew the lock handle (15).............

Then drive out both head lock sleeves (16) just like you drove out the quill lock sleeves, 4 pictures above..............

Remove this bolt that retains the hub, pinion, spring & pin assembly. Don't forget to save this washer..................


Now, slide out the hub, pinion, spring & pin assembly (54) chuck it in the vise and drive out the pin (56)....................


Slide (may have to tap) the feed handle off..................

Remove the feed stop collar (37)..................

Slide the quill/spindle assembly out...................

The Craftsman logo panel (6) is held to the cast iron head unit by 2 panel screws (7) that look like blind rivets. All you need to do to remove the logo panel is to locate the 2 small holes on the inside of the head unit...............

Use a small punch and knock them out from the inside..................


There ya go. Completely disassembled!

I didn't remove the pulley 'cause I don't have snap ring pliers long enough to reach inside. No worries. I'm gonna give it a solvent bath, duct tape any machined surfaces and sand blast it, along with the base and tray after I get my new sand blaster next week. Hope this helps someone.
MERRY CHRISTMAS!!
I know a lot of you guys have these old Craftsman 150 benchtops and floorstanding models. I'm doing a light resto on mine and thought I'd do a small write-up on disassembly of the head unit. Some think it's a daunting task but it really was quite simple. Follow along and you can disassemble yours just as easily.
I referenced this parts list in the write-up. The numbers in parenthesis correspond to the parts list and photo captions. You'll figure it out!
Craftsman 150 Operating Instructions/Parts List/Exploded Photos
Here's the beast in question.
No pics of the base and tray removal. Suffice to say with 60 years of rust and accumulated gunk you'll need to soak the pole joints with PB Blaster, pound on the cast iron pieces with a deadblow hammer, soak 'em again and let it sit overnight, come back the next day, soak and pound on them again and they should come off!
The pole was covered with rust and gunk. I simply clamped it to a 2x4, used my DA sander and sanded it with 150 grit followed by 240 to remove some of the scratches. Came out great! Here it is half done..............
Finished and covered with a light coat of oil for rust prevention................
On to head disassembly!
Head removed from pole.............
Flip the head upside down and remove these 2 bolts (1 on each side) to remove the motor support base (43)...............
Use a 3/32" allen wrench to remove the setscrew and pull off the lock handle (15)...........
Remove the quill lock screw (11)..................
Drive out the rear quill lock sleeve (10) from the front then drive out the front sleeve from the rear.................
Next, loosen the knob lock screw (17) and remove the hand knob (9)..............
Unscrew the lock handle (15).............
Then drive out both head lock sleeves (16) just like you drove out the quill lock sleeves, 4 pictures above..............
Remove this bolt that retains the hub, pinion, spring & pin assembly. Don't forget to save this washer..................
Now, slide out the hub, pinion, spring & pin assembly (54) chuck it in the vise and drive out the pin (56)....................
Slide (may have to tap) the feed handle off..................
Remove the feed stop collar (37)..................
Slide the quill/spindle assembly out...................
The Craftsman logo panel (6) is held to the cast iron head unit by 2 panel screws (7) that look like blind rivets. All you need to do to remove the logo panel is to locate the 2 small holes on the inside of the head unit...............
Use a small punch and knock them out from the inside..................
There ya go. Completely disassembled!
I didn't remove the pulley 'cause I don't have snap ring pliers long enough to reach inside. No worries. I'm gonna give it a solvent bath, duct tape any machined surfaces and sand blast it, along with the base and tray after I get my new sand blaster next week. Hope this helps someone.
MERRY CHRISTMAS!!
")