Bobby B.
Well-known member
I think you did a great job. I would love to be able to find a place like that and be able to do half as nice a job.
Just looks like a great place to be overall.
Just looks like a great place to be overall.


They also worked on small engines. They got a contract around 1965 to rebuild a couple dozen Wisconsin single cylinder engines. This is the first batch done and sitting on the lift. They improvised and turned one of the lift ramps into a work bench. Probably the only clear spot in the whole shop! See that metal pipe propped under the lift. That kept the lift from settling down while they worked since this took several days. There's the "CASH" sign up front and part of the Pepsi machine seen through the door.
This is the shop work truck and I'm pretty sure it's vehicle the Willy's engine sitting on the north room floor came from. You guys tell me the year, early to mid 50's I think? If that had been still sitting around for sure I would have restored it. Just might try to find another one and restore it to look like this. I've been know to do such foolish things!!
Thomas
Hi - Love the pictures before and after - its truely a labor of Love!
As for your shop truck From 1946 until 1949 the grill was relatively flat like this one you pictured, in April 1950 it changed to a sharper peak in the center. Visit http://www.public.asu.edu/~grover/willys/ for some good images and info.
Fantastic, I'd love to find somewhere like that all that junk appeals to the pack rat in me....I'd love to see some more pictures of the balcksmithing setup as this is a career I want to pursue when my kids go to school. I've done a few courses and have been collecting equipment and have made my own bottom draught forge from a kit. Old smiths shop are fascinating as thats when it was really a craft.
I am pleased that I am not losing my mind. I just knew I had seen this place in it's original form...somewhere.
Nice to know that it is in the center of the Universe, only a few miles from me.
That makes me off center I suppose.

The tools and machines were all there but slowly got buried behind more " stuff". As I go though the pictures I'll post what I can. As I said I still have the overhead line shaft set up, trip hammer, drill press, anvil etc. I know now I really will have no need for most of them and am figuring out how best to find them new homes.
Thomas


")
I think it would be impossible to put too much coverage or info on this BB767. This has been very cool to read.


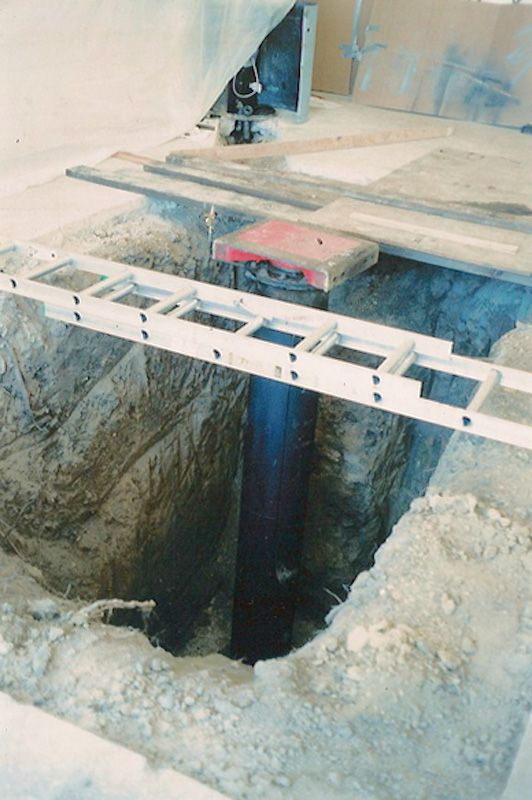
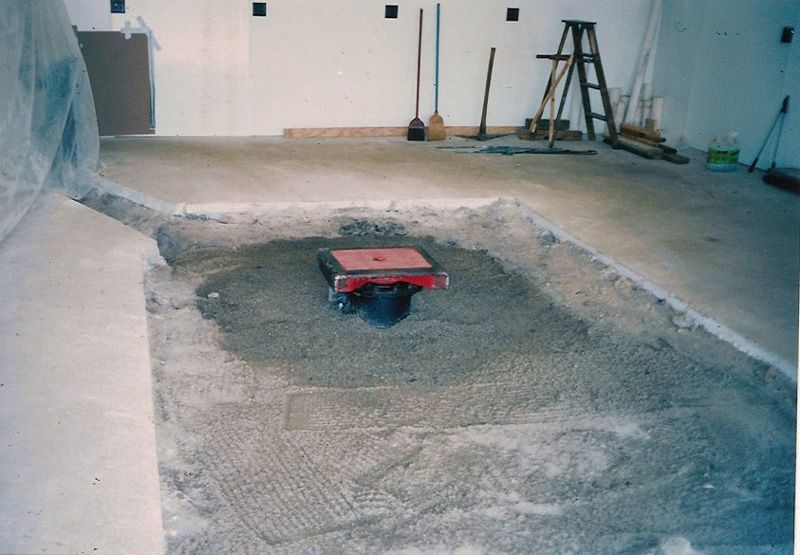
After cycling it up and down many, many, many times we loaded it with lots of steel scrap of which I had plenty (!!!), several hundred pounds and ran it up to the top, checked the pressure on my temporary gauge and left it over night to see if it would hold pressure. It did and that was that!!
Thomas


If it had leaked at that point, it would have been too late to fix it, no?
