KJ2018
Member
Hello all,
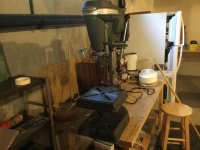
Have the subject drill press that I began work on. Mainly clean up so far.
Has a light grinding noise while running. I figure the bearings need replacing. Motor ok. Looks like it’s no newer that 1950, from what I’ve read, since the “panel” uses 6/32 screws and not rivets.
Feed handle is the straight rod type. 14.5in with handles.
My grandfather bought it new in the late 1940’s.
I don’t know how you determine if it’s a 150 or 100, I think they are?
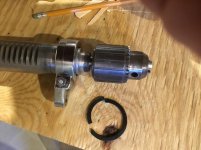
Can someone point me to the correct bearings I would need, once I get it apart??
Thanks! Ken
Have the subject drill press that I began work on. Mainly clean up so far.
Has a light grinding noise while running. I figure the bearings need replacing. Motor ok. Looks like it’s no newer that 1950, from what I’ve read, since the “panel” uses 6/32 screws and not rivets.
Feed handle is the straight rod type. 14.5in with handles.
My grandfather bought it new in the late 1940’s.
I don’t know how you determine if it’s a 150 or 100, I think they are?
Can someone point me to the correct bearings I would need, once I get it apart??
Thanks! Ken