To avoid these ads, REGISTER NOW!

From little barn to wood shop

Nick in WI

Well-known member
Joined
Nov 6, 2012
Messages
129
Hey everyone,

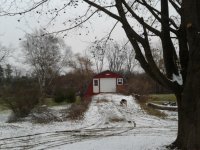
I have recently purchased a new (to me) house in Wisconsin with a small neglected barn on the property. After some deliberation on what to do with it I decided to make it into a wood shop instead my original plan to use the basement since the basement stairs location isn’t very conducive to moving lumber in and projects out.

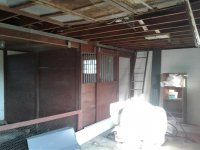
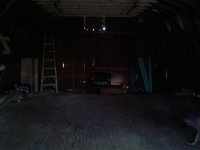
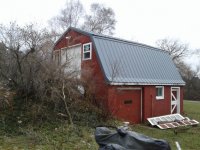
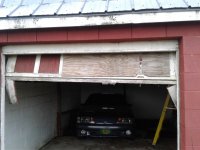
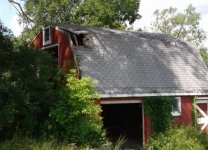
The barn has a cinder block lower level that was originally used for horses so it is half concrete and half dirt with one horse stall still existing. The garage door to the lower level is falling apart and inoperable. There is also a 40 amp sub panel and a yard hydrant in the lower level. The upper level had a functioning overhead door and a 1/2 plywood floor, half of which was in good condition with the other half in sub par condition. About 4 years ago a tree punched some holes in the roof and they were never repaired resulting in some rotted rafters roof deck and floor on that half of the barn.

I’ve already started the restoration process and am doing everything myself so it’s as I have time available but figured I’d document it so I have no excuse not to take progress pictures which I’m notoriously bad at keeping up with. That being said I don’t have too many progress pictures up unto this point.

The plan is to use the upper level as a wood shop with the dust collector, compressor and such in the lower level. I have a new insulated overhead door on order and will be installing that in the upper level and moving the existing plywood overhead door to the lower level to seal the barn up for the first time in well over a decade. Long term I will be insulating and heating the upper level but before that I need to house wrap and install siding over the existing plywood paneling.

Pictures are as follows:

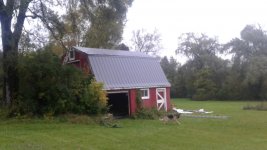
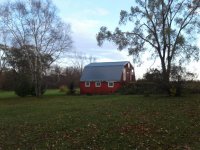
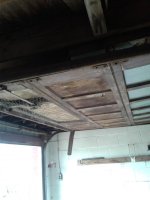
The roof before any work

Sistering up some of the rotted roof rafters

Installing the new roof

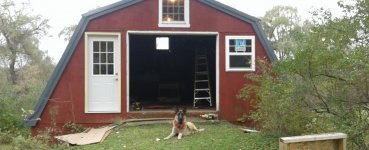
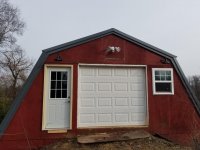
Added a walk door and window so that I didn’t always have to use the overhead door. The window is just installed temporarily until I do the house wrap. The upper windows on each end will be removed since the ceiling will cut through the middle.

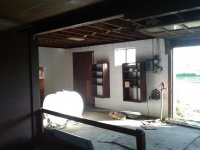
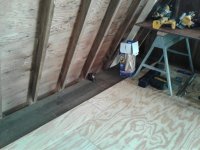
Installed 3/4” plywood over top the existing 1/2” floor


That’s where I’m at now, next on the list is the rough framing of the ceiling and knee wall and then I can get started on all of the wiring.
 

Attachments

  • 20180728_150749.jpg
    20180728_150749.jpg
    64.4 KB · Views: 423
  • 20181026_110732.jpg
    20181026_110732.jpg
    96.8 KB · Views: 434
  • 20181019_142704.jpg
    20181019_142704.jpg
    102.4 KB · Views: 419
  • 20181001_154032.jpg
    20181001_154032.jpg
    97.4 KB · Views: 419
  • 20180930_104523.jpg
    20180930_104523.jpg
    120.8 KB · Views: 408
  • 20180825_122317.jpg
    20180825_122317.jpg
    109.4 KB · Views: 396
  • 20181027_170056.jpg
    20181027_170056.jpg
    110.1 KB · Views: 378
To avoid these ads, REGISTER NOW!
OP
N

Nick in WI

Well-known member
Joined
Nov 6, 2012
Messages
129
Thanks, I'm enjoying the process. I considered scrapping the little barn since in the next year or two I'll be putting up a large pole building and could have easily just built a small room in a corner for wood working but I just couldn't see this thing go to waste. I also figured it wouldn't cost too much more to renovate it than to demo and dispose of it.
 

captain14

Well-known member
Joined
Dec 19, 2012
Messages
7,059
Location
Near College Park Maryland 20740
One of the first things to do is to remove all the vegetation away from the building. I’m sure it’s damaged something previously.

I’ll continue to follow your thread. We would call that a bank barn around here.

Who is the head of security posted in front of the upper level doorway?
 
OP
N

Nick in WI

Well-known member
Joined
Nov 6, 2012
Messages
129
One of the first things to do is to remove all the vegetation away from the building. I’m sure it’s damaged something previously.

I’ll continue to follow your thread. We would call that a bank barn around here.

Who is the head of security posted in front of the upper level doorway?

Yeah, I did what was essential to safely install the roof but this winter I'll be doing a lot of clean up around the barn, and entire property for that matter. Much easier to do without leaves.

That'd be Gator, he follows me pretty much everywhere lol.
 
OP
N

Nick in WI

Well-known member
Joined
Nov 6, 2012
Messages
129
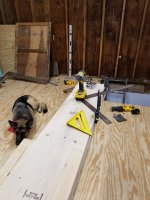
Not much progress lately, just countersinking and screwing hundreds of screws through the plywood floor. To avoid double handling, I cut to size and put the corner screws in when unloading the plywood but still have all the field screws to do. The laser level makes it easy to find the floor joist since it is a continues 24’ long 2×8 for the full width of the barn. I highly suggest getting a laser level if you don’t already have one because once you have it you inevitably find uses for it.

I also included a few other pictures just to give everyone an idea of what I’m working with.
 

Attachments

  • 20181029_165337.jpg
    20181029_165337.jpg
    158.5 KB · Views: 316
  • 20181029_162546.jpg
    20181029_162546.jpg
    162.8 KB · Views: 390
  • 20181029_162508.jpg
    20181029_162508.jpg
    113.8 KB · Views: 341
  • 20181029_162455.jpg
    20181029_162455.jpg
    121.9 KB · Views: 329
  • 20181029_162229.jpg
    20181029_162229.jpg
    146 KB · Views: 339
  • 20181029_162212.jpg
    20181029_162212.jpg
    142.7 KB · Views: 334
  • 20181029_162151.jpg
    20181029_162151.jpg
    135.8 KB · Views: 333

FTWingRiders

Well-known member
Joined
Mar 21, 2012
Messages
1,561
Location
Central Ma
Awesome! Kudos for saving it over demo. It kills me to see an old barn rot away, when all they had to do was keep the roof intact. Thats going to be a great workshop. What are the dimensions? Gators a handsome guy! He reminds me of Duke, our GS when I was a youngster growing up on the farm.

Keep posting, Ive got popcorn! :beer:
 
OP
N

Nick in WI

Well-known member
Joined
Nov 6, 2012
Messages
129
Awesome! Kudos for saving it over demo. It kills me to see an old barn rot away, when all they had to do was keep the roof intact. Thats going to be a great workshop. What are the dimensions? Gators a handsome guy! He reminds me of Duke, our GS when I was a youngster growing up on the farm.

Keep posting, Ive got popcorn! :beer:

It was definitely frustrating working on the bad side of the roof knowing that if the prior owners could have just tarped it after the tree damage it would be so much better off. The overall dimensions are 26' long by 24' wide, the second floor deck is about 22.5' wide and will be about 19' wide after I build the knee walls.

Thanks for commenting, I don't know if could ever go with another breed of dog after having a German Shepherd. I've gone through literally countless build/restoration threads with the proverbially popcorn lol.
 

captain14

Well-known member
Joined
Dec 19, 2012
Messages
7,059
Location
Near College Park Maryland 20740
Without seeing any clear Photos do you think the land was graded to the second floor? Sorta looks like it to me. Was hay, etc originally stored up there? Usually there is an opening to drop it to the stalls below.
 

el monte slim

Well-known member
Joined
Apr 4, 2018
Messages
243
Location
Midwest USA
I think you made a wise choice to fix the structure instead of having it demolished. The repair and renovation work looks good, and I like your plans for utilizing the space. :thumbup:

Viewing the pictures of your barn has made me realize how much I would enjoy having a workshop with ground level access to both the first and second floors. Speaking of pictures, Gator is casting one heck of a big shadow as he walks away from the barn!
 
OP
N

Nick in WI

Well-known member
Joined
Nov 6, 2012
Messages
129
Without seeing any clear Photos do you think the land was graded to the second floor? Sorta looks like it to me. Was hay, etc originally stored up there? Usually there is an opening to drop it to the stalls below.

Yes, the land was graded up to the upper level when it was originally built. It was likely used for hay storage. There is a scuttle hole with a ladder between the first and second. I will be opening up the scuttle hole to a stair way, it will be on the steeper side given it's location but better than a ladder.
 
OP
N

Nick in WI

Well-known member
Joined
Nov 6, 2012
Messages
129
I think you made a wise choice to fix the structure instead of having it demolished. The repair and renovation work looks good, and I like your plans for utilizing the space. :thumbup:

Viewing the pictures of your barn has made me realize how much I would enjoy having a workshop with ground level access to both the first and second floors. Speaking of pictures, Gator is casting one heck of a big shadow as he walks away from the barn!

In the beginning I was think I would use the house basement as a wood shop and I didn't have any real use for the barn. But after deciding that the basement stairs location made access too difficult it was full steam ahead on the barn resto. The access to both upper and lower levels really makes it an ideal space.

At over 100 lbs Gator is a big dude, but not quite as big as the shadow makes him appear lol.
 
OP
N

Nick in WI

Well-known member
Joined
Nov 6, 2012
Messages
129
One of the first things to do is to remove all the vegetation away from the building. I’m sure it’s damaged something previously.

I’ll continue to follow your thread. We would call that a bank barn around here.

Who is the head of security posted in front of the upper level doorway?

Took your advice and had this big elm taken down. I always try to avoid taking down trees but I'm pretty sure that's the tree that did the damage to the roof in the past and with the one shoot overhanging the barn pretty far it just wasn't worth the risk to me.
 

Attachments

  • 20181115_103754.jpg
    20181115_103754.jpg
    65.1 KB · Views: 228
  • 20181115_115232.jpg
    20181115_115232.jpg
    69.8 KB · Views: 210

FTWingRiders

Well-known member
Joined
Mar 21, 2012
Messages
1,561
Location
Central Ma
I’m the same .. hate cutting down a perfectly good tree, but I think that was a wise choice. Any more work on the shop?
 
OP
N

Nick in WI

Well-known member
Joined
Nov 6, 2012
Messages
129
I’m the same .. hate cutting down a perfectly good tree, but I think that was a wise choice. Any more work on the shop?

Lately it's been a bit slow in the shop. It's been an abnormally cold fall which makes it tough to stay motivated on such a project and I've been busy with other things, like cleaning up trees lol. I've got all the lumber to rough in the ceiling and stairs as well as everything to finish up the lighting electrical circuit which will be a nice with the days getting so short. I'll be back at it soon.
 
OP
N

Nick in WI

Well-known member
Joined
Nov 6, 2012
Messages
129
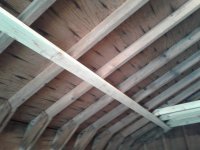
I got to work on the ceiling/collar ties today. I set the laser level on one end of the building and then worked my way back to it. I put up a ledger board on 1 side and then set the otherside with one screw and then worked my way back and forth which worked out well. I put the ceiling height right at 9’ which is really nice but only leaves me about 1.5’ of attic space. I could definitely do it but I’m really hoping that I never have to get up there. The missing one will be put up when I replace the garage door and the subsequent mounting brackets.

In other news I received some new additions for the shop: a 60v tracksaw and a long awaited planer.
 

Attachments

  • 20181116_132602.jpg
    20181116_132602.jpg
    66.8 KB · Views: 233
  • 20181116_130007.jpg
    20181116_130007.jpg
    69.2 KB · Views: 204
  • 20181116_105826.jpg
    20181116_105826.jpg
    114.4 KB · Views: 204
  • 20181116_105925.jpg
    20181116_105925.jpg
    136.3 KB · Views: 221
OP
N

Nick in WI

Well-known member
Joined
Nov 6, 2012
Messages
129
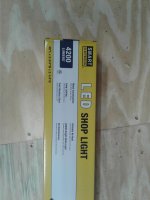
So I’ve finally made some progress of note. I wired and installed (6) 4’ led shop lights. I picked them up from Menards for $15 each when they were on sale. I also wired outlets on each side so when I add the knee braces up top I can put 2 more lights on each side since a lot of the tools will be up against the side walls. Overall I’m happy with them but I am glad I added the side outlets because there are shadows over there. The boxes and lights are just mounted temporarily as I plan to do a steel ceiling and need to figure out the exact rib layout so that they don’t interfere.

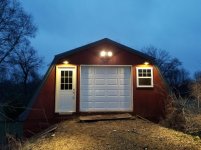
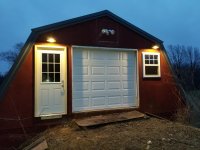
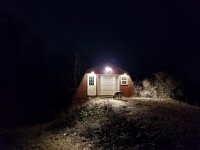
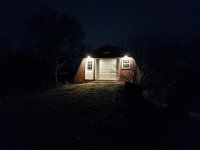
I also installed a motion light on the outside. It is made by RAB and I ordered it from Amazon. It wasn't cheap at $89 but it is a much better quality than the home store ones that I haven't had luck with. Then I wired up boxes for 2 barn lights that are on my Christmas list and will go above the overhead door corners. I wired those to a 3 way switch so that when the switch is in the down position the motion light sensor will turn them on but they can still be turned on independently of the motion light. I've only very briefly tested the motion sensor but I am happy with it so far.
 

Attachments

  • 20181120_113011.jpg
    20181120_113011.jpg
    86.1 KB · Views: 134
  • 20181120_112545.jpg
    20181120_112545.jpg
    61.1 KB · Views: 139
  • 20181119_185625.jpg
    20181119_185625.jpg
    126.7 KB · Views: 157
  • 20181120_120806.jpg
    20181120_120806.jpg
    132.1 KB · Views: 173
  • 20181120_120756.jpg
    20181120_120756.jpg
    75.7 KB · Views: 151
  • 20181120_113113.jpg
    20181120_113113.jpg
    101.8 KB · Views: 160
To avoid these ads, REGISTER NOW!
OP
N

Nick in WI

Well-known member
Joined
Nov 6, 2012
Messages
129
My new garage door finally showed up at Menards last week so I picked that up and got to work playing musical garage doors. The garage door that for the lower level was rotten and disintegrating from being left open below the leaking roof. Since the upper and lower garage doors were the same size I moved the original upper door to the lower level and installed a new insulated door above. Now for the first time in well over a decade the barn can be completely closed up and secure.

In other unrelated exciting news my excavator dropped off some equipment so that he can start the site prep for a 50x63 pole building I'll be putting up next spring.
 

Attachments

  • 20181204_133117.jpg
    20181204_133117.jpg
    105.1 KB · Views: 192
  • 20181130_153456.jpg
    20181130_153456.jpg
    155.6 KB · Views: 201
  • 20181204_132839.jpg
    20181204_132839.jpg
    155.1 KB · Views: 199
  • 20181126_144236.jpg
    20181126_144236.jpg
    123.3 KB · Views: 198
  • 20181126_144141.jpg
    20181126_144141.jpg
    59.4 KB · Views: 181
OP
N

Nick in WI

Well-known member
Joined
Nov 6, 2012
Messages
129
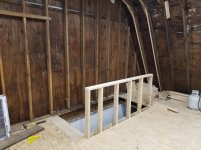
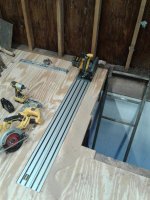
The barn has always had a small scuttle hole for a ladder on the back wall but my plans necessitate a stairway so I got to work enlarging the hole. Although far more precise than required I did use this opportunity to try out my new tracksaw. I’m really impressed with that thing, not only does it cut a perfectly straight line but it is easily the most smooth circular saw I’ve ever used. Next up is making the stair stringers and getting them installed.
 

Attachments

  • 20181205_135945.jpg
    20181205_135945.jpg
    125.6 KB · Views: 154
  • 20181205_143240.jpg
    20181205_143240.jpg
    125.3 KB · Views: 155
  • 20181205_151441.jpg
    20181205_151441.jpg
    97.6 KB · Views: 166
OP
N

Nick in WI

Well-known member
Joined
Nov 6, 2012
Messages
129
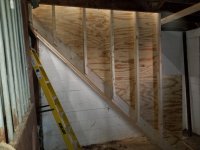
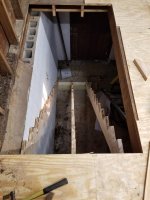
Today I was able to get started on the stairs. I've never built stairs before but it went pretty well. I ended up with a 7.5" rise and run. It's a little steep but no steeper than the stairs in my first house and definitely less steep than the ladder. Using a 45 degree slope really makes all the measuring easier. The stairs will end up about 36" wide and there will be about 36" between the final step and the back wall/horse door below. The horse door will not be able to open completely anymore but I don't plan to use that often once the stairs are in place. If I do find myself using that door more I will replace it with a standard out-swing walk door. I may also eventually install a 32" door on the bottom stair tread when I do the insulation just to keep the heat in a little better, but I don't love that idea so we'll see. I need to finish up some trim work on the opening, Build the wall and then I can install the treads/risers.
 

Attachments

  • 20181213_153732.jpg
    20181213_153732.jpg
    91.4 KB · Views: 155
  • 20181213_141458.jpg
    20181213_141458.jpg
    147.5 KB · Views: 158
  • 20181213_141324.jpg
    20181213_141324.jpg
    152.6 KB · Views: 143
  • 20181213_135242.jpg
    20181213_135242.jpg
    150.8 KB · Views: 138
  • 20181213_133332.jpg
    20181213_133332.jpg
    101.4 KB · Views: 140
  • 20181213_132917.jpg
    20181213_132917.jpg
    152.3 KB · Views: 143
OP
N

Nick in WI

Well-known member
Joined
Nov 6, 2012
Messages
129
A few days ago I did some work roughing out the opening which is over complicated because I am trying to recess the stair way into the area above the existing beam as far as possible to maximize the distance between the bottom stair tread and wall which ended up at about 36". It's not much but is enough to install a 32" door on the bottom stair in the future. Then yesterday I spent the day picking up. I am not always the most organized person when I work and sometimes I just need to take some time to organize everything. The only outlets in the upstairs at the moment are switched outlets for the lights so I hung some scrap near one that is prepped for future lights and used that for charging batteries. I'm glad I did because I've now decided that I will add some dedicated charger outlets that will be tied into the lighting circuit since I'm not a fan of leaving chargers on when the barn is unoccupied. I made the lighting circuit a 20 amp so I'm not concerned about overloading it with a few battery chargers.

Today I spent the day working on the half wall for the stairway. I wanted to build the wall before mounting the stringers so that I didn't have to notch out the wall sheeting for each tread and riser. I built the wall on the floor and then installed the sheeting. Then I put a ledger board on the wall so that when I flipped it up it would land in it's final location and not fall further since none of the studs extend all the way to the lower level floor. I roughed the half wall height at 33.25" so that when a trim board is added it will end up right at 34". That way I can use it as an in-feed support for a table saw since 34" is the standard table height. The dog still isn't quite sure what to make of the stair-less stairway but it will be done soon enough. The stringers are now permanently mounted and next up are the treads and risers and then I can finally stop teetering on the center stringer while going up and down.
 

Attachments

  • 20181218_145532.jpg
    20181218_145532.jpg
    141.9 KB · Views: 159
  • 20181218_163959.jpg
    20181218_163959.jpg
    149.5 KB · Views: 132
  • 20181218_155909.jpg
    20181218_155909.jpg
    139.5 KB · Views: 134
  • 20181218_144110.jpg
    20181218_144110.jpg
    92.4 KB · Views: 133
  • 20181218_142754.jpg
    20181218_142754.jpg
    151 KB · Views: 127
  • 20181218_164033.jpg
    20181218_164033.jpg
    151.5 KB · Views: 129

racingtadpole

Well-known member
Joined
Dec 3, 2011
Messages
2,029
Location
The far side of crazy.. but sometimes Australia
There’s a lot of interesting spaces on here that are fun to read about, but relatively few that have a strength of character to call a space I would like to work from. Yours is one of the few I would really like to work in. I’m not sure what it is about it other than just appearing as an inviting space to do things in. I’m in for updates...
 
OP
N

Nick in WI

Well-known member
Joined
Nov 6, 2012
Messages
129
There’s a lot of interesting spaces on here that are fun to read about, but relatively few that have a strength of character to call a space I would like to work from. Yours is one of the few I would really like to work in. I’m not sure what it is about it other than just appearing as an inviting space to do things in. I’m in for updates...

Thanks for the kind words. I'm a long way from really working "in" it but right now I'm really enjoying working "on" it. It's a fun project and I'm glad I can bring it back to make it into something functioning.
 

PlumGarage6

Active member
Joined
Dec 29, 2017
Messages
26
Location
Penn Yan, New York
Very nice, looks like things are moving right along. I like what your doing with the space.
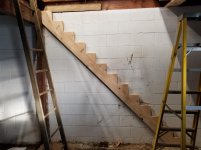
It looks like your "stair tester" is ready for testing lol
 
OP
N

Nick in WI

Well-known member
Joined
Nov 6, 2012
Messages
129
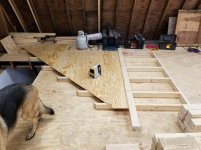
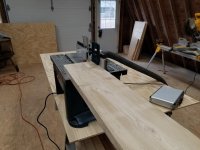
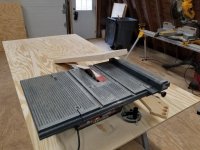
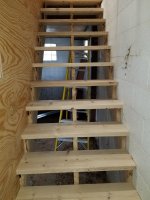
Today I started by cutting the 2x10's into stair treads. I temporarily set them in place and then numbered them as they came out. I commissioned the under powered but always reliable craftsman 8 inch table saw to trim them all to an even depth and remove the rounded over edges for a more finished look. Ironically enough after squaring the one edge I set up the router table to further round over the other edge. I would have liked to use a 3/4" round over bit to give full bullnose but the largest I had was a 1/2" radius. Finally I set up a quick "jig" to drill the holes in the risers so that they all end up in the same place, this was completely unnecessary but it improves the appearance a bit. The track saw came in handy when I started cutting the 1/2" plywood into risers. After that there was nothing left to but to do it and it come together well.

I gave it my best effort but I couldn't convince the inspector to give them a try. He's always been a cautious dog and stairs that just appeared out of no where seemed to have thrown him for a loop. He'll get there on his own time. I've still got lots of trimming out before I can call them complete but they feel pretty good and are now functioning stairs.
 

Attachments

  • 20181219_155410.jpg
    20181219_155410.jpg
    135.5 KB · Views: 153
  • 20181219_145147.jpg
    20181219_145147.jpg
    77.1 KB · Views: 138
  • 20181219_134455.jpg
    20181219_134455.jpg
    149.7 KB · Views: 135
  • 20181219_140537.jpg
    20181219_140537.jpg
    127.1 KB · Views: 136
  • 20181219_130220.jpg
    20181219_130220.jpg
    140.7 KB · Views: 139
  • 20181219_123601.jpg
    20181219_123601.jpg
    150.9 KB · Views: 143
  • 20181219_122157.jpg
    20181219_122157.jpg
    89 KB · Views: 147
OP
N

Nick in WI

Well-known member
Joined
Nov 6, 2012
Messages
129
He’ll Come Down on his own. Maybe a rainy day when he doesnt want to get wet going around the barn. Or when he smells that food and maybe he’ll get some of the ham sandwich?

Yeah, he'll get there. In all honesty I'm not going to push it because while half the lower level has concrete the other half is just a dirt floor and he'll track that all throughout the barn.
 
OP
N

Nick in WI

Well-known member
Joined
Nov 6, 2012
Messages
129
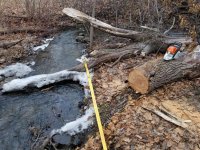
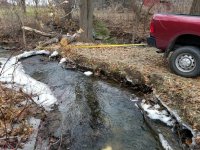
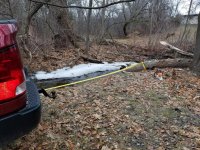
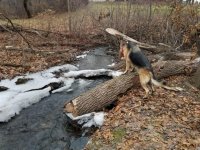
I didn't have time to work on the barn today but the warmer weather gave me the opportunity to work on another “wood” working project. Late last summer lightning struck large willow tree down by a creek that runs through the property about 100 yards from the barn. When it initially happened I left a few large logs lying partially in the creek because it was still flowing fine and frankly I was being lazy. Once the cold weather came the logs slowed the water enough to freeze and dam up the Creek and I feared that with the snow melt in spring I would end up with a flooded yard if they weren’t removed.

I don’t have any heavy(ish) equipment to help with this job so I attached a ratchet strap to the logs. I then cut the offending half with the chain saw and drug them out with my truck.

Overall in went pretty smoothly and after clearing a few other areas the creek is now flowing smoothly and ready for spring.
 

Attachments

  • 20181221_125830_resized.jpg
    20181221_125830_resized.jpg
    149.7 KB · Views: 139
  • 20181221_124801_resized.jpg
    20181221_124801_resized.jpg
    154.8 KB · Views: 147
  • 20181221_124729_resized.jpg
    20181221_124729_resized.jpg
    153.1 KB · Views: 157
  • 20181221_123910_resized.jpg
    20181221_123910_resized.jpg
    150.5 KB · Views: 144
  • 20181221_084511_resized.jpg
    20181221_084511_resized.jpg
    150.1 KB · Views: 160
OP
N

Nick in WI

Well-known member
Joined
Nov 6, 2012
Messages
129
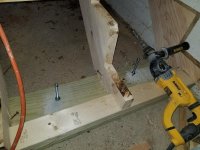
I am back to working on the barn and started the day by anchoring the lower board and stair stringers to the concrete. I made sure to drill all the way through the concrete so that if I ever need to remove this board I can punch the anchors all the way through and slip it out without disassembling the entire stair case. This is because I might someday want to replace the concrete in the barn because it's in pretty sad shape and only covers half of the floor currently.

20181224_100224_resized.jpg

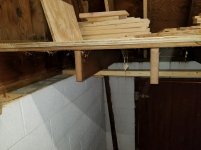
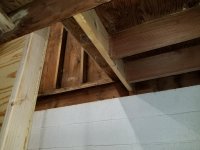
After that was done I started finishing off the stairwell "ceiling." I trimmed the floor joists and then added a support board. I then cut a piece of 3/4" plywood to finish it off and positioned it so that when the 1/2 plywood ceiling is added below it would **** up flush to it.

20181224_104937_resized.jpg

20181224_105623_resized.jpg

20181224_120249_resized.jpg

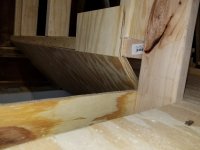
Then I moved on to completing the half wall return. When I cut the 3/4" beveled ceiling panel I ran it long so that I could maintain as much floor space as possible. The wall sort of sits on top of the 3/4" panel and is secured in place so that when the 1/2" plywood is installed it will also **** up flush with the 3/4" panel. When I initially cut the hole for the stairwell I ballparked the opening hoping there would be enough head room. As it stands I have about 3" of headroom when I naturally walk down the stairs and I'm over 6' tall so although it doesn't meet code for a residential dwelling it functions perfectly and I've preserved as much floor space as possible.

20181224_120454_resized.jpg

20181224_122331_resized.jpg

20181224_122356_resized.jpg

That's all for today and maybe a few days with the holidays. Hope everyone has a Merry Christmas!
 
OP
N

Nick in WI

Well-known member
Joined
Nov 6, 2012
Messages
129
With barn lights being all the rage right now I figured I'd install some on an actual barn. I wired them to a 3 way switch so that when in the down position they come on with the motion light but in the up position the stay on independent of the motion light status. I'm really pleased with they way they turned out and their size is perfect for the relatively small barn.

20181226_134533.jpg20181226_134544.jpg20181226_163819.jpg

20181226_163923.jpg20181226_171244.jpg20181226_171332.jpg
 

bad_idea

Well-known member
Joined
Jun 11, 2011
Messages
4,335
Location
Pasquotank, NC
Cool barn. The dirt ramp around the side is interesting. Will make it really easy to get heavy items upstairs, just drive the truck up the bank.
 

Cadman56

Well-known member
Joined
Sep 17, 2007
Messages
144
Location
SE Pa
Subscribed! You're doing a great job restoring the old barn. I really enjoy threads of this type. One can learn a lot by seeing what the tasks are, and how they are handled. Keep posting updates along with pics. :thumbup:
 
OP
N

Nick in WI

Well-known member
Joined
Nov 6, 2012
Messages
129
Cool barn. The dirt ramp around the side is interesting. Will make it really easy to get heavy items upstairs, just drive the truck up the bank.

Thanks! Drive up access is a design that's popular of all of the dairy barns in my area. This is much smaller and was never used as a dairy barn but I assume that's where the inspiration for the bank was.
 
To avoid these ads, REGISTER NOW!
Top Bottom