To avoid these ads, REGISTER NOW!

Above 1200 Sq/FT The Lone Beech Garage (60x46x16)

Wokspaces above 1200 squarefeet.
OP
S

sbosecker

Well-known member
Joined
Sep 25, 2012
Messages
3,539
Location
Peachtree City, GA
SB: hope you are surviving ok with all the weather that Michael is giving you. are you?

I bet your new garage would withstand a full on hurricane, but not sure all the tall trees and your old house would so hopefully you were out of harm's way.

DrivesItFar,

All is well here. Thank you so much for thinking of me.

Hurricane Michael passed well south of the Lone Beech Garage. We did get over 4-1/2 inches of rain and some wind but no damage at my property.


20181011-01.jpg 20181011-02.jpg

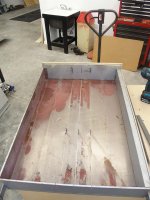
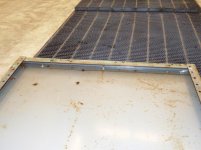
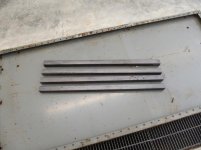
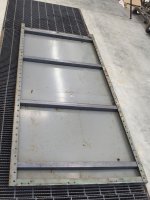
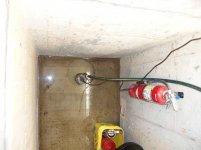
With that much rain in that short of time I was not surprised to find a bit of water in the "Tornado Shelter". About 15 minutes of sump pump action and that was resolved.

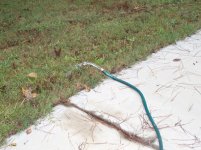
I'm pretty sure if I did a little work on the north side of the LBG I could get the water to run away from the building and that would solve my occasional water issue.

As it is now, the rain runs off the roof 2 feet away from the side of the building. That has caused a little depression in the ground and the water tends to seep in and towards the building as opposed to running away from the building.


A relatively minor amount of dirt moving would take care of this... I just haven't gotten to it yet.

Again - thanks for checking on me.


Best regards,

Scott
 
To avoid these ads, REGISTER NOW!

shortykorte

Well-known member
Joined
Sep 1, 2014
Messages
8,039
Location
Tallahassee, Fl
Good to hear just some water in the tornado shelter. The shelter sure would have been beneficial to those in panhandle area.


Sent from my iPhone using Tapatalk
 
OP
S

sbosecker

Well-known member
Joined
Sep 25, 2012
Messages
3,539
Location
Peachtree City, GA
Good to hear just some water in the tornado shelter. The shelter sure would have been beneficial to those in panhandle area.

shortykorte,

Words cannot express the emotions felt when one sees one's fellow countryman getting beat up like that.

Humbled that one has been spared... praying that one's taxes & charitable gifts are being efficiently and quickly used to bring relief - as best as it can -to those affected.

Best regards,

Scott
 

drivesitfar

Well-known member
Joined
Oct 23, 2013
Messages
36,075
Location
Pacific Northwest
SB: very happy to hear you and the LONE BEECH were spared from the force of Michael. speaking of a little dirt moving if you don't want to do it by hand with a shovel to get some exercise maybe an attachment on one of your tractors can maybe build you a ditch for a french drain?

cheers!
 
OP
S

sbosecker

Well-known member
Joined
Sep 25, 2012
Messages
3,539
Location
Peachtree City, GA
Saturday - October 13, 2018

Things starting to get back to normal after quite a bit of time away from the shop the past couple of months.

A couple of social events that have and will require time away from home in October. One has already taken place: 45th high school reunion in southern Indiana. The second is yet to come - Squadron Reunion from my time in the US Navy back in the early 80's.

Still, although I really haven't gotten any projects done recently, I have managed to add a couple of projects to my list in the past couple of days.

Just what I need - Ha!


20181013-01.jpg 20181013-02.jpg 20181013-03.jpg

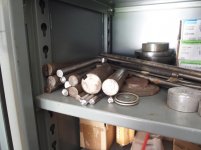
This past week I attended a couple of Estate Sales. The above is from one that the guy "never threw anything away". He had a wide variety of interests: one of which was metal working. I picked up - at a reasonable price - some steel and aluminum bits that I might be able to use for future projects.


20181013-04.jpg

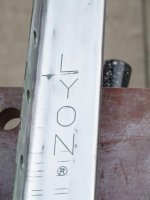
I found this LYON table at a second Estate Sale. It needs some TLC but the price was attractive.


20181013-05.jpg 20181013-06.jpg 20181013-07.jpg

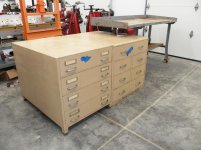
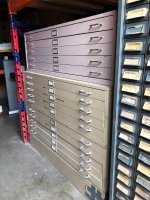
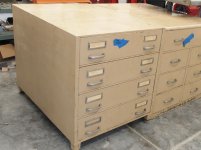
At the first sale I initially overlooked these two cabinets. After a bit I noticed that they were WAY more robust than I had first thought.

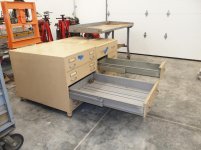
They are HEAVY! They are both about 41 inches deep & about 29 inches wide The drawers will extend almost their full length from the cabinet and will support a substantial load. So far I have not found a manufacturer's label on these cabinets.

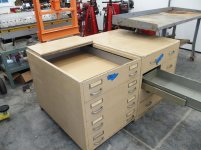
They both also have a feature I've not seen before... There's a folding section on the top of each cabinet that allows access to the top drawer without pulling it open. I don't think that feature is anything I will use but - as I said - I've never seen anything like that before.

I'm thinking I could put some steel plate - already on hand - on at least one of these and use it as a welding table - a' la Jack Olsen with his short Stronghold Cabinet/Steel Plate workbench arrangement.


Scott
 
Last edited:

drivesitfar

Well-known member
Joined
Oct 23, 2013
Messages
36,075
Location
Pacific Northwest
SB: I just made a post on your thread and thought you might be commenting on my FRENCH DRAIN IDEA to fix your tornado shelter water issue. instead i see that you have posted a couple amazing metal cabinets. i think I like metal cabinets better than the tools they hold some days.

here's a thread I started a couple years ago and i'd love to see your new tan cabinets posted on it. I think they were made by COLE cause they used that color a lot and the handles are similar. have a look around on this thread and maybe you'll get some more ideas on other metal cabinets you can use in your awesome shop/garage.

https://www.garagejournal.com/forum/showthread.php?t=305350&highlight=metal+cabinets

also I see what looks like a GREY LYON or STRONGHOLD cabinet i'd like to see more pictures of cause with those bolted in shelves I have a Lyon one that has had 2500 pounds of gym steel weight plates on each of it's 5 shelves and not a one of my shelves are bent.

great stuff and finds!!
 
OP
S

sbosecker

Well-known member
Joined
Sep 25, 2012
Messages
3,539
Location
Peachtree City, GA
SB: ...here's a thread I started a couple years ago and i'd love to see your new tan cabinets posted on it. I think they were made by COLE cause they used that color a lot and the handles are similar. have a look around on this thread...

...also I see what looks like a GREY LYON or STRONGHOLD cabinet i'd like to see more pictures of cause with those bolted in shelves I have a Lyon one that has had 2500 pounds of gym steel weight plates on each of it's 5 shelves and not a one of my shelves are bent.

great stuff and finds!!


DrivesItFar,

Thanks for the kind words and the drainage suggestions!

I will look through that thread and I will also post pictures and details on these recently acquired cabinets so that others can weigh in on their origin.

You are correct about the picture of the cabinet storing the bits of metal stock. It is a Stronghold cabinet acquired 3 years ago.

Information & pictures may be found in this THREAD.

Best regards,

Scott
 
Last edited:

shortykorte

Well-known member
Joined
Sep 1, 2014
Messages
8,039
Location
Tallahassee, Fl
Those cabinets will be a nice addition. I wonder if those are bank cabinets. I have some smaller ones and they’re stout for office cabinets. I like the welding table idea.


Sent from my iPhone using Tapatalk
 
OP
S

sbosecker

Well-known member
Joined
Sep 25, 2012
Messages
3,539
Location
Peachtree City, GA
Monday - October 15, 2018

So today I'm finally getting caught up with deferred chores and...

OK... I'm lying... you never get caught up with the chores.

Still, I thought I'd spend a couple of days - starting this afternoon - on some shop projects. The recent acquisition of a LYON steel table suggested I should try to finish refurbishing the one I had gotten a year and a half ago (Post 1814). I had gotten started on the restoration about a year ago and then had started - unexpectedly - acquiring metal working machines. Integrating those machines into the shop caused the first LYON table to be set aside.

I had no more than made the decision to go at the first LYON table hard when the phone rang. It was my employer letting me know I'm taking an airplane to Lima Peru tomorrow.


20181015-01.jpg

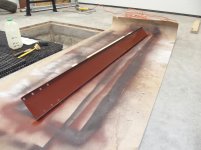
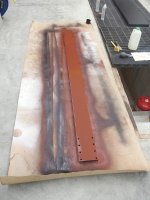
Well, that means I won't get as much done as I had hoped but I still wanted to move forward. I pulled out the horizontal support piece that had previously been given some paint removal treatment. I thought I had enough time this afternoon to get it cleaned up and painted.


20181015-02.jpg 20181015-03.jpg

Some work with the angle grinder and the piece was cleaned up enough for primer & paint.


20181015-04.jpg 20181015-05.jpg 20181015-06.jpg

Got the piece coated and then came in for the evening. When I get back from Peru it should be completely dry and I'll move onto another piece of the table.


Scott
 
Last edited:
OP
S

sbosecker

Well-known member
Joined
Sep 25, 2012
Messages
3,539
Location
Peachtree City, GA
Those cabinets will be a nice addition. I wonder if those are bank cabinets. I have some smaller ones and they’re stout for office cabinets. I like the welding table idea.

shortykorte,

I'm wondering if one of those cabinets might have been used to store computer media from back in the days of the main frame and mini-computers ... perhaps punch cards.

Oh yeah... for you kids "Mini Computers" were the size of refrigerators and were quite the "thing" in the late 70's.

Ha!

Best regards,

Scott
 

drivesitfar

Well-known member
Joined
Oct 23, 2013
Messages
36,075
Location
Pacific Northwest
SB: I bet it sure is nice to have a project that you can spread out in your garage to clean, paint or just let sit for a while while you are working on it?

speaking of old IBM (or maybe there was another computer company too) computer punch cards i remember making up a program when I was in High School that filled up a shoe box and had to be sent to the University of Washington to run it. that computer might not have fit inside of the LONE BEECH GARAGE.

did you mention the dimensions of your tan cabinets on here or on the metal cabinets thread that might give a few more details?

another style of cabinet you might like for extra parts and tool storage are the old blueprint files (called flat files too) and here's a few I have left that were made by Cole who I think made your big cabinets.

have a nice safe trip to PERU and if you are able to post any pictures of the places you travel to please do cause it really does help a thread get more interest and I (we) love seeing other parts of the worlds with comments of members who are actually there.

cheers
 

Attachments

  • moved Cole flat files 54x41 under loft (2).jpg
    moved Cole flat files 54x41 under loft (2).jpg
    130.5 KB · Views: 48
  • Cole brown flat file 43x32.jpg
    Cole brown flat file 43x32.jpg
    65.3 KB · Views: 48
  • 8th drawer open of 10 this one doesn't roll quite as smooth (2).jpg
    8th drawer open of 10 this one doesn't roll quite as smooth (2).jpg
    111.9 KB · Views: 49
OP
S

sbosecker

Well-known member
Joined
Sep 25, 2012
Messages
3,539
Location
Peachtree City, GA
SB: I bet it sure is nice to have a project that you can spread out in your garage to clean, paint or just let sit for a while while you are working on it?

speaking of old IBM (or maybe there was another computer company too) computer punch cards i remember making up a program when I was in High School that filled up a shoe box and had to be sent to the University of Washington to run it. that computer might not have fit inside of the LONE BEECH GARAGE.

did you mention the dimensions of your tan cabinets on here or on the metal cabinets thread that might give a few more details?

another style of cabinet you might like for extra parts and tool storage are the old blueprint files (called flat files too) and here's a few I have left that were made by Cole who I think made your big cabinets.

have a nice safe trip to PERU and if you are able to post any pictures of the places you travel to please do cause it really does help a thread get more interest and I (we) love seeing other parts of the worlds with comments of members who are actually there.


DrivesItFar,

It is a blessing to have a workshop that allows me to work on stuff in relative comfort... I am fortunate to have that situation. Granted I seem to be accumulating more stuff than working on stuff... I need to start processing some of the "bargains" that I've brought home.

Your story regarding sending a shoe box full of Punch Cards to U-Dub brought back some memories. In the hierarchy of Nerd-dum in the 70's, the larger your stack of Punch Cards was as you walked between buildings on campus - the more studly (from an engineer's standpoint) you were perceived to be. Ha!

Dimensions of the recently acquired cabinets were posted in the Metal Cabinet Thread.

More information on them follows in the next series of posts...

I do have one "Blueprint Cabinet". I plan to use it in the mezzanine for ...blueprints. Ha!

Made it down to Lima Peru and back without too much fuss... The usual thunderstorms in the dark over the isthmus of Panama and there was a volcano erupting in Ecuador we were keeping an eye on. I thought we might have to divert for a medical situation on the way back. An older fellow fainted as he came out of one of the First Class lavatories. After some oxygen, liquids & discussing his situation with a medical professional that was on board, he was able to return to his seat and finish his breakfast.

Thank goodness.

Best regards,

Scott
 
Last edited:
OP
S

sbosecker

Well-known member
Joined
Sep 25, 2012
Messages
3,539
Location
Peachtree City, GA
Monday - October 22, 2018

About a week ago I obtained a couple of cabinets. At some point I will probably want to paint them so today I was investigating how to remove the drawer handles and other trim.

One cabinet was pretty easy to figure out. The other, not so much...


20181022-01.jpg

We will discuss the easy one first.


20181022-02.jpg

The fasteners that secure the drawer handles to the drawer fronts are covered.


20181022-03.jpg

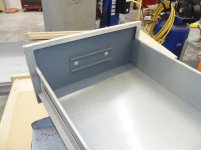
After some searching I found a single screw on the bottom of the drawer.


20181022-04.jpg 20181022-05.jpg 20181022-06.jpg

Removing that screw allowed the interior trim piece to be rotated upwards from the bottom. This allowed a "lip" on the top of the trim to disengage from the drawer and then it could be removed.


Continued in next post...
 
OP
S

sbosecker

Well-known member
Joined
Sep 25, 2012
Messages
3,539
Location
Peachtree City, GA
Continued...

20181022-11.jpg

Flush with success from the first cabinet I moved to the second one.


20181022-12.jpg

I found two of these tabs under the top drawer.


20181022-13.jpg 20181022-14.jpg

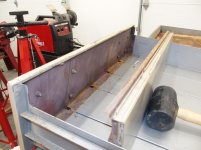
Once those two tabs were pushed in with a screwdriver I needed a tool to rotate the bottom of the interior trim like I had done on the first cabinet. While I could pull the trim out to some degree, the top did not want to release.


20181022-15.jpg

I finally got a mallet and struck the top of the trim to release it.


20181022-16.jpg 20181022-17.jpg

The metal was bent on each side of this trim piece. I wasn't the first one to try and get the trim piece out. I'm pretty sure I was the first to successfully remove it though.


Continued in next post...
 
Last edited:
OP
S

sbosecker

Well-known member
Joined
Sep 25, 2012
Messages
3,539
Location
Peachtree City, GA
Continued...


That was the top drawer... the remaining drawers in this cabinet are different.


20181022-21.jpg 20181022-22.jpg

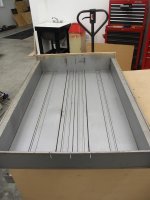
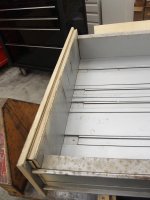
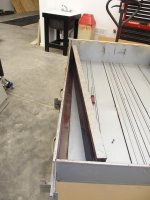
There are additional trim pieces on each side of the drawer and some trim pieces in the bottom of the drawer that received sliding "keepers" for the cards that were stored in these drawers. All this trim interferes with removing the trim piece that covers the fasteners on the front to the drawer.


20181022-23.jpg 20181022-24.jpg

Two screws on each side of the drawer secure the side trim pieces to the drawer.


20181022-25.jpg 20181022-26.jpg

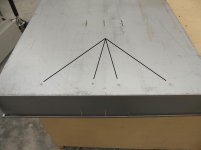
Now I encountered a more interesting situation. 8 rivets fasten the bottom trim to the bottom of this drawer.


20181022-27.jpg

I saw no option but to use an 1/8-inch drill bit to drill them out.


Continued in next post...
 
Last edited:
OP
S

sbosecker

Well-known member
Joined
Sep 25, 2012
Messages
3,539
Location
Peachtree City, GA
Continued...

20181022-31.jpg

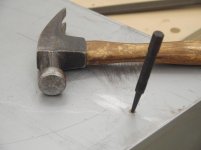
With the rivets drilled out, I used a punch to clear them from each of the holes.


20181022-32.jpg 20181022-33.jpg 20181022-34.jpg

Rivets removed, the bottom trim came out easily. I marked them to ease reassembly.


20181022-35.jpg 20181022-36.jpg 20181022-37.jpg

Once all the side & bottom trim was cleared away, the front trim was removed in exactly the same way as the top drawer.

The main point of this exercise was to solve the "How to access the Drawer Handle Fasterners" problem for each of the cabinets. I will wait to remove any additional handles/trim until I'm ready to repaint these cabinets.


Just about the time I finished piddling with the cabinets, the postwoman delivered a part to fix my 10-year old dishwasher that went on the fritz last week. I got that repaired in about 30 minutes.

All of the above plus outstanding fall weather made for a pretty good day!


Scott
 
Last edited:

drivesitfar

Well-known member
Joined
Oct 23, 2013
Messages
36,075
Location
Pacific Northwest
SD: great work getting to the drawer handles. I am planning on taking apart some of my old vintage cabinets and cleaning them up and either painting them ARMY GREEN or putting BLO on naked steel once my TO DO LIST is not including ORGANIZING or DIY HOME PROJECTS. I won't say SOME DAY i'll get to it, but it might be a while.

good to see you made progress and I bet those drawers will hold a ton of your stuff.

nice story about the computer punch cards at college that some of these younger tech guys probably have no idea of.
 
OP
S

sbosecker

Well-known member
Joined
Sep 25, 2012
Messages
3,539
Location
Peachtree City, GA
SD: great work getting to the drawer handles. I am planning on taking apart some of my old vintage cabinets and cleaning them up and either painting them ARMY GREEN or putting BLO on naked steel once my TO DO LIST is not including ORGANIZING or DIY HOME PROJECTS. I won't say SOME DAY i'll get to it, but it might be a while.

good to see you made progress and I bet those drawers will hold a ton of your stuff.

nice story about the computer punch cards at college that some of these younger tech guys probably have no idea of.


DrivesItFar,

Thanks for stopping by!

I had to Google "BLO" to figure out what that was.

Best regards,

Scott
 
To avoid these ads, REGISTER NOW!
OP
S

sbosecker

Well-known member
Joined
Sep 25, 2012
Messages
3,539
Location
Peachtree City, GA
Tuesday - October 23, 2018

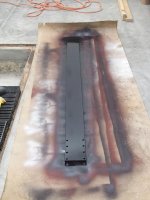
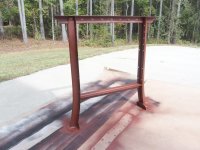
I decided to take advantage of the very nice fall weather we are having and work a bit more on refurbishing the first LYON table I got a while ago.


20181023-01.jpg

I had already done a bit of prep on this set of legs when I got distracted by other projects last year.


20181023-02.jpg

I got out the angle grinder and got to work. I prefer to do this sort of dust producing chore outside if possible.


20181023-03.jpg 20181023-04.jpg

I have decided that "better" is the enemy of "good enough" on this project. I've cleaned the many layers of paint off of most surfaces of these legs but in the hard-to-access corners I just scuffed it up as best as I could with hand tools.


20181023-05.jpg

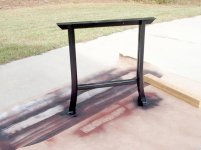
Primer...


20181023-06.jpg

...then the coat of black paint.


I hope to get some work done on the table top tomorrow.


Scott
 
Last edited:
OP
S

sbosecker

Well-known member
Joined
Sep 25, 2012
Messages
3,539
Location
Peachtree City, GA
Nice lesson on getting to the front handle hardware. Definitely make for a better resto job.


shortykorte,

Thanks for stopping by!

I agree that removing the hardware will make freshening up the exterior easier.

I was a bit surprised I had to drill our rivets on the second cabinet to get to where I could do that.

Best regards,

Scott
 
OP
S

sbosecker

Well-known member
Joined
Sep 25, 2012
Messages
3,539
Location
Peachtree City, GA
Wednesday - October 24, 2018

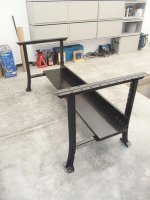
Last night before turning off the lights in the LBG I decided to used some fasteners to assemble the painted components of the LYON table.


20181024-01.jpg

OK, it's starting to come together.

Time to get cracking on the table's top.


20181024-02.jpg 20181024-03.jpg

Somewhere in the past a piece of wood was fastened into position under the table. I removed that and the table's end pieces which are held in place with countersunk machine screws & nuts.


20181024-04.jpg

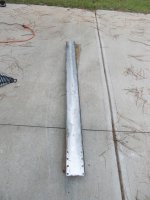
About a year ago I had purchased a stick of 1-1/2" square tubing and cut 4 pieces - each about 3 feet long - in the yard when I bought it. (Post 2092)

When I bought the table, the drawers were attached to the lip of the table top and supported - sort of - in the rear by the lower shelf of the table. A sloppy arrangement in my opinion.

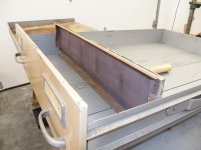
My intention is to use the tubing to stiffen the table top and also to provide mounting points for the LYON table's drawers.


20181024-05.jpg 20181024-06.jpg

In the Steel Supplier's yard I had used a portable bandsaw to cut the pieces. I needed to square up those ends and then cut them to the proper length.


Continued in next post...
 
OP
S

sbosecker

Well-known member
Joined
Sep 25, 2012
Messages
3,539
Location
Peachtree City, GA
Continued...


20181024-11.jpg 20181024-12.jpg

Once a piece was squared up on one end, I used one of the table's end pieces to locate the correct place to scribe a line on the tubing.


20181024-13.jpg 20181024-14.jpg

A bit of work with the Harbor Freight horizonal band saw and I had my 4 pieces of tubing cut to length.

The drawers will attach to the tubing as shown in the second picture.

I have quite a bit of work to do on the tubing yet. Holes need to be drilled for fasteners and access slots will need to be milled to allow a wrench to get to the fasteners.


20181024-15.jpg 20181024-16.jpg

I cleaned up the table's end pieces with the angle grinder.


Continued in next post...
 
Last edited:
OP
S

sbosecker

Well-known member
Joined
Sep 25, 2012
Messages
3,539
Location
Peachtree City, GA
Continued...

With the table's end pieces cleaned up it was time for some paint.


20181024-21.jpg 20181024-22.jpg

I used a couple of scrap pieces of wood to be used as supports while painting the end pieces.


20181024-23.jpg 20181024-24.jpg

Primed and painted - I just brought them into the LBG after drying outside for a couple of hours.


I hope to get some work done on the table top itself tomorrow.


Scott
 
Last edited:
OP
S

sbosecker

Well-known member
Joined
Sep 25, 2012
Messages
3,539
Location
Peachtree City, GA
Thursday - October 25,2018


Work on the LYON table refurbishment continued this morning but time was limited due to forecast rain and an upcoming multi-day social event.


20181025-01.jpg 20181025-02.jpg

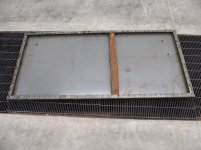
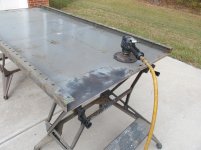
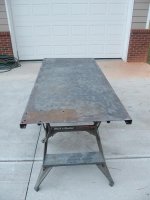
I got the table top outside onto a couple of Workmate work-stations. I got to work on the bottom of the table top with a D/A Sander and the angle grinder.


20181025-03.jpg

Some time with abrasives and the bottom was prepped.


20181025-04.jpg 20181025-05.jpg

Primed and painted the bottom as the skies were darkening.


20181025-06.jpg

My wife helped me bring the table top into the LBG where it could dry no matter what the weather did.


It will be a couple of days before I can return to the shop to continue this project.


Scott
 
Last edited:

drivesitfar

Well-known member
Joined
Oct 23, 2013
Messages
36,075
Location
Pacific Northwest
SB: I know you've got a few tractors inside the Lone Beech Garage, but wondering if you might be able to allocate a certain amount of space for PAINTING since the weather isn't always perfect outside?

I love LYON built benches and cabinets and your bench is really shaping up. nice work so far!!
 
OP
S

sbosecker

Well-known member
Joined
Sep 25, 2012
Messages
3,539
Location
Peachtree City, GA
SB: I know you've got a few tractors inside the Lone Beech Garage, but wondering if you might be able to allocate a certain amount of space for PAINTING since the weather isn't always perfect outside?

I love LYON built benches and cabinets and your bench is really shaping up. nice work so far!!

DrivesItFar,

Thanks for the kind words!

I hope, at some point, to have an area for painting in the LBG. For the moment, I'm lucky to have some splendid fall weather that allows me to paint outside.

Best regards,

Scott
 
OP
S

sbosecker

Well-known member
Joined
Sep 25, 2012
Messages
3,539
Location
Peachtree City, GA
Sunday - October 28, 2018

For the past few days I was in Pensacola, FL attending a reunion of the squadron I served with in the early 80's. Sea Stories were in abundant supply!

Returned home late-afternoon today...


20181028-01.jpg

...and refurbishment of the LYON table continued...

My wife helped me carry the table top from inside to outside. Quite a bit of prep work had been done to the top last year.


20181028-02.jpg

I just needed to hit the top with the D/A sander for a bit.


20181028-03.jpg 20181028-04.jpg 20181028-05.jpg

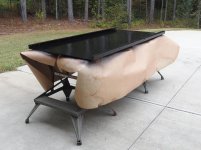
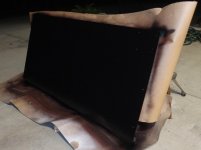
After the top had been cleaned up with abrasives, I asked my wife to come back out and help me set the table top on its side. This allowed me to prime and paint the table easier than if it had been sitting horizontal.

It was pretty dark when I finished the painting.


20181028-06.jpg

My wife helped me carry the top inside to dry.

I'm hoping I can get the machining work done on the tubing this week but - at the moment - it's not clear where I will be able to fit that in


Scott
 
Last edited:

drivesitfar

Well-known member
Joined
Oct 23, 2013
Messages
36,075
Location
Pacific Northwest
SB: yep i agree with 1/2 that you are doing well with that old Lyon steel table.

in case you see an old Lyon desk like this one you might want to pick it up. it does weigh about 300 pounds which is next to nothing for you to move around at the Lone Beech Garage, and hopefully you'll have help loading it. that's if you need one or might want it.

i'm just here to help give you some ideas and spend more of your hard earned cash. :)
 

Attachments

  • WP_20160805_005.jpg
    WP_20160805_005.jpg
    149.1 KB · Views: 66
  • navy desk cabinet maker 5 (2).jpg
    navy desk cabinet maker 5 (2).jpg
    153.6 KB · Views: 68
  • WP_20150417_013.jpg
    WP_20150417_013.jpg
    147.4 KB · Views: 72
OP
S

sbosecker

Well-known member
Joined
Sep 25, 2012
Messages
3,539
Location
Peachtree City, GA
Scott Great work on your table, it will come up a treat:thumbup:

SB: yep i agree with 1/2 that you are doing well with that old Lyon steel table.

in case you see an old Lyon desk like this one you might want to pick it up. it does weigh about 300 pounds which is next to nothing for you to move around at the Lone Beech Garage, and hopefully you'll have help loading it. that's if you need one or might want it.

i'm just here to help give you some ideas and spend more of your hard earned cash. :)


1/2 Cup & DrivesItFar,

Thanks for stopping by and for the encouragement on the LYON Table refurbishment!

I must say I think I need to continue to refurbish rather than acquire "treasures" for a while. I've got quite a few projects that need to be worked on.

I suspect my willpower will last until I see one of the LYON tables DrivesItFar posted.

Ha!


Best regards,

Scott
 
OP
S

sbosecker

Well-known member
Joined
Sep 25, 2012
Messages
3,539
Location
Peachtree City, GA
Friday - November 2, 2018


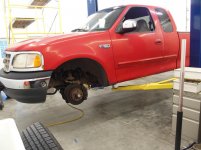
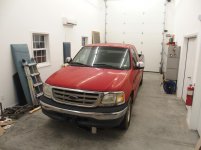
Yesterday I returned to the LBG to knock out some routine maintenance on my 19-year old pickup.


20181030-01.jpg 20181030-02.jpg 20181030-03.jpg

Tire rotation followed by...


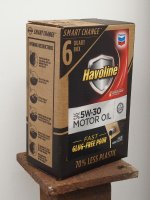
20181031-04.jpg 20181031-05.jpg

An oil change. The second picture is a new item I spotted in Walmart recently. A 6-quart box of oil. Apparently Walmart is the only vendor selling Havoline this way. I'm old enough to remember the quart oil cans you stabbed a nozzle into to dispense the oil so this is the latest in several innovations in motor oil containers.

I thought it might be difficult to get the oil out of the plastic bag inside the box but it actually worked pretty well.


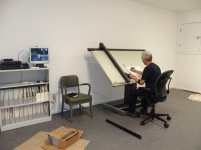
20181031-06.jpg 20181031-07.jpg

While the oil was draining out of my truck, I went up the stairs to the LBG's Mezzanine and started drawing. I'm sure some folks can just walk into a shop and start making stuff without thinking about it ahead of time. I generally need to puzzle out the problem in my head first. Sitting down at the drafting table helps me to work through the issues before I get into the shop.

I was drawing up the slots that I was going to need to mill into the 4 pieces of steel tube that will be added to the LYON table as it is refurbished.


Continued in next post...
 
OP
S

sbosecker

Well-known member
Joined
Sep 25, 2012
Messages
3,539
Location
Peachtree City, GA
Continued...


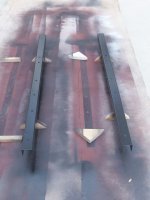
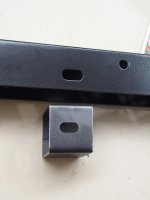
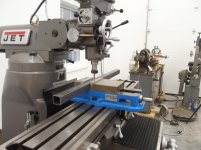
This afternoon I went out to the shop, plan in hand, with the goal of machining holes for fasteners and slots for tool access in some 1-1/2 inch square steel tubing. The LYON table needs something to fasten its drawer stacks to and I think the tubing will do the trick after some machining is accomplished.


20181101-11.jpg 20181102-12.jpg

I mounted a 5/16-inch end mill in an ER32 collet and did a test to see if this was going to work. I compared my effort to the slot cut into the LYON tables end pieces and it seemed to match pretty well.


20181102-13.jpg

So I got to work...


20181102-14.jpg

After a bit of time I had the lower faces of the tubing slotted for fasteners. The piece closest to the camera is the LYON table's end piece. I referred to it periodically as a reference.


20181102-15.jpg

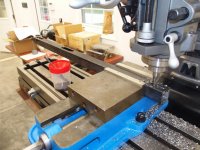
I took the ER32 Collet with the 5/16-inch end mill out of the milling machine and installed a 3/4-inch R8 collet with a 3/4-inch end mill. I did another test on some scrap tubing. It wasn't long enough to slot but I was able to plunge through the scrap piece.


20181102-16.jpg 20181102-17.jpg

I had to adjust my speeds and feeds (slower) from what I had calculated to get a decent finish on the edge of the slots. I also used some cutting oil during the plunge into the steel and that helped quite a bit.

…did I mention I really don't know what I'm doing?
It was a bit ugly at first but tweaking my feed rate seemed to help a lot.

Here's a short video of the JET Mill cutting a 3/4-inch slot...

Video


Continued in next post...
 
Last edited:
OP
S

sbosecker

Well-known member
Joined
Sep 25, 2012
Messages
3,539
Location
Peachtree City, GA
Continued...

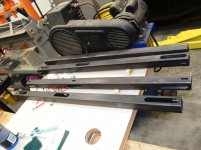
20181102-21.jpg

When I was finished with the milling, I had 2 left-hand pieces and 2 right-hand pieces.


20181102-22.jpg

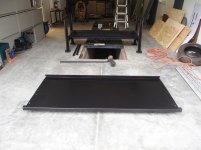
Here are the drawer stacks that came with the LYON table. I have already separated one of them from the top to see if my tube-support-scheme is going to work.


20181102-23.jpg

I slid a left-handed tube and a right-handed tube into the appropriate location under the LYON table.

My long suffering bride came out to the Lone Beech Garage to help me mount the single drawer to the two pieces of tubing. Without some way to support the drawer as it is being fastened to the tubes, it is at least a 2-person job and 3 might be more efficient than 2.

...but we got it installed. I wanted to make sure this support plan was going to work before I primed and painted the 4 pieces of tubing.


20181102-24.jpg 20181102-25.jpg

Some pictures from the sides showing how the large slots allow access to the tops of the fasteners. I'm going to have to put some sort of shim between the rear of the drawer frame and the support tube.

I'm still waiting to get a pie in the face... but I'm going to bed tonight thinking this is going to work!


Scott
 
Last edited:

drivesitfar

Well-known member
Joined
Oct 23, 2013
Messages
36,075
Location
Pacific Northwest
SB: you seem to be doing great using the old mill so whether you know exactly what you are doing or not I bet you'll get better every time you use it.

nice work on the Lyon table/bench. when you mentioned your long suffering bride I hope her health is ok or do you just not like asking her to help you in the LONE BEECH GARAGE?

keep up the great progress!!
 
OP
S

sbosecker

Well-known member
Joined
Sep 25, 2012
Messages
3,539
Location
Peachtree City, GA
Scot, well done.:thumbup:

SB: you seem to be doing great using the old mill so whether you know exactly what you are doing or not I bet you'll get better every time you use it.

nice work on the Lyon table/bench. when you mentioned your long suffering bride I hope her health is ok or do you just not like asking her to help you in the LONE BEECH GARAGE?

keep up the great progress!!


Thanks guys!

"long suffering bride"... I am pleased to report that my spouse's health is excellent.

I thought almost all wives, by generally being married to men, were by definition "long suffering". Ha!

When I asked my wife to come out and help me I had not yet realized the extent that gravity was not going to be my friend while positioning the drawer under the table and trying to line up the fasteners. As a result there was a bit of spousal standing around while I tried to find a cardboard box tall enough to hold the drawer in place.

I guess I was feeling guilty about some of her time being wasted when I wrote that line.

Best regards,

Scott
 
Last edited:
OP
S

sbosecker

Well-known member
Joined
Sep 25, 2012
Messages
3,539
Location
Peachtree City, GA
Saturday - November 3, 2018

This morning I went back out to the LBG and removed the drawer from the table/tubes. This was a much simpler task with gravity working for me!

Then I did something I should have done before fastening the drawer to the table/tubes last evening. I got out a couple of files and removed all the sharp edges that resulted from yesterday's milling operations.

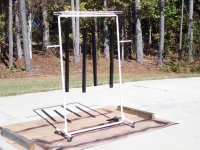
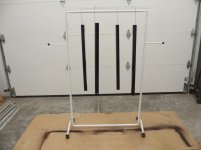
With the tubes ready for priming & painting I came back into the house and asked my wife if she could think of anything I could hang the tubes from while I painted them.

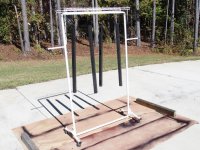
She thought about that for a moment and then led me upstairs to the attic. Back in a corner, surrounded by cardboard boxes, was a clothes hanging rack that hadn't fit into our laundry room's work flow.

It looked like it would be perfect for my painting needs and she said it was available for my use. I started moving boxes so as to extract it...


20181103-01.jpg

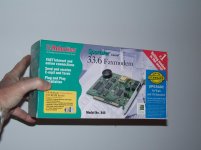
That's when I came across evidence that we needed to do some serious culling of "stuff" in the attic.


20181103-02.jpg 20181103-03.jpg 20181103-04.jpg

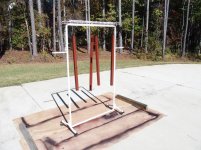
The rack worked great! I hung the tube on some wire hooks; primed the tubes and painted them.


20181103-05.jpg

Although it was a beautiful fall day, we're getting cooler than average temperatures for this time of the year. The paint might not have cured properly if I had left the rack outside all afternoon.

A bonus was the casters on the rack allowed me to easily roll the painted tubes into the Lone Beech Garage to dry in a warmer environment.

Next step in the LYON table refurbishment will be getting the drawer stacks cleaned up.

Scott
 
Last edited:
To avoid these ads, REGISTER NOW!
Top Bottom