To avoid these ads, REGISTER NOW!

Below 265 SQ/FT "you should knock it down" single car garage rescue

All workspaces below 265 squarefeet.
To avoid these ads, REGISTER NOW!

winnipegtibook

Well-known member
Joined
Jun 3, 2010
Messages
300
Location
100 miles from Tolstoi
Yes, the interior. Bare plywood has the feel of a working shop, the money and time spent on fine paint-work (for the record, I have no issues with paint, as I do have white corrugated steel in mine), but keeping the plywood reminds you that its a place to work, plus play. And that time could be put towards projects. I think the bare plywood just reinforces the "did it on the cheap" philosophy.
 
OP
O

old_smokey

Well-known member
Joined
May 16, 2018
Messages
412
Location
Manitoba
I’ve been busy since my last post!

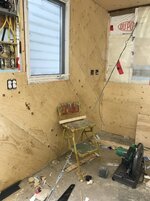
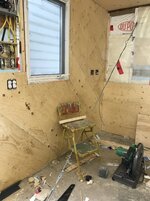
First off, I finished sheeting the ceiling and walls.

The longer east wall was a mostly straight forward affair. The north wall with the man door was more complicated as there was a lot to work around

We decided to sheet that wall with the plywood ata 45 degree angle. Since the building was pulled straight to the left, it naturally may want to fall back over to the right. With the sheets at an angle, the wood is being compressed against the grain, giving the wall more strength that simply relying on the strength of the plywood glue.

At the same time I added a layer of tight fitting 1” rigid foam insulation on the entire wall. This adds a little more rigidity to the wall, but more importantly means I don’t need poly vapour barrier. That leaves the studs exposed and available for glue. So that wall now has rigid foam, PL premium glue and a million screws on it. That should really help keep it plumb

f146f51f53f96fa2615c148807289cda.jpg
c20140dee8a07a9d5636c041cd174217.jpg

At the same time, I decided to move the cable I used to pull it straight, right up against the wall and leave it there permanently as a safety measure. I’m building a workbench and pegboard or shelving on that wall anyway, so it will be out of sight anyway. I figure better to have it and not need it, than need it and not have it. I used some leftover window bar angle iron for a floor bracket.

2e0c14d95f26c96ffc76ffa3dcba3ee8.jpg
709123acd790c2cf22182822bd3f5300.jpg
d6ad86375dfb27188dc6d81b9840c7f1.jpg
57da1521213ff4a7264020c315013576.jpg

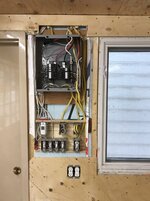
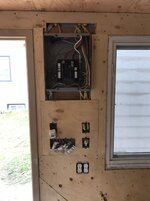
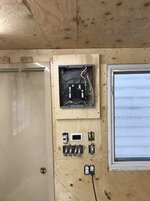
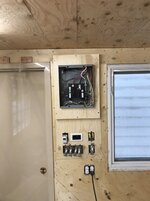
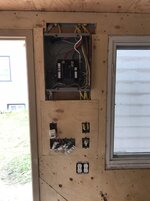
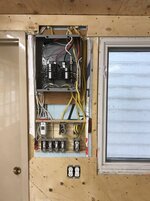
Next up was cutting all the little fiddly bits around the sub panel, switches and door. This was tricky and I didn’t get it all my first try. But it looks great now IMO.

5e047c2bd020796f57ac8118d8ff8920.jpg
ab25b7e2e70e942d0c6705d58bb6bfbb.jpg
bda870dc0b616ed1ae03e01c0e9b7f5b.jpg
d76f1bbe2d635ba1d0d671253156b594.jpg

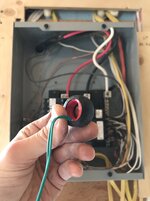
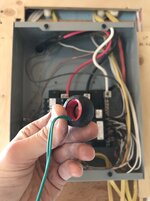
That little LCD screen is a power meter that displays current consumption as well as a running tally of kilowatt hours. It’ll be great for monitoring the cost of keeping this shop warm over winter! Super easy to integrate and install.

bc429736da9440ace09c17958f5b10a2.jpg

To the right in that empty box, I’m installing a Stelpro Maestro WiFi smart thermostat. I ordered it last week, and it’ll control a Stelpro spider ceiling heater. Now I can control and monitor the heating system from my phone! I hope that leads to cost savings and also a warm shop to walk into.

Oh I forgot about the car door! I finishing installing and tensioning the torsion spring. After two days of failed attempts, I finally discovered my problem. The instructions said ‘springs with a red painted end are installed on the left. Black springs on the right’. Mine had bright red painted bolts on the end, so I did the left. Turns out that was incorrect and there was a small black painted dot I didn’t see. I switched sides and my door opens beautifully now. Without an electric opener the top panel is a loose fit against the inner wall, so I need to address that soon. Otherwise I’m happy! My concrete job shows just a sliver of light leaking through on both ends, so I have a high spot in the center that needs to be ground down.
ae2cbcdd20b0cdb78ad8cd2ce2fa1f06.jpg

I think that brings me up to date. This week I’ll start planning out how I shim the floor level for the hardwood gym floor!

fda98420a02e33740695156cb86f7723.jpg


Sent from my iPhone using Tapatalk
 

Attachments

  • fda98420a02e33740695156cb86f7723.jpg
    fda98420a02e33740695156cb86f7723.jpg
    445.7 KB · Views: 1
  • ae2cbcdd20b0cdb78ad8cd2ce2fa1f06.jpg
    ae2cbcdd20b0cdb78ad8cd2ce2fa1f06.jpg
    187.4 KB · Views: 1
  • bc429736da9440ace09c17958f5b10a2.jpg
    bc429736da9440ace09c17958f5b10a2.jpg
    310.1 KB · Views: 1
  • d76f1bbe2d635ba1d0d671253156b594.jpg
    d76f1bbe2d635ba1d0d671253156b594.jpg
    490.8 KB · Views: 1
  • bda870dc0b616ed1ae03e01c0e9b7f5b.jpg
    bda870dc0b616ed1ae03e01c0e9b7f5b.jpg
    375.3 KB · Views: 1
  • ab25b7e2e70e942d0c6705d58bb6bfbb.jpg
    ab25b7e2e70e942d0c6705d58bb6bfbb.jpg
    395.6 KB · Views: 1
  • 5e047c2bd020796f57ac8118d8ff8920.jpg
    5e047c2bd020796f57ac8118d8ff8920.jpg
    430.9 KB · Views: 1
  • 57da1521213ff4a7264020c315013576.jpg
    57da1521213ff4a7264020c315013576.jpg
    444.1 KB · Views: 1
  • d6ad86375dfb27188dc6d81b9840c7f1.jpg
    d6ad86375dfb27188dc6d81b9840c7f1.jpg
    333.1 KB · Views: 1
  • 709123acd790c2cf22182822bd3f5300.jpg
    709123acd790c2cf22182822bd3f5300.jpg
    421.8 KB · Views: 1
  • 2e0c14d95f26c96ffc76ffa3dcba3ee8.jpg
    2e0c14d95f26c96ffc76ffa3dcba3ee8.jpg
    465.2 KB · Views: 1
  • c20140dee8a07a9d5636c041cd174217.jpg
    c20140dee8a07a9d5636c041cd174217.jpg
    469.7 KB · Views: 1
  • f146f51f53f96fa2615c148807289cda.jpg
    f146f51f53f96fa2615c148807289cda.jpg
    403.2 KB · Views: 3
OP
O

old_smokey

Well-known member
Joined
May 16, 2018
Messages
412
Location
Manitoba
Today I started the most exciting part possibly... the floor!

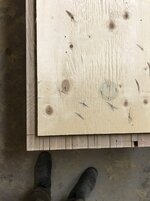
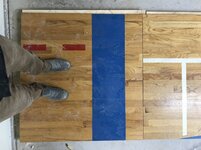
If you remember, back in August I got a big pile of oak gym flooring cut out in 4x7 panels, on two layers of 1/2” plywood. Since my pad is awful and I can’t afford to replace it, and this flooring was free, I’m gonna shim it flat and have a wood floor!

My plan is to make lap joints along the edges of the panels. I might add some 1/2” rigid foam under the floor for added insulation too, not sure yet.

To level it, I’m thinking I’ll level and fasten some runners along the walls, then run a straight edge across the width of the garage at the appropriate height. Then shim from the floor up to the bottom of the straight edge every 16” in a grid pattern. That’ll be easier than full width sleepers and just as strong I think. The gym floor was originally installed on floating rubber pucks about that width, and it was solid.

I’ll mark out the grid on the floor, lay down the rigid foam, then the wood flooring, and then screw the floor down through those shims with tapcons. I’ll pre-drill the shims and glue them to the floor first so they don’t get twisted outta sorts during that process.

f0d54541a8c0095ffde4d3af3190dcfa.jpg

fed0d7e8d36e7a1926e42d207f5d6a3f.jpg

I hope to have all the panels prepped by Sunday. It’ll take me longer to shim the pad up though. But complete floor should be doable by mid November


Sent from my iPhone using Tapatalk
 

Attachments

  • f0d54541a8c0095ffde4d3af3190dcfa.jpg
    f0d54541a8c0095ffde4d3af3190dcfa.jpg
    407.9 KB · Views: 2
  • fed0d7e8d36e7a1926e42d207f5d6a3f.jpg
    fed0d7e8d36e7a1926e42d207f5d6a3f.jpg
    507 KB · Views: 3
OP
O

old_smokey

Well-known member
Joined
May 16, 2018
Messages
412
Location
Manitoba
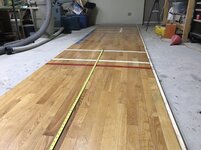
More progress on the oak gym flooring tonight. I finished the center strip of floor panels.

I’ll have three strips of panels running from to back. I cut one panel in half so I’ll have a half panel on both ends, meaning I won’t have any point where four corners meet im the floor.

It’s absolutely a two person job due to the weight of the panels, and is a bit rough on the skil saw due to the embedded staples, but were making good time. Im hoping we’re finished by next week and ready to shim the pad.

I also got my heater and thermostat today. I ordered a Stelpro Maestro line voltage WiFi thermostat and a Spider 4000w ceiling heater. Got them both on a killer sale, saved maybe $150 on the pair. They both seem really well made, have good reviews too. I’ll see about installing those in the next week or two as it’s starting to snow here and there!

b3bb0dc03bfe9e1c55ad3cb9860f3727.jpg
ce2a15cd3fae46fa4dc0498046e646d4.jpg
9f7bb7c1afdee377aefada0d56ca8ec1.jpg


Sent from my iPhone using Tapatalk
 

Attachments

  • ce2a15cd3fae46fa4dc0498046e646d4.jpg
    ce2a15cd3fae46fa4dc0498046e646d4.jpg
    460.5 KB · Views: 1
  • b3bb0dc03bfe9e1c55ad3cb9860f3727.jpg
    b3bb0dc03bfe9e1c55ad3cb9860f3727.jpg
    501.7 KB · Views: 1
  • 9f7bb7c1afdee377aefada0d56ca8ec1.jpg
    9f7bb7c1afdee377aefada0d56ca8ec1.jpg
    569.1 KB · Views: 1

Warrenator

Well-known member
Joined
May 31, 2008
Messages
781
Location
Newberg, OR
Might be too late here, but I wonder if you could float the floor on large sheets of polystyrene foam.... like 1/2 inch. Might help with the heat.

All looks really great. I love the turnbuckle against the wall, kinda like a constant reminder of the project. If it were me I'd pat myself on the back every time I saw it, and think "I can fix anything!"
 
OP
O

old_smokey

Well-known member
Joined
May 16, 2018
Messages
412
Location
Manitoba
Might be too late here, but I wonder if you could float the floor on large sheets of polystyrene foam.... like 1/2 inch. Might help with the heat.

All looks really great. I love the turnbuckle against the wall, kinda like a constant reminder of the project. If it were me I'd pat myself on the back every time I saw it, and think "I can fix anything!"

Thanks! Honestly I was a bit bummed to have the cable permanently attached, it felt a bit like a failure, but I've changed my tune since then. I'm pretty confident the building won't move again, but given I have a steel man-door, if the building does shift at all, it's not like I can trim the door to close smoothly like a wood door. Better to have the cable here as a safety mechanism. Plus it'll be hidden anyway.

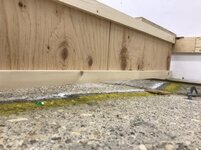
As to your suggestion of the floor, I actually am planning on running 1/2" rigid foam under the wood floor to help with insulation. However I can't lay it flat on the pad, and then the wood flat on top. The concrete pad is way, way to uneven. The East side drops down about 2.25" or so. The previous owner lifted the building, poured a new footing of sorts on top of the old pad, then dropped the building back down. For reasons beyond me, they only poured under the walls, leaving the rest of the floor sunken down. I'd fill it in with concrete myself, but it's out of my budget, and probably would crack badly very quickly.

My plan is to level with wood shims and/or sleepers, and fill the spaces between with rigid foam. If I do a careful job and seal along the edges, it will also act as a vapour barrier, hopefully preventing the floor from getting too out of whack over time.
 
OP
O

old_smokey

Well-known member
Joined
May 16, 2018
Messages
412
Location
Manitoba
Well I decided to paint today. Two cans of white primer followed by some flat white garden variety paint. The initial coat really soaked into the wood, glad I decided to actually use primer. It’s very very bright inside now!

50005743343587b4bbd3e688541c99ee.jpg

I also hooked up my WiFi system in order to test the thermostat and heater. Getting the Ethernet fittings together was a testing experience, but it’s all good now. I used an old Apple airport express for WiFi, as well as piping in music soon.

The thermostat hooked up easily. With the heater roughed in so I could try (still need to finish the heater mounting bracket inside the recessed ceiling pocket), I was able to control the heat remotely and bring it up from 3C to 13C in a few minutes. It stayed warm inside all day after that.

Tomorrow I’m back on the flooring task.


Sent from my iPhone using Tapatalk
 

Attachments

  • 50005743343587b4bbd3e688541c99ee.jpg
    50005743343587b4bbd3e688541c99ee.jpg
    449.8 KB · Views: 2
Last edited:
OP
O

old_smokey

Well-known member
Joined
May 16, 2018
Messages
412
Location
Manitoba
Progress on the floor:

I went to my Dad’s shop and we worked on a system for shimming the floor level, as well as insulating it.

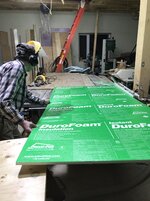
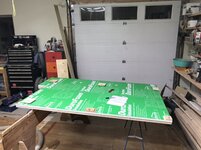
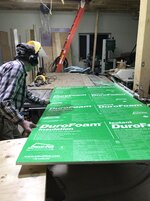
My plan is to use Plastifab Durofoam 3/4” under the wood floor. It’s the same stuff I used in the ceiling, with a reflective film on one side.

Initially I was planning on shimming the floor level with strips, then laying the foam down, then the wood. Problem is, that would be really difficult because of the size and weight of the wood panels. So I have a plan…

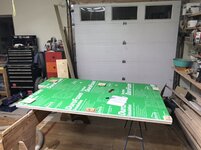
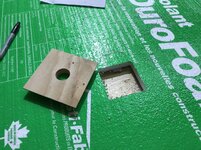
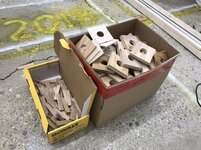
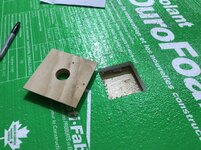
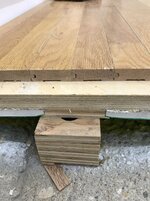
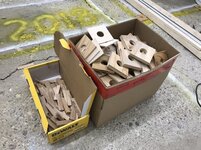
I’m going to apply the foam panels to the back of the wood panels first. The foam will be cut to the same size as the wood panels. I cut ten 4x4” “top hat” wood blocks with a 1/2” lip at the top, which will essentially act as a retainer for the foam, as well as a fastening point for the shims. So now the foam will be held tight up against the wood floor, providing an air and water drainage gap between the foam and the concrete.

1e460e539181428a6551a2bef45ce1f6.jpg

Testing:
e15ec7cfb253e50f9dbbfcb26fd28439.jpg

I’m going to run four of these along each long edge, and two in the middle. So ten blocks per panel. Each will have a Tapcon running through the gym floor, sub floor, shim stack and then concrete. I might add additional shims, but a quick test shows that ten shims per panel feels quite solid.

So with my 9 gym floor panels insulated, with 10 shims pre applied in specific locations, all I need to do is fasten the remaining shims needed to level the floor to the concrete pad. Then it’s a simple matter of laying the wood flooring down onto the pre-applied shims.

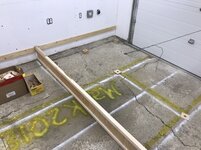
I have a laser level that I’ll be using to mark up along the walls. Then I’ll screw some runners along the two long walls, and use this wood “I-beam” as a reference.

b29d9090902e70f94c4695bdec108955.jpg

I’m going to mark the floor with paint anywhere I want a shim stack, build it up to grade using the I-beam as my reference point, and then note the location of the shim stack so I can make sure it lines up with the ‘top hat’ foam retainer shims I showed earlier.

As long as I’m precise with my measuring, this should make it a “drop in” process. It’s much more work on the measuring side of things, but if I get it right, there will be zero messing about. I carry the wood panels in, lay them down, screw them into the pad.


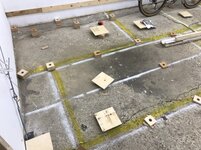
Last update - I vacuumed and cleaned the floor so my paint marking would stick. Look at all these massive cracks I discovered buried under the fine concrete dust!!

721722a78d320b72fc75b48db4873763.jpg


Sent from my iPhone using Tapatalk
 

Attachments

  • 721722a78d320b72fc75b48db4873763.jpg
    721722a78d320b72fc75b48db4873763.jpg
    519.2 KB · Views: 2
  • b29d9090902e70f94c4695bdec108955.jpg
    b29d9090902e70f94c4695bdec108955.jpg
    500.8 KB · Views: 1
  • e15ec7cfb253e50f9dbbfcb26fd28439.jpg
    e15ec7cfb253e50f9dbbfcb26fd28439.jpg
    581.9 KB · Views: 1
  • 1e460e539181428a6551a2bef45ce1f6.jpg
    1e460e539181428a6551a2bef45ce1f6.jpg
    600.1 KB · Views: 3

amkluttz

Well-known member
Joined
Sep 8, 2014
Messages
279
Location
Concord, NC
I've been following along for the entire thread and can't wait to see your gym floor go down. I don't remember, did you ever mention the dimensions of your garage?
 
OP
O

old_smokey

Well-known member
Joined
May 16, 2018
Messages
412
Location
Manitoba
Thanks guys

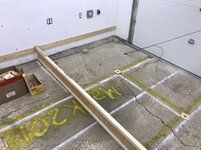
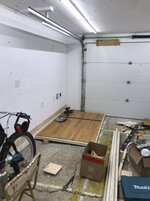
Last night I made small but important step. I used a laser level to mark the walls, then screwed in a row of slats on each long wall. Looks like the high point is in the middle, with a out 3/4” variance to the east of center, and it slopes down to almost 2.5” in the north west corner!

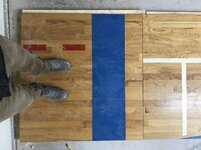
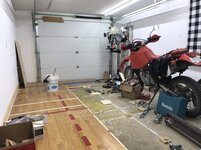
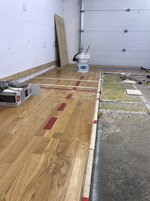
Next I outlined where my floor panel edges will be using tape and paint. Nice coincidence was that the tape was the exact width of my lap joints. So I am able to mark where the edge of the subfloor will be vs the finished hardwood. Now I can pre apply shims where the underhanging subfloor will be, drive tapcons through that, and cover the lip and screw heads with the next sheet.

Hard to describe in words, but you’ll see in a pic within the next two weeks.

ccbab8cbbfdc643d3ea44f276f3e6ae5.jpg

Tonight I’ll pull the masking tape off, cut a pile of 4x4 shims of various plywood thicknesses and start building it up.


Sent from my iPhone using Tapatalk
 

Attachments

  • ccbab8cbbfdc643d3ea44f276f3e6ae5.jpg
    ccbab8cbbfdc643d3ea44f276f3e6ae5.jpg
    409.6 KB · Views: 4
OP
O

old_smokey

Well-known member
Joined
May 16, 2018
Messages
412
Location
Manitoba
I've been following along for the entire thread and can't wait to see your gym floor go down. I don't remember, did you ever mention the dimensions of your garage?

Glad you're enjoying the project. It's a first for me and I've been learning a huge amount between my Dad and just going for it.

The garage is a 12x20' (exterior).

I expect to have the concrete floor shimmed next week. Then I'll pickup the floor insulation and start installing everything one piece at a time - fit the insulation to the gym flooring at my Dad's shop (that's where I'm storing the floor at the moment) haul a panel over, and finish fit it here. Should go pretty quickly once I'm in a rhythm.
 

amkluttz

Well-known member
Joined
Sep 8, 2014
Messages
279
Location
Concord, NC
Glad you're enjoying the project. It's a first for me and I've been learning a huge amount between my Dad and just going for it.

The garage is a 12x20' (exterior).

I expect to have the concrete floor shimmed next week. Then I'll pickup the floor insulation and start installing everything one piece at a time - fit the insulation to the gym flooring at my Dad's shop (that's where I'm storing the floor at the moment) haul a panel over, and finish fit it here. Should go pretty quickly once I'm in a rhythm.


I was curious because I have a 12'x22' that I keep my SV650 in. My problem is that I try to cram too much in to it and it makes it hard to maneuver around the bike. With a 30" deep work bench on one side and a 19" deep toolbox on the other I find myself sliding between the bike's bar end mirrors and the work bench or tool box. I'm very interested to see how you set your shop up.

When I first heard you were going with a wood floor versus concrete I thought you were crazy. I've changed my mind and am excited to see how this floor, and the whole shop, turn out. You've done a lot of good work on this place! I also think painting it white was a great idea. I put up OSB in half of my shop and painted it white and it made such a big difference in brightness and the feeling of the place.


Andy
 
OP
O

old_smokey

Well-known member
Joined
May 16, 2018
Messages
412
Location
Manitoba
I was curious because I have a 12'x22' that I keep my SV650 in. My problem is that I try to cram too much in to it and it makes it hard to maneuver around the bike. With a 30" deep work bench on one side and a 19" deep toolbox on the other I find myself sliding between the bike's bar end mirrors and the work bench or tool box. I'm very interested to see how you set your shop up.

When I first heard you were going with a wood floor versus concrete I thought you were crazy. I've changed my mind and am excited to see how this floor, and the whole shop, turn out. You've done a lot of good work on this place! I also think painting it white was a great idea. I put up OSB in half of my shop and painted it white and it made such a big difference in brightness and the feeling of the place.


Andy
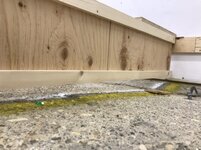
I also thought I was crazy for putting in a wood floor for a while hah! I mean, who puts a wood floor in a garage? But I've obviously come around since. I think it'll be a comfortable surface in the winter, give me a flat floor for my toolbox, workbench and bikes to sit on, and is just pretty cool. Plus given the fact it was free, why not give it a try.

My plan is to run a 30" deep workbench along the wall with the smaller window. Basically from the man door to the wall. Then my toolbox and other larger tools along the East wall, and keep the West wall with the big window completely clear. I think that should be enough room to walk all the way around the bike without getting caught on anything, but it will definitely be cramped. Once I have more than two bikes in there, who knows. I really can't afford to have anything extra stored in there, like lawncare stuff. Not sure where I'm going to hide that stuff until I build a shed or something.
 
OP
O

old_smokey

Well-known member
Joined
May 16, 2018
Messages
412
Location
Manitoba
Started working on the floor shimming last night.

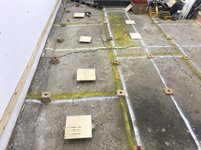
I cut a box full of shims from various thickness of plywood. Using different combinations I should be able to shim to within 1/16”. I cut some shims for the shims (hah!) in order to get the stacks level.

ecd08a411172622a39dc16a301d5770f.jpg

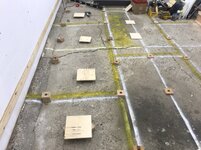
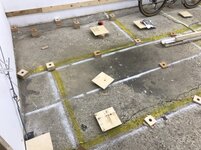
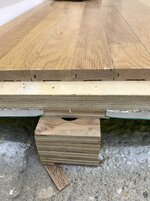
My intention is to run 4 shims along each wood floor panel long edge, and two in the centre. So 10 per panel. That puts a contact point about every 2.5 feet. That feels pretty solid, no major bouncing. These shims go straight from the concrete pad, through the rigid foam insulation, and to the plywood subfloor/hardwood floor panels.

I’m going to add additional shims with a much larger foot print in any areas I suspect might need more support, like under a heavy toolbox, that won’t travel all the way through the rigid foam. Something like a 10x10” block that spreads the weight across a large area of the insulation so it isn’t crushed. That should really help reduce any chance of bounce.

I have no idea if/how much this floor will move from frost. Based on how it looks, I suspect it’ll play a few games by spring. I’m hoping it doesn’t mess up the floor too badly, but no way of knowing at this point.

I put down the first 8 shim stacks, starting at the car door. It ranged from 1/8” to about 2.5” out.

153320c8ee6b4e784e52fae0a6a8f41e.jpg
08cd865aad3a55111751a46fee2215cf.jpg
60fb2e5bb44303dc5ea230abba3347ec.jpg

It’s pretty quick work - I locate the bottom shim according to the painted lines, level it, then stack extra shims until it hits my reference board. Should be done the whole garage over the next couple evenings.


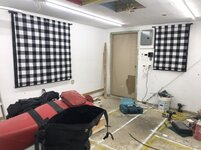
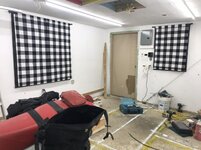
Also, my Mom made some nice curtains out of spare fabric. Sure beats that ratty old tarp I had hanging over the window!

3fd24e1c97d6e243618833269e048c55.jpg


Sent from my iPhone using Tapatalk
 

Attachments

  • 08cd865aad3a55111751a46fee2215cf.jpg
    08cd865aad3a55111751a46fee2215cf.jpg
    668.6 KB · Views: 1
  • 153320c8ee6b4e784e52fae0a6a8f41e.jpg
    153320c8ee6b4e784e52fae0a6a8f41e.jpg
    461.4 KB · Views: 1
  • ecd08a411172622a39dc16a301d5770f.jpg
    ecd08a411172622a39dc16a301d5770f.jpg
    596.4 KB · Views: 1
  • 60fb2e5bb44303dc5ea230abba3347ec.jpg
    60fb2e5bb44303dc5ea230abba3347ec.jpg
    479.8 KB · Views: 1
  • 3fd24e1c97d6e243618833269e048c55.jpg
    3fd24e1c97d6e243618833269e048c55.jpg
    366.8 KB · Views: 2
OP
O

old_smokey

Well-known member
Joined
May 16, 2018
Messages
412
Location
Manitoba
Would a layer of self leveling concrete be easier to get the old floor leveled out?

Easier yes, but way more expensive. I would need a huge amount to get the floor level. And given how many cracks are in the pad, the new pour would inevitably just crack as well. I priced it out once a few months ago, I think I'd need over $1,000 in levelling compound :shocking: Another problem is that it would be close to 3" thick in the lowest spot, and most levelling compound has a max thickness of 1/2" or so. So I'd need to pour regular concrete over the old pad, and then levelling on that.

At that point, I may as well tear the pad out and replace it. I'm doing it this way because it's only costing me a tube of PL Premium. All the shims are from scrap wood. And it'll only take me a few evenings to get it finished.
 
To avoid these ads, REGISTER NOW!
OP
O

old_smokey

Well-known member
Joined
May 16, 2018
Messages
412
Location
Manitoba
Getting super close to putting the first gym panel down. I’m almost done shimming the floor, but ran out of PL with maybe 5-8 left.

I’m using 4x4” shims, PL’d to the floor, that will pass through rigid foam insulation and into the 1” plywood subfloor, about 8 per panel, with a tapcon in each. Then I’m putting much larger shims, about 10x10, that the insulation and subfloor will rest directly against, just to reduce flex and bounce in the suspended floor. No tapcon or screws in these. I put extras where i plan to put my heavy tools and tool box.

Next up I’ll start prepping the remaining floor panels and start installing them within the next week or so!

80d696d1b1041af39575d0f115d6e5e4.jpg

da5c6c002795712417e9266638181bec.jpg
3b984630b6a1a063b18a85db9a96834c.jpg


Sent from my iPhone using Tapatalk
 

Attachments

  • 3b984630b6a1a063b18a85db9a96834c.jpg
    3b984630b6a1a063b18a85db9a96834c.jpg
    359.9 KB · Views: 3
  • da5c6c002795712417e9266638181bec.jpg
    da5c6c002795712417e9266638181bec.jpg
    533 KB · Views: 1
  • 80d696d1b1041af39575d0f115d6e5e4.jpg
    80d696d1b1041af39575d0f115d6e5e4.jpg
    508.2 KB · Views: 4

larry_g

Well-known member
Joined
Apr 28, 2007
Messages
16,920
Location
oregon
Have you done anything to the shims that are on the concrete floor to prevent then from rotting when the moisture level rises? I would think you'd at least want the bottom of the shim pack to be pressure treated. Do you have a plan to vent the area between the concrete and the flooring panels? If you have no venting then I'd worry about mold and other problems.

lg
no neat sig line
 
OP
O

old_smokey

Well-known member
Joined
May 16, 2018
Messages
412
Location
Manitoba
Great idea regarding venting. Technically this won't be air tight, there will be a gap all the way around the edge, and along the car-door wall especially. But it would be pretty easy to add some grates or something in the floor.

The shims have a bit of preservative on the bottom, stuff I used for sealing end grain on pressure treated wood.

Using all treated wood would have been better for long term use, but I'm really not sure if this floor will last long enough for any rot to occur. Obviously I hope it lasts a long time, but we'll see.

Then there's the fact that the walls have no treated wood anywhere, and all the bottom plates show no rot anywhere. I'm confident it won't be caving in any time soon. But I do agree about the mold comment, I'll add some air flow in there somehow.
 
OP
O

old_smokey

Well-known member
Joined
May 16, 2018
Messages
412
Location
Manitoba
Finished the final shimming tonight. I added additional support right under the future workbench legs, as well as the entire east wall where my tools will be, and the center where most of the work will be done. It should be nice and firm.

ac64cb0b80101d1a1c1882c1fa463f83.jpg

Then I finished up just about all the remaining electrical. Wired up about ten or twelve more plugs, plus the heater. The only thing I have left is a GFCI outside, and the smoke detector.

Heater was a breeze - modified the dump-sourced shroud so it was flat on top, screwed the heater bracket to it, fitted the whole assembly to the ceiling and bam - I’ve got heat!

69ae3a4465b207bc5deb83b5206923f8.jpg
1ac87d4c7251b5710a57600e4fc95bad.jpg
f58b5ea1d2f7f31f373411c28ef1a1ac.jpg


Sent from my iPhone using Tapatalk
 

Attachments

  • 1ac87d4c7251b5710a57600e4fc95bad.jpg
    1ac87d4c7251b5710a57600e4fc95bad.jpg
    367.7 KB · Views: 1
  • f58b5ea1d2f7f31f373411c28ef1a1ac.jpg
    f58b5ea1d2f7f31f373411c28ef1a1ac.jpg
    299.6 KB · Views: 1
  • 69ae3a4465b207bc5deb83b5206923f8.jpg
    69ae3a4465b207bc5deb83b5206923f8.jpg
    373.9 KB · Views: 1
  • ac64cb0b80101d1a1c1882c1fa463f83.jpg
    ac64cb0b80101d1a1c1882c1fa463f83.jpg
    608.8 KB · Views: 3
OP
O

old_smokey

Well-known member
Joined
May 16, 2018
Messages
412
Location
Manitoba
"you should knock it down" single car garage rescue

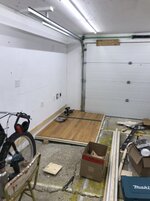
Big step forward last night, the first bit of flooring went down!

We're starting in the back corner and working our way across to the man door. With the painted lines we put down earlier, it's pretty fast and easy to measure the location of each stack of shims. I thought that would take much more time, so I'm happy.

Back at my Dad's shop we cut the panel to final size, leaving about a 1/4" gap to the wall. I really don't want to be fussing with a tight fit with these heavy beasts. A tiny gap will allow for expansion, shifting, maybe provide a little bit of ventilation under it too.

Next we cut the 3/4” Durafoam to match the panel, and lay it against the underside of the wood floor. Then mark the location of the centre of each stack of shims as per our earlier measurements, and use a small router and a jig/template to cut a nice clean square out.

If you remember a while back, I cut a pile of ‘top hat’ shaped shims that will hold the foam tight against the wood floor. Those go in all the little foam cutouts. Once those were screwed down, it was time to install!
6dff5329bc103596a4f8333da763db80.jpg
b19398269aa98bb12bb15ab65f60b857.jpg
4d2a9230860b73c400db44698b257730.jpg


I’m pleased to say everything worked great. All the ‘top hat’ shims installed under the floor lined up with the stacks glued to the slab. The floor felt really nice and firm. No bouncing, which was my biggest concern. We have a nice consistent 1/4” gap along the wall too.
2fe8260785c387db73566943703a184b.jpg
89a7ac0aa1822a00186c5d5e9f6b5692.jpg
https://uploads.tapatalk-cdn.com/20181106/5b963ee5a717e376e921c3528c09d421.jpg

I’m going to install all the panels without anchors first to make sure it all fits properly, then drive all the tapcons down through the shims, and wood screws along the lap joints. Tonight I’m aiming to have the entire East 1/3 side of the shop completed. Should be finished within about a week!

I’ll also need to make a small ramp to transition from the concrete to the top of the wood floor as it’s quite a difference in height, but that’s for later.


Sent from my iPhone using Tapatalk
 

Attachments

  • 2fe8260785c387db73566943703a184b.jpg
    2fe8260785c387db73566943703a184b.jpg
    350.1 KB · Views: 3
  • 4d2a9230860b73c400db44698b257730.jpg
    4d2a9230860b73c400db44698b257730.jpg
    660.4 KB · Views: 1
  • b19398269aa98bb12bb15ab65f60b857.jpg
    b19398269aa98bb12bb15ab65f60b857.jpg
    444.4 KB · Views: 1
  • 6dff5329bc103596a4f8333da763db80.jpg
    6dff5329bc103596a4f8333da763db80.jpg
    490.7 KB · Views: 1
  • 89a7ac0aa1822a00186c5d5e9f6b5692.jpg
    89a7ac0aa1822a00186c5d5e9f6b5692.jpg
    552.1 KB · Views: 3
OP
O

old_smokey

Well-known member
Joined
May 16, 2018
Messages
412
Location
Manitoba
"you should knock it down" single car garage rescue

Making fast progress now. Just over 1/3 done the floor. This first row took a bit longer to get dead straight, but it’s important in order for the rest of the panels to fit tight.

2971db701036826ee0aa8c0a8dbe165c.jpg

bb4b9d9142168f5594e16647343ee270.jpg

1c5a60eca2102a6b997330e993b63d94.jpg

That wide angle distorts really bad but you get the idea. Tomorrow the center strip goes in!

35149cb2043df9b17a440eefe5e3e947.jpg
Sent from my iPhone using Tapatalk
 

Attachments

  • 2971db701036826ee0aa8c0a8dbe165c.jpg
    2971db701036826ee0aa8c0a8dbe165c.jpg
    591.1 KB · Views: 3
  • bb4b9d9142168f5594e16647343ee270.jpg
    bb4b9d9142168f5594e16647343ee270.jpg
    440.1 KB · Views: 1
  • 1c5a60eca2102a6b997330e993b63d94.jpg
    1c5a60eca2102a6b997330e993b63d94.jpg
    483.3 KB · Views: 1
  • 35149cb2043df9b17a440eefe5e3e947.jpg
    35149cb2043df9b17a440eefe5e3e947.jpg
    550.2 KB · Views: 2

wasfast

Well-known member
Joined
Apr 10, 2014
Messages
874
Location
San Diego CA
You mentioned securing the floor after installation but as robust and heavy as it is, I really doubt you'll need to. It sure looks nice!

What's the plan for the transition from the floor under the garage door outside?
 
OP
O

old_smokey

Well-known member
Joined
May 16, 2018
Messages
412
Location
Manitoba
You mentioned securing the floor after installation but as robust and heavy as it is, I really doubt you'll need to. It sure looks nice!

What's the plan for the transition from the floor under the garage door outside?

True, probably not required, but I'm going to anyway to minimize creaking and squeaks, as well as the chance that an individual sheet twists or bows, causing a tripping hazard along the joint edges. Either way, this is one seriously robust floor :lol_hitti

I do have a plan for the transition. I'm going to cut that panel back a few inches and build a ramp that ties into the sheet. It will basically be like a two-step ramp from outside. First up the existing concrete ramp outside to the door, where it levels off for about 6 inches, then another ramp up to the top of the flooring. Same idea for the man-door.
 
OP
O

old_smokey

Well-known member
Joined
May 16, 2018
Messages
412
Location
Manitoba
Cost for this floor installation is:
- flooring: FREE!
- insulation: $120 (Canadian)
- PL Premium x2: $14
- Tapcons, 25x3", 25x3.75", 10x5": $50
- Box of Fin screws for along the lap joints: $12

TOTAL:$196.

Still need to buy some foam to wedge in along the outside edges. Maybe a bit of rubber matting for the ramp by the big door.

- Time investment.....err...rather substantial haha.
 
OP
O

old_smokey

Well-known member
Joined
May 16, 2018
Messages
412
Location
Manitoba
Another late night, but got the next 1/3 down.


I tapcon’d the first 1/3 of the floor but I think I’m going to dial back on that for the rest. It’s overkill. I wanted to do that initially because the sheets had bowed slightly when they were removed from the gym. Now they lay flat. Using screws along all the lap joints is enough to keep the seems flush. I have a schematic if the location of every shim stack so I can always drive a few in if a sheet bows badly down the line.

More tonight, possibly the last evening of major floor work!
efb6d78dce7456413a8c5541b0f0f4e3.jpg

ad93af709d8e68e0b4d54b70c215ab06.jpg


Sent from my iPhone using Tapatalk
 

Attachments

  • ad93af709d8e68e0b4d54b70c215ab06.jpg
    ad93af709d8e68e0b4d54b70c215ab06.jpg
    535.2 KB · Views: 2
  • efb6d78dce7456413a8c5541b0f0f4e3.jpg
    efb6d78dce7456413a8c5541b0f0f4e3.jpg
    601.3 KB · Views: 2
OP
O

old_smokey

Well-known member
Joined
May 16, 2018
Messages
412
Location
Manitoba
Almost done! The last panel goes in tonight. These sure take longer than expected to install. Getting the seams perfectly flush takes lots of little tweaks but is worth it.

599a941ab7a0a93d624d0b38517d7d87.jpg

f6167d5ee148a1043a114ecfd076628e.jpg

fd6176f490087a93164a793cd9d1b37e.jpg

I’ll wrap up the last piece tonight then take a break for a few days hah. Been working till midnight every night after coming home from the day job. Next week I’ll start bringing some tools in, including my uncles old Snap On tool chest I recently acquired. That’ll be a project of its own.


Sent from my iPhone using Tapatalk
 

Attachments

  • 599a941ab7a0a93d624d0b38517d7d87.jpg
    599a941ab7a0a93d624d0b38517d7d87.jpg
    419.9 KB · Views: 2
  • fd6176f490087a93164a793cd9d1b37e.jpg
    fd6176f490087a93164a793cd9d1b37e.jpg
    407.3 KB · Views: 1
  • f6167d5ee148a1043a114ecfd076628e.jpg
    f6167d5ee148a1043a114ecfd076628e.jpg
    491.8 KB · Views: 2
OP
O

old_smokey

Well-known member
Joined
May 16, 2018
Messages
412
Location
Manitoba
Drum roll!

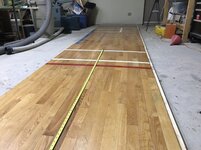
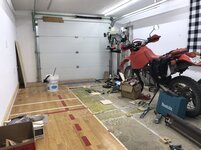
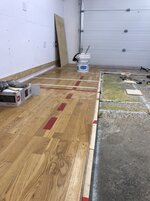
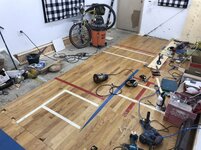
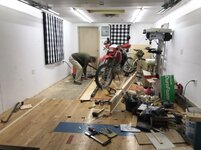
Floor is in! And it looks and feels great. I have a couple small holes to fill, as well as entry/exit ramps to build for both doors, but at this point I can shift my focus to building out the workshop, not the building itself.

e26baa1d7223758db1a5a2de62a5879a.jpg

80b20419be2c1fea7e996ea07d7182ec.jpg

857e77495bab42255be353458201ad28.jpg

I figure this floor took my dad and I around 80+ hours to put down. There was a lot of fussing to get the panels to fit perfectly. But it was worth it, every seam is nice and tight.

4384dfd9707653e4c62a3bdeba5b34c0.jpg

Next up is making the ramps, planning the workbench, and movin in!


Sent from my iPhone using Tapatalk
 

Attachments

  • 857e77495bab42255be353458201ad28.jpg
    857e77495bab42255be353458201ad28.jpg
    300.2 KB · Views: 1
  • e26baa1d7223758db1a5a2de62a5879a.jpg
    e26baa1d7223758db1a5a2de62a5879a.jpg
    307.4 KB · Views: 1
  • 80b20419be2c1fea7e996ea07d7182ec.jpg
    80b20419be2c1fea7e996ea07d7182ec.jpg
    393.7 KB · Views: 1
  • 4384dfd9707653e4c62a3bdeba5b34c0.jpg
    4384dfd9707653e4c62a3bdeba5b34c0.jpg
    588.3 KB · Views: 1

captain14

Well-known member
Joined
Dec 19, 2012
Messages
7,098
Location
Near College Park Maryland 20740
Very good looking floor. I enjoyed the dialogue as you progressed.

I’d be afraid of dragging something across the floor or spilling liquids that would damage the floor.

I hope you enjoy it for a long time.

Please continue with the photos and explanations as you create the two door transition plates.
 
OP
O

old_smokey

Well-known member
Joined
May 16, 2018
Messages
412
Location
Manitoba
Oh I’m afraid of ruining it too! I’m going to put a rubber mat down as a work area. Already put a door mat to keep the snow out.

Here is a quick sketch of the plan for the ramp. It won’t be a very long ramp, doesn’t need to be for a moto.

516b3897b08b0d694ec07bc9810b167d.jpg


Sent from my iPhone using Tapatalk
 

Attachments

  • 516b3897b08b0d694ec07bc9810b167d.jpg
    516b3897b08b0d694ec07bc9810b167d.jpg
    88.8 KB · Views: 1
OP
O

old_smokey

Well-known member
Joined
May 16, 2018
Messages
412
Location
Manitoba
Dad and I built a prototype lock for the garage door tonight. With the low headroom rails and no electric opener to hold the top panel against the wall, the top edge flops back and forth an inch or two in the closed position. There just isn’t enough of an angle on that upper rail to keep it tight. So we’re making a set of three arms that will pivot on the headboard just below the torsion spring pipe, and latch into some kind of receiver bolted into the upper panel. That will prevent the door being opened upward or pushed inward by would-be thieves. No pics but more to come this week.

Also started moving tools in. My uncle Milt gave me his old snap on work box and a lot of tools. He was diagnosed with throat cancer and wasn’t really expected to pull through. He gave away all his tools to family. However by some miracle the tough ****** beat it and is in remission as of last month. He’s lost digits on the job, has more scars than I can count, now this. Anyway, he’s happy to see it being put to use by the next generation. It needs some repair and attention, so that’ll be one of the next projects on deck here.

I only brought the top half in today, need some extra arms and ramps for the chest.

572eba96d4ce0f0e783feb640953740f.jpg


Sent from my iPhone using Tapatalk
 

Attachments

  • 572eba96d4ce0f0e783feb640953740f.jpg
    572eba96d4ce0f0e783feb640953740f.jpg
    383.5 KB · Views: 1
To avoid these ads, REGISTER NOW!
Top Bottom