To avoid these ads, REGISTER NOW!

ZMotorsports Shop Projects 2.0

customh

Well-known member
Joined
Feb 18, 2013
Messages
562
Location
East Bethel, MN
If you have someone with laser or water jet it will make short work of the visible part..

Unfortunately I don't ...

Road trip!!!

I think if I told her I was taking off on a road trip right now I’d come back to a divorce.

Ever heard of these things called shipping companies?? Heck Pat's only double digit miles away from me and I've only gotten out there once.
 
Last edited:
To avoid these ads, REGISTER NOW!

4 FN 27

ALLIANCE MEMBER
Joined
Oct 19, 2015
Messages
4,635
Location
Minnesnowta
I wouldn't know what to send him Travis. I'll just have to trial and error as I go, like most things lately.:lol_hitti

A napkin with Charcoal rubbed on it. Seems that is what I get most of the time...LOL...

Nice work Mike. I wish I could free hand it!!! Me...I gotta create a 3D Model and then go to town...a blessing and a curse.

The "Sample Corner" in my Office...every one of these templates came with a "Can you make something like this?."

attachment.php


I have a Data Base of parts that I have designed and programmed that goes back to 1988.
 

Attachments

  • IMG_7325.jpg
    IMG_7325.jpg
    153.8 KB · Views: 1,278
OP
Z

zmotorsports

ALLIANCE MEMBER
Joined
Oct 20, 2009
Messages
21,477
Location
Northern Utah
A napkin with Charcoal rubbed on it. Seems that is what I get most of the time...LOL...

Nice work Mike. I wish I could free hand it!!! Me...I gotta create a 3D Model and then go to town...a blessing and a curse.

The "Sample Corner" in my Office...every one of these templates came with a "Can you make something like this?."


I have a Data Base of parts that I have designed and programmed that goes back to 1988.

I wish I had the technology portion of it Pat. I'm still very much old skool when fabricating.
 

LXCam

ALLIANCE MEMBER
Joined
Apr 23, 2013
Messages
19,211
Location
AZ
Turning out great Mike, looks like it'll flow with the lines of the ride nicely.

I wish I had the technology portion of it Pat. I'm still very much old skool when fabricating.

****, I can barely sharpen a pencil.
 
OP
Z

zmotorsports

ALLIANCE MEMBER
Joined
Oct 20, 2009
Messages
21,477
Location
Northern Utah
Turning out great Mike, looks like it'll flow with the lines of the ride nicely.


****, I can barely sharpen a pencil.

Thanks Cam. Only took me three tries until I got a version I liked. That is a big rear end to try to get lines to flow and not look like a big ole' piece of plate stuck back there. I much prefer building these for the Wranglers as they are a LOT less work.
 
OP
Z

zmotorsports

ALLIANCE MEMBER
Joined
Oct 20, 2009
Messages
21,477
Location
Northern Utah
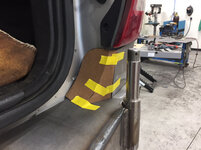
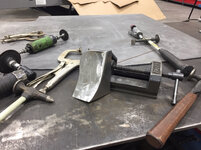
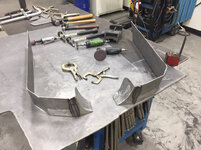
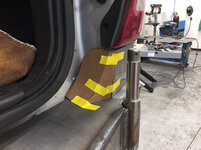
Tonight I fabricated a couple of little filler pieces. These holes or gaps jumped out at me when I walked into the shop tonight so I figured I’d address them.

Started with some CAD.
c6dce1f0ca2f0d06bf301e9621453448.jpg

Transferred the patterns to sheet metal and welded them at the proper angle to meet up with the gate when closed.
e5970c1849c5c67e8dcf27b42bce28af.jpg

One last test fit before welding to the upper corner pieces.
065aad97d6dfb6c7718379a1e6d9a1f6.jpg

Tested with the hatch closed.
f211ef81d3f424b0959a822dc8915796.jpg

Removed to finish welding and metal finishing.
153e3eb0a4bdcee5df83bd330d3594c0.jpg

Next will be to weld the upper corners in place and the last several filler pieces before moving on to the carrier.

Thanks for looking.
 

Attachments

  • c6dce1f0ca2f0d06bf301e9621453448.jpg
    c6dce1f0ca2f0d06bf301e9621453448.jpg
    711.5 KB · Views: 0
  • e5970c1849c5c67e8dcf27b42bce28af.jpg
    e5970c1849c5c67e8dcf27b42bce28af.jpg
    132 KB · Views: 0
  • 065aad97d6dfb6c7718379a1e6d9a1f6.jpg
    065aad97d6dfb6c7718379a1e6d9a1f6.jpg
    719.6 KB · Views: 0
  • f211ef81d3f424b0959a822dc8915796.jpg
    f211ef81d3f424b0959a822dc8915796.jpg
    732.5 KB · Views: 0
  • 153e3eb0a4bdcee5df83bd330d3594c0.jpg
    153e3eb0a4bdcee5df83bd330d3594c0.jpg
    776.4 KB · Views: 0
OP
Z

zmotorsports

ALLIANCE MEMBER
Joined
Oct 20, 2009
Messages
21,477
Location
Northern Utah
Last night I blended a couple of welds and then welded the corner sections in place.

88bdf70b56e5aa4c4198242da4cffb65.jpg

d269c06a47fbcceff23cbf20fc8da562.jpg

508e7e8b76d854d0ad762bc111c39309.jpg

2058b32de6070b31c180d9a8686fe4ed.jpg

69e65f9b453a2dc32483712be273f13b.jpg

Thanks for looking.
 

Attachments

  • d269c06a47fbcceff23cbf20fc8da562.jpg
    d269c06a47fbcceff23cbf20fc8da562.jpg
    712.7 KB · Views: 1
  • 508e7e8b76d854d0ad762bc111c39309.jpg
    508e7e8b76d854d0ad762bc111c39309.jpg
    688.5 KB · Views: 0
  • 2058b32de6070b31c180d9a8686fe4ed.jpg
    2058b32de6070b31c180d9a8686fe4ed.jpg
    665.2 KB · Views: 0
  • 69e65f9b453a2dc32483712be273f13b.jpg
    69e65f9b453a2dc32483712be273f13b.jpg
    667 KB · Views: 0
  • 88bdf70b56e5aa4c4198242da4cffb65.jpg
    88bdf70b56e5aa4c4198242da4cffb65.jpg
    711.8 KB · Views: 0

snyder

Well-known member
Joined
Dec 18, 2008
Messages
545
Location
Baltimore md.
Looks real nice. Could you explain how you dress the weld downs. I bought a selection of flap discs for my 4 1/2 grinder, not sure if that's the best choice. I will be using epoxy primer and gloss black urethane as a topcoat.
 
OP
Z

zmotorsports

ALLIANCE MEMBER
Joined
Oct 20, 2009
Messages
21,477
Location
Northern Utah
Looks real nice. Could you explain how you dress the weld downs. I bought a selection of flap discs for my 4 1/2 grinder, not sure if that's the best choice. I will be using epoxy primer and gloss black urethane as a topcoat.

Thanks.

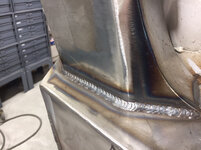
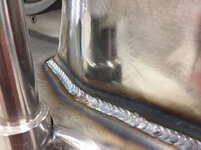
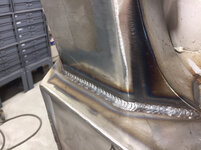
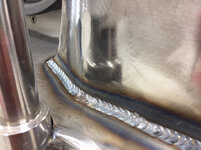
As for prepping the corners where I welded I merely used a 4" grinding disk to knock the top edge down then a flap disk to blend and roll the edge. The key is to give yourself a nice open corner joint to weld so you are just filling in the corner with weld joining the to pieces. You don't want to grind away much of the weld, basically just to get the rolled edge. If you have an area that you think you may have ground too much you can always weld that section from the back side to ensure it doesn't crack or separate from vibration and use.

Generally my patterns end up being symmetrical from side to side but on occasion I will have to touch up an edge or corner on the belt sander to ensure a nice open corner joint for welding. Fitment is the key to a nicely rounded corner when done, that way your not doing a lot of grinding. Personally I hate grinding my welds but for aesthetics on a rounded corner like this I think they look better, although maybe if my welds were nicer I would feel differently.:bounce:

Thanks for following along and I hope that answered your question.
 
Last edited:

Firstram

Well-known member
Joined
May 16, 2017
Messages
1,394
Mike, your welds look great! Your son's jeep deserves blended corners, that urban assault look is not refined enough for that caliber of a vehicle. Same thing applies to your jeep.

It takes a lot of skill and practice to grind and blend a fabbed part. I take pride in the fact that I can blend my ****** welds and still make flap discs last a long time. Yours must last forever!
 
OP
Z

zmotorsports

ALLIANCE MEMBER
Joined
Oct 20, 2009
Messages
21,477
Location
Northern Utah
Mike, your welds look great! Your son's jeep deserves blended corners, that urban assault look is not refined enough for that caliber of a vehicle. Same thing applies to your jeep.

It takes a lot of skill and practice to grind and blend a fabbed part. I take pride in the fact that I can blend my ****** welds and still make flap discs last a long time. Yours must last forever!

Thank you. I agree, I prefer the rounded/blended corners on a project like this. It makes them look so much cleaner and "refined".:lol_hitti

My son does want to leave a couple of the internal corner or T-joint welds and not grind them, he thinks it will look cool to see the ripples through the powder coating but all outside corner joints will be blended.

As for the flap disks, mine don't last as long as I would like but longer than they did years ago.:beer:

Thanks for the compliments and for following along on my projects. I hope you find them enjoyable.
 

aka Larry

Well-known member
Joined
May 2, 2012
Messages
8,099
Location
Eastern, NC
My son does want to leave a couple of the internal corner or T-joint welds and not grind them, he thinks it will look cool to see the ripples through the powder coating but all outside corner joints will be blended.

I agree with your son. Beautiful fillet welds like yours should be left as-is for all to see.
 
OP
Z

zmotorsports

ALLIANCE MEMBER
Joined
Oct 20, 2009
Messages
21,477
Location
Northern Utah
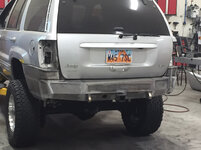
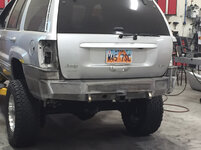
I was able to get quite a bit done on my son’s rear bumper today.

c5c9491bb1aebedb2259c0fbd62f2476.jpg

eb9445c74456b84e7785cad14c4e9738.jpg

6e8a15bdda7213aac9c0cda72e78c166.jpg

96702167b5db448cb938fe6a7ab8ebe5.jpg

Removed to weld a few things on the backside and complete the metal finishing.
c4aed4e58671d047f3da31a858d3c9a4.jpg

After it is metal finished we will reinstall it so we can fabricate the tire carrier then off to powder coater.
 

Attachments

  • c5c9491bb1aebedb2259c0fbd62f2476.jpg
    c5c9491bb1aebedb2259c0fbd62f2476.jpg
    652.2 KB · Views: 1
  • eb9445c74456b84e7785cad14c4e9738.jpg
    eb9445c74456b84e7785cad14c4e9738.jpg
    675.4 KB · Views: 0
  • 6e8a15bdda7213aac9c0cda72e78c166.jpg
    6e8a15bdda7213aac9c0cda72e78c166.jpg
    658.8 KB · Views: 0
  • c4aed4e58671d047f3da31a858d3c9a4.jpg
    c4aed4e58671d047f3da31a858d3c9a4.jpg
    800 KB · Views: 0
  • 96702167b5db448cb938fe6a7ab8ebe5.jpg
    96702167b5db448cb938fe6a7ab8ebe5.jpg
    633.8 KB · Views: 0
Last edited:
To avoid these ads, REGISTER NOW!

LXCam

ALLIANCE MEMBER
Joined
Apr 23, 2013
Messages
19,211
Location
AZ
That's turned out fantastic Mike, great job as usual!

On a side note. How's your baby running and have you done a dang burnout yet? :p
 

jalbrecht55

Active member
Joined
Jun 5, 2011
Messages
41
Location
Silverdale, WA
Nice job! So.... if say your fillet welds weren’t so nice (like mine) how would you go about blending/smoothing them? I really haven’t found a good tool yet to do so.
 
OP
Z

zmotorsports

ALLIANCE MEMBER
Joined
Oct 20, 2009
Messages
21,477
Location
Northern Utah
That is the nicest WJ rear bumper that I have seen! Nice job! And I build Jeeps for a living :)

Thanks Quinn, I appreciate that.

I'm embarrassed to admit that it took me three attempts before I got some lines that I liked. IT was starting to look pretty crude at first.

Thank you.
 
OP
Z

zmotorsports

ALLIANCE MEMBER
Joined
Oct 20, 2009
Messages
21,477
Location
Northern Utah
Very nice bumper. Did your son cut the pieces and you weld them?


Sent from my iPhone using The Garage Journal mobile app

That's turned out fantastic Mike, great job as usual!

On a side note. How's your baby running and have you done a dang burnout yet? :p

WOWZA, that bumper looks amazing, nicely done.
You're son is very lucky to have such an awesome Dad:thumbup:

I will echo the comments above.... another well executed project....!


Sent from my iPad using Tapatalk Pro

Well done Mike!:thumbup:

Thanks guys. I appreciate all of the kind words.

Shorty, it was a joint effort for the first part but lately since he's been focused on getting his house it has just been me in the evenings working on it.

Sorry Cam, no burnout yet. To be honest I haven't really gotten on it full throttle yet as quarter throttle seems to be more than enough. Every time I turn the ignition I get insta-grin. I love it so far, best mod I've done to the Jeep hands down.

I'm getting excited to get it off road I just don't know when that will be yet. Our local club went on a run yesterday but I had too much work in the shop and decided to sit it out. That and my wife was battling a kidney stone since Tuesday so she wouldn't have been comfortable sitting all day in the Jeep. The way things are looking I won't have a chance to get it off road until after my son's wedding in June which is way too long for me.

Thanks for following along and commenting everyone. I really appreciate that others enjoy seeing my projects.
 
Last edited:
OP
Z

zmotorsports

ALLIANCE MEMBER
Joined
Oct 20, 2009
Messages
21,477
Location
Northern Utah
Nice job! So.... if say your fillet welds weren’t so nice (like mine) how would you go about blending/smoothing them? I really haven’t found a good tool yet to do so.

Back in the 90's when I built my first street rod/race car and wanted the frame detailed to the max, I used a 4" grinding disk that I knocked the square edge off of so it had a radius then ran it around the welds. I followed this with body biller then wrapped sanding paper around fuel line to sand the radius prior to primer, sanding, paint and clearcoat. That seemed to work well but WOW, that was a lot of work. It was then that I decided to work on my welds a bit more so I wouldn't have so much finishing work.:lol_hitti
 

macgyver

Well-known member
Joined
Feb 13, 2008
Messages
45
Location
Big Bear Lake
Thanks Quinn, I appreciate that.

I'm embarrassed to admit that it took me three attempts before I got some lines that I liked. IT was starting to look pretty crude at first.

Thank you.

Roundish vehicles are tough to do sometimes. Making bumpers for certain Jeeps that look good is tough to do. 3 tries or 1, either way it is awesome! I have scrapped many revisions trying to make good looking stuff before.
 

jbmatth

Well-known member
Joined
Jun 3, 2013
Messages
5,692
Location
Northern Ok.
That is one great looking bumper for your sons Jeep. Perhaps I missed it but what thickness of plate are you using for the bumpers you build for Jeeps?

JB
 
OP
Z

zmotorsports

ALLIANCE MEMBER
Joined
Oct 20, 2009
Messages
21,477
Location
Northern Utah
That is one great looking bumper for your sons Jeep. Perhaps I missed it but what thickness of plate are you using for the bumpers you build for Jeeps?

JB

Thank you JB.

The majority of this one is 10-gauge with a little bit of 12-gauge mixed in.

It varies from vehicle to vehicle on what thickness I use based on intended uses. For example on fronts that will have a winch I use 1/4" for the center section but if they are not planning on installing a winch I will use 10-gauge. On all mounts where the recovery points are affixed I use 1/4" as well. This bumper was a bit different because I used the actual Class III hitch as the bumper attachment point. Coming off of the hitch I used 1.5"x .120" wall square tubing for gussets or supports as well. I was pleasantly surprised when we lifted the bumper off of the Jeep the other day as I thought it would be much heavier than it is, it actually isn't too awfully heavy for as much steel is on it.

Thanks for checking out my project JB.
 
OP
Z

zmotorsports

ALLIANCE MEMBER
Joined
Oct 20, 2009
Messages
21,477
Location
Northern Utah
Last night I didn't get much done in the shop. I started the refrigerator in the coach then started the engine of the coach and let it run for about a half hour because it hasn't ran in so long but the wife and I are thinking about heading out for a couple of days next week for a little R&R.

I did however get a little blending done on the bumper and had to hit a couple of spots that I forgot to weld and then my son and his fiancé got the keys to their new home so the wife and I went over to their place and walked through their new home with them. It seems so weird to say let's go over to their place.:confused: I am so happy for them but it turned out to be much more emotional than I thought it would be. I thought my wife would be the one struggling with my son moving out but maybe I'm having a harder time with it than I thought I would. Next to my wife he's been my best friend as well as shop buddy for the past couple of decades. I'm gonna miss having him around each evening in the shop.
 
OP
Z

zmotorsports

ALLIANCE MEMBER
Joined
Oct 20, 2009
Messages
21,477
Location
Northern Utah
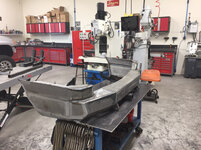
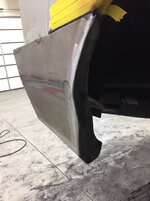
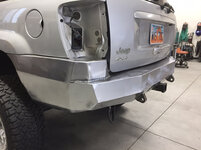
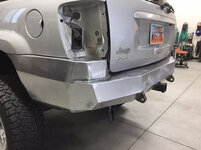
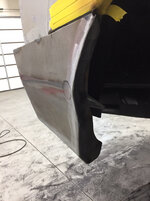
I finished metal finishing the main body of the bumper tonight as well as did a major cleaning of my shop. I had soooo much grinding dust on the floor it was disgusting.

832abcbbf8571d113293d0d7f10d6437.jpg

f795085fce7cdc19244d428efa10896d.jpg

I have a few other things to do in the shop just the next few days then I can start fabricating the swing out tire carrier for his Jeep.
 

Attachments

  • 832abcbbf8571d113293d0d7f10d6437.jpg
    832abcbbf8571d113293d0d7f10d6437.jpg
    648.7 KB · Views: 2
  • f795085fce7cdc19244d428efa10896d.jpg
    f795085fce7cdc19244d428efa10896d.jpg
    641 KB · Views: 2
Last edited:

MP&C

Well-known member
Joined
Oct 21, 2009
Messages
4,405
Location
Leonardtown, MD
WOW! Nice job on the bumper Mike, I can see them beating the doors down for more after the Jeep guys see it...
 
Last edited:
aka Larry

Well-known member
Joined
May 2, 2012
Messages
8,099
Location
Eastern, NC
No details on the metal finishing? Who are you, and what did you with Mike?

Seriously, it looks great Mike, and also looks like a lot of work.
 
OP
Z

zmotorsports

ALLIANCE MEMBER
Joined
Oct 20, 2009
Messages
21,477
Location
Northern Utah
Bumper looks really nice.
How much clearance did you leave at driver side Qtr panel wheel flare area? Looks really close.

Thank you. There is about 3/16" between the bumper and the flared out section on the wheel opening. I also machined a threaded bung and welded it to the inside of the bumper in which it the front "wings" of the bumper will fasten to upon final assembly. There were existing holes in the body that I used. They were the same ones the OEM plastic bumper affixed to.
 
OP
Z

zmotorsports

ALLIANCE MEMBER
Joined
Oct 20, 2009
Messages
21,477
Location
Northern Utah
No details on the metal finishing? Who are you, and what did you with Mike?

Seriously, it looks great Mike, and also looks like a lot of work.

Thanks Vincent. Nothing special on the metal finishing. I just knock the welds down a bit with a 4" abrasive disk on the grinder, although most of the areas the welds were pretty rounded because I had nice fitting open corner joints to fill in. On those I merely used a 60-grit flap disk to blend and roll the weld over slightly. Lastly I ran over the entire surface with an 8" Scotchbrite wheel using my large Wild Cat grinder putting the final finish on it. The last step really isn't necessary as it will get sandblasted prior to powder coating but it looks nice up until that point.:lol_hitti

Thanks for stopping by and checking out my projects. Hope the race car is coming along nicely.
 
To avoid these ads, REGISTER NOW!
Top Bottom