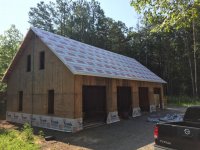
Went ahead and decided just to do a gable roof with dormers on the front and a long shed dormer on the back. Ordered the ridge beam today, and the would to frame the gable end walls and shed dormer wall. Got the lumber up on the second floor, was a little dicey with the fork lift. Once up there, opened up the bundle, and a little more than half of the studs were ****. Looked like they picked from all the pieces everyone else discarded. Should be fun working it out with the lumber yard.

You are using an out of date browser. It may not display this or other websites correctly.
You should upgrade or use an alternative browser.
You should upgrade or use an alternative browser.
Above 1200 Sq/FT New Garage/Barn Build
- Thread starter Samh
- Start date
Wokspaces above 1200 squarefeet.
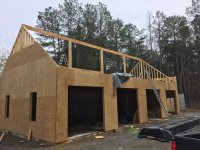
Go the sheathing done on the front, and the garage doors framed out. Starting out on the roof framing and the shed dormer wall on the back. Checked the square of the floor, and it is within 1/16" on the diagonals. This thing might just be a russian piano 
Got the lumber swapped out at the lumber yard.
I think my favorite part of this build so far is the moving of all the lumber back and forth around the site.
Got the lumber swapped out at the lumber yard.
I think my favorite part of this build so far is the moving of all the lumber back and forth around the site.
Attachments

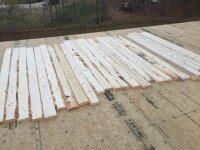
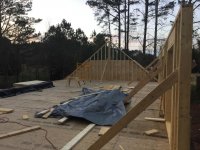
Started framing the walls for the shed dormer. I ordered precut studs. Turns out the ones I had to return and exchange out, were pre cut to 92-7/8 instead of 92-5/8. Didn't realize it until trying to put the top plate on the first wall.
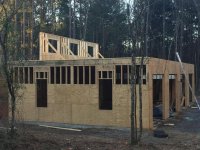
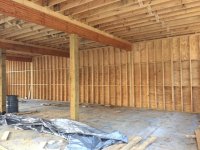

Motoman1100
Well-known member
Man this is really going to be a legit garage, it's really looking good!
Man this is really going to be a legit garage, it's really looking good!
Thanks, it is coming along. Hoping to get the gable end walls done this week and start the rafters next week. Worried about running out of money now though.


Motoman1100
Well-known member
That will be a long ridge. What size beam are you using?
That will be a long ridge. What size beam are you using?
2 11-7/8 LVLs sistered together. Total span is 60', but will have a post every 15', so only 15' unsupported. plan is to have 30'-30', then other side is 15'-30'-15' so the joint is lapped at the center post.
captain14
Well-known member
Go the sheathing done on the front, and the garage doors framed out. Starting out on the roof framing and the shed dormer wall on the back. Checked the square of the floor, and it is within 1/16" on the diagonals. This thing might just be a russian piano
Got the lumber swapped out at the lumber yard.
I think my favorite part of this build so far is the moving of all the lumber back and forth around the site.
I am just tired thinking about moving the lumber multiple times.
I am just tired thinking about moving the lumber multiple times.
The good news is, the rafters showed up yesterday, so I'll get to move those now..

DarrenF
Well-known member
nice work man. i wish i would have stick framed my second floor. Went with attic trusses, which turned into a bit of a pain in the ***.
nice work man. i wish i would have stick framed my second floor. Went with attic trusses, which turned into a bit of a pain in the ***.
Thanks. I went this direction, since I felt like it offered me more freedom from a floor layout perspective. Engineer at the truss company thought I was an idiot though.
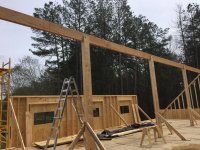
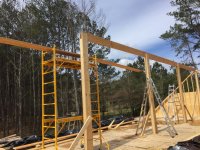
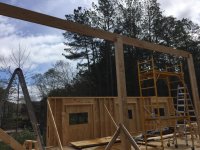
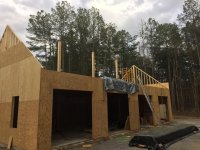
Got the posts set on Saturday, and then set the ridge beam yesterday. The ridge beam is 11-7/8" LVL I did a 2-ply. So the layout for the first is 30-30, the next ply is 15-30-15. It wasn't too bad setting them by hand. Took about 2 hours. Lots of up and down ladders and scaffolding. Only thing that made it a little sketchy was I could only get so close to the post, so after setting one end, had to stand right on the edge of the scaffolding to lift it over the middle post. Hopefully today, I can get them straightened up and nailed together.
Attachments



YukonXL04
Well-known member
Wow! Looks awesome! Great work for diy!
Wow! Looks awesome! Great work for diy!
Thanks!
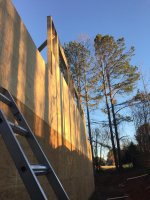
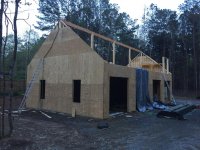
Didn't seem to get a lot done this weekend. go the last little bit of plywood up on the gable ends. There wasn't really a good way to do this alone. And tried several different methods. First try was to slide it over from the side, and slide along the the course below it. Dropped the first piece. Second attempt was to talk it up the the ladder. Seemed like a good idea, until I got tired with about another 4 feet to go. Made a mark at the 4ft line since I was laying the horizontally, to put in the center of the stud. Unfortunately, picked the wrong stud. Luckily wasn't too bad pulling the nail out and moving. Third attempt was to drive in some 16d nails on every other stud and feed in from the side again so it had more to rest on. This worked well, but was still slow. Last course was doing the same thing, just up on scaffolding. Have the top left, but that may be left open for the gable vents.
And lots of going up and down the ladder to nail these. In working on the top course, realized that ladder math is a thing. My extension ladder is a 24ft, and the building should be right at 26ft to the peak. With my ladder fully extended, I had to get to the 2nd rung from the top and hold on to the top of the plywood to nail the top portion. Looks like I will be buying a 28ft in the near future.
Also started on one of the dormers on the front. Wife said she wanted it to be wide enough to fit a bed lengthwise in it. Framed it at 8ft. Seems a bit over powering. Will probably redo at 5ft and see how that looks.
And lots of going up and down the ladder to nail these. In working on the top course, realized that ladder math is a thing. My extension ladder is a 24ft, and the building should be right at 26ft to the peak. With my ladder fully extended, I had to get to the 2nd rung from the top and hold on to the top of the plywood to nail the top portion. Looks like I will be buying a 28ft in the near future.
Also started on one of the dormers on the front. Wife said she wanted it to be wide enough to fit a bed lengthwise in it. Framed it at 8ft. Seems a bit over powering. Will probably redo at 5ft and see how that looks.
Attachments

Motoman1100
Well-known member
Even slow progress is still progress. That's hard work brother and even harder by yourself! Its looking good, congrats

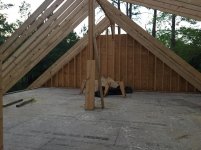


Latest update. Have been working on getting the hurricane ties installed. Fixing the load path issue between 2nd story posts and first floor posts. I decided againt doing the doghouse dormers on the front, as they didn't really add much in the way of square footage, and didn't feel like it was worth the trouble to frame out. Bad news, is now I'll need to add windows to the gable end walls.
Attachments

Motoman1100
Well-known member
After living in the upper midwest for 22yrs I learned those little doghouse dormers can definitely be just another place for a leak to develop. Place is coming along....huge. Nice work Sam.
Bigblockyeti
Banned
Thanks. I went this direction, since I felt like it offered me more freedom from a floor layout perspective. Engineer at the truss company thought I was an idiot though.
The remark from the engineer doesn't surprise me at all, of course he wants you to buy what he's selling!
This has been a great read for me and the exact same as what I'm hoping to do down the road in ~5 years down to the same dimensions. The only difference is I'll probably be running a steel beam down the middle of the garage ceiling for a beam trolley to ride on.
My math tells me with a 4" slab it would be 29.6 yards of concrete, going deeper in a few areas, how much did you end up using total? What strength concrete did you use?
Stick built is the way to go, my wife and I have the land already and were planning on building our house first then a shop shortly (hopefully) there after. In upstate SC, custom build prices shot from ~$85/sqft. to around $150 in under two years with the booming economy. We instead bought a house that fits us well in an HOA subdivision which is probably an ok investment but the little areas where corners were cut is driving me crazy. Even more so talking myself out of fixing some of the stuff as it's not going to bother the next owner and it will consume resources that can otherwise be used when I get to build MY house. It also has a hip roof with trusses 24" O.C., both of which I hate!
The remark from the engineer doesn't surprise me at all, of course he wants you to buy what he's selling!
This has been a great read for me and the exact same as what I'm hoping to do down the road in ~5 years down to the same dimensions. The only difference is I'll probably be running a steel beam down the middle of the garage ceiling for a beam trolley to ride on.
My math tells me with a 4" slab it would be 29.6 yards of concrete, going deeper in a few areas, how much did you end up using total? What strength concrete did you use?
Stick built is the way to go, my wife and I have the land already and were planning on building our house first then a shop shortly (hopefully) there after. In upstate SC, custom build prices shot from ~$85/sqft. to around $150 in under two years with the booming economy. We instead bought a house that fits us well in an HOA subdivision which is probably an ok investment but the little areas where corners were cut is driving me crazy. Even more so talking myself out of fixing some of the stuff as it's not going to bother the next owner and it will consume resources that can otherwise be used when I get to build MY house. It also has a hip roof with trusses 24" O.C., both of which I hate!
I went with 6" slab as the cost wasn't that much different. I did have 12"Wx24"D grade beams running the 32ft depth every 15 feet. That way I wouldn't have to pick where I wanted posts to go. It came in at 55 yards of concrete. Believe it was 4500psi. I'd have to check. Had a friend do it who does that for a living and told him what I would be putting in there.
I think if I could go back, I'd stick build a gambrel roof, as I'd be dealing with shorter length lumber, as the lumber I have been getting for the rafter isn't the greatest as far as twist goes.
I had thought about running a beam(not steel though) length wise, as it would have been cheaper, and I could have run the rafters the opposite way that I did, but then I wouldn't have a full 12ft tall in each bay.
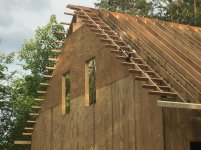
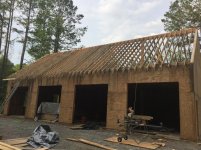
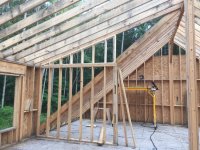
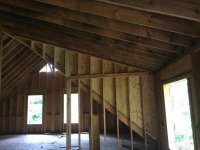
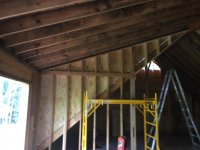
Latest updates Got the rafters up, working on the barge/ladder rafters and eaves, framing up the shed dormer side walls, and installed blocking at the walls for the rafters. Has been slow going lately.
Attachments




Motoman1100
Well-known member
Man that's a lot of space upstairs. Looks good
Man that's a lot of space upstairs. Looks good
Thanks. It's coming along slowly but surely.
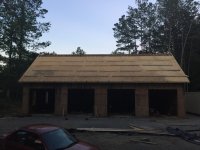
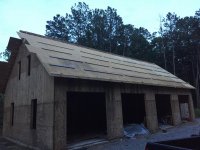
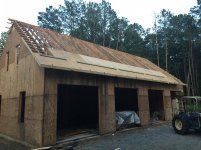
So have the roof sheathing done except the cut piece at the top for all the 10/12 pitch portions. Working on the 4/12 shed dormer portion now, and only have the first row done. Got the eaves framed on the front and back, and currently deciding whether or not I want to do a brow across the front and back to break up the vertical siding I am planning on having, or just a piece of 1x12 trim and some drip cap. Trim would be easiest, but the brow would provide some rain protection for the windows. On a lessons learned note, when sheathing, at the ends, I just left the plywood long, to speed up the process of getting sheets up, planning on trimming afterwards. Trimming afterwards is a colossal pain-in-the-***. Also makes me think when I am done, to do a lessons learned/things I'd do differently post/section.
Also, the original plan was to use hardisoffit that is pre-vented, but in looking at the specs, it only have 5 sq/in of venting per lineal foot. Given that I need (according to all the ventilation calculators) 920 sq/in, that isn't even going to come close. Makes me wonder how that actually works for any venting requirements.
Had previously posed the question in the general forum about my dilemma with doing a ridge vent, since I had originally planned on using an active system with gable end vents/fans, and framed my ridge beam and rafters accordingly. Had a neighbor who is a framer that says doing a ridge vent over a 3-1/2" ridge beam isn't an issue with 1" cut on each side, but everything online tends to disagree. But have also started thinking about framing some working cupolas for the ridge ventilation. Plan would be to have 3, where they line up with the small wall between each garage door.
Also, the original plan was to use hardisoffit that is pre-vented, but in looking at the specs, it only have 5 sq/in of venting per lineal foot. Given that I need (according to all the ventilation calculators) 920 sq/in, that isn't even going to come close. Makes me wonder how that actually works for any venting requirements.
Had previously posed the question in the general forum about my dilemma with doing a ridge vent, since I had originally planned on using an active system with gable end vents/fans, and framed my ridge beam and rafters accordingly. Had a neighbor who is a framer that says doing a ridge vent over a 3-1/2" ridge beam isn't an issue with 1" cut on each side, but everything online tends to disagree. But have also started thinking about framing some working cupolas for the ridge ventilation. Plan would be to have 3, where they line up with the small wall between each garage door.
Attachments

That's going to be a nice space!
Thanks. Starting to see the light at the end of the tunnel.
Roof Sheathing is done. In all, took almost 100 sheets of 5/8" plywood. Got it finished right before it started pouring rain, so no pics yet. Now, just need to finish some framing on the shed dormer wall and get it sheathed, and it will be ready for shingles.
Still on the fence about the cupola, but sheathed the roof, where I would just need to remove some screws in the plywood for the opening. Whether or not I do one will probably be dictated by when the roofer can do the shingles. If he is ready now, I will forget it, but if not, will proceed.
Still on the fence about the cupola, but sheathed the roof, where I would just need to remove some screws in the plywood for the opening. Whether or not I do one will probably be dictated by when the roofer can do the shingles. If he is ready now, I will forget it, but if not, will proceed.
kruizer66
Well-known member
Very nice.. loving this DIY project. Is that your fence or the neighbors behind your new shop?
Very nice.. loving this DIY project. Is that your fence or the neighbors behind your new shop?
The wooden fence is mine. The pasture fence at the back is my neighbors to the rear. They have about 20 acres of woods. Originally, everything behind that fence was just pine trees. The plan when I am finished with the build, is to extend the front of the fence which is stacked stone pillars with would fencing between all the way down to the end of my property, and do a large swinging gate on the driveway down to the garage. I was shocked when I started getting prices on the stacked stone pillars. Everyone was quoting about $1200 per pillar. And I need like 8 of them...lol Needless to say, I will probably be trying my hand at stacked stone pillars in the near future. I am debating on whether or not move/remove that fence when done and move it down to the property line.
Would also like to add that since I started the roof sheathing about 2 weeks ago, it has consistently been 88 degrees or more even when I start at 6:30. Pretty much said I wasn't going to work until it was later in the day, because the times that I did, I thought I was legit going to die from a heart attack because of how hot it has been. Also have a new found respect for headbands..lmao. Always looking like I'm working for the weekend..lol
BSAschields
Well-known member
Subscribed 
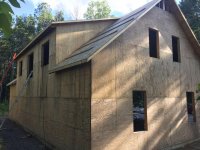
Finally finished all wall and roof sheathing. That was 205 sheets of 5/8 BCX plywood. Now get to have that inspected so I can get some house wrap on this thing and get started on the siding and roofing. Inspection is scheduled for tomorrow.
Attachments


Last edited:
Kevkx125
Well-known member
Looks good Samh. Nice size and the best part is you are doing it yourself!!
Looks good Samh. Nice size and the best part is you are doing it yourself!!
Thanks.
Passed my bracing inspection today. Now I can finally get house wrap on it and protect from all the rain we've been having this year.