To avoid these ads, REGISTER NOW!

What did you do "IN" your garage today?

KillNThrill24

Well-known member
Joined
Dec 28, 2018
Messages
174
Location
Wadsworth, Ohio
Still working, but getting my line lock hooked up finally, and now working on wiring it. Plus it's finally warm enough to have time shepherd pup out here. She's getting into everything, but im hoping she'll get used to being out here and play with her toys instead. received_2359115267706018.jpegSnapchat-1123025986.jpeg

Sent from my Note 9 using The Garage Journal mobile app
 
To avoid these ads, REGISTER NOW!

Magnum440d100

Well-known member
Joined
Dec 2, 2018
Messages
3,581
Location
Indiana
“Rebuilt” the Moen kitchen faucet....

Yesterday, I decided that since the hot water was coming out cloudy, I should flush the water heater.

Hooked up the hose to the water heater, shut the water off at the inlet to the house, opened the pressure relief valve, and then opened the drain valve.

Nothing but clean clear water came out :headscrat

Turned the water back on, and same thing. Clean clear water out the drain.

So I buttoned everything up, let the tank fill, then turned the faucets on. They ran clean(ish) for a minute, then out came the brownest, blackest water you’ve ever seen!

Eventually, the kitchen sink faucet stopped flowing, so I knew that crud had clogged it... Took it out, cleaned it out, and pressure was restored... It hasn’t flowed this nice since about 2012 hahaha
 

NKlamerus

Well-known member
Joined
Feb 3, 2014
Messages
1,381
Location
Springfield, Or. (From Florida)
Re: What did you do "IN" your garage today?

New shelf for my batteries, 5$

It's not perfect but I like it so far, definitely like that it's clear, let's light through when it's empty, also looks cleaner IMO
55c0b9760cd18f8b6f6d3bc8b0a1245e.jpg
 

BlueBomber

Well-known member
Joined
Sep 14, 2013
Messages
3,201
Location
Outside Boston, MA
“Rebuilt” the Moen kitchen faucet....


Yesterday, I decided that since the hot water was coming out cloudy, I should flush the water heater.


Hooked up the hose to the water heater, shut the water off at the inlet to the house, opened the pressure relief valve, and then opened the drain valve.


Nothing but clean clear water came out :headscrat


Turned the water back on, and same thing. Clean clear water out the drain.


So I buttoned everything up, let the tank fill, then turned the faucets on. They ran clean(ish) for a minute, then out came the brownest, blackest water you’ve ever seen!


Eventually, the kitchen sink faucet stopped flowing, so I knew that crud had clogged it... Took it out, cleaned it out, and pressure was restored... It hasn’t flowed this nice since about 2012 hahaha
Hmmm. I haven't drained my water heater in....well, I can't remember the last time. I will have to put that on the summer maintenance schedule.

Sent from my SM-G950U using Tapatalk
 

KillNThrill24

Well-known member
Joined
Dec 28, 2018
Messages
174
Location
Wadsworth, Ohio
Installed the line lock on the gt500, then went to change the oil on my 4.7 grand cherokee..... And put the cap back on. Coolant came out of the pan. She's done, sadly. I'm not sure if it's worth the effort to fix with the rest of the vehicle being pretty rusty. received_2359115267706018.jpeg20190411_183412.jpg

Sent from my Note 9 using The Garage Journal mobile app
 

Motorman55

Well-known member
Joined
Apr 10, 2016
Messages
2,650
Location
South Jersey
Went to the garage for tools to work in the house. Put away some supplies while in there and made some noise.

Then back into the house to install all new brushed nickle door handle sets on all the interior doors. After that I installed the new matched set of Delta chrome bathroom accessories. Towel bar, toilet paper holder, door hook.

Still have to install the matching Delta chrome faucet. Maybe tomorrow.
 

henrysgarage

Well-known member
Joined
Oct 10, 2010
Messages
254
Location
Carleton Place, ON, Canada
Resealed the top cover on the HenryJ trany. Replaced the "O" ring on the pump shaft of my floor jack. Replaced the drive on my 3/8" Snapon ratchet, which was free even after almost 50 years.
 
Last edited:

mmb617

Well-known member
Joined
Dec 5, 2010
Messages
4,424
Location
PA
I've been working on a couple things to get my bike ready for the upcoming riding season. Towards the end of last year the starter was acting up so I installed a new one. It would have been a lot simpler if you didn't have to open the primary to get at the mounting bolts, but everything went smooth with that project.


47592508841_fb52254678_c.jpg


Next up was a carb replacement. I bought my bike new in 1988 and it came stock with a CV carb and rubber intake both of which were well known to be junk so within the first year of ownership I'd replaced the intake with a one piece aluminum one and had installed a Screaming Eagle butterfly type carb. At that time the bike ran fine, but over the last 30 years things have gone slowly downhill to the point that I kind of got used to it spitting, sputtering, backfiring and bucking. I wanted to rebuild the carb but it's so old I couldn't find replacement parts. This past Christmas my son got me a complete S&S carb and intake kit, so it was time to get that puppy installed.

I did run into a couple snags. When I went to install the S&S intake I found that it reused the stock intake flanges which I'd gotten rid of 30 years ago. I was shocked to find that new OEM,s were around $75, so I rolled the dice and bought a chinesium set on ebay for $25 figuring they were just two metal flanges, what could go wrong? As it turns out they didn't fit properly but after some work with a file I was able to get the clearance I needed, but it took a fair amount of filing and test fitting. And that's why the OEM's cost more, I'm sure they would fit right out of the box.

The next snag was when I went to hook up the throttle cables and noticed that on my old carb they were on the front side of the carb, but on the new one they were on the rear side, which meant they were just a tad too short to work. I got a Drag Specialties set that was cheaper than OEM's and had a made in the USA sticker on them for a good price. The fit and finish on them was great.

Here's a couple pics of the old setup, mid-job, and new setup:


47539582332_d39440a34a_c.jpg


40626524333_615894bf04_c.jpg


47539676002_9ac048df29_c.jpg


The bike started and idled great right away, and a test ride showed me why so many old Harleys run S&S carbs. I don't know if my bike ran this good when it was brand new. After years of it running like **** it's refreshing to have it run so good.
 

cjcocn

Well-known member
Joined
Feb 22, 2016
Messages
152
Location
Manitoba, Canada
New coils and rotors (front) in my buddy's 2004 Grand Cherokee.

Also pulled the caliper guide pins and cleaned / lubricated them, then pulled the heater blower resistor (it came out in pieces) and ordered a new one online.

Drove it out and cleaned up after that, then made some fishing plans for after work today.
 

PhantomEB

Well-known member
Joined
Feb 6, 2006
Messages
6,817
Location
Medicine Hat, AB, Canuckistan
Worked with my brother at a concrete plant doing some upgrades to their rail car pulling system, learned how to wash seized bearings off shafts via oxy propane torch.

Came home and washed/cleaned out car as it’s date night with my better half.
 

Jazz1

Well-known member
Joined
Jan 3, 2016
Messages
4,188
Location
Thunder Bay On.
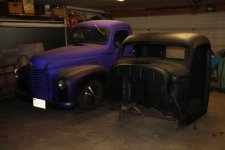
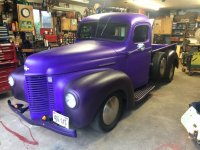
Got hotrod out of winter storage and into garage and snow started again. I have a few things planned for truck over the next few weeks
 

Attachments

  • 947FA2FE-7BBF-40B2-9EB1-E5B77ADD7FF1.jpg
    947FA2FE-7BBF-40B2-9EB1-E5B77ADD7FF1.jpg
    103.2 KB · Views: 110
  • DE637FFA-A064-4C52-84AC-D9282008BCA2.jpg
    DE637FFA-A064-4C52-84AC-D9282008BCA2.jpg
    156.9 KB · Views: 138
  • 36A346FB-90F1-4EF2-9D4B-333466F22D11.jpg
    36A346FB-90F1-4EF2-9D4B-333466F22D11.jpg
    111.1 KB · Views: 114
Last edited:

DHC-2

Member
Joined
Aug 14, 2012
Messages
12
Location
Toronto
Jealous of your wood stove! Insurance won't allow me to have one.
Is there a story to go with the truck?
Spent a few summers north of you, always liked T Bay...
 

Outlawmws

Well-known member
Joined
Aug 9, 2011
Messages
39,325
Location
The Badlands
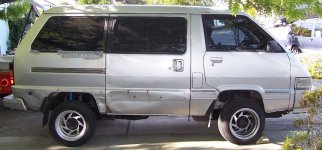
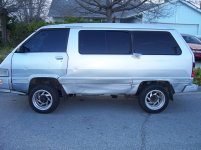
Took the 32 YO Project van to the Toy dealer and they fixed the recall.

Free safety inspection: Only thing they found was a comment about not having an "extra" floor mat on the drivers side! :lol:
 

Outlawmws

Well-known member
Joined
Aug 9, 2011
Messages
39,325
Location
The Badlands
I can't speak for Moen.. It wasn't that way with Delta for me. I replaced the entire guts on the single handle Kit faucet and the handle itself as the screw corroded into place, as well as a hand held shower head, no questions asked.
 

Jazz1

Well-known member
Joined
Jan 3, 2016
Messages
4,188
Location
Thunder Bay On.
Jealous of your wood stove! Insurance won't allow me to have one.
Is there a story to go with the truck?
Spent a few summers north of you, always liked T Bay...

Truck is a frame off rest I kept. I have made a few changes over the years, got rid of GM bumper and made front signals housing out of kitchen light globes.
Garage is fully insured with wood stove although I did have to get stove/chimney WETT inspected.

https://www.flickr.com/photos/22832895@N08/albums/72157627714792392
 

Attachments

  • IMG_2001.JPG
    IMG_2001.JPG
    29.3 KB · Views: 108
  • IMG_3114.jpg
    IMG_3114.jpg
    85.6 KB · Views: 121
  • IMG_3133.jpg
    IMG_3133.jpg
    151.6 KB · Views: 133
Last edited:
To avoid these ads, REGISTER NOW!

protegeV

Well-known member
Joined
Apr 18, 2018
Messages
13,363
Location
DFW
Rainy day project on my father in law's daily.
 

Attachments

  • 20190413_125421.jpg
    20190413_125421.jpg
    122.6 KB · Views: 134

Outlawmws

Well-known member
Joined
Aug 9, 2011
Messages
39,325
Location
The Badlands
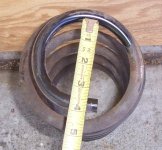
Spent the afternoon swapping the stock rear springs in the 87 Toyota 4WD project van for Aerostar springs. Had to cut part of a coil off the bottom to match the bottom cup, and about 1-1/2 of a coil off the top to open the top coli fully and reduce the amount of lift a little.

All told it's about 2" higher, and I'll get another inch to an inch and a half from the tires tomorrow when I get rid of the roller skate wheels. I also get the Aerostar progressive spring rate. it has a softer section and as that compresses a stronger load section.

I also replaced the stock shocks with Toyota / Blisten TRD Tacoma gas shocks. This compensates for the taller ride.

I'l lift the front using the Torsion bar adjustment screws. I'l still need to trim the front wells a little.

attachment.php


attachment.php


attachment.php


attachment.php


attachment.php
 

Attachments

  • Target.jpg
    Target.jpg
    99.4 KB · Views: 995
  • Remnanta.jpg
    Remnanta.jpg
    76.7 KB · Views: 1,001
  • Adter.jpg
    Adter.jpg
    132.7 KB · Views: 1,001
  • Planned tires.jpg
    Planned tires.jpg
    100.8 KB · Views: 1,002
  • Tvan Profile 002.jpg
    Tvan Profile 002.jpg
    153.4 KB · Views: 1,478

Manatee91

Well-known member
Joined
Sep 15, 2014
Messages
76
Spent the afternoon swapping the stock rear springs in the 87 Toyota 4WD project van for Aerostar springs. Had to cut part of a coil off the bottom to match the bottom cup, and about 1-1/2 of a coil off the top to open the top coli fully and reduce the amount of lift a little.


All told it's about 2" higher, and I'll get another inch to an inch and a half from the tires tomorrow when I get rid of the roller skate wheels. I also get the Aerostar progressive spring rate. it has a softer section and as that compresses a stronger load section.


I also replaced the stock shocks with Toyota / Blisten TRD Tacoma gas shocks. This compensates for the taller ride.


I'l lift the front using the Torsion bar adjustment screws. I'l still need to trim the front wells a little.


attachment.php


attachment.php


attachment.php


attachment.php


attachment.php
I like it. It would make a cool camper

Sent from my SM-G930V using Tapatalk
 

Magnum440d100

Well-known member
Joined
Dec 2, 2018
Messages
3,581
Location
Indiana
Still loosely hanging parts. Found out I don’t have (or can’t find) a passenger side headlight bucket...

But I’m finding more parts as I put more parts on the truck.

I was able to finally separate the original drivers inner fender from the crunched core support, so the original inner fender on the drivers side is installed.

Tomorrow will be getting hood hinges installed, and then I’ll be able to do some underhood work.

I’m getting excited because I’m making more room in my back shed, to store more stuff that doesn’t belong up in the front. Soon I’ll have room to where I can disassemble the 2wd trans and 4wd trans to swap tail housings and install the transfer case onto the 2wd trans. Gotta do them side by side, which requires a LOT of room....
 

Attachments

  • EBE44A27-A147-425F-B4D9-5F65FB8F4717.jpg
    EBE44A27-A147-425F-B4D9-5F65FB8F4717.jpg
    153 KB · Views: 45

Outlander

Well-known member
Joined
Jul 30, 2010
Messages
5,154
Location
Quebec, Canada
Did some ATV club admin stuff, then figured a quick nap before heading out to the garage. Woke up at 7:45PM !!

Tomorrow will be busy day, in spite of all the snow I'll start spring clean up. That includes hanging the trouble light Mrs Outlander gave me for Christmas.

Princess Auto delivered a garden trailer this week. I'll bring that to the cottage next week and start putting it together.

Naps do interfere with chores....or is it the other way around?
 

rharman

Well-known member
Joined
Apr 22, 2012
Messages
8,905
Location
SoCal
I've been working on a couple things to get my bike ready for the upcoming riding season. Towards the end of last year the starter was acting up so I installed a new one. It would have been a lot simpler if you didn't have to open the primary to get at the mounting bolts, but everything went smooth with that project.

Next up was a carb replacement. I bought my bike new in 1988 and it came stock with a CV carb and rubber intake both of which were well known to be junk so within the first year of ownership I'd replaced the intake with a one piece aluminum one and had installed a Screaming Eagle butterfly type carb. At that time the bike ran fine, but over the last 30 years things have gone slowly downhill to the point that I kind of got used to it spitting, sputtering, backfiring and bucking. I wanted to rebuild the carb but it's so old I couldn't find replacement parts. This past Christmas my son got me a complete S&S carb and intake kit, so it was time to get that puppy installed.

I did run into a couple snags. When I went to install the S&S intake I found that it reused the stock intake flanges which I'd gotten rid of 30 years ago. I was shocked to find that new OEM,s were around $75, so I rolled the dice and bought a chinesium set on ebay for $25 figuring they were just two metal flanges, what could go wrong? As it turns out they didn't fit properly but after some work with a file I was able to get the clearance I needed, but it took a fair amount of filing and test fitting. And that's why the OEM's cost more, I'm sure they would fit right out of the box.

The next snag was when I went to hook up the throttle cables and noticed that on my old carb they were on the front side of the carb, but on the new one they were on the rear side, which meant they were just a tad too short to work. I got a Drag Specialties set that was cheaper than OEM's and had a made in the USA sticker on them for a good price. The fit and finish on them was great.

Here's a couple pics of the old setup, mid-job, and new setup:

The bike started and idled great right away, and a test ride showed me why so many old Harleys run S&S carbs. I don't know if my bike ran this good when it was brand new. After years of it running like **** it's refreshing to have it run so good.

S&S has always made great products. Carbs, air cleaners, stroker kits.

I smiled when I read "Drag Specialties". I worked in HD dealers in the 70's and early 80's and DS was king of the hill at that time. They were practically printing money. They had their own Cessna Citation and they flew me and a couple other parts managers from the LA area back to their HQ in Minnesota for a tour. It was an awesome trip.
 

Outlawmws

Well-known member
Joined
Aug 9, 2011
Messages
39,325
Location
The Badlands
That's pretty cool ... looks like a VW Syncro?

first gen Toyota Minivan. made from 84-89, 87 (my year) is the first year available 4WD, which was why I bought it.

I like it. It would make a cool camper

Sent from my SM-G930V using Tapatalk

Thanks! Definitely going camping/hunting. I'm not doing a major camper conversion on it as I'm primarily a tent camper, but I wil be setting up a sleeping platform that I can stow using 3-4 1X12's plus one support stand that can fold away, plus a couple of gutter pins (probably clamp on) to let me hang a canopy tarp off the slider door side.

The sleeping platform is only for those times I'm just stopping for a night, or for a single overnighter where setting up a ful camp doesn't make sense.

I'm still looking for a suitable front brush guard/bumper to adapt to it, and a receiver hitch in the back. the old battle damage on the lower panels gets pushed/pulled out and probably bed liner to cover the minor defects (its going it get scratched again anyway where I will take it, so I'm not too concerned with perfection or show room quality).

I'l flat black that and the bumpers, I already de-rusted and painted the wiper arms that way, and the front below the windshield will, get that too, and the lower parts of the back hatch. The top will stay silver to help reflect heat, with possibly some Black detail at the gutter.
 

Manatee91

Well-known member
Joined
Sep 15, 2014
Messages
76
first gen Toyota Minivan. made from 84-89, 87 (my year) is the first year available 4WD, which was why I bought it.


Thanks! Definitely going camping/hunting. I'm not doing a major camper conversion on it as I'm primarily a tent camper, but I wil be setting up a sleeping platform that I can stow using 3-4 1X12's plus one support stand that can fold away, plus a couple of gutter pins (probably clamp on) to let me hang a canopy tarp off the slider door side.


The sleeping platform is only for those times I'm just stopping for a night, or for a single overnighter where setting up a ful camp doesn't make sense.


I'm still looking for a suitable front brush guard/bumper to adapt to it, and a receiver hitch in the back. the old battle damage on the lower panels gets pushed/pulled out and probably bed liner to cover the minor defects (its going it get scratched again anyway where I will take it, so I'm not too concerned with perfection or show room quality).


I'l flat black that and the bumpers, I already de-rusted and painted the wiper arms that way, and the front below the windshield will, get that too, and the lower parts of the back hatch. The top will stay silver to help reflect heat, with possibly some Black detail at the gutter.
I would love to do a pop up one someday but for now my camping setup is my xterra and a tent if my wide is with me or a military sleep system if I am solo. I also have done a couple of trips with the bivy strapped on the top of this bag tied to the sissybar.
4665a5dea2fc72c0995cc85d49e7d772.jpg


Sent from my SM-G930V using Tapatalk
 

jonshonda

Well-known member
Joined
Jul 17, 2017
Messages
4,749
Location
Wisconsin
Eventually, the kitchen sink faucet stopped flowing, so I knew that crud had clogged it... Took it out, cleaned it out, and pressure was restored... It hasn’t flowed this nice since about 2012 hahaha

I take the aerators off faucets after I do a flush because it's almost 100% stuff will get stuck in them. Just saves the headache of having to pull a bunch of stuff out of them, which can be challenging at times.
 

Outlawmws

Well-known member
Joined
Aug 9, 2011
Messages
39,325
Location
The Badlands
I take the aerators off faucets after I do a flush because it's almost 100% stuff will get stuck in them. Just saves the headache of having to pull a bunch of stuff out of them, which can be challenging at times.

:+1: also, run the tubs (Not shower heads)first; more flow, and no aerators...
 

555

Well-known member
Joined
Nov 10, 2007
Messages
2,312
Location
Nomad-Arkansas & Georgia
Worked on a two drawer lateral file cabinet to tool storage project. It was free but had been on a carport for several years with house plants on top of it. Lot's of surface rust and some pitting. Most of the "restoration" has been sanding with a spray can finish. It's not the prettiest one I've seen, but will suffice for the Lost Dreams Garage.
 

Outlawmws

Well-known member
Joined
Aug 9, 2011
Messages
39,325
Location
The Badlands
Still doing it! Taking a lunch break while the paint dries on the rims, and the compressor come up to pressure.

Swapping the "kids" project Sami, rims with the Toy van's tires and rims, painting the "new" rims flat black then mounting the new tires and balancing them (all manually by hand, I have a manual bead breaker) Pics later.
 

PhantomEB

Well-known member
Joined
Feb 6, 2006
Messages
6,817
Location
Medicine Hat, AB, Canuckistan
Gained a little more floor space in my 24x24 by forever lending my buddy’s kid a table saw. I done all my wood working so don’t need it any time soon unless me and my GF end up with an acreage in the next year and I build a 40x40.

Now I got room under my bolt bin for a roller cart to hold scrap steel, which will be more versatile!
 

NUTTSGT

Super Moderator
Staff member
Joined
Sep 14, 2009
Messages
51,130
Location
Northern Central Ohio
Cut some rebar down for some stakes for the fire dept. We had to put some booms out the other day across the river to catch some possible diesel from a wreck. We had nothing on station to attach the booms to. I'll take them to the city mechanic and get some help with heating/bending a 3" 90° on one end. I'm out of gas for my torch.

Then changed the oil in the daughter's Cobalt for the last time, 207K miles, and it's getting sold as she found a 2016 Jeep.

Finally got some more work done on the last base cabinet. This will be for the pantry the wife wants to swap out for a few cupboards.
 

Motorman55

Well-known member
Joined
Apr 10, 2016
Messages
2,650
Location
South Jersey
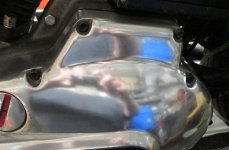
I took a lot of pics of the 74 Harley today. I wanted pictures to go along with the list of the things I need to do. The list is a little long.

The bare aluminum surfaces on the primary and cam case will need some work. They got discolored and stained from sitting around outside even though the bike was covered with a soft sheet and tarp, didn't matter much.

I cleaned off a small section of the primary and just gave it a quick polish with a little bit of Semi-Chrome polish compound. Looks like it'll polish up nicely when done.

Tomorrow starts with a thorough washing.
 

Attachments

  • IMG_2747 (2).jpg
    IMG_2747 (2).jpg
    143.2 KB · Views: 120
Last edited:
To avoid these ads, REGISTER NOW!
Top Bottom