

You are using an out of date browser. It may not display this or other websites correctly.
You should upgrade or use an alternative browser.
You should upgrade or use an alternative browser.
What's on your walls? Neat storage ideas!
- Thread starter scottybaccus
- Start date
Shelf under another Shelf
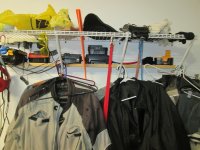
OK, a shelf tucked under a shelf onto the shelf brackets, into wasted space:
Just a 1x4" furring strip used as a charging station, and to store small items (I hate deep shelves).
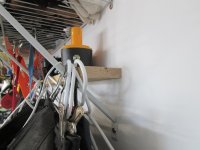
What to do with the chain left over from a hanging light?
Bend a link of it 90 degrees into an L bracket.

OK, a shelf tucked under a shelf onto the shelf brackets, into wasted space:
Just a 1x4" furring strip used as a charging station, and to store small items (I hate deep shelves).
What to do with the chain left over from a hanging light?
Bend a link of it 90 degrees into an L bracket.
Attachments

Last edited:
fishspike57
Well-known member
This is a great thread of ideas. But what I would like to see is what do you guys have in the corners? Especially the space right next to the garage doors. Always seems to be a catch all.
Thanks
Thanks
Lp670mike
Member
Hi all,
This is my first post, but I have been visiting this site for some time now.
These are not great pictures but you can see the tool board that I built in the background. One of these days I will take some good pictures and post them in the Garage Gallery.
Mike.
This is my first post, but I have been visiting this site for some time now.
These are not great pictures but you can see the tool board that I built in the background. One of these days I will take some good pictures and post them in the Garage Gallery.
Mike.
Attachments


QwikKotaTx
Well-known member
Is that a Lambo??Hi all,
This is my first post, but I have been visiting this site for some time now.
These are not great pictures but you can see the tool board that I built in the background. One of these days I will take some good pictures and post them in the Garage Gallery.
Mike.
Sent from my SM-G900V using Tapatalk
Lp670mike
Member
Sort of lol.
It is a replica I have been chipping away at for years.
Most of the body parts are OEM or molded from OEM body panels so it is very accurate.
It is a replica I have been chipping away at for years.
Most of the body parts are OEM or molded from OEM body panels so it is very accurate.
AldeanFan
Well-known member
Sort of lol.
It is a replica I have been chipping away at for years.
Most of the body parts are OEM or molded from OEM body panels so it is very accurate.
This needs it’s own thread!
I want to see details on a replica Lambo!
Sent from my iPhone using Tapatalk
FTWingRiders
Well-known member
Hi all,
This is my first post, but I have been visiting this site for some time now.
These are not great pictures but you can see the tool board that I built in the background. One of these days I will take some good pictures and post them in the Garage Gallery.
Mike.
WOW! Theres a whole lot that needs more pictures going on there! Nice!
And Welcome to GJ!!
HotDoggin
Active member
This is a great thread of ideas. But what I would like to see is what do you guys have in the corners? Especially the space right next to the garage doors. Always seems to be a catch all.
Thanks
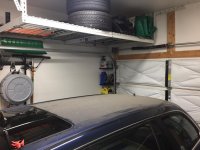
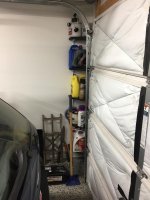
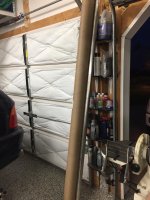
First thing I think I can contribute to in a while! Pardon the stuff in the way of the middle shelves - Mid exhaust project on my project car (the 3-series wagon that's in the corner of one of these pictures), so nowhere good to put the exhaust tubing at the moment.
I used a piece of 1/2" MDF (painted black) and some shelf brackets to perfectly fit some rounded shelves... Shelves are spaced such that I can get the tallest gallon jug of motor oil, car soap, coolant, etc. into the space (including the floor spacing). They stick out about 6.5" from the wall and are plenty to get a handful of stuff on em'.
I think they cost me like a total of $20 for all the brackets and a small container of satin black paint.
I also have a hanging rack that barely clears the garage door for things like wheels/tires, unused engine stand parts, yard tools, etc...
The combo of shelves allows me to keep ALL of my garage-fluids in the garage, and not have to relocate them elsewhere.
Attachments
nitroracer20
Well-known member
rick carpenter
Well-known member


Lp670mike
Member
This needs it’s own thread!
I want to see details on a replica Lambo!
Sent from my iPhone using Tapatalk
Thanks for interest.
I plan to start a Garage diary on here soon.
Mike
Lp670mike
Member
WOW! Theres a whole lot that needs more pictures going on there! Nice!
And Welcome to GJ!!
Thanks for the welcome.
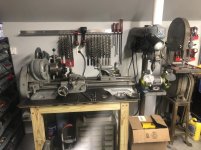
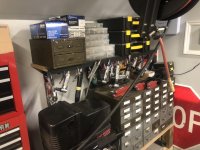
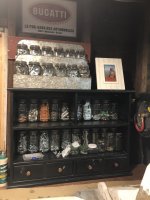
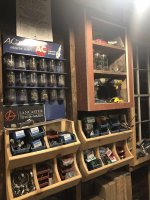
I snapped a couple pics at 4:30 am on my way to work. Its hard to get good pictures when its dark out because I have mostly old style hanging pendant lights in my garage. But here are a few more of my storage ideas.
Mike
Attachments


Lp670mike
Member
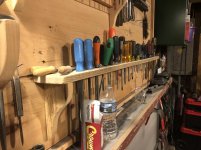
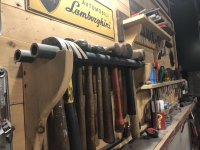
Here are a few close ups of the Tool Board.
It is a little messy at the moment. I have too many projects going on right now.
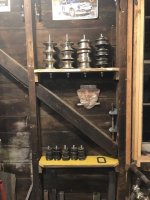
Also my shelf for my Harbor Freight tubing roller dies. Just simple threaded rod bolted through a piece of wood. One nice thing about having no insulation and open wall framing is that it makes nice space for small shelves.
Mike
It is a little messy at the moment. I have too many projects going on right now.
Also my shelf for my Harbor Freight tubing roller dies. Just simple threaded rod bolted through a piece of wood. One nice thing about having no insulation and open wall framing is that it makes nice space for small shelves.
Mike
Attachments

Lp670mike
Member
Hmmm...what will go on remainder of angle? Hammers?
Really liking this work area! nice job
FMC1959
Well-known member
This is a great thread of ideas. But what I would like to see is what do you guys have in the corners? Especially the space right next to the garage doors. Always seems to be a catch all.
Thanks
Here is something I had posted earlier in this thread that could help in what you are looking for
On this post, pic # 3 is upside down (not sure why???)
https://www.garagejournal.com/forum/showpost.php?p=6582195&postcount=1510
This post I try to explain how it is setup
https://www.garagejournal.com/forum/showpost.php?p=6602786&postcount=1521
Something I haven't got around to trying yet but would like to give a shot is something like what this guy has on his hanging tool cabinet. I would probably do larger scale; maybe 5-6 feet high and width being 2-3 feet....space permitting.
I really like the sliding panels, you can organize many items and have easy access to everything, and I don't believe it should be too hard to build.
Lucky13driver
Well-known member
A work in progress. But what I have so far.
Here's a link to my workbench build
https://www.garagejournal.com/forum/showthread.php?t=408820
Here's a link to my workbench build
https://www.garagejournal.com/forum/showthread.php?t=408820
Attachments

Monza Harry
Well-known member
Dan I drilled a "big" hole in the leading edge [3/8" or 7/16"] and use a big nail to hang them on. This works well [for me anyways] until you pile a load of **** in front of them then they get real Heavy at full arms length. Harry P.S. I see someone showed basically the same idea!My car ramps are the old fashioned stamped steel ones so kinda heavy for the towel bar idea(?) Anyone think it would still work or have a better idea for storing them up out of the way?
I've been storing mine like this for several years now.


Last edited:
nicholam77
Well-known member


bad_idea
Well-known member
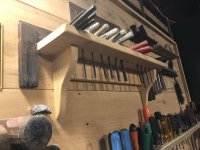
Simple and elegant (for a garage) screwdriver rack. I like it. How'd you attach it to the wall.
nicholam77
Well-known member
Simple and elegant (for a garage) screwdriver rack. I like it. How'd you attach it to the wall.
Thanks! I just used a few 2" deck screws up through the bottom, diagonally, into the wall. The wall is 5/8" plywood. I thought about pocket screws but this seemed stronger. With two on the ends and one in the middle it's pretty solid.
Notgrownup
Well-known member
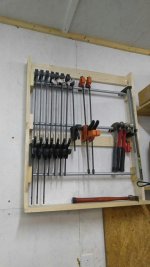
Stole this idea from the web to hang my clamps.
Really not bad. How much did you spend? Wanna do something similar n my garage but a little bigger.
Notgrownup
Well-known member
$20 maybe
rmmiller
Well-known member
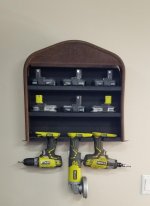
My wife was showing me pictures of the cordless tool/battery wall fixtures a while back saying I needed one. It was her way of telling me she was tired of looking all over for batteries. I took the hint and made my own using the radiator shell for my Model T. When I do that project I plan on using a Model A shell so no loss.
While I was wrapping that up I decided to make a cable tie holder. PVC glued together with magnetic tape so I can move it around as needed.

While I was wrapping that up I decided to make a cable tie holder. PVC glued together with magnetic tape so I can move it around as needed.
drivesitfar
Well-known member
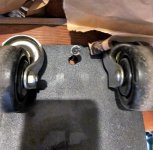
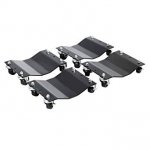
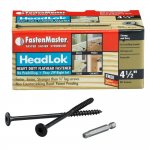
ALL: i've got these 4 4 wheel dollies I could move most anything on including a car and they always are handy when I need them. I just don't need them often and they were hard to store until I put a few of these fastenmaster 6 inch screws in a beam in my garage and now all 4 dollies hang up out of my way nicely.
I also put up some extension cords up on screws off the same beam.
I also put up some extension cords up on screws off the same beam.
Attachments
-
 modified long spider bit screws to hold 4 dollies 2.jpg147.2 KB · Views: 628
 -
 modified long spider bit screws to hold 4 dollies.jpg140.9 KB · Views: 648
 -
 modified long spider bit screws to hold 4 dollies 1.jpg148.1 KB · Views: 727
 -
 car dollies.jpg10.1 KB · Views: 585
 -
 fastenmaster-wood-screws-fmhlgm412-50-64_1000.jpg123.5 KB · Views: 592
 -
 id-1_headlok-spider-drive_lg.jpg75.2 KB · Views: 542
 -
 moving big steel bench on wheels.jpg154.2 KB · Views: 746
There are a lot of pages on this thread, so I do not know if anyone posted something similar.
I got tired of the small area behind the door (service door in my garage), which usually gets filled with a bunch of brooms, or levels, piping or anything that stands off the floor and doesn't take so much room that the door can still be opened.
I had seen this in stores for displaying tools and built this behind my door. This allows much more "stuff" in an organized manner. Just needed 2 feet x 6 feet of pegboard, 2x3 to frame it, 2x4's on the wall and hinges + whatever pegs or hooks needed.
This has worked out pretty good for me.
I'm just curious how often you use that Katana Sword in your garage?

johno
Well-known member
I'm just curious how often you use that Katana Sword in your garage?
O, they're indispensable , every garage should have one.
LS6 Tommy
Well-known member
Tommy,
Thanks!
How did you mount yours on the wall?
Best regards,
Scott
Hey, I just saw your question from last year.

They mount on two metal cleats that run the full length of the cabinet. I also ran a couple if 2" spax screws into the studs to pull them up tight.
Tommy
FMC1959
Well-known member
I'm just curious how often you use that Katana Sword in your garage?
O, they're indispensable , every garage should have one.
So far, never. Just waiting for the right opportunity....like if I catch someone breaking in

Lucid Moments
Well-known member
So far, never. Just waiting for the right opportunity....like if I catch someone breaking in
That is what my 12 gauge pump is for

Motorman55
Well-known member
I removed the wheels from my Motorcraft parts cabinets and mounted them up on the wall. This afforded me some additional floor space under them to store my mechanics seats.
Also hung my mechanics creeper on the wall behind the door where it opens up.
Still some space left on that wall section should I wish to add some narrow shelving in the future.
Also hung my mechanics creeper on the wall behind the door where it opens up.
Still some space left on that wall section should I wish to add some narrow shelving in the future.
Attachments


Last edited:
Old Man Roger
Well-known member
When a Katana is needed, no other tool will do.I'm just curious how often you use that Katana Sword in your garage?
penright
ALLIANCE MEMBER
Had to throw this corner into the mix. Just finished the chair storage rack. The lawn tools and ramp hangers were done a couple of years ago.
The next picture is the opposite side. I got these from my mother-in-law. She had a Christina Book store and she had trinkets in the bins.
The last picture is an example of a 3D printed cap that I need to print and plug the end of the C channel that is sticking out. I have a better shade of orange. The lower right is my stack of this C channel I picked up at the steel salvage yard. I think it may have been used for pallet racks. The paint is back on epoxy and I have to use a stone grinder to remove it for welding. I have not found any paint that will match it. That is why I sanded and painted the ramps black. After that, I need to come up with a better plan. I think I will take one down to a paint store for a match. I know that sound like overkill, but all I need is a little to cover up welds and if I leave the epoxy paint, that will never come off.
The shop is still new and I have a lot of wall space left.


The next picture is the opposite side. I got these from my mother-in-law. She had a Christina Book store and she had trinkets in the bins.
The last picture is an example of a 3D printed cap that I need to print and plug the end of the C channel that is sticking out. I have a better shade of orange. The lower right is my stack of this C channel I picked up at the steel salvage yard. I think it may have been used for pallet racks. The paint is back on epoxy and I have to use a stone grinder to remove it for welding. I have not found any paint that will match it. That is why I sanded and painted the ramps black. After that, I need to come up with a better plan.
I think I will take one down to a paint store for a match. I know that sound like overkill, but all I need is a little to cover up welds and if I leave the epoxy paint, that will never come off. The shop is still new and I have a lot of wall space left.
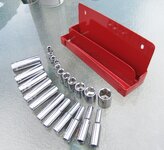
Finished my wall mounting socket box for 1/4" drive, 5/32 to 9/16" in 11 steps.
Next one will be blue, for the metric equivalent sockets. (shown in edited pictures 6-19-25)
Next one will be blue, for the metric equivalent sockets. (shown in edited pictures 6-19-25)
Attachments



Last edited:
larry4406
Well-known member
Finished my wall mounting socket box for 1/4" drive, 5/32 to 9/16" in 11 steps.
Next one will be blue, for the metric equivalent sockets.
Very nice! Sheet metal brake project?
Yes, all done on the brake, except for the end caps. Those were formed on a 3/4" square piece of CRS with the help of a vise. The step downs on those caps were sawn out with a hacksaw, after forming.
Everything was assembled using pop rivets, not a huge fan of those but they worked out fine here. The nail heads were driven out and the rivets were crushed flat with a punch to yield a flat, firm connection.
Everything was assembled using pop rivets, not a huge fan of those but they worked out fine here. The nail heads were driven out and the rivets were crushed flat with a punch to yield a flat, firm connection.

