To avoid these ads, REGISTER NOW!

ZMotorsports Shop Projects 2.0

C2tuck

Well-known member
Joined
Apr 22, 2015
Messages
663
Location
North Texas
You're Freedom Tops were leaking?


That's one of the things I like about mine is that they are leak free and quiet. I worried about this Sunrider top leaking but not tested yet, although I've heard and read good things about it. I really liked my Bestop Trektop NX soft top but didn't care for the rear zipper setup and lost a little bit of storage at the back due to the slant back design, although LOVED the looks of it. Once I made up my mind to sell the soft top and stick with the hard top only my wife and I both commented on missing the ability to flip the front section back with the soft top. When Bestop came out with this product last year I thought the best of both worlds, hard top at the back and ability to flip the front section back for open top drives.


I will reinstall my Freedom tops during the colder winter months but we're sure looking forward to our drives with the top back.


Thanks for stopping by. Sorry to hear that you had issues with your 2014 Wrangler, I hadn't heard of issues with the OEM top(s).


Unfortunately yes...and I’m talking a gallon of water splashing down on the nav unit when the wife hit the brakes after moving it in the driveway after a rain shower. Took it in multiple times and they couldn’t fix it. Service manager actually told me and I quote...”it’s a Jeep, it’s supposed to leak”. Needless to say I jumped all over his ***. Told him a $6k one of CL is different than a $45k one. They ended up buying it back which is a shame cause it was her favorite vehicle.

Have had two friends with the same problem. One on another 14, and one on an 18.
 
To avoid these ads, REGISTER NOW!

C2tuck

Well-known member
Joined
Apr 22, 2015
Messages
663
Location
North Texas
Never leaked with the soft top installed, by we do a lot of highway driving and it’s really loud with a soft top on the highway.
 
OP
Z

zmotorsports

ALLIANCE MEMBER
Joined
Oct 20, 2009
Messages
21,470
Location
Northern Utah
Never leaked with the soft top installed, by we do a lot of highway driving and it’s really loud with a soft top on the highway.


My soft top was slightly louder but not bad to be honest.

After some interstate driving today I noticed this Sunrider is similar to my soft top, slightly louder but not bad at all. Luckily this engine is so much quieter than my little V6 screaming.
 
Last edited:

Motown

Well-known member
Joined
May 11, 2011
Messages
1,704
Location
SE Michigan
A couple of days ago I got the SRS (Supplemental Restraint System) or airbag light on the dash. It would occasionally go out then come back on as I turned the steering wheel so I knew it was the clock spring in the steering column. I’ve been busy the last couple of evenings and didn’t get any shop time but today on my lunch hour I stopped by my local dealership and picked up a new clock spring.

Upon arriving home I disconnected the battery and allowed the system to discharge for about fifteen minutes while I grabbed the mail and changed.

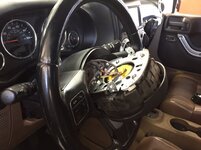
I started by removing these two 6mm bolts (10mm head) on either side of the steering wheel which hold the airbag to the steering wheel.
5a5637586a3810dad58e630043791c62.jpg

Gently tip the airbag out of its pocket being careful not to tug on the wires.
f4b3470ca5cb0226448311a12e31a88a.jpg

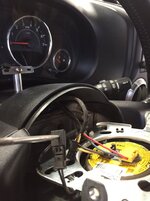
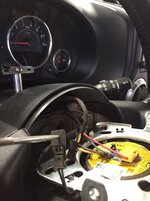
There’s a small hole in this connector for the horn in which to insert a pick and gently separate the connector.
47acada85a6d5e6ea6ca6870a19f1579.jpg

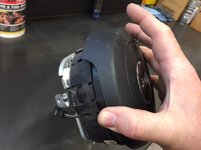
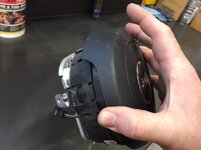
Next squeeze the tabs together on each of these black and yellow connectors on the back of the airbag and disconnect.
ab510c99fa0dc5d16466e7c36fb18430.jpg

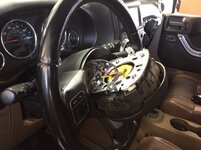
Remove the airbag/horn assembly.
9646f005c9294c2cce0112ebb1ec8636.jpg

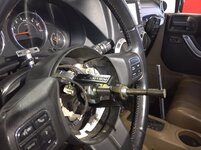
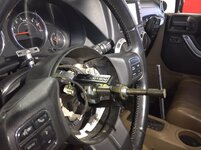
Next remove the 10mm (13mm head) bolt holding the steering wheel to the splined shaft and install a two arm puller the apply pressure. You may find it necessary to smack the end of the puller with a hammer to get the splined hub to release from the shaft.
a54648397bb54d4da918eb4d6a02d2c8.jpg

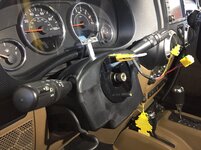
Steering wheel removed.
943f076c1e8a80e91efd4d729df20784.jpg

Next remove the column shroud by removing these two T-20 Torx screws.
dbd65702b9d413f5798d96659f0118bc.jpg

You’ll need a long thin bladed T-20 to reach up into these two holes as they are quite deeply recessed.
14ca6ac16b231a9fef46fe5f2b58ffa4.jpg

And this T-20 under the bottom of the lower shroud.
fe9be26cab13d0171a9be43a2cc72890.jpg

Then pop the two shroud halves apart and set aside. The aluminum standoff is for my Aeroforce gauge along with the small black wire seen here just under the gauge cluster.
d26220104ba6882bcefe55fcea030831.jpg

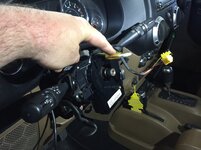
Then you’ll need about a 2"-3” T-20 and preferably a flex head ratchet to remove the next two fasteners.
f9c86f88685e481226a9f3091a0b002c.jpg

One here behind the turn signal lever.
a060b90b4c302a7a6fd3093692ef3d74.jpg

One here behind the wiper switch.
a997fc267330fb3cb391092d7bb14ecb.jpg

And the last one here on the front just ahead of the ignition tumbler.
fdd670b7c62bf4a8ae196459f8f9637b.jpg

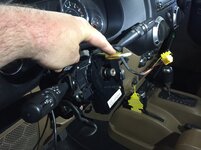
Lift the assembly off and turn upside down to reveal four connectors that must be disconnected. These are simple squeeze the tab and pull.
19c4f3e4e7bfa625236c2e8b8a9b44ff.jpg

Assembly out and on the bench.
3f36dfbd500ddaee32a2f9319a77ad49.jpg

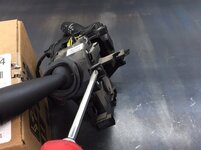
Next to the turn signal switch there is a Phillips head screw to remove.
c09c6a9effa684e8f9a337f3bf2507a0.jpg

And behind the wiper switch a Phillips head screw to remove.
ab50530cce45681b2ddd62486724ce06.jpg

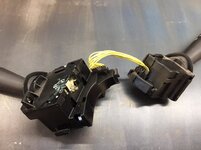
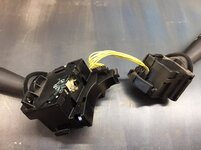
Then the turn signal and wiper assemblies slide apart from the clock spring assembly. No need to unplug the connectors merely leave them connected.
e50f235e2ed8b6ced4e701b3f56bfe25.jpg

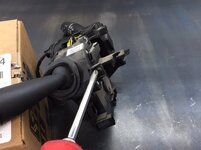
There’s the nugget you’re after, the clock spring assembly.
833b5c21b0aa0e521029497712d8c642.jpg

New left, old right.
09e4fd5c6c4d6b444d0f8e3e64c81b7d.jpg

Chrysler part number of the new clock spring.
077dec5995d8eee415937ad0412a3332.jpg

Reassembly is the reverse of disassembly. Clock spring/turn signal/wiper assembly reinstalled. Do not remove this keeper until after the steering wheel is installed as this is what prevents the clockspring from rotating and you can damage the new one before it is completely installed.
9fe06900d66ab0f4cbe62abf06328b22.jpg

Upper and lower column shrouds installed.
7c2607d90227e40677ea1078b6bdc04e.jpg

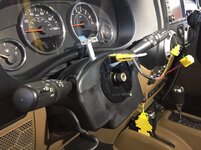
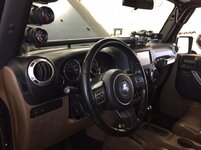
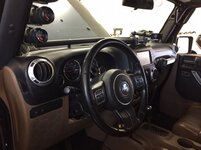
Steering wheel, airbag and Aeroforce gauge installed. Project complete.
2caca360b23bc0620b7ae67a92fd6998.jpg

Thanks for looking.

Those clocksprings on the JK have been a real problem. You should see how many they get back in warranty. The design is not real great for a vehicle that is used in dirty conditions. It has an optical eye internally and the dirt will coat the lens and the steering angle cannot be read. I work for the supplier that has the JL clockspring, and ours is magnetic, which dirt will not effect.
 

Attachments

  • 14ca6ac16b231a9fef46fe5f2b58ffa4.jpg
    14ca6ac16b231a9fef46fe5f2b58ffa4.jpg
    105.2 KB · Views: 1
  • e50f235e2ed8b6ced4e701b3f56bfe25.jpg
    e50f235e2ed8b6ced4e701b3f56bfe25.jpg
    102.2 KB · Views: 1
  • ab50530cce45681b2ddd62486724ce06.jpg
    ab50530cce45681b2ddd62486724ce06.jpg
    90.7 KB · Views: 0
  • c09c6a9effa684e8f9a337f3bf2507a0.jpg
    c09c6a9effa684e8f9a337f3bf2507a0.jpg
    90.7 KB · Views: 0
  • f9c86f88685e481226a9f3091a0b002c.jpg
    f9c86f88685e481226a9f3091a0b002c.jpg
    75 KB · Views: 0
  • 3f36dfbd500ddaee32a2f9319a77ad49.jpg
    3f36dfbd500ddaee32a2f9319a77ad49.jpg
    96 KB · Views: 0
  • 19c4f3e4e7bfa625236c2e8b8a9b44ff.jpg
    19c4f3e4e7bfa625236c2e8b8a9b44ff.jpg
    124.7 KB · Views: 0
  • 9646f005c9294c2cce0112ebb1ec8636.jpg
    9646f005c9294c2cce0112ebb1ec8636.jpg
    86.2 KB · Views: 0
  • fdd670b7c62bf4a8ae196459f8f9637b.jpg
    fdd670b7c62bf4a8ae196459f8f9637b.jpg
    116.1 KB · Views: 0
  • a997fc267330fb3cb391092d7bb14ecb.jpg
    a997fc267330fb3cb391092d7bb14ecb.jpg
    109.1 KB · Views: 0
  • a060b90b4c302a7a6fd3093692ef3d74.jpg
    a060b90b4c302a7a6fd3093692ef3d74.jpg
    89.4 KB · Views: 0
  • d26220104ba6882bcefe55fcea030831.jpg
    d26220104ba6882bcefe55fcea030831.jpg
    128 KB · Views: 0
  • fe9be26cab13d0171a9be43a2cc72890.jpg
    fe9be26cab13d0171a9be43a2cc72890.jpg
    75 KB · Views: 0
  • 833b5c21b0aa0e521029497712d8c642.jpg
    833b5c21b0aa0e521029497712d8c642.jpg
    102.3 KB · Views: 0
  • 09e4fd5c6c4d6b444d0f8e3e64c81b7d.jpg
    09e4fd5c6c4d6b444d0f8e3e64c81b7d.jpg
    108.5 KB · Views: 0
  • f4b3470ca5cb0226448311a12e31a88a.jpg
    f4b3470ca5cb0226448311a12e31a88a.jpg
    111.4 KB · Views: 0
  • 47acada85a6d5e6ea6ca6870a19f1579.jpg
    47acada85a6d5e6ea6ca6870a19f1579.jpg
    104.2 KB · Views: 0
  • ab510c99fa0dc5d16466e7c36fb18430.jpg
    ab510c99fa0dc5d16466e7c36fb18430.jpg
    97.3 KB · Views: 0
  • 2caca360b23bc0620b7ae67a92fd6998.jpg
    2caca360b23bc0620b7ae67a92fd6998.jpg
    105 KB · Views: 0
  • 5a5637586a3810dad58e630043791c62.jpg
    5a5637586a3810dad58e630043791c62.jpg
    83 KB · Views: 0
  • a54648397bb54d4da918eb4d6a02d2c8.jpg
    a54648397bb54d4da918eb4d6a02d2c8.jpg
    125.7 KB · Views: 0
  • 9fe06900d66ab0f4cbe62abf06328b22.jpg
    9fe06900d66ab0f4cbe62abf06328b22.jpg
    108.1 KB · Views: 0
  • 943f076c1e8a80e91efd4d729df20784.jpg
    943f076c1e8a80e91efd4d729df20784.jpg
    105.4 KB · Views: 0
  • dbd65702b9d413f5798d96659f0118bc.jpg
    dbd65702b9d413f5798d96659f0118bc.jpg
    102.3 KB · Views: 0
  • 077dec5995d8eee415937ad0412a3332.jpg
    077dec5995d8eee415937ad0412a3332.jpg
    71.3 KB · Views: 0
  • 7c2607d90227e40677ea1078b6bdc04e.jpg
    7c2607d90227e40677ea1078b6bdc04e.jpg
    141 KB · Views: 1
OP
Z

zmotorsports

ALLIANCE MEMBER
Joined
Oct 20, 2009
Messages
21,470
Location
Northern Utah
Those clocksprings on the JK have been a real problem. You should see how many they get back in warranty. The design is not real great for a vehicle that is used in dirty conditions. It has an optical eye internally and the dirt will coat the lens and the steering angle cannot be read. I work for the supplier that has the JL clockspring, and ours is magnetic, which dirt will not effect.

Yeah, I've seen them fail even in the 30-50k mile range by those who don't keep their interior very clean. I feel I did a fairly good job of keeping mine clean with 97k miles on it. I haven't seen many go much further than that. Other than being a bit on the pricey side, they are easy to replace.
 
OP
Z

zmotorsports

ALLIANCE MEMBER
Joined
Oct 20, 2009
Messages
21,470
Location
Northern Utah
Sweet! I’ve wanted one of those for a while now but keep forgetting about them until seeing one reminds me. Did you get twill or the black diamond?

Matt, I waffled on this top also for a while. Mainly because I had the Bestop Trektop NX soft top that I had been running for several years. However, the last three years I haven't installed the soft top. I kept telling myself that it was because I was so busy with the new house and shop but ultimately I guess I'm not as big a fan of the soft tops as I thought I was originally. I especially don't like the zipper and retentions systems that Jeep and top manufacturers use to secure the top to the Jeep body and getting in/out of the rear of the soft top with zippers is a PITA in my opinion and I get into the rear of my Jeep a lot. Between the toolbox, my CO2 tanks and our folding chairs and cooler I am in the back nearly every time we stop on the trail and I got tired of the whole zipper thing especially when it gets dirt/dust in them. I'm not a fan of going ******* because of how filthy everything gets inside.

The wife and I were talking last fall and had pretty much decided to just have the hard top and sell the soft top but we both commented that the only thing we would miss would be the ability to quickly fold the front section back and have open air over the driver's/passenger's seating. The Freedom tops are a bit better design but I hate having to store them when we are out traveling and I like the ability to quickly go enclosed again if the weather changes or the trail gets too dusty. When we saw this Sunrider top we both thought that's what we need to have the best of both worlds. So far we like it but it's only been on for a few days now. It's not as quiet as with the Freedom tops on, pretty much like our old Trektop NX soft top, but not that loud where it's annoying either. On the interstate we can still carry on a conversation rather easily and actually a bit better now because this V8 engine just lumbers along at 2k RPM not screaming at 2650 like the little V6 did.

So far I can recommend this top. It takes a bit to install the first time because of the material stiffness but once you get it installed and let it sit outside in the sun for a while and conform it folds easily up and down.

As for which one we got, I opted for the heavier 30 oz material of the twill vs. the lighter Black Diamond.
 
OP
Z

zmotorsports

ALLIANCE MEMBER
Joined
Oct 20, 2009
Messages
21,470
Location
Northern Utah
What a beautiful weekend we had here weather wise. Sun and blue sky all weekend.

I left work a bit early on Friday as I had to get my lawns mowed then pressure washed the entire house, shop, fence, gates and driveway. Finished up about 8:00 Friday night. The wife was hosting a bridal shower for our future daughter in law on Saturday and I wanted everything to look perfect.

While the shower was taking place on Saturday I performed the 100k mile service on my wife’s Acura TL as it is getting close.

The external transmission filter took a little time to get to due to having to remove the battery and tray. I’m not quite sure who the genius was who designed the fastener placement but what a PITA to get to the two fasteners under the tray.
a865beafa3b496268309e82ee676a57d.jpg

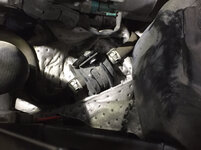
I place an absorbent pad around the filter to catch any ATF as I disconnected the hoses.
8946f3052f94eb996f9bb15a2f691b53.jpg

New filter at the ready.
f4e3f27ebf1a849d9c6854600464d574.jpg

New filter in place with retainer fastened and hoses reinstalled.
37296d8bbb2b46d4d2ac50f25f7ad623.jpg

After dumping the coolant I went to work removing the thermostat housing for thermostat replacement. The top bolt was easy enough to get to but the lower rear one was not easily accessed due to a wire loom and connectors in the way. I ended up removing more than I should have had to just to get a 10mm 1/4”-drive socket on the fastener.
e9caec8636e459e6645df79a9b3257af.jpg

On the top of the transmission you can see the fill plug for the transmission fluid. From the top if you move the two heater hoses to the side you can get a long 3/8” extension with a 17mm socket to remove the plug. Then a long funnel will fit right inside the opening without spilling a drop.
8e79155a9796bb5b21aa5a27a367a577.jpg

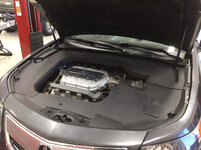
Finished up and engine covers reinstalled.
715d6b64e5fe48e94cd887452249161f.jpg

I lightly set the tires on the floor so I could run around the car and torque the wheels to the proper torque.
93c2e5a30ae51de5672a9854e81cf3b3.jpg

Thanks for looking.
 

Attachments

  • f4e3f27ebf1a849d9c6854600464d574.jpg
    f4e3f27ebf1a849d9c6854600464d574.jpg
    670.6 KB · Views: 0
  • a865beafa3b496268309e82ee676a57d.jpg
    a865beafa3b496268309e82ee676a57d.jpg
    759.2 KB · Views: 0
  • 8946f3052f94eb996f9bb15a2f691b53.jpg
    8946f3052f94eb996f9bb15a2f691b53.jpg
    667.7 KB · Views: 0
  • 93c2e5a30ae51de5672a9854e81cf3b3.jpg
    93c2e5a30ae51de5672a9854e81cf3b3.jpg
    715.9 KB · Views: 0
  • 715d6b64e5fe48e94cd887452249161f.jpg
    715d6b64e5fe48e94cd887452249161f.jpg
    696.9 KB · Views: 0
  • 8e79155a9796bb5b21aa5a27a367a577.jpg
    8e79155a9796bb5b21aa5a27a367a577.jpg
    621.2 KB · Views: 0
  • e9caec8636e459e6645df79a9b3257af.jpg
    e9caec8636e459e6645df79a9b3257af.jpg
    706.2 KB · Views: 0
  • 37296d8bbb2b46d4d2ac50f25f7ad623.jpg
    37296d8bbb2b46d4d2ac50f25f7ad623.jpg
    677.9 KB · Views: 0
Last edited:

casmurbax

Well-known member
Joined
Sep 25, 2012
Messages
2,761
Location
Wilton, NY
Wholly **** on the spring replacement on the spring replacement in the Jeep.

Hard to keep the engine clean? Clean from what? The car looks immaculate.
 
OP
Z

zmotorsports

ALLIANCE MEMBER
Joined
Oct 20, 2009
Messages
21,470
Location
Northern Utah
Wholly **** on the spring replacement on the spring replacement in the Jeep.

Hard to keep the engine clean? Clean from what? The car looks immaculate.

Thanks.

That engine cover on the Acura seems to attract road grime and debris from wet weather and needs to be cleaned regularly or it looks like ****. I appreciate your feedback though, I try to keep things looking nice and it is great to hear feedback that supports that.
 
OP
Z

zmotorsports

ALLIANCE MEMBER
Joined
Oct 20, 2009
Messages
21,470
Location
Northern Utah
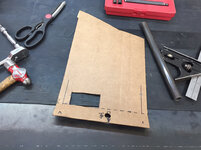
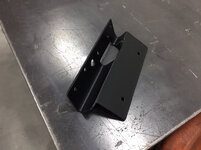
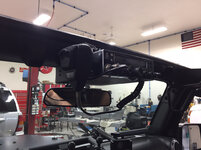
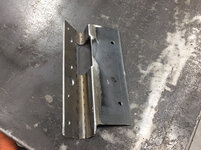
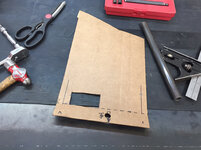
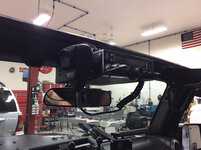
I fabricated a mount for my new Cobra Model 29 CB tonight. There’s not much room in these Jeeps for a full size CB and I have been having issues with my Model 75 lately.

Cardboard template.
2c032b969aa66bbf8f59a4c9f3a27713.jpg

Transferring to steel.
2e87edf159cfb018ea2e1586056d83f7.jpg

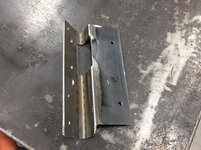
Cut and bent in the press brake along with marking the mounting holes.
7d55d120ba9982f72d285b6574480798.jpg

Mocked up for test fit.
7fceb2452cd9838400ddd2c9dd45beb0.jpg

Plate welded to mount the bracket to.
05322d99d1918433804bc02893eb84aa.jpg

Beadblasted and painted.
1c588dd34ccc5f509eba64795d05788e.jpg

Installed, plastic windshield surround reinstalled and mounting bracket secured.
d347daed0486b578144a86edb0008ab8.jpg

Mounting complete.
d87fea5c025fbc8f6de1cf2b54e56350.jpg

d86cd6c7bcfed64baaf608e9e4809ac7.jpg

Next I just have to wire in up and it’s completed and ready for the trail.

Thanks for looking.
 

Attachments

  • 05322d99d1918433804bc02893eb84aa.jpg
    05322d99d1918433804bc02893eb84aa.jpg
    871.3 KB · Views: 0
  • 1c588dd34ccc5f509eba64795d05788e.jpg
    1c588dd34ccc5f509eba64795d05788e.jpg
    702 KB · Views: 0
  • 7fceb2452cd9838400ddd2c9dd45beb0.jpg
    7fceb2452cd9838400ddd2c9dd45beb0.jpg
    641.2 KB · Views: 0
  • 7d55d120ba9982f72d285b6574480798.jpg
    7d55d120ba9982f72d285b6574480798.jpg
    665.6 KB · Views: 0
  • 2e87edf159cfb018ea2e1586056d83f7.jpg
    2e87edf159cfb018ea2e1586056d83f7.jpg
    846.1 KB · Views: 0
  • 2c032b969aa66bbf8f59a4c9f3a27713.jpg
    2c032b969aa66bbf8f59a4c9f3a27713.jpg
    785.2 KB · Views: 0
  • d347daed0486b578144a86edb0008ab8.jpg
    d347daed0486b578144a86edb0008ab8.jpg
    644 KB · Views: 0
  • d87fea5c025fbc8f6de1cf2b54e56350.jpg
    d87fea5c025fbc8f6de1cf2b54e56350.jpg
    690.3 KB · Views: 0
  • d86cd6c7bcfed64baaf608e9e4809ac7.jpg
    d86cd6c7bcfed64baaf608e9e4809ac7.jpg
    631 KB · Views: 0
Last edited:
OP
Z

zmotorsports

ALLIANCE MEMBER
Joined
Oct 20, 2009
Messages
21,470
Location
Northern Utah
Nice job on the CB bracket.

Thank you. I had a major design change right in the middle of fabricating the front bracket last night. My original design was going to be a front mounting bracket to the windshield frame then another bracket at the sound bar, just above the driver/passenger's shoulders and then a couple of round tubes running fore and aft to the join the two brackets in which the CB would mount to. However, once I got the front bracket fabricated I noticed just how rigid it was and decided I really didn't need to go any further which will also keep the open feeling when we have the top flipped back. I also like this design because it is barely detectable. You can see the CB hanging there but don't really notice the bracket. I like things that are invisible in plain sight. It sits just above the mirror and doesn't even affect any viewing out of the rear view mirror. I figure I'll have the mic cord wrapped around the CB for most of the time when daily driving and then when using it on the trail, I'll let it hang where it is within easy reach.
 

WoodsTruck

Well-known member
Joined
Jan 12, 2013
Messages
1,026
Nice installation. I have had to use warped washers on my CB side mount bolts if they get too wiggly on rough roads.

Curious where you will mount the antenna given such small ground planes on soft top rigs.
 
To avoid these ads, REGISTER NOW!
OP
Z

zmotorsports

ALLIANCE MEMBER
Joined
Oct 20, 2009
Messages
21,470
Location
Northern Utah
Nice installation. I have had to use warped washers on my CB side mount bolts if they get too wiggly on rough roads.

Curious where you will mount the antenna given such small ground planes on soft top rigs.

I'm actually not running a soft top, just the front section where my Freedom Tops resided.

As for the antenna, I am not changing that from my last CB. I run my antenna on my swing away tire carrier about in the middle of the Jeep so it extends slightly above the roofline by about 2'. That will remain the same but I will be re-routing my coax from the antenna up either the A-pillar or the B-pillar and around the windshield trim panel along with the power and ground to keep everything hidden.
 
OP
Z

zmotorsports

ALLIANCE MEMBER
Joined
Oct 20, 2009
Messages
21,470
Location
Northern Utah
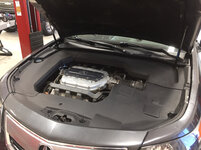
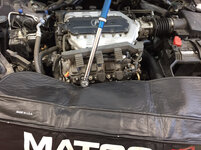
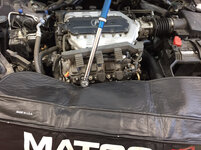
I forgot to pickup spark plugs for the wife’s Acura last weekend so I hurried and replaced them this morning.

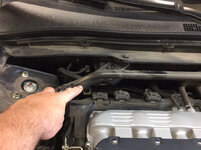
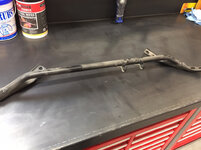
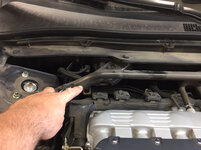
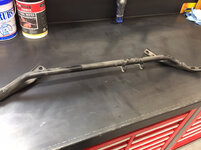
After removing engine covers I thought access would be better if I removed the strut tower support bar.
0eefed4b45f8276a047f946da35afb83.jpg

04a5cf042f254fc92c2058225634610e.jpg

Access is much better now.
6b94cebb06a9615dfc0b5962ac7bf9ab.jpg

OEM spark plugs still looked pretty decent.
31f53d89569ad84b32954fd01449f407.jpg

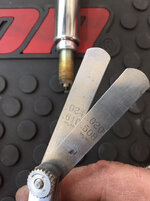
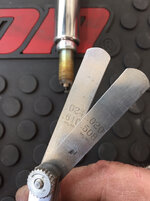
Prepping to gap the new NGK plugs to specification.
c53c4775e9adb70aa9b392af92bb1c0a.jpg

08cf26c99bd9fe4aa7bbf89e86c1829e.jpg

Torquing the spark plugs to spec.
adb1a3fc13f0a5b90324dfe67c1c9ed9.jpg

6dd43769c4646fc0bb1c0d228a33756a.jpg

Lastly I drained and refilled the transmission again with another 4 qts of ATF and took it for a test drive.
 

Attachments

  • 0eefed4b45f8276a047f946da35afb83.jpg
    0eefed4b45f8276a047f946da35afb83.jpg
    703.9 KB · Views: 0
  • 04a5cf042f254fc92c2058225634610e.jpg
    04a5cf042f254fc92c2058225634610e.jpg
    702.5 KB · Views: 0
  • 31f53d89569ad84b32954fd01449f407.jpg
    31f53d89569ad84b32954fd01449f407.jpg
    705.5 KB · Views: 0
  • c53c4775e9adb70aa9b392af92bb1c0a.jpg
    c53c4775e9adb70aa9b392af92bb1c0a.jpg
    673.5 KB · Views: 1
  • 08cf26c99bd9fe4aa7bbf89e86c1829e.jpg
    08cf26c99bd9fe4aa7bbf89e86c1829e.jpg
    730.1 KB · Views: 1
  • adb1a3fc13f0a5b90324dfe67c1c9ed9.jpg
    adb1a3fc13f0a5b90324dfe67c1c9ed9.jpg
    126.7 KB · Views: 2
  • 6dd43769c4646fc0bb1c0d228a33756a.jpg
    6dd43769c4646fc0bb1c0d228a33756a.jpg
    787.2 KB · Views: 1
  • 6b94cebb06a9615dfc0b5962ac7bf9ab.jpg
    6b94cebb06a9615dfc0b5962ac7bf9ab.jpg
    746.8 KB · Views: 1

jalbrecht55

Active member
Joined
Jun 5, 2011
Messages
41
Location
Silverdale, WA
What type of funnel or setup do you have for filling the transmission? I had a heck of a time with my wife’s Honda Accord being that the fill point is “way down there” and quite small. I cobbled something together but would like to find the right tool for the job next time.
 
OP
Z

zmotorsports

ALLIANCE MEMBER
Joined
Oct 20, 2009
Messages
21,470
Location
Northern Utah
What type of funnel or setup do you have for filling the transmission? I had a heck of a time with my wife’s Honda Accord being that the fill point is “way down there” and quite small. I cobbled something together but would like to find the right tool for the job next time.

I have a plastic funnel that is about 12" long and about 1/2" or maybe a bit larger at the small end so it fits into the fill opening. Places the funnel opening just above the engine's intake plane so filling the transmission is very easy.


honda has a 17 MM fill plug on the top of the trans

Same on the wife's Acura. Fill plug just over centerline of the transaxle and a dipstick at the front of the transaxle for checking fluid.
 
OP
Z

zmotorsports

ALLIANCE MEMBER
Joined
Oct 20, 2009
Messages
21,470
Location
Northern Utah
Cant you fill down the dipstick tube?

Yes you can but it is bit smaller diameter which will take longer and bigger chance of spitback so I opted to just use the fill hole. It really isn't that bad to get access to once you move the two heater hoses out of their strain relief holder.
 
OP
Z

zmotorsports

ALLIANCE MEMBER
Joined
Oct 20, 2009
Messages
21,470
Location
Northern Utah
WOOHOOOOO!!!!!

A couple of major milestones today, one in particular that I am so ecstatic about. Firstly, I passed the 5k mile mark today on the new GM LS powertrain in my 2011 Jeep Wrangler. It has been running and driving flawlessly.

The second part, and the part I’m most excited about, is that I made an appointment last week with the Utah State Bureau of Air Quality to have my Jeep certified by the State with the new GM powertrain.

My appointment was this morning. I’ve been quite nervous because without this certification my Jeep was nothing more than an off-road toy and that was the exact opposite of my original intentions with this engine swap. This was also the last piece of the puzzle and ultimately the validation of the entire project.

The inspectors went through it very thoroughly from top to bottom even before they plugged their computer into it. They knew what they were looking for that’s for certain. They rolled around on creepers under it looking for all of the emissions components from the GM Denali. Catalytic converters, O2 sensors, EVAP canister and vent valve along with looking at wiring harness and connectors.

The last step was plugging into the data link connector and verified that everything was communicating and that the ECM was recognizing all of the required components as well as verifying all of the readiness monitors had been set.

I am happy to report that it passed with flying colors.
9372f0736047f7e9ce223e25c3a3db22.jpg

0f89cfbdc2b59722184cc97cccb46118.jpg

If you look at the black cover on the power distribution panel next to the ECM you will see the State certification stating this vehicle has a different engine that what it came from the OEM with but it has been inspected and certified that it has passed the State of Utah emissions. It also states that if there are any questions during the annual emissions testing to call and it has their phone number.
50a04463758331c30927086b34cad82c.jpg

While the one inspector went into the office to process the paperwork and print the decal the other guy went inside and grabbed another gentleman. When hey both came back into the service bay the we’re talking and the guy in the business casuals walked around the Jeep and said to the other guy “wow, you’re right, this thing is clean.”

He turned to me and asked who I had do the engine swap. I was concerned at this point because I have no credentials to speak of and worried that if the average Joe did the work if they would look deeper into the swap but ultimately just blurted our that I did all of the work. He shook my hand and said “great job, excellent work” and walked away.

Pheeeew. That was a relief.

As I was pulling out I couldn’t wait to call my wife and tell her the news. I was so happy and had to share it with the one person who never questioned me throughout the entire project.

Although she didn’t realize I had made an appointment because the emissions isn’t due until later in the year. I told her I wanted to get it over with so I could quit worrying about it. I also didn’t tell her because I didn’t want her to worry as I was worrying enough for both of us. ��

I guess I can call that project a success now.
 

Attachments

  • 9372f0736047f7e9ce223e25c3a3db22.jpg
    9372f0736047f7e9ce223e25c3a3db22.jpg
    760.1 KB · Views: 1
  • 50a04463758331c30927086b34cad82c.jpg
    50a04463758331c30927086b34cad82c.jpg
    772.3 KB · Views: 1
  • 0f89cfbdc2b59722184cc97cccb46118.jpg
    0f89cfbdc2b59722184cc97cccb46118.jpg
    760.2 KB · Views: 0
Last edited:
OP
Z

zmotorsports

ALLIANCE MEMBER
Joined
Oct 20, 2009
Messages
21,470
Location
Northern Utah
I don't think anyone here had a doubt.

Congratulations! You deserve it after all the research and hard work you put into this swap.:beer: and more :beer:

Thanks guys. I guess maybe I was the only one worried then.:lol_hitti

I appreciate you guys following along and commenting along the way. Over all that was a FUN project. Now I can rack up the miles and enjoy it.
 

TLCObsession

Well-known member
Joined
Aug 30, 2011
Messages
328
Location
Bellingham, WA
The only reason any of us from out of state would wonder is because we don't know the rules in UT. When I lived in CA 20 years ago, it was was subjective and dependent on the inspector you got. Your work is beyond thorough and any inspector who doesn't recognize the intent and execution shouldn't be an inspector.

Well done.
 
To avoid these ads, REGISTER NOW!
Top Bottom