To avoid these ads, REGISTER NOW!

ZMotorsports Shop Projects 2.0

OP
Z

zmotorsports

ALLIANCE MEMBER
Joined
Oct 20, 2009
Messages
21,462
Location
Northern Utah
I don't think that's possible :lol_hitti Must be some kind of sorcery.

I'm not looking forward to that part on my JK.

If you buy a complete suspension system and your Jeep is "typical" for what they designed the system for then the bump stop extensions are usually pretty close but still on the conservative side. IF your Jeep is like ours with pretty much every component altered or changed and a lot of weight added then you pretty much will have to pick a starting point and sneak up on the ideal setup from there. Yes it can be done but it does take some time if you want it exact.

For example, when I first lifted my Jeep back in 2011 I purchased the BDS 4.5" long arm system and it came with 3" bumpstop extensions for the stock D44 housing, that was running 35" tires. I never did hit my fenders or any suspension components in those years.

Now after many more alterations and still around 4.25" of overall lift and 37" tires my final setup is sitting at 2.25" of bump stop in the front and 3.5" in the rear with absolutely no rubbing, but it is quite close. My front actual bump stops measure 3.125" but the Dynatrac ProRock44 housing has a flat spring pocket and they come with a .880" puck to get it to stock height. So I removed that .880" puck and machined one bump stop measuring 3.125" which equates to approx. 2.25" over stock for bump stop extensions. I also have had to trim my front bumper back a little and reform my rear inner fenders but it clears the 37" tires with less bump stop than I did with my 35" tires and the bump stop extensions that came with the kit. I am not willing to get into cutting body or any major surgery to run less bump stop so this is where mine will live. Also worth noting, when I finally gave up on BDS's poly joints and built my own suspension links I put a bit more bend in the front lowers to allow more clearance for when I went to 37's because I would see that tire contacting the lower control arms was a common occurrence.

Just think it through systematically and you will minimize the amount of times you need to mess with the bump stops. Also, if you haven't already seen them, Synergy makes a very nice set of bump stops that snap together in 1" increments allowing you to make changes in 1" increments without having to remove the springs each time. I have used them on a few Jeeps but I ended up machining my own bump stops and I wanted to get it closer than using 1" pucks.
 
To avoid these ads, REGISTER NOW!
OP
Z

zmotorsports

ALLIANCE MEMBER
Joined
Oct 20, 2009
Messages
21,462
Location
Northern Utah
I think your son is a chip off the ol' block; his Jeep looks as clean as yours! Can't wait to see what's up next.

Thanks Cam. It's nice to see his vehicles clean again. There for a few months after he bought his house and was getting ready for his wedding I was getting concerned because they were being neglected. My wife told me not to say anything because he had a lot going on but he managed it and came back to earth.:beer:
 

jeepinerdeep

Well-known member
Joined
Dec 28, 2013
Messages
2,099
Location
South Central PA
If you buy a complete suspension system and your Jeep is "typical" for what they designed the system for then the bump stop extensions are usually pretty close but still on the conservative side. IF your Jeep is like ours with pretty much every component altered or changed and a lot of weight added then you pretty much will have to pick a starting point and sneak up on the ideal setup from there. Yes it can be done but it does take some time if you want it exact.

For example, when I first lifted my Jeep back in 2011 I purchased the BDS 4.5" long arm system and it came with 3" bumpstop extensions for the stock D44 housing, that was running 35" tires. I never did hit my fenders or any suspension components in those years.

Now after many more alterations and still around 4.25" of overall lift and 37" tires my final setup is sitting at 2.25" of bump stop in the front and 3.5" in the rear with absolutely no rubbing, but it is quite close. My front actual bump stops measure 3.125" but the Dynatrac ProRock44 housing has a flat spring pocket and they come with a .880" puck to get it to stock height. So I removed that .880" puck and machined one bump stop measuring 3.125" which equates to approx. 2.25" over stock for bump stop extensions. I also have had to trim my front bumper back a little and reform my rear inner fenders but it clears the 37" tires with less bump stop than I did with my 35" tires and the bump stop extensions that came with the kit. I am not willing to get into cutting body or any major surgery to run less bump stop so this is where mine will live. Also worth noting, when I finally gave up on BDS's poly joints and built my own suspension links I put a bit more bend in the front lowers to allow more clearance for when I went to 37's because I would see that tire contacting the lower control arms was a common occurrence.

Just think it through systematically and you will minimize the amount of times you need to mess with the bump stops. Also, if you haven't already seen them, Synergy makes a very nice set of bump stops that snap together in 1" increments allowing you to make changes in 1" increments without having to remove the springs each time. I have used them on a few Jeeps but I ended up machining my own bump stops and I wanted to get it closer than using 1" pucks.

I have a stack of aluminum Rokmen pucks leftover from my TJ in the shop for just the reason you described. Hopefully I'll get it with what I have, if not I'll check out those Synergy's you mentioned. Thank's for the tip, yep I'm waiting for fenders and tire so I only have to do this once!
 

lilscorpion

Well-known member
Joined
Mar 15, 2010
Messages
3,600
Location
Colorado
Thanks for following along Matt and I hope I answered your questions to your satisfaction. Sorry if I rambled a bit but I wanted to convey as much information as possible and as detailed as possible so it would at least have some value.

As of right now I don't think there is anything I would change and just want to drive the hell out of it. I actually talked to a couple of people about doing LS swaps in their Jeeps but doubt I'll hear back because you know how people like to talk and very few ever follow through.:headscrat

Awesome! Did the spring rate increase noticably change the comfort on-road or off between obstacles? Can you remind us which fox shocks you have them paired with? Are they the smoothies? At first I thought they were a little stiff but after only a few short miles I realized that they were about perfect because the lower spring rate springs were allowing too much compression resulting in a soft or spongy feel to the ride. On hard corners/curves I was getting a bit more body roll than I liked also. Once I installed the new Metalcloack dual rate springs with the higher spring rate I quickly realized that it was much more sure footed having less "sponginess" to the rear of the Jeep and feels much more planted going into corners and/or tight curves. Canyon driving is a hoot now as I can actually accelerate through a curve and not feel like the rear end is squatting too much. It rides fantastic both on and off-road, much better than before.

Off-road I didn't hit my bump stops at all like before when going through a dip or whoop. The only time I got up against my rear bump stops was when crawling and slowly compressing the rear springs to full stuff or nearly full stuff. Also the couple of ledges I climbed up I had noticed that the Jeep didn't seem to have as much weight transfer to the rear like it did prior, but in all honesty the ledges weren't quite as big as the ones I experience in places like Moab so I'll be able to have more information after next months trip to Moab.

That's promising. I'm okay with being into my bumps when crawling its bottoming on the whoops and corners that drives me nuts. Excited to see how it does in Moab now.

As for shocks, I am running the Fox 2.0 non-reservoir shocks. Sorry I don't have the part numbers handy but they are the ones for a JKU with a 4-6 inch lift so I could get a bit more extension (droop).

Ok, cool. I had the same shocks (emulsion) on my XJ and loved them. At the time I got them because I didn't feel I needed the reservoirs but was admittedly worried that I'd be sorry. In the end I think I'm not using my jeep in a way that the reservoirs are necessary or if I am, I don't know how to tell that I am even in the whoops. Sounds like lenth-wise you're set up almost perfectly. Based on how you described them and my initial measurements, they could be either the 10" or 12" shocks. Are you running limit straps?

As for rubbing in the rear. When I cut my front pinch seams down in the rear fender wells I cut them a bit further than needed because I knew one day I would be going to 37" tires. I cut them and welded the pinch seam back together about 8 years ago to the point where they are almost perfectly flat with the inner fender. In the rear of the rear fender well, I did have to heat up and reform the plastic inner fender very slightly because during full stuff the tire was just rubbing the rear and I didn't want the tire to catch the edge and roll it under. I think I rubbed in the rear because when I built my control arms I shifted the axle rearward very slightly to assist in clearing the front pinch seam and may have gone just a tad too much. Right now at full stuff with the rear suspension I am clearing the front pinch seam by about 3/4" and the rear inner fender and bumper by about 3/8". Like I mentioned my control arms are adjustable but I built them when I got tired of continually replacing the bushings in the BDS control arms. I am also long-armed all the way around. I used Johnny Joints at the frame ends and OEM rubber encapsulated ones at the axle ends all the way around the Jeep.

Ok, well that makes complete sense. I've not yet gotten into the body yet so I'll need to plan on a little trim trim on the pinch seam. Man I hate cutting into the pinch seam. There's really nothing to worry about but in my age I've gotten kinda weird about rust prevention after learning to the extent that body shops (should) prep before paint when repairing areas like rocker panels where it's difficult to get things truly sealed. I view pinch seams just like those areas. Anyway, I'll cut it, it's what has to be done. I'll remember heating the fender trick too if I end up keeping the stocks. Super helpful, thank you.

Shoot, I hate hearing that they are wearing faster than expected. Mine have nearly 11k driven miles on them and about another 4k of flat-towed miles and still look very good for 15k miles. I did however get a little rock rash on two of my new Raceline wheels last week but I knew that would happen and it is pretty much unavoidable if you plan on playing in the rocks at all.
I mentioned this to my wife the other night and she's thinking that maybe I wrote down the odometer incorrectly. We're actively debating when I actually put the tires on. The difference would be 8k which might actually make the wear not so good. Another factor I failed to throw out there initially is that I didn't get my toe set correctly initial so I got so early wear on my fronts in the first 3 months. More I think about it, the more I recommend we both wait to see what you think for longevity..

As of right now I don't think there is anything I would change and just want to drive the hell out of it. I actually talked to a couple of people about doing LS swaps in their Jeeps but doubt I'll hear back because you know how people like to talk and very few ever follow through.
LS swap is a non-trivial upgrade. Even the less complex ones like fenders and corners tend to have only a 30-ish% completion rate. Problem with the LS is it's a tri-fecta of commitment -
  1. $$$
  2. Time
  3. Complexity

Any one of the above can cause people to shy away. Two of them make it seem maybe too heavy to tackle. When the 3 of them finally sink in it comes down to what separates the bench racing from racing. I'll be honest, I'm not worried about the money (wife is), I'm not worried about the work or fab involved, I am a little concerned about the modern complexities of the new motors in which I have very little experience. I have a real example -

When installing the new steering box, I did research but somehow it didn't sink in the importance of locking the steering wheel in place. though I thought we had, somehow my son and I got out of alignment by a rotation and when cycling the steering, the clock-spring in the steering wheel broke and now nothing works in the steering wheel. Though I've not yet tackled a fix which seems fairly straight forward, I was reminded that my old way of thinking brain is what got me into the mess in the first place. I'm not super excited for learning a lesson with something as expensive as a transmission or a motor. I think I've just become more risk adverse in my old(er) age.
 
Last edited:

lilscorpion

Well-known member
Joined
Mar 15, 2010
Messages
3,600
Location
Colorado
Also, if you haven't already seen them, Synergy makes a very nice set of bump stops that snap together in 1" increments allowing you to make changes in 1" increments without having to remove the springs each time. I have used them on a few Jeeps but I ended up machining my own bump stops and I wanted to get it closer than using 1" pucks.

Slick, had not seen them before. Awesome share!
 
OP
Z

zmotorsports

ALLIANCE MEMBER
Joined
Oct 20, 2009
Messages
21,462
Location
Northern Utah
What a great day working with my son in the shop yesterday. I’ve missed that lately.

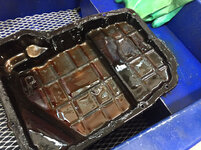
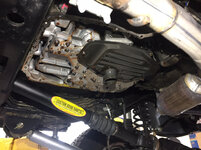
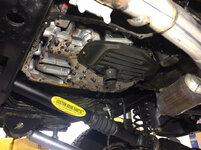
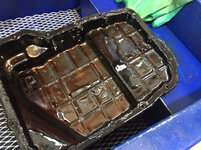
Started by dropping the transmission pan.
555eacbd3396bb4ccbd1d6e77b87a823.jpg

Actually looks pretty good with very little sludge.
e9233de5f134a51d319d1b94336b7802.jpg

2e3bb8658105667f7f21ae3f28f2df8f.jpg

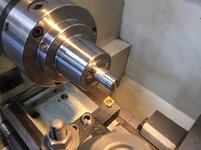
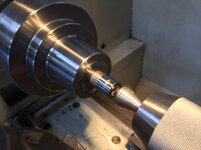
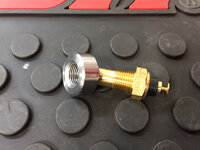
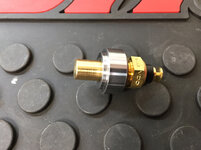
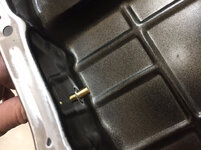
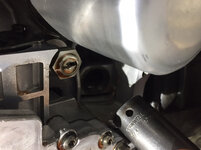
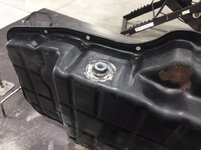
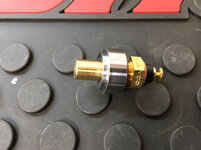
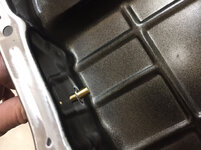
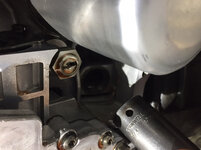
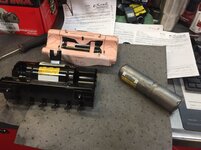
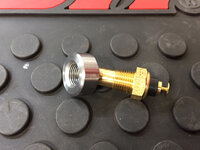
While everything was dripping off I machined a bung to be welded in the pan for the transmission temperature sending unit
4ca5d830fc0adc7e51425936da10fe2a.jpg

90839acd9810f688f5d5705e4cfc599f.jpg

871462e11993f883276a2cf325ab9432.jpg

a44adf4607c2f10567913dc85549115f.jpg

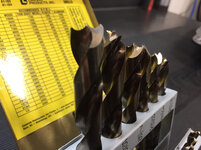
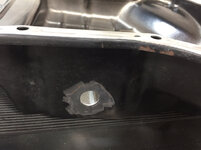
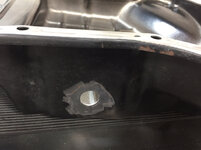
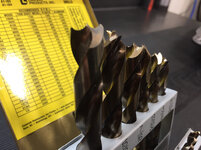
Used my sheet metal bits to drill the hole once the location was determined.
3770bd71645a681636d6aac0250232b9.jpg

f250cfa05f3425fd9b81d70e027953d7.jpg

78447b039026440cc8da748593cb029d.jpg

b546d98aa4ee508cc7f6414a747a0c1f.jpg

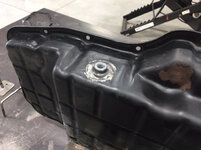
Welded and painted.
4e7e024fac25f5a34ab03249292ac7cb.jpg

79f12b72fee2c85c097b9f1b9add5163.jpg

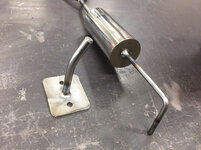
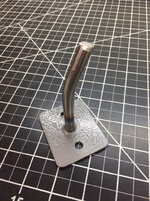
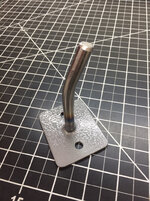
While I was waiting for the paint to dry and while I had the welder out I fixed my 3rd hand and fabbed up a holder for my dust pan and small broom.
34a850245cf9a0d96826040931f36f60.jpg

Painted.
216049e298a9ed6e32e350e504612e70.jpg

Bolted to side of my cabinet.
e48ade9c4dcb67633b6cd263b6fe1d43.jpg

c649895cbde1d25b1bad95c2f1656245.jpg

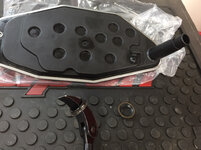
Old trans filter and filter seal removed. Careful when removing this seal to avoid scoring the inside of the seal bore. I will install a prybar until it contacts the bore then back it off slightly to avoid damage.
bfda56d0e5fe8370476a9802ca0e188f.jpg

Deep socket inverted to drive the new seal in flush with the bore. I lubed up seal as well as the filter and installed new filter.
15cd1cdbf9d152ab63013ed00e9b892d.jpg

While I had the pan off I also replaced the spin on cooler filter prior to installing the pan.
881cae0425150dac234d6d79fbc82206.jpg

A small amount of dressing to hold the pan gasket in place during installation.
31f47ce9588937d0bc29c1cd04e43ae8.jpg

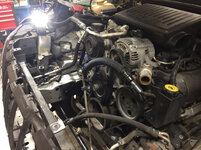
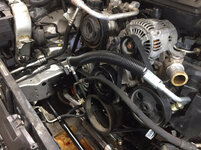
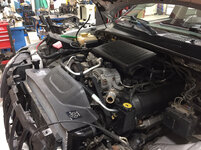
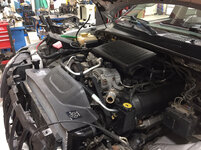
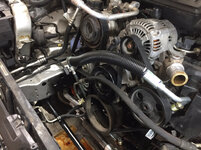
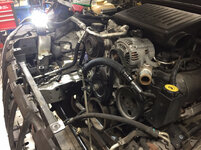
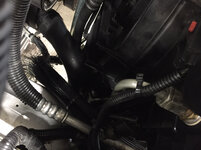
While we were looking at mounting the aux. transmission cooler locations my son noticed a small trace of coolant at the tank crimp on the radiator. We ultimately decided to replace the radiator while we had it in the shop. We also noticed a slight leak around the power steering hose at the crimp so picked a new one up.
eb97d280c86cd600cd726cff951c9d3e.jpg

e82eb8d239b8d10c449dd4cf5098b248.jpg

Everything going back together.
a8f1631aeecf3d3d3229008eb85bfd22.jpg

More to come.
 

Attachments

  • 2e3bb8658105667f7f21ae3f28f2df8f.jpg
    2e3bb8658105667f7f21ae3f28f2df8f.jpg
    749.3 KB · Views: 0
  • a8f1631aeecf3d3d3229008eb85bfd22.jpg
    a8f1631aeecf3d3d3229008eb85bfd22.jpg
    824 KB · Views: 0
  • 4e7e024fac25f5a34ab03249292ac7cb.jpg
    4e7e024fac25f5a34ab03249292ac7cb.jpg
    623.3 KB · Views: 0
  • c649895cbde1d25b1bad95c2f1656245.jpg
    c649895cbde1d25b1bad95c2f1656245.jpg
    663.8 KB · Views: 0
  • 78447b039026440cc8da748593cb029d.jpg
    78447b039026440cc8da748593cb029d.jpg
    625.5 KB · Views: 0
  • a44adf4607c2f10567913dc85549115f.jpg
    a44adf4607c2f10567913dc85549115f.jpg
    707.8 KB · Views: 0
  • b546d98aa4ee508cc7f6414a747a0c1f.jpg
    b546d98aa4ee508cc7f6414a747a0c1f.jpg
    782.1 KB · Views: 0
  • f250cfa05f3425fd9b81d70e027953d7.jpg
    f250cfa05f3425fd9b81d70e027953d7.jpg
    626.2 KB · Views: 0
  • 3770bd71645a681636d6aac0250232b9.jpg
    3770bd71645a681636d6aac0250232b9.jpg
    722.3 KB · Views: 0
  • 871462e11993f883276a2cf325ab9432.jpg
    871462e11993f883276a2cf325ab9432.jpg
    719.8 KB · Views: 0
  • 90839acd9810f688f5d5705e4cfc599f.jpg
    90839acd9810f688f5d5705e4cfc599f.jpg
    666.1 KB · Views: 0
  • 4ca5d830fc0adc7e51425936da10fe2a.jpg
    4ca5d830fc0adc7e51425936da10fe2a.jpg
    723.1 KB · Views: 0
  • 79f12b72fee2c85c097b9f1b9add5163.jpg
    79f12b72fee2c85c097b9f1b9add5163.jpg
    661.3 KB · Views: 0
  • 34a850245cf9a0d96826040931f36f60.jpg
    34a850245cf9a0d96826040931f36f60.jpg
    758.7 KB · Views: 0
  • bfda56d0e5fe8370476a9802ca0e188f.jpg
    bfda56d0e5fe8370476a9802ca0e188f.jpg
    108.7 KB · Views: 0
  • 555eacbd3396bb4ccbd1d6e77b87a823.jpg
    555eacbd3396bb4ccbd1d6e77b87a823.jpg
    768 KB · Views: 0
  • e9233de5f134a51d319d1b94336b7802.jpg
    e9233de5f134a51d319d1b94336b7802.jpg
    894.1 KB · Views: 0
  • 15cd1cdbf9d152ab63013ed00e9b892d.jpg
    15cd1cdbf9d152ab63013ed00e9b892d.jpg
    660 KB · Views: 0
  • 881cae0425150dac234d6d79fbc82206.jpg
    881cae0425150dac234d6d79fbc82206.jpg
    711.4 KB · Views: 0
  • e82eb8d239b8d10c449dd4cf5098b248.jpg
    e82eb8d239b8d10c449dd4cf5098b248.jpg
    811.5 KB · Views: 0
  • e48ade9c4dcb67633b6cd263b6fe1d43.jpg
    e48ade9c4dcb67633b6cd263b6fe1d43.jpg
    621.1 KB · Views: 0
  • eb97d280c86cd600cd726cff951c9d3e.jpg
    eb97d280c86cd600cd726cff951c9d3e.jpg
    808.3 KB · Views: 0
  • 31f47ce9588937d0bc29c1cd04e43ae8.jpg
    31f47ce9588937d0bc29c1cd04e43ae8.jpg
    716.9 KB · Views: 0
  • 216049e298a9ed6e32e350e504612e70.jpg
    216049e298a9ed6e32e350e504612e70.jpg
    841.8 KB · Views: 0
Last edited:

shortykorte

Well-known member
Joined
Sep 1, 2014
Messages
8,039
Location
Tallahassee, Fl
Never heard of sheet metal bits. Learned something new.

You didn’t make several of those holders by chance? I’ll be working on a set for myself.


Shorty Korte
Always remember quality in QST

Sent from my iPhone using Garage Journal
 
OP
Z

zmotorsports

ALLIANCE MEMBER
Joined
Oct 20, 2009
Messages
21,462
Location
Northern Utah
Never heard of sheet metal bits. Learned something new.

You didn’t make several of those holders by chance? I’ll be working on a set for myself.


Shorty Korte
Always remember quality in QST

Sent from my iPhone using Garage Journal

Nice work on the Cherokee.

Thanks guys.

Sorry Shorty, I only made the one hanger that I was needing.:bounce:
 
OP
Z

zmotorsports

ALLIANCE MEMBER
Joined
Oct 20, 2009
Messages
21,462
Location
Northern Utah
Awesome! Did the spring rate increase noticably change the comfort on-road or off between obstacles? Can you remind us which fox shocks you have them paired with? Are they the smoothies? At first I thought they were a little stiff but after only a few short miles I realized that they were about perfect because the lower spring rate springs were allowing too much compression resulting in a soft or spongy feel to the ride. On hard corners/curves I was getting a bit more body roll than I liked also. Once I installed the new Metalcloack dual rate springs with the higher spring rate I quickly realized that it was much more sure footed having less "sponginess" to the rear of the Jeep and feels much more planted going into corners and/or tight curves. Canyon driving is a hoot now as I can actually accelerate through a curve and not feel like the rear end is squatting too much. It rides fantastic both on and off-road, much better than before.


That's promising. I'm okay with being into my bumps when crawling its bottoming on the whoops and corners that drives me nuts. Excited to see how it does in Moab now.


Ok, cool. I had the same shocks (emulsion) on my XJ and loved them. At the time I got them because I didn't feel I needed the reservoirs but was admittedly worried that I'd be sorry. In the end I think I'm not using my jeep in a way that the reservoirs are necessary or if I am, I don't know how to tell that I am even in the whoops. Sounds like lenth-wise you're set up almost perfectly. Based on how you described them and my initial measurements, they could be either the 10" or 12" shocks. Are you running limit straps?


Ok, well that makes complete sense. I've not yet gotten into the body yet so I'll need to plan on a little trim trim on the pinch seam. Man I hate cutting into the pinch seam. There's really nothing to worry about but in my age I've gotten kinda weird about rust prevention after learning to the extent that body shops (should) prep before paint when repairing areas like rocker panels where it's difficult to get things truly sealed. I view pinch seams just like those areas. Anyway, I'll cut it, it's what has to be done. I'll remember heating the fender trick too if I end up keeping the stocks. Super helpful, thank you.

I mentioned this to my wife the other night and she's thinking that maybe I wrote down the odometer incorrectly. We're actively debating when I actually put the tires on. The difference would be 8k which might actually make the wear not so good. Another factor I failed to throw out there initially is that I didn't get my toe set correctly initial so I got so early wear on my fronts in the first 3 months. More I think about it, the more I recommend we both wait to see what you think for longevity..

LS swap is a non-trivial upgrade. Even the less complex ones like fenders and corners tend to have only a 30-ish% completion rate. Problem with the LS is it's a tri-fecta of commitment -
  1. $$$
  2. Time
  3. Complexity

Any one of the above can cause people to shy away. Two of them make it seem maybe too heavy to tackle. When the 3 of them finally sink in it comes down to what separates the bench racing from racing. I'll be honest, I'm not worried about the money (wife is), I'm not worried about the work or fab involved, I am a little concerned about the modern complexities of the new motors in which I have very little experience. I have a real example -

When installing the new steering box, I did research but somehow it didn't sink in the importance of locking the steering wheel in place. though I thought we had, somehow my son and I got out of alignment by a rotation and when cycling the steering, the clock-spring in the steering wheel broke and now nothing works in the steering wheel. Though I've not yet tackled a fix which seems fairly straight forward, I was reminded that my old way of thinking brain is what got me into the mess in the first place. I'm not super excited for learning a lesson with something as expensive as a transmission or a motor. I think I've just become more risk adverse in my old(er) age.

I hear ya on multiple counts Matt. I feel the same way about getting into the bump stops. I was getting into them way to easily which is what prompted my latest spring upgrade. With two people sitting in the rear seat even street driving and hitting a pothole or going through a dip was contacting the bump stops which was unacceptable. Now I really have to be flexing off-road to get into the bump stops and the on-road manners are awesome.

As for the complexity of many of the mod/upgrades it can be overwhelming unless you brake it down into pieces. Twenty plus years ago I wouldn't have thought twice about cutting up a body for a little clearance but like you, I now worry about things like corrosion protection and wanting to keep things nice and rust free for much longer. Many people just say it's cutting and welding, nothing to it. While they are correct if steps are not taken to protect the exposed material it won't last long.

When I cut my pinch seams I liberally coated the inside with POR-15 and then rust through coating on the piece I was welding. Once welded I used seam sealer and then paint. Possibly overkill but I don't want to deal with rust and don't want to have to ever deal with that area again. Even at that, the amount I cut off was minimal, just enough to obtain the results I was after as I didn't want to cut any more than necessary.

Like the amount of work you have done and are doing to your son's LJ, people who haven't done it don't seem to understand all that is needed to have things work properly after modifying a system as much as that and especially when introducing non-OEM parts into a system. It requires homework/research and a lot of it.

When it came to the engine transplant I felt much better about combining FCA and GM systems only after much research and investigation. All of that research is what calmed my nerves and gave me the confidence to move forward. Swapping engines and so forth 20 plus years ago was a no-brainer but you have to think through multiple systems these days. Much like your clock spring scenario, one component can have drastic impacts on multiple others.

I actually show the clockspring replacement earlier in my projects thread here because mine went bad earlier this year or late last year and I had to replace it. All in all it's a pretty simple procedure.
 

jbmatth

Well-known member
Joined
Jun 3, 2013
Messages
5,692
Location
Northern Ok.
I helped a friend replace the radiator on his Grand Cherokee, wow that was way more work than I expected compared to the GM stuff I'd been messing with previously. Did the trans pan already have a drain plug? That is one thing I try to add when getting into them if I plan to have the vehicle very long at all.

JB
 
OP
Z

zmotorsports

ALLIANCE MEMBER
Joined
Oct 20, 2009
Messages
21,462
Location
Northern Utah
I helped a friend replace the radiator on his Grand Cherokee, wow that was way more work than I expected compared to the GM stuff I'd been messing with previously. Did the trans pan already have a drain plug? That is one thing I try to add when getting into them if I plan to have the vehicle very long at all.

JB

JB, the radiator replacement was definitely one of the more involved ones that I have done.

The transmission pan did not have a drain plug but it does now as the sending unit will serve double duty. I feel the same way, if I plan on keeping it for any length of time I add a drain plug for the next time the trans needs servicing.

Thanks for stopping by and checking out what projects I'm working on.
 
OP
Z

zmotorsports

ALLIANCE MEMBER
Joined
Oct 20, 2009
Messages
21,462
Location
Northern Utah
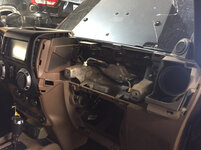
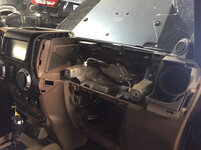
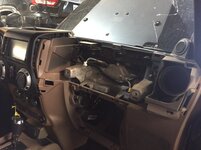
I’ve been trying to get my air bag recall completed on my Jeep but Chrysler wouldn’t allow me to take the part, replace it and return the old one to them. I tried telling them I will bring them the old one, video tape the replacement to prove it was done correctly and allow them to claim the work and get paid for it but I won’t let anyone work work on my cars. Last week they called me back and said they would allow me to go into the shop and watch the mechanic and asked if that would be sufficient. I agreed and today was my appointment. The mechanic did a great job. He was very nice and was very professional throughout the process.

Upon completion I thanked him and apologized as I know what it’s like having someone watch you while you work. He said he didn’t mind and completely understood why.

Dash cover removed.
006772e371e03a1b8fb8473e5c7260b8.jpg

Propulsion cartridge being replaced.
b612c77bd23771a7bd5b5b77bb4d3501.jpg

I really wish I could let go a little but I’m so uptight about things. Hell I didn’t sleep for **** last night just knowing I had to take it in to have the recall done today.
 

Attachments

  • b612c77bd23771a7bd5b5b77bb4d3501.jpg
    b612c77bd23771a7bd5b5b77bb4d3501.jpg
    758.9 KB · Views: 0
  • 006772e371e03a1b8fb8473e5c7260b8.jpg
    006772e371e03a1b8fb8473e5c7260b8.jpg
    717.5 KB · Views: 0

aka Larry

Well-known member
Joined
May 2, 2012
Messages
8,089
Location
Eastern, NC
What's that big wavy line on the right side of the windshield Mike? I know it must be an optical illusion because there's no way you be rolling with a cracked windshield!
 
OP
Z

zmotorsports

ALLIANCE MEMBER
Joined
Oct 20, 2009
Messages
21,462
Location
Northern Utah
What's that big wavy line on the right side of the windshield Mike? I know it must be an optical illusion because there's no way you be rolling with a cracked windshield!

You caught me, it's two big cracks. The I-15 corridor here in between Ogden and Layton have been torn up due to adding a lane for the past several months. I had been fortunate for the first part with only one small rock chick that I quickly filled at home that evening. However, the week before we were leaving for South Dakota a big rock came off the back of a dump truck and smacked the bottom of the windshield just below my wiper and above the cowl creating about a 2" diameter spot which basically destroyed the windshield. While we were in South Dakota the week before last it ran creating what you now see.
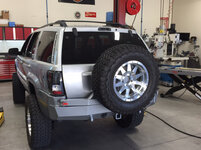
I am waiting until after our next Moab trip to get it replaced. All in all I really can't be that upset. This is the original windshield and I have 103k miles on the Jeep plus about another 30k of it being flat-towed behind our coach. I have had about 5 rock chips that I have repaired but none have run until this last one and being a Jeep with a very flat windshield I guess I should consider myself fortunate as I know many that have had multiple windshields replaced by now.

What ***** is I have one on my 2006 Duramax that I also need to have replaced as the one day I decided to drive it to work about 4 weeks ago it too took a rock impact and by the end of the day at work it had spread clear across to the passenger side from nearly center.:mad:
 

macgyver

Well-known member
Joined
Feb 13, 2008
Messages
45
Location
Big Bear Lake
I’ve been trying to get my air bag recall completed on my Jeep but Chrysler wouldn’t allow me to take the part, replace it and return the old one to them. I tried telling them I will bring them the old one, video tape the replacement to prove it was done correctly and allow them to claim the work and get paid for it but I won’t let anyone work work on my cars. Last week they called me back and said they would allow me to go into the shop and watch the mechanic and asked if that would be sufficient. I agreed and today was my appointment. The mechanic did a great job. He was very nice and was very professional throughout the process.

Upon completion I thanked him and apologized as I know what it’s like having someone watch you while you work. He said he didn’t mind and completely understood why.

Dash cover removed.
006772e371e03a1b8fb8473e5c7260b8.jpg

Propulsion cartridge being replaced.
b612c77bd23771a7bd5b5b77bb4d3501.jpg

I really wish I could let go a little but I’m so uptight about things. Hell I didn’t sleep for **** last night just knowing I had to take it in to have the recall done today.

I have been putting off the air bag recall for the same reason. I don't want anyone tearing into my JK.
 

Attachments

  • b612c77bd23771a7bd5b5b77bb4d3501.jpg
    b612c77bd23771a7bd5b5b77bb4d3501.jpg
    130.9 KB · Views: 0
  • 006772e371e03a1b8fb8473e5c7260b8.jpg
    006772e371e03a1b8fb8473e5c7260b8.jpg
    106.2 KB · Views: 0
OP
Z

zmotorsports

ALLIANCE MEMBER
Joined
Oct 20, 2009
Messages
21,462
Location
Northern Utah
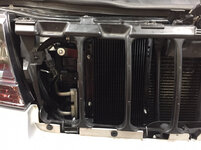
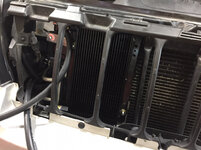
Tonight my son came by after work and we were able to get the aux. transmission cooler completed as well as the upper and lower radiator hoses installed and most all of the engine bay reassembled with the exception of the battery tray.

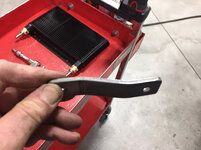
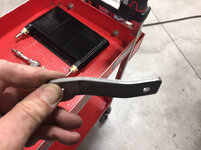
I fabricated three brackets to mount the cooler.
655cc832849079447094ebdee0dd937d.jpg

d494cc4b183a78c40a1ac633ca7436b0.jpg

0fcb57c00db3af5c2088b03778820cf3.jpg

Mocked up.
c3a0d69a89697fac7a707bb95316dbfe.jpg

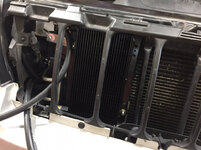
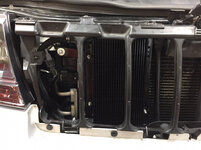
Top of the cooler nestled right under the core support.
47713fb5c3404bd975da9f297e2a4af9.jpg

Brackets bead blasted, painted and installed for the last time.
5e839f82bc1d46e6b79e0c49fc0a3f4b.jpg

I also installed abrasion sleeve on the transmission cooler hoses.
41aad2bef8f486c9690f210714f3ef2b.jpg

40d5f98381b1707d5918f87b47a58e71.jpg

Thanks for looking.
 

Attachments

  • 40d5f98381b1707d5918f87b47a58e71.jpg
    40d5f98381b1707d5918f87b47a58e71.jpg
    692 KB · Views: 0
  • 41aad2bef8f486c9690f210714f3ef2b.jpg
    41aad2bef8f486c9690f210714f3ef2b.jpg
    723.8 KB · Views: 0
  • 5e839f82bc1d46e6b79e0c49fc0a3f4b.jpg
    5e839f82bc1d46e6b79e0c49fc0a3f4b.jpg
    683.5 KB · Views: 0
  • 47713fb5c3404bd975da9f297e2a4af9.jpg
    47713fb5c3404bd975da9f297e2a4af9.jpg
    697.9 KB · Views: 0
  • c3a0d69a89697fac7a707bb95316dbfe.jpg
    c3a0d69a89697fac7a707bb95316dbfe.jpg
    710.6 KB · Views: 0
  • 0fcb57c00db3af5c2088b03778820cf3.jpg
    0fcb57c00db3af5c2088b03778820cf3.jpg
    747.7 KB · Views: 0
  • d494cc4b183a78c40a1ac633ca7436b0.jpg
    d494cc4b183a78c40a1ac633ca7436b0.jpg
    730.8 KB · Views: 0
  • 655cc832849079447094ebdee0dd937d.jpg
    655cc832849079447094ebdee0dd937d.jpg
    696 KB · Views: 1
Last edited:
To avoid these ads, REGISTER NOW!

Nlped

Well-known member
Joined
Feb 24, 2014
Messages
151
Location
Hayden AL
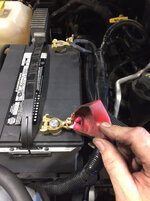
Were trying to get my son’s WJ ready and sneak back down there towards the end of the month and test it out.


I ask because my dad & stepmom will be there next week and be there for 2 weeks. We are going to try and get out there the 2nd week. Guess we’ll miss you.

Sent from my iPhone using Tapatalk
 
OP
Z

zmotorsports

ALLIANCE MEMBER
Joined
Oct 20, 2009
Messages
21,462
Location
Northern Utah
Looks great as always Mike!

Thank you. I appreciate that.

I also just noticed that this is your first post. I am honored that you made your first post on my thread after being a member of the forum for 8 plus years.
I ask because my dad & stepmom will be there next week and be there for 2 weeks. We are going to try and get out there the 2nd week. Guess we’ll miss you.

Sent from my iPhone using Tapatalk

We have friends there all month and after talking with the wife last night it looks like we are going to try to get there around the 12th or 13th. We'll be staying at the OK RV Park again. If you're still there please stop by and say hi.
 
Last edited:
OP
Z

zmotorsports

ALLIANCE MEMBER
Joined
Oct 20, 2009
Messages
21,462
Location
Northern Utah
Mike,
I'm interested in your sheet metal drill bits. Would you tell me who makes them? Do you like them?
Thanks, Jon

Jon, the set I have I purchased from Lawson many years ago. I don't do a ton of sheet metal work but when I do use them they work slick. They cut the outer edge so nice and clean and the holes are actually round with minimal cleanup around the outer edge.

Thanks for stopping by Jon.
 

ttpete

Well-known member
Joined
Mar 8, 2011
Messages
6,737
Location
Dearborn, MI
Jon, the set I have I purchased from Lawson many years ago. I don't do a ton of sheet metal work but when I do use them they work slick. They cut the outer edge so nice and clean and the holes are actually round with minimal cleanup around the outer edge.

Thanks for stopping by Jon.

For sheet metal, I generally use Hougen Rotabroaches. They make a nice clean hole and are available in inch or metric sizes. I use brad point drills for plastics, mostly for motorcycle windshields. They won't start cracks like regular twist drills will.
 
OP
Z

zmotorsports

ALLIANCE MEMBER
Joined
Oct 20, 2009
Messages
21,462
Location
Northern Utah
For sheet metal, I generally use Hougen Rotabroaches. They make a nice clean hole and are available in inch or metric sizes. I use brad point drills for plastics, mostly for motorcycle windshields. They won't start cracks like regular twist drills will.

Agreed. I have the Rotacut annular cutters as well and prefer them for most jobs but I hadn't used these in a while and thought I would get them out and dust them off. In many of my previous pictures of when we were building my son's suspension on his WJ last year I show the Rotacut annular cutters in use. They sure make a nice perfectly round hole and fast.
 

ttpete

Well-known member
Joined
Mar 8, 2011
Messages
6,737
Location
Dearborn, MI
Agreed. I have the Rotacut annular cutters as well and prefer them for most jobs but I hadn't used these in a while and thought I would get them out and dust them off. In many of my previous pictures of when we were building my son's suspension on his WJ last year I show the Rotacut annular cutters in use. They sure make a nice perfectly round hole and fast.

I've probably cut thousands of spot welds. The advantage is that I can pilot it in a center punch mark and only go through one layer, then grind the buttons off.
 
OP
Z

zmotorsports

ALLIANCE MEMBER
Joined
Oct 20, 2009
Messages
21,462
Location
Northern Utah
I've probably cut thousands of spot welds. The advantage is that I can pilot it in a center punch mark and only go through one layer, then grind the buttons off.

Yep. Back when I was doing a lot of paint & body work I wore several out cutting spot welds. They worked perfectly for that because like you said, you don't damage the bottom panel. It's an efficient way to cut spot welds for sure.
 
OP
Z

zmotorsports

ALLIANCE MEMBER
Joined
Oct 20, 2009
Messages
21,462
Location
Northern Utah
Last night we continued work on my son’s WJ. We were able to pull a vacuum on the cooling system and while we had it sealed off checking for leaks my son installed the air box and I installed the battery tray and battery. After refilling the transmission and the power steering we took it for a road test before tackling the next job, a leaking front axle seal.

Before closing up the shop I pulled the front tires/wheels and drained the gear oil.
72b29df3b20b06f71f2e5500ce46fc24.jpg
 

Attachments

  • 72b29df3b20b06f71f2e5500ce46fc24.jpg
    72b29df3b20b06f71f2e5500ce46fc24.jpg
    686 KB · Views: 2
Last edited:
OP
Z

zmotorsports

ALLIANCE MEMBER
Joined
Oct 20, 2009
Messages
21,462
Location
Northern Utah
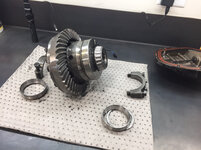
Finished replacing the inner axle seals on the front axle of my son’s WJ tonight.

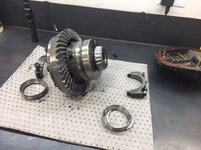
Carrier out.
fb327af8ad52913047c18b1e1eb2ad98.jpg

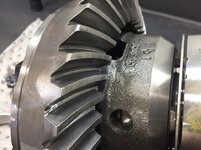
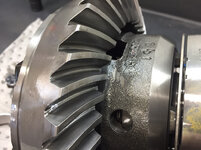
Wear patten looks fantastic.
2a34ee561795392debbf32a3780f2850.jpg

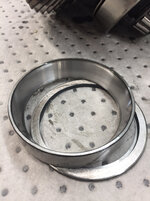
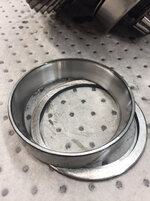
Wear pattern on the races and bearings looks great also.
182be1bf453128e4b13150caed6b3a1a.jpg

Thanks for looking.
 

Attachments

  • 182be1bf453128e4b13150caed6b3a1a.jpg
    182be1bf453128e4b13150caed6b3a1a.jpg
    675.8 KB · Views: 0
  • 2a34ee561795392debbf32a3780f2850.jpg
    2a34ee561795392debbf32a3780f2850.jpg
    767 KB · Views: 0
  • fb327af8ad52913047c18b1e1eb2ad98.jpg
    fb327af8ad52913047c18b1e1eb2ad98.jpg
    687.4 KB · Views: 0
Last edited:
OP
Z

zmotorsports

ALLIANCE MEMBER
Joined
Oct 20, 2009
Messages
21,462
Location
Northern Utah
We didn’t get as much done yesterday on my son’s WJ as I had hoped but we at least made progress. Again, the little details take time.

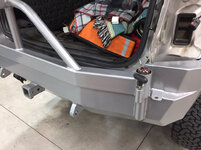
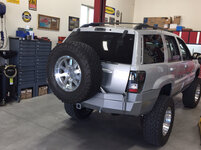
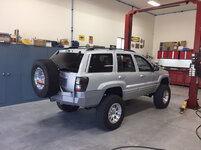
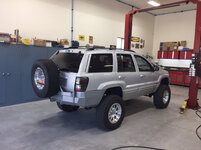
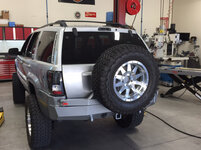
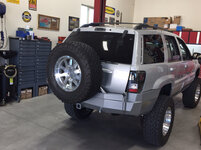
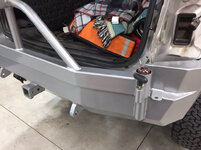
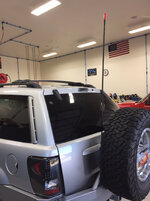
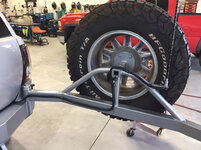
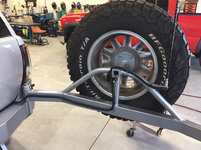
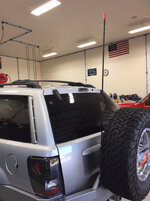
We installed his tire carrier that has been sitting on my shop floor for about nine months now.

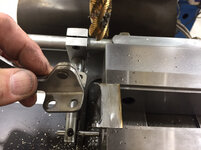
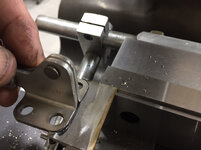
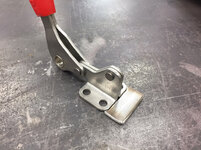
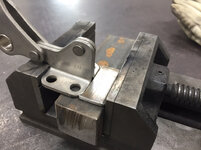
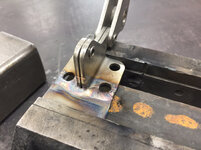
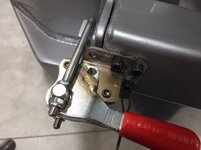
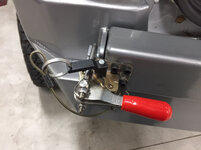
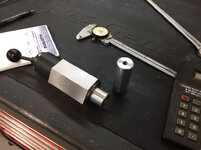
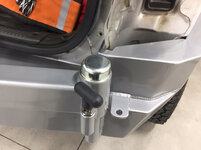
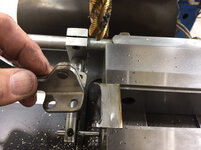
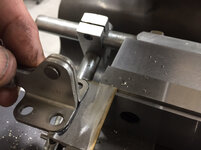
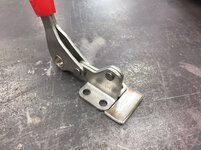
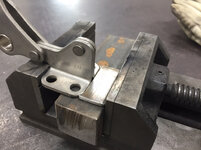
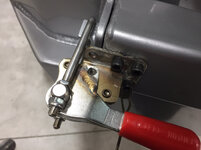
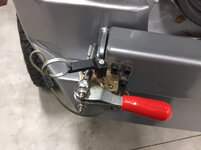
While I was waiting for my son in the morning I added some stainless steel material to the Destaco toggle clamp for his carrier.
cf0d1907dec5afa5ef866c8274cdb6df.jpg

328521f22be3a0cdbd83aeb215c907f1.jpg

20021b3cf4ecfbe9eef6c461e69c0a76.jpg

4180333b7d42a3b9ce050804b5879466.jpg

838546e427546c9f7aa2b26cd4a7768b.jpg

When my son showed up we installed the carrier.
b1e8276a015d246e1b499722150d2f5d.jpg

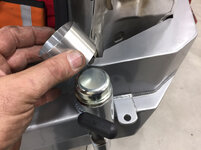
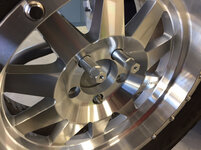
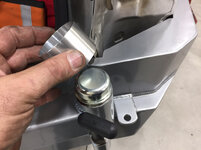
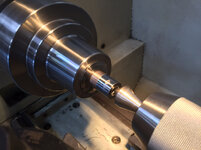
Installation of the dust cap with my machined driver.
2aa330f474ffcec93b54a7866daa0fb5.jpg

26b000bba1d93c208fbb3bfbd6c837ca.jpg

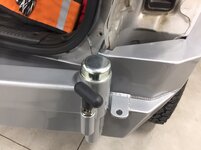
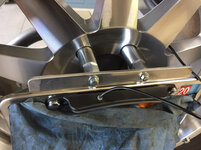
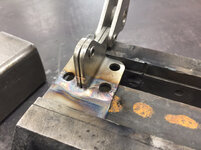
We installed the toggle clamp and welded a small tab on the clamp to locate a push pin.
b70dd860d54d7839f058ba0983cd6fe3.jpg

c374eb29414a892a2cd211ea5a841b80.jpg

2b5504f2ff7da1e3f844a9e44959ba2f.jpg

7b203c390194326100e2ca8b8286a032.jpg

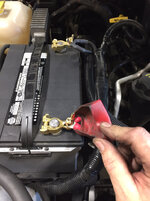
The battery terminals were in pretty poor condition so we replaced them with some high grade marine connectors. We cut the original connectors off as the cables themselves were in good condition and crimped new lugs on with heat shrink.
46e588349d9628d071ea43e0a02e2248.jpg

e6d6bb0364463f65b9bb7cc941437192.jpg

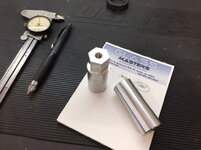
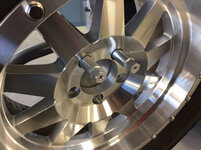
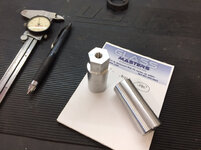
Next task was to fabricate a license plate mount as now with an externally mounted spare tire the license plate is hidden if left in the OEM location. We used standard 1/2”-20 lug nuts which left about 3/4” of threads protruding. The plane was to machine some standoffs from 1” aluminum with flats for a 3/4” socket, the same as the lug nuts.
76172b3af2fbf2b7efde575e241d13ca.jpg

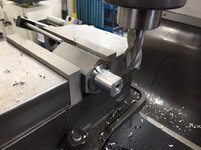
They were drilled and tapped with 1/2”-20 threads on one side and 8mm x 1.25 threads on the other. Then placed into my 6-sided collet holder in which to machine the flats.
b120f92d6de71a6533a79489ffc76eff.jpg

Machining the flats.
2beebaf3f5f6013ac540081f9497a036.jpg

One down one to go.
7a45326dd2d699b731f995605c03b515.jpg

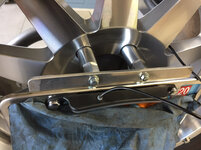
Standoffs mocked into place.
9aca73df9a362caa0b2909c106e461b2.jpg

I cut a piece of 3/16” aluminum plate just a little taller than the license plate and drilled & tapped for the plate and LED light.
c1c5ac9e523331d614dad91dee606c4f.jpg

f498d21b84af5ad817e71ff5b4895851.jpg

Before closing up the shop I ran a couple of wires from his right tail light marker circuit to power the license plate light and temporarily zip-tied the wiring until we can install the CB some time this week.

Thanks for looking.
 

Attachments

  • 26b000bba1d93c208fbb3bfbd6c837ca.jpg
    26b000bba1d93c208fbb3bfbd6c837ca.jpg
    622.1 KB · Views: 0
  • 9aca73df9a362caa0b2909c106e461b2.jpg
    9aca73df9a362caa0b2909c106e461b2.jpg
    717.6 KB · Views: 0
  • cf0d1907dec5afa5ef866c8274cdb6df.jpg
    cf0d1907dec5afa5ef866c8274cdb6df.jpg
    679.2 KB · Views: 0
  • e6d6bb0364463f65b9bb7cc941437192.jpg
    e6d6bb0364463f65b9bb7cc941437192.jpg
    752.9 KB · Views: 0
  • 76172b3af2fbf2b7efde575e241d13ca.jpg
    76172b3af2fbf2b7efde575e241d13ca.jpg
    767.2 KB · Views: 1
  • b120f92d6de71a6533a79489ffc76eff.jpg
    b120f92d6de71a6533a79489ffc76eff.jpg
    747.9 KB · Views: 1
  • 2beebaf3f5f6013ac540081f9497a036.jpg
    2beebaf3f5f6013ac540081f9497a036.jpg
    726.8 KB · Views: 1
  • 7a45326dd2d699b731f995605c03b515.jpg
    7a45326dd2d699b731f995605c03b515.jpg
    731 KB · Views: 0
  • c1c5ac9e523331d614dad91dee606c4f.jpg
    c1c5ac9e523331d614dad91dee606c4f.jpg
    785.9 KB · Views: 0
  • f498d21b84af5ad817e71ff5b4895851.jpg
    f498d21b84af5ad817e71ff5b4895851.jpg
    700.7 KB · Views: 0
  • 46e588349d9628d071ea43e0a02e2248.jpg
    46e588349d9628d071ea43e0a02e2248.jpg
    726.3 KB · Views: 0
  • 7b203c390194326100e2ca8b8286a032.jpg
    7b203c390194326100e2ca8b8286a032.jpg
    743.2 KB · Views: 0
  • 2b5504f2ff7da1e3f844a9e44959ba2f.jpg
    2b5504f2ff7da1e3f844a9e44959ba2f.jpg
    727 KB · Views: 0
  • 328521f22be3a0cdbd83aeb215c907f1.jpg
    328521f22be3a0cdbd83aeb215c907f1.jpg
    617.9 KB · Views: 0
  • 20021b3cf4ecfbe9eef6c461e69c0a76.jpg
    20021b3cf4ecfbe9eef6c461e69c0a76.jpg
    801 KB · Views: 0
  • 4180333b7d42a3b9ce050804b5879466.jpg
    4180333b7d42a3b9ce050804b5879466.jpg
    697 KB · Views: 0
  • 838546e427546c9f7aa2b26cd4a7768b.jpg
    838546e427546c9f7aa2b26cd4a7768b.jpg
    722.1 KB · Views: 0
  • b1e8276a015d246e1b499722150d2f5d.jpg
    b1e8276a015d246e1b499722150d2f5d.jpg
    724.4 KB · Views: 0
  • 2aa330f474ffcec93b54a7866daa0fb5.jpg
    2aa330f474ffcec93b54a7866daa0fb5.jpg
    650.3 KB · Views: 0
  • b70dd860d54d7839f058ba0983cd6fe3.jpg
    b70dd860d54d7839f058ba0983cd6fe3.jpg
    651 KB · Views: 0
  • c374eb29414a892a2cd211ea5a841b80.jpg
    c374eb29414a892a2cd211ea5a841b80.jpg
    647.5 KB · Views: 0
Last edited:

LXCam

ALLIANCE MEMBER
Joined
Apr 23, 2013
Messages
19,202
Location
AZ
That plate holder is slick Mike, what a cool job you pulled off! Hey, we’re you source that hex C collet holder or did you make it? I’m always pulling out the indexing one for such tasks but I like the fact that one would be much quicker to set it up for an angled plane verses jigging up mine to a sine plate.

Btw, any issues with droop on the rack?
 
OP
Z

zmotorsports

ALLIANCE MEMBER
Joined
Oct 20, 2009
Messages
21,462
Location
Northern Utah
That plate holder is slick Mike, what a cool job you pulled off! Hey, we’re you source that hex C collet holder or did you make it? I’m always pulling out the indexing one for such tasks but I like the fact that one would be much quicker to set it up for an angled plane verses jigging up mine to a sine plate.

Btw, any issues with droop on the rack?

Super clean! Love the details!

That license plate solution is awesome! Tire carrier turned out slick as well.

Thanks for the comments guys. I appreciate them.

Cam, the collet holder I purchased as a set. The set consisted of a hex and a square body as well as two knurled locking nuts and a quick release lever. I've had them for quite some time and can't remember if I purchased them from MSC or Enco. I'm pretty sure it was Enco. They are not a high end manufacturer but they are nicely ground and hold tight tolerances.

As for any droop on the tire carrier, none when we installed it. It barely touches the glide block that I put on the clamp end. I actually need to take mine apart and re-grease the spindle bearings and give it a tightening as mine is barely starting to droop with my 37" tire where it now glides up and over the glide block and it has been on my Jeep for nearly 8 years.
 
OP
Z

zmotorsports

ALLIANCE MEMBER
Joined
Oct 20, 2009
Messages
21,462
Location
Northern Utah
We installed the CB in my son’s WJ tonight.

Installed the antenna and worked our way forward. Through the left tail light opening and along the passenger interior trim panels up to the center console where we installed the unit.

84228fa76e5be0d18bed06165bf9042b.jpg

bde5d93c8cce678f1a2d5f61e5ebe196.jpg

Thanks for looking.
 

Attachments

  • bde5d93c8cce678f1a2d5f61e5ebe196.jpg
    bde5d93c8cce678f1a2d5f61e5ebe196.jpg
    774.4 KB · Views: 0
  • 84228fa76e5be0d18bed06165bf9042b.jpg
    84228fa76e5be0d18bed06165bf9042b.jpg
    668.5 KB · Views: 0
Last edited:
To avoid these ads, REGISTER NOW!
Top Bottom