To avoid these ads, REGISTER NOW!

ZMotorsports Shop Projects 2.0

LXCam

ALLIANCE MEMBER
Joined
Apr 23, 2013
Messages
19,202
Location
AZ
Oh gezzz thanks Mike. Now I have this overwhelming urge to disassemble my lathe and detail the dang thing.

BTW, We have the same lathe cept mine wasn't via Matt. When I fist got it I was doing a **** load of production parts for those fuel hats I showed you a couple years back. I was jonesing for a DRO but got cheap and did some inexpensive scales and displays......pretty hokie but very effective. Well those didn't last but 3-4 years before they started having issues. You know what, I'm like you at this point and live just fine without them. The only one I've keep functioning and use often is the tail stock travel, that's GREAT for repetitive plunge work.

But I'll admit one of these days I'll end up getting an Acu-rite DRO like I have for my mill.
 
To avoid these ads, REGISTER NOW!
OP
Z

zmotorsports

ALLIANCE MEMBER
Joined
Oct 20, 2009
Messages
21,460
Location
Northern Utah
Oh gezzz thanks Mike. Now I have this overwhelming urge to disassemble my lathe and detail the dang thing.

BTW, We have the same lathe cept mine wasn't via Matt. When I fist got it I was doing a **** load of production parts for those fuel hats I showed you a couple years back. I was jonesing for a DRO but got cheap and did some inexpensive scales and displays......pretty hokie but very effective. Well those didn't last but 3-4 years before they started having issues. You know what, I'm like you at this point and live just fine without them. The only one I've keep functioning and use often is the tail stock travel, that's GREAT for repetitive plunge work.

But I'll admit one of these days I'll end up getting an Acu-rite DRO like I have for my mill.
I too have a digital scale that I built for the tailstock and it is nice to measure depth with the tailstock but other than that just can't see the need right now either. One of these days though.

How long have you had you 13x40 lathe Cam and are you still happy with it?
 

LXCam

ALLIANCE MEMBER
Joined
Apr 23, 2013
Messages
19,202
Location
AZ
I too have a digital scale that I built for the tailstock and it is nice to measure depth with the tailstock but other than that just can't see the need right now either. One of these days though.

How long have you had you 13x40 lathe Cam and are you still happy with it?

Right around 8-9 years now and more then happy. It's not near as beefy as my old american junior but the likely hood of my wife finding me wrapped around it bleed out is reduced by 99%. For the stuff I make its accurate as all get out, I can hold a half a thou when the part requires it, but that does require some finesse.
 
OP
Z

zmotorsports

ALLIANCE MEMBER
Joined
Oct 20, 2009
Messages
21,460
Location
Northern Utah
Right around 8-9 years now and more then happy. It's not near as beefy as my old american junior but the likely hood of my wife finding me wrapped around it bleed out is reduced by 99%. For the stuff I make its accurate as all get out, I can hold a half a thou when the part requires it, but that does require some finesse.

Awesome. Thanks for the reply Cam. Same experience here with being able to hold tight tolerances. It's a great lathe.
 

sanddan

Well-known member
Joined
Jul 7, 2005
Messages
708
Location
Oregon
Looking and actually buying are two different things Pat. I started looking again but don't know if/when I will actually pull the trigger. At this point it's a luxury and not a necessity.

That was the main reason I bought it when I got the lathe, first thing I did after getting it up and running was installing the DRO. I just wish I'd gotten a 6 jaw chuck instead of the 3 jaw that came with it. I'm in the same boat as you are with the DRO, a 6 jaw would be nice but not necessary. The only regret I have with my 1340GT.
 
OP
Z

zmotorsports

ALLIANCE MEMBER
Joined
Oct 20, 2009
Messages
21,460
Location
Northern Utah
That was the main reason I bought it when I got the lathe, first thing I did after getting it up and running was installing the DRO. I just wish I'd gotten a 6 jaw chuck instead of the 3 jaw that came with it. I'm in the same boat as you are with the DRO, a 6 jaw would be nice but not necessary. The only regret I have with my 1340GT.

Awesome.

Thanks for the feedback Dan and thanks for stopping by. Hope all is well with you and your family my friend.
 
OP
Z

zmotorsports

ALLIANCE MEMBER
Joined
Oct 20, 2009
Messages
21,460
Location
Northern Utah
Last week I posted up some accolades to Benchmark Abrasives for their customer service even after a bit of a large gap since my last order. I had mentioned that they were very professional and attentive to my questions as I ordered and changed my address to my new home.

When I received my order late last week I noticed that I was short a couple of belts. I used the email that I received for my order confirmation and shipping information to reply with the notice that I had been shorted two belts and only received 3 of the 5 belts I had ordered. I quickly received a response from Jack @ Benchmark Abrasives to apologize and inform me he would investigate what happened.

I received an email this morning telling me they found out what had happened and they would be shipping out the balance of the order today. I then almost immediately received a telephone call from Jack stating the same thing as the email and explained that there was no excuse and the mistake was on them but wanted to make sure I was taken care of.

Although they did in fact short me part of my order they sure did their best to make it right and not offer empty excuses, just accepted responsibility and informed me that I would be receiving my order balance this week.

I can't recommend purchasing from Benchmark Abrasive enough. Great people and great customer service, even though at times things get mixed up.
 
OP
Z

zmotorsports

ALLIANCE MEMBER
Joined
Oct 20, 2009
Messages
21,460
Location
Northern Utah
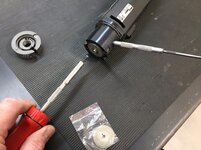
Tonight I took a few minutes to replace the diamond wheel on my Weld Craft tungsten dressing tool. I’ve had this tungsten grinder/dresser for about 10+ years and this is the original diamond wheel so I’ve been very impressed.

7c253070afc0c78e190c897dda5af194.jpg

e3ec1649989ff5f928e20805bb2e51af.jpg

Here you can see the wear around the outer third or so of the wheel.
fc3ac91f469f1823ec820df7d304aee6.jpg

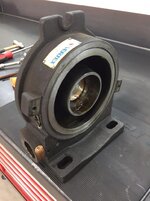
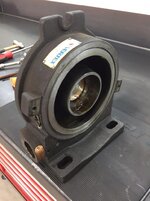
I then decided to tear my Vertex 8” rotary table down and clean, inspect and lube. I bought this rotary table at an estate sale about 8 or so years ago and it’s always seemed to be a bit on the tight side. Well after going through my compound slide on the lathe the other night and seeing how smooth it operates now I thought I would do the same to the rotary table.
cc1affdaacfb5d21f338c0867654ba3b.jpg

I think here is a lot of the problem. The grease is dry and chunky so a thorough cleaning in the solvent tank is a good place to start. I knew this piece wasn’t used much when I purchased it as it was in like new condition but there’s no saying how long it has sat on the guy’s shelf.
91284dccd6f1088ec79dde4f0b2de7f2.jpg

All of the internals were covered in the same nasty grease. No wonder it seems so tight and not smooth in operation.
1328a33c6f19a765161ad0adbf9f4a41.jpg

Cleaned and ready for a good inspection.
2fb7ccb5599ea498083d4592a2ff3807.jpg

I think I’m going to see how readily available the tapered bearing is and just replace the bearings. The roller bearing is merely a 6208 non-sealed or shielded bearing. The tapered bearing has a very slight catch in it that I can’t seem to flush out so I’m going to make a call to my bearing supply house tomorrow and check on availability. Worse case scenario if I can’t locate one easily is I’ll let it soak in carb cleaner for a while and dissolve the dried grease.
 

Attachments

  • 7c253070afc0c78e190c897dda5af194.jpg
    7c253070afc0c78e190c897dda5af194.jpg
    90.7 KB · Views: 0
  • 91284dccd6f1088ec79dde4f0b2de7f2.jpg
    91284dccd6f1088ec79dde4f0b2de7f2.jpg
    90.3 KB · Views: 0
  • 1328a33c6f19a765161ad0adbf9f4a41.jpg
    1328a33c6f19a765161ad0adbf9f4a41.jpg
    128.6 KB · Views: 0
  • 2fb7ccb5599ea498083d4592a2ff3807.jpg
    2fb7ccb5599ea498083d4592a2ff3807.jpg
    58.1 KB · Views: 0
  • e3ec1649989ff5f928e20805bb2e51af.jpg
    e3ec1649989ff5f928e20805bb2e51af.jpg
    135.5 KB · Views: 0
  • cc1affdaacfb5d21f338c0867654ba3b.jpg
    cc1affdaacfb5d21f338c0867654ba3b.jpg
    98 KB · Views: 0
  • fc3ac91f469f1823ec820df7d304aee6.jpg
    fc3ac91f469f1823ec820df7d304aee6.jpg
    81.7 KB · Views: 0
Last edited:

Kiwi Canuck

Well-known member
Joined
Dec 13, 2014
Messages
156
Location
Langley BC
Mike I'm going to help you out here with the DRO, either buy from Asia or check with Matt, I'm sure he would be able to get the same unit you have on the mill for a pretty reasonable deal.

You need an Easson ES-8A Display (to match your mill), for scales go with a 1000mm GS10 (5um, .0002") Glass Scale for the X (some call it the Z) and a GS31 (1um) 200mm for the cross slide, it's a smaller unit and fits on the cross slide, GS10/GS11 does not fit. Or you could use the GS30 but it's 5um, it's what I'm using as I originally got the GS11 and it did not fit, so Matt had a spare GS30 scale and sent it too me no charge.

I bought from Siton (Wilson Haung) at Aliexpress, if you do buy from him, make sure he knows you need a GS31 for the cross slide, It adds about $30 to the order.

https://www.aliexpress.com/item/322...95f63ea1043801e8-1585622596622-08987-VnYZvQVf

Here, I am encouraging you to buy and I haven't even finished my install, but going by how much I love using my mill with the DRO the DRO on the lathe should be just as cool.

David.

BTW thanks for the answers on my previous post, I double checked my T-nut and it was also a bit tall, so I took a skim off the top and it tightens up way better now, I also lapped it on a sheet of 600 grit paper and it slides in with no force required, I must of had a bit of a burr on the machined edges and neglected to clean them up in my haste to try it out.

David.
 
Last edited:
OP
Z

zmotorsports

ALLIANCE MEMBER
Joined
Oct 20, 2009
Messages
21,460
Location
Northern Utah
Mike I'm going to help you out here with the DRO, either buy from Asia or check with Matt, I'm sure he would be able to get the same unit you have on the mill for a pretty reasonable deal.

You need an Easson ES-8A Display (to match your mill), for scales go with a 1000mm GS10 (5um, .0002") Glass Scale for the X (some call it the Z) and a GS31 (1um) 200mm for the cross slide, it's a smaller unit and fits on the cross slide, GS10/GS11 does not fit. Or you could use the GS30 but it's 5um, it's what I'm using as I originally got the GS11 and it did not fit, so Matt had a spare GS30 scale and sent it too me no charge.

I bought from Siton (Wilson Haung) at Aliexpress, if you do buy from him, make sure he knows you need a GS31 for the cross slide, It adds about $30 to the order.

https://www.aliexpress.com/item/322...95f63ea1043801e8-1585622596622-08987-VnYZvQVf

Here, I am encouraging you to buy and I haven't even finished my install, but going by how much I love using my mill with the DRO the DRO on the lathe should be just as cool.

David.

BTW thanks for the answers on my previous post, I double checked my T-nut and it was also a bit tall, so I took a skim off the top and it tightens up way better now, I also lapped it on a sheet of 600 grit paper and it slides in with no force required, I must of had a bit of a burr on the machined edges and neglected to clean them up in my haste to try it out.

David.

Thanks for the information David. I have to put a couple of tires on the coach and then depending on where I'm at I may or may not look more closely at a DRO for the lathe. I do like my Eason ES-8A on the mill though.

I appreciate you taking the time to follow along and especially for the comments and information.
 
OP
Z

zmotorsports

ALLIANCE MEMBER
Joined
Oct 20, 2009
Messages
21,460
Location
Northern Utah
I received a call from my tire guy this morning. He informed me that my Michelin XZA2 Energy 295/80R-22.5 tires arrived that I had him order a few days ago.

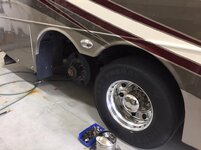
I got the coach off the ground and removed the tires so I can bring them to the tire shop.

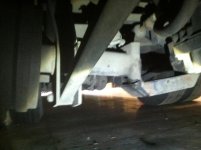
Tag tires removed. I’m glad to get rid of these POS Goodyear’s finally.
db24079e95003bf0bc3e024fbb9a612e.jpg

0692af34e630089d0bb6168960f6e1f9.jpg

Steer’s removed. The two new tires will go on the steer and the 3+ year old steers will go on the tag.
c54941bdd5ceec8d705163ecd63db053.jpg

be69e27b73f829b3967a592cce044afd.jpg

Loaded on the trailer and strapped down.
6a52fa7820c7028149e907dc5077b78a.jpg
 

Attachments

  • 6a52fa7820c7028149e907dc5077b78a.jpg
    6a52fa7820c7028149e907dc5077b78a.jpg
    81.4 KB · Views: 1
  • db24079e95003bf0bc3e024fbb9a612e.jpg
    db24079e95003bf0bc3e024fbb9a612e.jpg
    95.9 KB · Views: 0
  • 0692af34e630089d0bb6168960f6e1f9.jpg
    0692af34e630089d0bb6168960f6e1f9.jpg
    73 KB · Views: 0
  • c54941bdd5ceec8d705163ecd63db053.jpg
    c54941bdd5ceec8d705163ecd63db053.jpg
    98.9 KB · Views: 0
  • be69e27b73f829b3967a592cce044afd.jpg
    be69e27b73f829b3967a592cce044afd.jpg
    85.7 KB · Views: 13
Last edited:

GRN96WS6

Well-known member
Joined
Dec 23, 2012
Messages
2,257
Location
SOMD
Out of curiosity other than maybe weight, why wouldn't you just toss them in the bed of the dmax?

RVs seem to never wear out their tread, my parents have a '15 coachmen with 6 tires and about 40k miles on it and have had to replace two tires already, that would drive me bonkers having different mileage tires everywhere.
 
OP
Z

zmotorsports

ALLIANCE MEMBER
Joined
Oct 20, 2009
Messages
21,460
Location
Northern Utah
Out of curiosity other than maybe weight, why wouldn't you just toss them in the bed of the dmax?

RVs seem to never wear out their tread, my parents have a '15 coachmen with 6 tires and about 40k miles on it and have had to replace two tires already, that would drive me bonkers having different mileage tires everywhere.

You answered your own question, weight. I barely lifted them 10 inches up onto the trailer, let alone 45+ inches up into the bed of my lifted Duramax.

That is correct, most RV tires weather out, check out, or age out whatever you want to call it rather than wear out. I keep a close eye on my tires and although the industry standard is to replace them at 7 years many people think that at 8 years they'll blow up or something. Granted the risk does go up significantly after that 7 year mark but I always kept mine covered and for the last 3 years they have been completely out of the UV unless I'm using the coach.

I don't really have an issue running different age tires on different axles but I like to keep the same age on the same axle, especially on the drive axle which are dual setups, more importantly is tire diameter on a dual setup.

My tags are in fact about worn out as they are down to the wear bars but they were on my steers a few years ago, then when I installed new steers and drives about 4 years ago I moved these two to the tag axle position. They have a tendency to scrub a bit more merely by placement in relation to the drive axle so they are due for replacement.

But trust me @ around $800 a tire plus the FET tax and labor I don't change tires willy nilly. I monitor my tires like most everything else on the coach and just didn't feel like they were going to make it another year.

Plus I just had to get these last two Goodyear POS's off of my coach.
 

sanddan

Well-known member
Joined
Jul 7, 2005
Messages
708
Location
Oregon
Wise move to keep on top of those tires. On a recent trip down south a good friend had a tag tire blow out. They were at the 8-9 year mark. It damaged the body fiberglass and inside wheel well but even worse the tag axle was broken nearly in half. He can do body and paint work but the axle damage is another story. The cost to repair will be far more than the cost of 2 tires. After seeing the damage the next day in camp I was very glad I had just replaced all 8 tires before this trip. Mine were at the 8 year mark and looked perfect on the outside but it was still time to replace them.

IMG_1365.jpg
 

GRN96WS6

Well-known member
Joined
Dec 23, 2012
Messages
2,257
Location
SOMD
You answered your own question, weight. I barely lifted them 10 inches up onto the trailer, let alone 45+ inches up into the bed of my lifted Duramax.


That is correct, most RV tires weather out, check out, or age out whatever you want to call it rather than wear out. I keep a close eye on my tires and although the industry standard is to replace them at 7 years many people think that at 8 years they'll blow up or something. Granted the risk does go up significantly after that 7 year mark but I always kept mine covered and for the last 3 years they have been completely out of the UV unless I'm using the coach.


I don't really have an issue running different age tires on different axles but I like to keep the same age on the same axle, especially on the drive axle which are dual setups, more importantly is tire diameter on a dual setup.


My tags are in fact about worn out as they are down to the wear bars but they were on my steers a few years ago, then when I installed new steers and drives about 4 years ago I moved these two to the tag axle position. They have a tendency to scrub a bit more merely by placement in relation to the drive axle so they are due for replacement.


But trust me @ around $800 a tire plus the FET tax and labor I don't change tires willy nilly. I monitor my tires like most everything else on the coach and just didn't feel like they were going to make it another year.


Plus I just had to get these last two Goodyear POS's off of my coach.

I'm sure your spreadsheet game is on point as to which tires are on what axle and what month day year they were put on there as well as mileage [emoji1787][emoji1787]
 
OP
Z

zmotorsports

ALLIANCE MEMBER
Joined
Oct 20, 2009
Messages
21,460
Location
Northern Utah
I'm sure your spreadsheet game is on point as to which tires are on what axle and what month day year they were put on there as well as mileage [emoji1787][emoji1787]

On our 46 OTR trucks at work, yes, spreadsheet is dead nuts on as it has to be for our records.

As to my personal coach, my records are accurate but I only have three axles (3 dates) to worry about and I can keep track of that by the dates on the tires just as easy as looking at my notes.

Other cars in our stable all get four tires at a time so again, just personal records and mileage to track, eezy peezy.
 
OP
Z

zmotorsports

ALLIANCE MEMBER
Joined
Oct 20, 2009
Messages
21,460
Location
Northern Utah
Wise move to keep on top of those tires. On a recent trip down south a good friend had a tag tire blow out. They were at the 8-9 year mark. It damaged the body fiberglass and inside wheel well but even worse the tag axle was broken nearly in half. He can do body and paint work but the axle damage is another story. The cost to repair will be far more than the cost of 2 tires. After seeing the damage the next day in camp I was very glad I had just replaced all 8 tires before this trip. Mine were at the 8 year mark and looked perfect on the outside but it was still time to replace them.

IMG_1365.jpg

WOW. That looks ugly Dan. My tag tires were right at 10 years old with a DOT date of 1210 (twelfth week of 2010). They were not cracking or checking at all and I would have felt comfortable running them another season but they were worn well into the wear bars.

My thoughts were the same as I would rather buy new tires now vs. repair my new paint job later.:lol_hitti

I've seen the after affects of many blowouts and nearly all of them get into the body but haven't seen too many do structural damage like that one. What chassis is under his coach? Most of the Roadmaster tag axles are a one piece round tube axle with a recess for the driveshaft. That one appears to be rectangular tubing that was cut and welded to create the recess.
 
Last edited:

Kiwi Canuck

Well-known member
Joined
Dec 13, 2014
Messages
156
Location
Langley BC
Mike, I thought a date code of 1210 would be the 12th week of 2010, so about March 2010, not that it makes much difference.

David.
 
OP
Z

zmotorsports

ALLIANCE MEMBER
Joined
Oct 20, 2009
Messages
21,460
Location
Northern Utah
Mike, I thought a date code of 1210 would be the 12th week of 2010, so about March 2010, not that it makes much difference.

David.

My bad David, yes the first two digits are the week. I guess my fingers weren't communicating with my brain.:lol_hitti I had to go back and re-read that because I know it was around March 2010 and it took me reading it three times to see that I typed month instead of week.:bounce:
 

Wanna Ride

Well-known member
Joined
Jul 28, 2010
Messages
2,790
I can't recommend purchasing from Benchmark Abrasive enough. Great people and great customer service, even though at times things get mixed up.

To date, the only thing I've ordered from them are 4.5" flapper discs. Always get my orders in a timely manner, and seem to be pretty good products. Good to hear their customer service is where it should be.
 
To avoid these ads, REGISTER NOW!
OP
Z

zmotorsports

ALLIANCE MEMBER
Joined
Oct 20, 2009
Messages
21,460
Location
Northern Utah
To date, the only thing I've ordered from them are 4.5" flapper discs. Always get my orders in a timely manner, and seem to be pretty good products. Good to hear their customer service is where it should be.

So far I like the new ceramic belts and disks although I really haven't used them all that much in the past week or so. Time will tell if they stay sharp longer and last longer but I'm optimistic they will.

I also received the shorted belts yesterday in the mail and a little "gift" in the box as an apology for the shortage on my order. It was a nice gesture from Jack but really not necessary as he made it right anyways.

I love doing business with companies like this and usually don't go all out promoting vendors but when one goes above and beyond even after a small mix-up I just have to pass that information along.

Thank you for posting up your experience as well even though I really have no affiliation with them, it's just good to hear common themes when it comes to customer service.
 
OP
Z

zmotorsports

ALLIANCE MEMBER
Joined
Oct 20, 2009
Messages
21,460
Location
Northern Utah
Benchmark Abrasives

Okay guys, I generally don't do this but I have had such a great experience with Benchmark Abrasives that I just have to post this. Jack sent me an email earlier this morning and mentioned that they are running a free Mix-pack flap disk promotion and said I could post it here for fellow Garage Journal members.

Here is a link to the Benchmark Abrasives website.
https://benchmarkabrasives.com/

He said to use code FREEMIX and it would be good for 1 each per customer (just have to pay shipping).

I have absolutely no affiliation with Benchmark Abrasives and am merely an end user. I just wanted to share this promo with fellow forum members and help to promote good vendors who treat people right.
 

sanddan

Well-known member
Joined
Jul 7, 2005
Messages
708
Location
Oregon
WOW. That looks ugly Dan. My tag tires were right at 10 years old with a DOT date of 1210 (twelfth week of 2010). They were not cracking or checking at all and I would have felt comfortable running them another season but they were worn well into the wear bars.

My thoughts were the same as I would rather buy new tires now vs. repair my new paint job later.:lol_hitti

I've seen the after affects of many blowouts and nearly all of them get into the body but haven't seen too many do structural damage like that one. What chassis is under his coach? Most of the Roadmaster tag axles are a one piece round tube axle with a recess for the driveshaft. That one appears to be rectangular tubing that was cut and welded to create the recess.

It's a 2001 Holiday Rambler, 550hp Cat single slide. He does haul a 24' trailer but this trip he only had a SXS in it so not a huge load. It might be an Ambassador maybe?
 
OP
Z

zmotorsports

ALLIANCE MEMBER
Joined
Oct 20, 2009
Messages
21,460
Location
Northern Utah
It's a 2001 Holiday Rambler, 550hp Cat single slide. He does haul a 24' trailer but this trip he only had a SXS in it so not a huge load. It might be an Ambassador maybe?


Dan, so it would be on a Roadmaster chassis and if it had a tag axle it would have to be a Navigator, especially with the big CAT engine. Those are nice coaches. The Ambassador didn’t come with a tag axle nor the large displacement engine. If memory serves the early-2000’s Ambassadors has the 350 hp Cummins engine. Either way I’m sure that wasn’t an easy repair.
 
OP
Z

zmotorsports

ALLIANCE MEMBER
Joined
Oct 20, 2009
Messages
21,460
Location
Northern Utah
Yesterday was my first Saturday I’ve had off work in the past month so I made the most of it and worked on a few projects that I had been putting off.

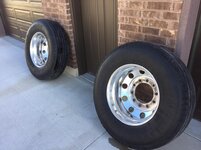
New steer tires for the coach.
31c2150eb6edf85a9ac76a5cff95c7ae.jpg

I put my 4 year old steers on my tag axle wheels.
4a16ee52601f0648258c1ff0658d55e7.jpg

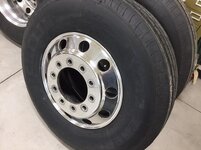
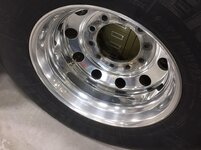
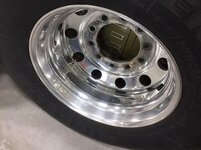
I decided to apply a coat of polish before putting them on the coach. Steer wheel done.
8585ccfd5bb81cd47cf30c291e8cb384.jpg

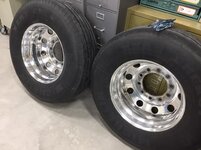
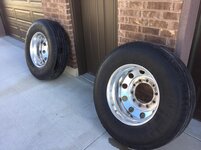
Tag axle tires & wheels. The one on the right has not yet been polished. The left has.
25ea2179eb76daf62d5cbf1bb8d9d97d.jpg

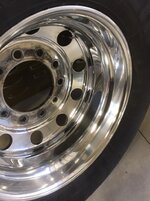
Pre-polishing.
40a4b4608c76b663d8e1d2028e5ae1be.jpg

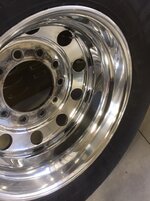
Post-polishing.
b44f167f599cb215aa41174dd1c91aa2.jpg

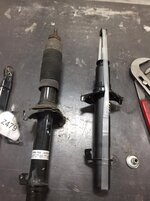
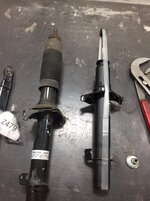
I had purchased new shocks for the wife’s 4th gen Acura TL about a month ago but I haven’t had the time to install them until now.

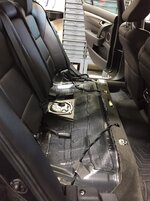
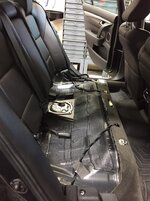
Rear seat had to be removed. Starting with the bottom cushion. Push down and pull out on the two small retainers under the bottom cushion.
88567d264bb14e73e5b099f348078c6d.jpg

0aae03fb04d6d818e6d3653cabbd3eae.jpg

After the back cushion was removed it allowed access to the upper rear shock mount fasteners.

Once the shock and coil spring assembly is removed from the rear suspension the coil can be compressed and shock replaced.
ad72493721acf4f6028654199978d15b.jpg

Moving to the front, remove the lower pinch bolt and separate the shock from the lower wishbone.
b5f5329e339cabc00c49bfb439251501.jpg

Many think that the upper ball-joint and steering joints must be separated in order to remove the front coil and shock assembly but that is not necessary. Just apply a small amount of upward pressure on the suspension once the shock is free and this allows the upper A-arm to raise and create the needed space in order to angle and tilt to remove the coil spring and shock assembly. No need to remove any additional suspension components.
fc1fcb09041c0e7afbfcb6e2b706e82c.jpg

Coil and shock assembly removed and ready to be compressed using the strut compressor.
0edcf1338b444fe58fe72bec9f2a9205.jpg

264fcc96b410efefc1708800fe8424dc.jpg

84b0a86d1f855c58373ff7018386b980.jpg

Thanks for looking.
 

Attachments

  • 0edcf1338b444fe58fe72bec9f2a9205.jpg
    0edcf1338b444fe58fe72bec9f2a9205.jpg
    51 KB · Views: 0
  • 264fcc96b410efefc1708800fe8424dc.jpg
    264fcc96b410efefc1708800fe8424dc.jpg
    90.6 KB · Views: 0
  • 84b0a86d1f855c58373ff7018386b980.jpg
    84b0a86d1f855c58373ff7018386b980.jpg
    101.2 KB · Views: 0
  • fc1fcb09041c0e7afbfcb6e2b706e82c.jpg
    fc1fcb09041c0e7afbfcb6e2b706e82c.jpg
    86.6 KB · Views: 0
  • b5f5329e339cabc00c49bfb439251501.jpg
    b5f5329e339cabc00c49bfb439251501.jpg
    94 KB · Views: 0
  • 31c2150eb6edf85a9ac76a5cff95c7ae.jpg
    31c2150eb6edf85a9ac76a5cff95c7ae.jpg
    93.2 KB · Views: 0
  • ad72493721acf4f6028654199978d15b.jpg
    ad72493721acf4f6028654199978d15b.jpg
    88.3 KB · Views: 0
  • 0aae03fb04d6d818e6d3653cabbd3eae.jpg
    0aae03fb04d6d818e6d3653cabbd3eae.jpg
    85.1 KB · Views: 0
  • 88567d264bb14e73e5b099f348078c6d.jpg
    88567d264bb14e73e5b099f348078c6d.jpg
    101.9 KB · Views: 1
  • b44f167f599cb215aa41174dd1c91aa2.jpg
    b44f167f599cb215aa41174dd1c91aa2.jpg
    109.2 KB · Views: 1
  • 40a4b4608c76b663d8e1d2028e5ae1be.jpg
    40a4b4608c76b663d8e1d2028e5ae1be.jpg
    87.4 KB · Views: 1
  • 25ea2179eb76daf62d5cbf1bb8d9d97d.jpg
    25ea2179eb76daf62d5cbf1bb8d9d97d.jpg
    85.9 KB · Views: 1
  • 8585ccfd5bb81cd47cf30c291e8cb384.jpg
    8585ccfd5bb81cd47cf30c291e8cb384.jpg
    81.7 KB · Views: 1
  • 4a16ee52601f0648258c1ff0658d55e7.jpg
    4a16ee52601f0648258c1ff0658d55e7.jpg
    95.3 KB · Views: 2
Last edited:
OP
Z

zmotorsports

ALLIANCE MEMBER
Joined
Oct 20, 2009
Messages
21,460
Location
Northern Utah
Mike,
Thanks for posting this. Just ordered and will be looking at other stuff I need to stock up on.

Bill

Hmm I sure wonder what the shipping will be up here to Canada. Did just get a 10 pack of 40 grit off amazon last month.....

Mike, thanks for sharing
I placed an order cant wait to try them out.

I'm interested in your experiences. Hope they work out as well as they have for m.
 

HEEP

Well-known member
Joined
Nov 20, 2007
Messages
121
Location
Chattanooga, TN
Prompt service also. Ordered on Friday, and it is out for delivery today. Can't wait to see what quality of product is. But, if Mike uses them I'm sure it is great.

Bill
 
OP
Z

zmotorsports

ALLIANCE MEMBER
Joined
Oct 20, 2009
Messages
21,460
Location
Northern Utah
Prompt service also. Ordered on Friday, and it is out for delivery today. Can't wait to see what quality of product is. But, if Mike uses them I'm sure it is great.

Bill

I hope you like them, but then again, I have no affiliation. I'm just an end user myself but thought I'd pass along some savings and information about a good company and product.
 

C_F

ALLIANCE MEMBER
Joined
Jan 21, 2005
Messages
9,675
Location
Utah...SNOW BLOWS!
Your strut spring compressor looks sweet! Compressing the spring on three sides like that would greatly reduce the risk of the spring coming loose, I like it. :thumbup:
 
OP
Z

zmotorsports

ALLIANCE MEMBER
Joined
Oct 20, 2009
Messages
21,460
Location
Northern Utah
Your strut spring compressor looks sweet! Compressing the spring on three sides like that would greatly reduce the risk of the spring coming loose, I like it. :thumbup:

Mike has all the cool tools.

Thanks guys. The Brannick 7600 spring compressor is definitely the cats meow when it comes to compressors. My wife is awesome because I have had an old OTC clam shell style for the past 15 or so years and last year I mentioned that I wanted to get a professional style compressor and she didn't even blink when she told me if I needed one to get it. I made sure she came out to the shop on Saturday so she could see just how much easier (and safer) it was.
 
OP
Z

zmotorsports

ALLIANCE MEMBER
Joined
Oct 20, 2009
Messages
21,460
Location
Northern Utah
Tonight I finished polishing the last couple of wheels in preparation for installing back on the coach.

For those interested in what polish I use for a maintenance shine here it is...... Busch Aluminum Polish.
b1f2ed56e399d973b6363a22ea3fce65.jpg

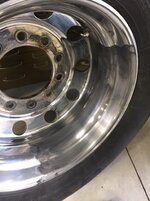
I hope this shows up. If you look just above the valve stem in this picture you can see the upper portion has not been polished yet and the lower portion has. Again, this is just a hand application and doesn’t require a lot of elbow grease to just use as normal maintenance to remove the oxidation.
05a888a7baba63a0777e067210c4d772.jpg

I’ll usually apply a quarter of a wheel at a time. You can see how easily it removes the surface oxidation.
9777c87ac4289fb89caaa5f1bb5ee935.jpg

3f6d572067537b1ac436261b476f3ecd.jpg

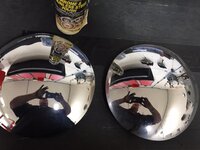
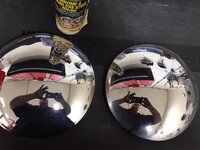
Next moving on to the front center caps they weren’t too bad but while they were off it’s easier to polish so out came the Busch Chrome & Stainless Steel Polish. The one on the right is untouched and the left one has polish on it.
dc66a11b935eeda59f3759d2a6c6c42c.jpg

Left, Polish removed and shined up. Right untouched.
dc9f762373a59d8596aa32647775b0c1.jpg

c5a7f3081403bef59ada9bc962d5fcb7.jpg

Both polished and ready to be installed.
3c63056b2c9cf04648bb9daa6312b012.jpg
 

Attachments

  • 3c63056b2c9cf04648bb9daa6312b012.jpg
    3c63056b2c9cf04648bb9daa6312b012.jpg
    97.7 KB · Views: 1
  • c5a7f3081403bef59ada9bc962d5fcb7.jpg
    c5a7f3081403bef59ada9bc962d5fcb7.jpg
    97.5 KB · Views: 0
  • dc9f762373a59d8596aa32647775b0c1.jpg
    dc9f762373a59d8596aa32647775b0c1.jpg
    96.7 KB · Views: 0
  • dc66a11b935eeda59f3759d2a6c6c42c.jpg
    dc66a11b935eeda59f3759d2a6c6c42c.jpg
    79.4 KB · Views: 0
  • 3f6d572067537b1ac436261b476f3ecd.jpg
    3f6d572067537b1ac436261b476f3ecd.jpg
    99.2 KB · Views: 0
  • 9777c87ac4289fb89caaa5f1bb5ee935.jpg
    9777c87ac4289fb89caaa5f1bb5ee935.jpg
    96.4 KB · Views: 0
  • 05a888a7baba63a0777e067210c4d772.jpg
    05a888a7baba63a0777e067210c4d772.jpg
    96.6 KB · Views: 0
  • b1f2ed56e399d973b6363a22ea3fce65.jpg
    b1f2ed56e399d973b6363a22ea3fce65.jpg
    101.6 KB · Views: 0
Last edited:
OP
Z

zmotorsports

ALLIANCE MEMBER
Joined
Oct 20, 2009
Messages
21,460
Location
Northern Utah
Wow, the difference in the center caps is amazing!

Nice work as always Mike.

Thanks Vincent. Yeah, I almost didn't polish them because I thought they just needed to be washed off. After running a coat of polish around them I was glad I didn't put them on before polishing, big difference.
 

Bob Heine

ALLIANCE MEMBER
Joined
Oct 24, 2009
Messages
10,708
Location
Boca Raton, Florida
Mike, Benchmark Abrasives is a terrible place. They have things I need and they have things I haven't seen anywhere else. They have so many horribly distracting things that I filled my cart with them and forgot about putting FREEMIX in the box when I checked out. I ended up ordering:

  • Three Felt Polishing Flap Discs (first time I've seen these)
  • Two Medium (Red) Surface Conditioning Flap Discs
  • Two Coarse (Tan) Surface Conditioning Flap Discs
  • Four 120 Grit 3" Mini Flap Disc Zirconia Quick Change Discs
  • Cut, Grind, Finish! All-In-One Variety Pack
    • Two 40 Grit T29 High Density Flap Disc
    • Two 60 Grit T29 High Density Flap Disc
    • Two 80 Grit T29 High Density Flap Disc
    • Four 4.5"x.040"x7/8" Type 1 Cutting Wheels
    • 4.5"x.040"x7/8" Type 27 Cutting Wheels
    • 4.5"x1/4"x7/8" Type 27 Grinding Wheels
attachment.php


I would be really upset if the prices were unreasonable but they aren't. I was also expecting long shipping delays but the order I placed Saturday was shipped on Monday and it arrived today.

Still a tiny bit upset, I went back and ordered the FREEXIX pack of ten 4.5" Zirconia flap disks :

  • Three 40 Grit
  • Three 60 Grit
  • Three 80 Grit
  • One 120 Grit
Now I have to to work on some steel projects so I can try out some of those flap wheels.

Mike, the only reason I'm upset with Benchmark Abrasives is because I can't be upset with you.
 

Attachments

  • Benchmark Abrasives 1.jpg
    Benchmark Abrasives 1.jpg
    107.6 KB · Views: 535
To avoid these ads, REGISTER NOW!
Top Bottom