To avoid these ads, REGISTER NOW!

And so it begins: 50x140

78SC4X4

Well-known member
Joined
Apr 21, 2018
Messages
370
Location
Port Orchard Wa
A portapotty is always a great sign things are about to get started!

9 min is about 3x my attention span. But I think seeing a video on the process would be cool.
 
To avoid these ads, REGISTER NOW!
OP
M

mkarlin

Well-known member
Joined
Jun 18, 2016
Messages
220
Location
Northeast
Then you will be happy to know I have edited the video to just under or right at 4 minutes, so maybe that would work. For the final product I will edit it to make it shorter

will work on getting it posted

A portapotty is always a great sign things are about to get started!

9 min is about 3x my attention span. But I think seeing a video on the process would be cool.
 

matt_i

Well-known member
Joined
Mar 14, 2008
Messages
10,741
Location
SE Michigan
Looks like the hardest part is done.

Do you have any more specs on the building? Like sketches, or elevations, floor plans etc?

We will eventually get to see the result :) but it might generate more interest to post your plans.
 
OP
M

mkarlin

Well-known member
Joined
Jun 18, 2016
Messages
220
Location
Northeast
Thanks for the advice, hopefully not too late to generate some interest. I hired a member of this forum do my lighting plan which came out really great. I am excited for the build and to finally have some space to work on my camaro and other projects.

I just got my camaro from a nightmare experience from a locally well know builder. There were so many things hald done, so many. I did my homework and did a lot of reference checks and they came recommended. But something happened and I did not get the quality or attention to detail that the others had. He even built a couple cars that were revealed at Sema and in a couple hot rod magazine builds


I have attached are a couple of the PDFs of the layout and plans.

Plans: (I am sure there is a lot I am forgetting or omitting but it is not intentional)
flush mount drive on scissor lift
radiant floor heat
Future plan: inground/canister 2 post lift


What questions does everyone have?


Looks like the hardest part is done.

Do you have any more specs on the building? Like sketches, or elevations, floor plans etc?

We will eventually get to see the result :) but it might generate more interest to post your plans.
 

Attachments

  • GJ 2.jpg
    GJ 2.jpg
    64.3 KB · Views: 221
  • GJ Layout.jpg
    GJ Layout.jpg
    72.3 KB · Views: 178
  • GJ3.jpg
    GJ3.jpg
    134.5 KB · Views: 180

rixtrix1

Well-known member
Joined
Aug 25, 2013
Messages
3,010
Location
Chandler, AZ (from west NE)
This is a really neat build. Loved the video and would like more if you have the time( Is there a link to a larger format? ). Sorry about your Camaro. Builders may be well known, but you seldom know which employee is actually doing the job. And, you already found out how comprehensive the oversight was!:shocking:
 
OP
M

mkarlin

Well-known member
Joined
Jun 18, 2016
Messages
220
Location
Northeast
Was originally thinking I would do commercial white doors with no windows, but now I am thinking I will do narrow windows at the top of the doors for so extra light
 

Attachments

  • images.jpeg
    images.jpeg
    5.7 KB · Views: 97
  • images-2.jpeg
    images-2.jpeg
    7.6 KB · Views: 96
OP
M

mkarlin

Well-known member
Joined
Jun 18, 2016
Messages
220
Location
Northeast
I think I have the video figured out better, let me know if this works better.

The guys started Thursday, so only got two days of building done but its coming along nicely.
I will also post some images but thought this 51second video would be nice.

We also got a ton of rain some that was nice to get some water in the ground to help getting it all ready and packed for concrete.

Will be doing radiant floor heat, likely going with Radiantec and lay all the tubing out myself. over 2 in XPS and a 15mil vapor barrier.

I find it hard to organize my thought like some of the other builds, but will keep working on it.


78SC4X4

Well-known member
Joined
Apr 21, 2018
Messages
370
Location
Port Orchard Wa
Was originally thinking I would do commercial white doors with no windows, but now I am thinking I will do narrow windows at the top of the doors for so extra light

I'll be watching to see how you like them. I think the added light would also be nice. I still have a little while to decide.
 
OP
M

mkarlin

Well-known member
Joined
Jun 18, 2016
Messages
220
Location
Northeast
Ok here are some images of the last few days. We got a pretty big rain storm and was excited to see how well backed the site work was. It really helped pack the breezeway which we dug out after the other site work was done, to tie it into the barn.

They are moving right along and am excited to see all work that happens this week. Will likely be bring in hay this week if the weather holds out.

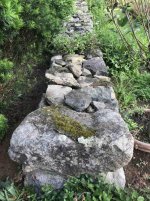
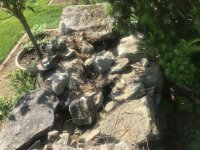
Along with a side project yesterday of fixing an old stone wall in the garden.
 

Attachments

  • stonewall after.jpg
    stonewall after.jpg
    152.8 KB · Views: 177
  • stonewall before.jpg
    stonewall before.jpg
    150.9 KB · Views: 167
  • walls.jpg
    walls.jpg
    150.7 KB · Views: 191
  • stonewall before 1.jpg
    stonewall before 1.jpg
    154.6 KB · Views: 176
  • rain.jpg
    rain.jpg
    107.4 KB · Views: 210
OP
M

mkarlin

Well-known member
Joined
Jun 18, 2016
Messages
220
Location
Northeast
Thanks. Yeah I am really glad I started the time-lapse. Will also do them for the interior especially for the worship area with the lift
 
OP
M

mkarlin

Well-known member
Joined
Jun 18, 2016
Messages
220
Location
Northeast
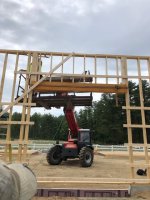
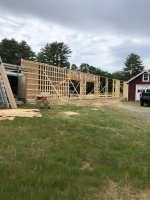
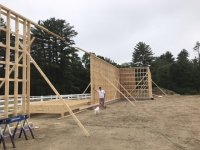
And the progress continues. They are getting the walls up, and it is amazing how much bigger a building looks when the walls go up.

Trying to decide on interior portion of the workshop and dirty room. Thinking Trusscore plastic panel for the dirty room. Maybe metal for the workshop or just plywood to start. Hard to know
 

Attachments

  • 61340594211__4CD90B1D-40B7-4393-B524-C983EC2CC039 (2).jpeg
    61340594211__4CD90B1D-40B7-4393-B524-C983EC2CC039 (2).jpeg
    121.1 KB · Views: 162
  • IMG_5202 (1).jpeg
    IMG_5202 (1).jpeg
    98.4 KB · Views: 161
  • IMG_5198 (1).jpeg
    IMG_5198 (1).jpeg
    119.2 KB · Views: 167
OP
M

mkarlin

Well-known member
Joined
Jun 18, 2016
Messages
220
Location
Northeast
Was away for the last couple days, amazing what two days of progress looks like. Also took in some hay today
 

Attachments

  • 552B3817-2B8E-4FE5-BA46-FC87EA56DA02.jpeg
    552B3817-2B8E-4FE5-BA46-FC87EA56DA02.jpeg
    110.7 KB · Views: 179
  • C10AA970-966F-40B0-8F04-F503983C79CE.jpeg
    C10AA970-966F-40B0-8F04-F503983C79CE.jpeg
    95.4 KB · Views: 182
  • 08AD7FB3-245C-4854-8E63-F3982D3EE316.jpg
    08AD7FB3-245C-4854-8E63-F3982D3EE316.jpg
    62 KB · Views: 189
  • 2316E569-A7A4-4C73-B99D-94E6D63E27CF.jpeg
    2316E569-A7A4-4C73-B99D-94E6D63E27CF.jpeg
    26.6 KB · Views: 216
OP
M

mkarlin

Well-known member
Joined
Jun 18, 2016
Messages
220
Location
Northeast
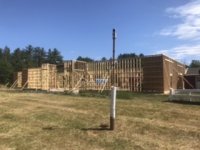
All of the walls are basically up
And the steel beam is installed and ready to support some weight. Trusses coming early next week.
 

Attachments

  • EABAFC12-F4AC-4110-96C0-2F22D1005F5D.jpeg
    EABAFC12-F4AC-4110-96C0-2F22D1005F5D.jpeg
    30.9 KB · Views: 166
OP
M

mkarlin

Well-known member
Joined
Jun 18, 2016
Messages
220
Location
Northeast
Ok here is part 2 of the build time-lapse. I tried to keep it short and cut out the less important stuff, but did leave in the moon for a spot that was really cool

This week the wall went up and the I beam for the bump out

 
OP
M

mkarlin

Well-known member
Joined
Jun 18, 2016
Messages
220
Location
Northeast
Shifted the time lapse to the other side of the building to get some of the more interesting parts of the rest of the build

Will start having more interior details as it goes on.

Any questions from those of you watching the build?
 

Attachments

  • 4F3B4769-FE9A-400B-BBA7-64C89E7F3524.jpeg
    4F3B4769-FE9A-400B-BBA7-64C89E7F3524.jpeg
    27.9 KB · Views: 131
  • F64E6295-6168-480E-855A-D0E74826F1EE.jpeg
    F64E6295-6168-480E-855A-D0E74826F1EE.jpeg
    27.2 KB · Views: 101
  • F151BCBB-334D-4ADC-B454-C72B588006C6.jpeg
    F151BCBB-334D-4ADC-B454-C72B588006C6.jpeg
    51.6 KB · Views: 103
Last edited:
OP
M

mkarlin

Well-known member
Joined
Jun 18, 2016
Messages
220
Location
Northeast
Why, in a million years, would you want that style of lift? It's not full size.

And most of all, you can't work under it (unless I'm missing something), which is the whole point of a lift.

Put in a full-size 4-poster, 9,000lb capacity minimum. Anyway, that's MHO. Please tell me the 'good' points on that lift???

50 x 140 does give me serious garage envy, LOL. Good luck with it!

-
I have decided to do an inground 2 post. For all the reasons people mentioned. I was watching videos of the scissor alignment lift and it was not going to work like I wanted
 
OP
M

mkarlin

Well-known member
Joined
Jun 18, 2016
Messages
220
Location
Northeast
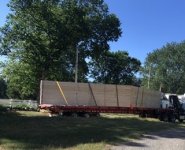
The trusses showed up for part of the building
 

Attachments

  • EB49B76A-F7DA-462E-882C-C65D80A24D33.jpeg
    EB49B76A-F7DA-462E-882C-C65D80A24D33.jpeg
    42.1 KB · Views: 95
To avoid these ads, REGISTER NOW!
OP
M

mkarlin

Well-known member
Joined
Jun 18, 2016
Messages
220
Location
Northeast
Much happened today. Trusses were moved inside the building to get them strapped together for the big crane that will come next Thursday. It is pretty exciting all of process that seems to be happening. I feel like I should be writing longer updates but not sure what people want to hear about or see. So I find myself having shorter updates.

I did come across this for storage and really like the idea.
https://www.levrack.com
 

Attachments

  • 3211007B-D349-4978-A199-2CFB05EF3BB7.jpeg
    3211007B-D349-4978-A199-2CFB05EF3BB7.jpeg
    29 KB · Views: 234
  • 47F7CFAD-B121-4C68-B9F5-D54FE715A867.jpeg
    47F7CFAD-B121-4C68-B9F5-D54FE715A867.jpeg
    36.7 KB · Views: 219
  • BF1F2349-AE34-4F1F-BC43-E4CAA29CFDFF.jpeg
    BF1F2349-AE34-4F1F-BC43-E4CAA29CFDFF.jpeg
    116.8 KB · Views: 210
  • 579281C1-0491-4D44-A4CB-D3F5D97D6181.jpeg
    579281C1-0491-4D44-A4CB-D3F5D97D6181.jpeg
    93.9 KB · Views: 222
Last edited:

travisn1

Well-known member
Joined
Oct 22, 2012
Messages
152
Location
Waterloo NY
I don't understand. Is the roof being lifted in place all at once? You already had a crane on site, why weren't they just set in place then?
 

Jayman17

Well-known member
Joined
Feb 6, 2017
Messages
3,815
Location
Seattle, Wa
+1 on what Travis said. As far as your updates, to me they are fine. I appreciate and enjoy the photos. Man you have a HUUGGEE building there! Thanks for posting...

Jay
 
OP
M

mkarlin

Well-known member
Joined
Jun 18, 2016
Messages
220
Location
Northeast
I don't understand. Is the roof being lifted in place all at once? You already had a crane on site, why weren't they just set in place then?

They will strap and apply all the plywood in sections. I think 8 truss sections and then lift in place once each section is tied together
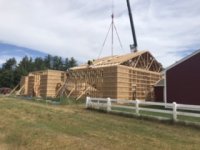
I added a picture of what was done at another build
 

Attachments

  • DF0E1EDB-3C92-4CA9-A0C5-7E63C3D53E56.jpeg
    DF0E1EDB-3C92-4CA9-A0C5-7E63C3D53E56.jpeg
    75.3 KB · Views: 261
OP
M

mkarlin

Well-known member
Joined
Jun 18, 2016
Messages
220
Location
Northeast
BAD NEWS, I moved the timelapse and for some reason it only died Sunday night before any work started. The good news is there are some videos of the lifting of the trusses and I think it would have been hard to see it anyway given that most of it happened inside the walls. I will work on fixing it today and try it out for the weekend.
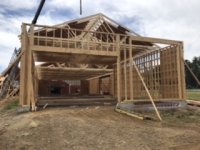
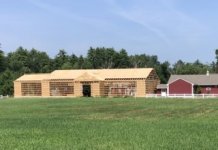
 
OP
M

mkarlin

Well-known member
Joined
Jun 18, 2016
Messages
220
Location
Northeast
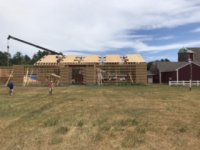
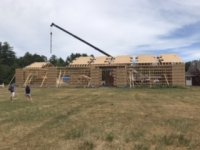
The trusses are coming together and should be raised on Thursday
 

Attachments

  • 895A79E1-F9E2-45D8-8F49-D493F80DE526.jpeg
    895A79E1-F9E2-45D8-8F49-D493F80DE526.jpeg
    114.8 KB · Views: 106
  • 848228D1-2D47-4A32-AAB6-02F699295DD2.jpeg
    848228D1-2D47-4A32-AAB6-02F699295DD2.jpeg
    93.3 KB · Views: 112
  • 1795B9BE-C9F1-434B-B7B8-81C0DB0AE0AD.jpeg
    1795B9BE-C9F1-434B-B7B8-81C0DB0AE0AD.jpeg
    31.6 KB · Views: 126
OP
M

mkarlin

Well-known member
Joined
Jun 18, 2016
Messages
220
Location
Northeast
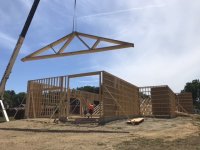
Super productive day. 4 hours to set the trusses.
 

Attachments

  • F690C8BE-3A41-407A-B8AB-FECA2BB91712.jpeg
    F690C8BE-3A41-407A-B8AB-FECA2BB91712.jpeg
    26.1 KB · Views: 223
  • 01B87888-937E-4A0D-8D5A-CBCD2E03CA65.jpeg
    01B87888-937E-4A0D-8D5A-CBCD2E03CA65.jpeg
    26.4 KB · Views: 195
  • 8606DB8F-B2BD-4DAF-AD21-BE63C89D56D7.jpeg
    8606DB8F-B2BD-4DAF-AD21-BE63C89D56D7.jpeg
    25.4 KB · Views: 211
  • 73A5631A-1BB3-4FC9-B9AB-99E5354D4CC6.jpeg
    73A5631A-1BB3-4FC9-B9AB-99E5354D4CC6.jpeg
    26.1 KB · Views: 207
  • 721C794D-96BB-4367-8C09-373B1552417B.jpeg
    721C794D-96BB-4367-8C09-373B1552417B.jpeg
    32 KB · Views: 197
OP
M

mkarlin

Well-known member
Joined
Jun 18, 2016
Messages
220
Location
Northeast
Well it has been a busy week and many answers about the trusses are answered in this video.

Hope you enjoy!


OP
M

mkarlin

Well-known member
Joined
Jun 18, 2016
Messages
220
Location
Northeast
Has been a slow period. Got the trusses up on the bump out and all of the truss ends have been cut. Waiting for them to finish the trim to get the roof done. We have had a lot of rain, wish the roof was finished. Atleast they used exposure grade one OSB, so hopefully not a huge deal
 

Attachments

  • BE54230A-3A89-420B-A98D-F42C94AA073A.jpeg
    BE54230A-3A89-420B-A98D-F42C94AA073A.jpeg
    27.5 KB · Views: 247

jblnut

ALLIANCE MEMBER
Joined
Jan 17, 2015
Messages
7,130
Location
In the Middle of MN
I've been following along since post #1 and I agree about the method with the trusses being odd but neat. Seems like more work to build them on the ground and lift them up but it might be easier as well. Definitely probably goes quicker with less risk of falling off !!!

I was pretty happy about my 54x72x18 that is currently going up but damn dude !! This will be a really nice space !!!
 
OP
M

mkarlin

Well-known member
Joined
Jun 18, 2016
Messages
220
Location
Northeast
Great progress, interesting methods.

I've been following along since post #1 and I agree about the method with the trusses being odd but neat. Seems like more work to build them on the ground and lift them up but it might be easier as well. Definitely probably goes quicker with less risk of falling off !!!

I was pretty happy about my 54x72x18 that is currently going up but damn dude !! This will be a really nice space !!!


Thanks guys. It started strong, and is slowing down alittle but I suspect that is how it goes. This is my first real building going up. I think I had timeline in my head that was not realistic. Thought I would be laying my radiant tubing end of the month, but that is looking unlikely. I also think electrical will take a while, we will be helping the electrician to help with labor. (he is semi retired and does not want to work a ton of hours per day). SO I hope I can run wires and get things ready for him to just do the things he needs to do.
 

Pluribus

Well-known member
Joined
Dec 16, 2012
Messages
2,143
Location
Skagit County, WA
50' x 140' is a bit mind boggling! Then again, for some on this forum that is considered a 3-car garage, maybe 3-1/2 when you look at the build advice threads. Not surprised that the progress is frustrating. With that size, everything takes a LOT of time. Phew, and I thought remodeling a 3,000 square foot house was a lot of work!

Curious about your going stick-built. Did you consider a steel-framed building? I see people on GJ saying that larger/wider buildings like this are more economical with a steel frame. Were there other reasons you chose conventional framing?

Time lapses are always fun to see. Looking forward to seeing this continuing to come together.
 
OP
M

mkarlin

Well-known member
Joined
Jun 18, 2016
Messages
220
Location
Northeast
50' x 140' is a bit mind boggling! Then again, for some on this forum that is considered a 3-car garage, maybe 3-1/2 when you look at the build advice threads. Not surprised that the progress is frustrating. With that size, everything takes a LOT of time. Phew, and I thought remodeling a 3,000 square foot house was a lot of work!

Curious about your going stick-built. Did you consider a steel-framed building? I see people on GJ saying that larger/wider buildings like this are more economical with a steel frame. Were there other reasons you chose conventional framing?

Time lapses are always fun to see. Looking forward to seeing this continuing to come together.

Thanks for following. We choose stick built to match the rest of the farm. It’s an old farm with several other building. When I got estimates I looked into Morton but to make the little bump out the 36x40 jog would
Have required 3 building to get attached to each other and it ended up only saying 10%. Which was not worth it in the end.

Wood built did limit use to 50 ft wide. 60 would have been great but it also would
Have over powered the horse barn it is attached too
 
OP
M

mkarlin

Well-known member
Joined
Jun 18, 2016
Messages
220
Location
Northeast
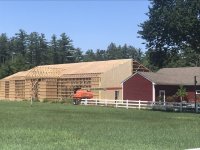
Siding has started so they can do the roofing.

The roofing material showed up earlier this week.
 

Attachments

  • 85EA9306-3DE6-4595-A580-ECCED97F5426.jpeg
    85EA9306-3DE6-4595-A580-ECCED97F5426.jpeg
    129.5 KB · Views: 142
  • F19B8F06-5EC1-4566-8476-84249B159F17.jpg
    F19B8F06-5EC1-4566-8476-84249B159F17.jpg
    73.1 KB · Views: 141

matt_i

Well-known member
Joined
Mar 14, 2008
Messages
10,741
Location
SE Michigan
Lol you know its serious when a semi truck shows up with a full load to deliver the roofing materials! Is the crane still there to lift them up to the roof or do the roofers have to hand-carry?

I was thoroughly impressed at the protection gained by just the application of synthetic underlayment. I thouught it would be a leaky woven product but was as tight as a roof for the few weeks it took me to get all of the shingles on.

Looking forward to updates.
 
OP
M

mkarlin

Well-known member
Joined
Jun 18, 2016
Messages
220
Location
Northeast
Lol you know its serious when a semi truck shows up with a full load to deliver the roofing materials! Is the crane still there to lift them up to the roof or do the roofers have to hand-carry?

I was thoroughly impressed at the protection gained by just the application of synthetic underlayment. I thouught it would be a leaky woven product but was as tight as a roof for the few weeks it took me to get all of the shingles on.

Looking forward to updates.

There is a lull and a a boom lift. I think they will be using the lull.

I agree, I thought the same thing when the supplies showed up on the semi, given not a full load but sill took up a significant amount of the truck.
 
To avoid these ads, REGISTER NOW!
Top Bottom