To avoid these ads, REGISTER NOW!

Above 1200 Sq/FT The Lone Beech Garage (60x46x16)

Wokspaces above 1200 squarefeet.

LutzTD

Well-known member
Joined
Dec 31, 2011
Messages
3,673
Location
Lutz, Florida
looks like a nice compressor setup.

once you run it, if you still feel you have too much vibration transferring to the pad, you could use a small amount of the vibration pad on top of the foot, then the washer and nut. you still have a hard connection to the concrete with the nut on the foot, but likely it wont matter anyway
 
To avoid these ads, REGISTER NOW!
OP
S

sbosecker

Well-known member
Joined
Sep 25, 2012
Messages
3,539
Location
Peachtree City, GA
looks like a nice compressor setup.

once you run it, if you still feel you have too much vibration transferring to the pad, you could use a small amount of the vibration pad on top of the foot, then the washer and nut. you still have a hard connection to the concrete with the nut on the foot, but likely it wont matter anyway

LutzTD,

Thanks for the hints!

I have run it and it seems OK but I'll keep the above in mind.

Best regards,

Scott
 

matt_i

Well-known member
Joined
Mar 14, 2008
Messages
10,754
Location
SE Michigan
Hi Scott

If you still get Spherosyn encoders with a Newall DRO package, they are very easy and forgiving to install.

In very high-level, lack-of-detail, the scale is in a stainless steel tube. The supports at the ends are a system of compliance via slip-fits, but one simply leaves the supports loose, runs the reader head as close as the axis travels will go, and then tighten the screws on the support. That's it. No indication or anything (although there's some kind of tape measure accuracy required...but its no hours of indicating and shimming).

Hope the transition to retirement goes well, I like your plan from what I've seen in the thread. I'm a bit too young currently but the virus shutdown gave me a taste of it which was pretty nice.

Maybe I missed it but do you use your old tractor(s) to cut the grass at your house? I have been logging some hours on a Farmall Cub mowing the greenery. :)
 
OP
S

sbosecker

Well-known member
Joined
Sep 25, 2012
Messages
3,539
Location
Peachtree City, GA
Hi Scott

If you still get Spherosyn encoders with a Newall DRO package, they are very easy and forgiving to install.

In very high-level, lack-of-detail, the scale is in a stainless steel tube. The supports at the ends are a system of compliance via slip-fits, but one simply leaves the supports loose, runs the reader head as close as the axis travels will go, and then tighten the screws on the support. That's it. No indication or anything (although there's some kind of tape measure accuracy required...but its no hours of indicating and shimming).

Hope the transition to retirement goes well, I like your plan from what I've seen in the thread. I'm a bit too young currently but the virus shutdown gave me a taste of it which was pretty nice.

Maybe I missed it but do you use your old tractor(s) to cut the grass at your house? I have been logging some hours on a Farmall Cub mowing the greenery. :)


matt_i,

This DRO kit came with the Spherosyn encoders. I'm praying that you are correct regarding ease of installing these items. HA!

I've been training for retirement for some time. It's the details of government controlled healthcare here in the end game that have been more troublesome than anything else. I did get my Medicare Card in the mail last week so that's a milestone. I won't bore you with the details but I had to undo part of that to avoid paying two premiums (Employer & Medicare) in August. I will reapply for Part B to start in September in August. I could find no way to achieve this other than applying for A & B and then immediately cancelling B via a phone call. Fortunately they seem to have competent & patient folks at our local Social Security Office.

Yes I do use one of my Allis-Chalmers Model G's to bush hog one part of my property. It does a great job at this.


VIDEO

This was early Spring 2019 and I was cleaning up the dead brush from the previous year.

Thanks for the encouragement regarding the DRO installation!

Best regards,

Scott
 
OP
S

sbosecker

Well-known member
Joined
Sep 25, 2012
Messages
3,539
Location
Peachtree City, GA
Thursday - June 4, 2020

Earlier this week I ordered what I hope will be the last components that will allow the completion of Version 1.0 of the Dust Control Ductwork. UPS is indicating that order should arrive tomorrow.

...and now for something completely different.

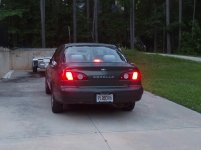
This afternoon I drove past the 2002 Corolla as I was returning from an errand. I thought it looked like the brake lights were on but I assumed it was just a reflection from the sun. I mean, no one’s in the car to push the brake pedal so the brake lights can’t be on.


20200604-01.jpg

This evening I stepped outside to do something and was startled to see this.

Hmmm....

I went out to the Corolla and fiddled around with the brake pedal. The lights stayed on.

I was thinking the brake light switch may have failed but it was time to check the Internet for ideas.

The first thing I found for a Toyota Corolla with “brake lights that won’t go off” was a fellow that suggested a rubber “cushion” between the Brake Light Switch and the Brake Pedal can fail.

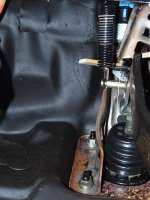
I went out to the Corolla and looked on the Floor Board.


20200604-02.jpg 20200604-03.jpg

At least two of those 3 pieces in the first picture are parts of the “cushion”. The remaining one is probably something else that is failing. HA!

The second picture is an attempt to show where the "cushion" should be. White Arrow points to the spot.

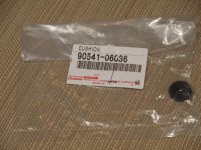
I came in and ordered a replacement “cushion” (Toyota Part 90541-06036). I hope to have it here by early next week.


20200604-04.jpg

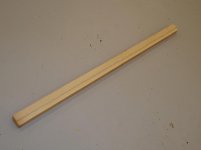
Still I needed to find something to keep the lights from being on and draining the battery. I found a thin piece of scrap wood that looked like it would work.


20200604-05.jpg

I pushed down on the Brake Pedal and placed the scrap wood where the "cushion" should be (White Arrow). Releasing the Brake Pedal trapped the wood in position. The Brake Lights were now out.

I can’t wait to try to replace the “cushion” when I get it. I’m pretty sure two hands aren’t going to be enough ...and there’s only room for one anyway.


Scott
 
Last edited:

LutzTD

Well-known member
Joined
Dec 31, 2011
Messages
3,673
Location
Lutz, Florida
great fix on the Toyota, having master mechanic knowledge base on the internet has saved many a part swap head scratcher.....
 
OP
S

sbosecker

Well-known member
Joined
Sep 25, 2012
Messages
3,539
Location
Peachtree City, GA
great fix on the Toyota, having master mechanic knowledge base on the internet has saved many a part swap head scratcher.....

LutzTD,

In this case particularly... It's tough to get an unobstructed view of the Brake Light Switch to begin with. If you're not aware of this little rubber cushion's existence, you probably wouldn't even notice it not being there.

The good news it is a cheap fix. Most of the cost is shipping. Since getting to my closest Toyota Dealership is a 1-1/2-gallons-of-gas-round-trip-and-an-hour-of-time investment, I ordered it online. I should get the "cushion" next week sometime.


20200604-06.jpg

I had actually driven past the dealership as I picked up this Craigslist Lambda LQD-421 Power Supply. I think when I returned from that trip is when I first noticed (and disregarded as reflected sunlight) the Corolla's illuminated brake lights.

The Power Supply was a typical Craigslist acquisition. I don't have a pressing need for it at the moment but it was nearby and at an attractive price. It will be living in the LBG's upper room.

Best regards,

Scott
 
OP
S

sbosecker

Well-known member
Joined
Sep 25, 2012
Messages
3,539
Location
Peachtree City, GA
Sunday - June 7, 2020

A couple of days ago I had been planning to receive the last shipment (I hope) of Dust Collection Version 1.0 ductwork supplies. At around noon I received a text from UPS indicating that the scheduled arrival of this shipment had been changed from that day (Friday) to Tuesday.

Weird.

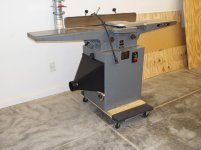
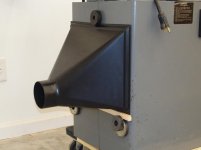
So I spent some time trying to mock up some sort of bracket for the Jointer's Dust Hood.


20200605-01.jpg 20200605-02.jpg

I took a piece of scrap wood and cut a groove the width of my sawblade's kerf.


20200605-03.jpg 20200605-04.jpg

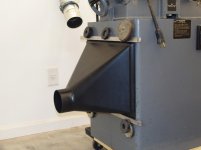
Using some magnets and the wooden "bracket", I set up the Dust Hood on the Jointer.

This may work but sealing the vertical edges of the Dust Hood may be problematic. I'm trying to decide whether to press on with milling some aluminum pieces for the top and bottom of the Dust Hood and then seeing where the project goes from there.


Scott
 
Last edited:
OP
S

sbosecker

Well-known member
Joined
Sep 25, 2012
Messages
3,539
Location
Peachtree City, GA
Monday - June 8, 2020


20200608-01.jpg 20200608-02.jpg

The Brake Light Switch Cushion (Toyota Part 90541-06036) arrived in today's mail. Had I known then what I know now, I might have written, "REFUSED - Return To Sender" on the envelope and put it back into the mailbox.

I strode confidently into the LBG with the small rubber part in hand. "This shouldn't take long", I thought. I had asked my bride to assist me by depressing the brake pedal if I asked her to. Since today was the 46th anniversary of our first date, she took pity on me and agreed to stand by in the shop.

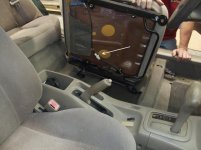
After watching me in an inverted SERE School Stress Position for quite a while and listening to my repeated muffled cries of dismay, she suggested that maybe removing the Corolla's driver seat might help.


20200608-03.jpg 20200608-04.jpg 20200608-05.jpg

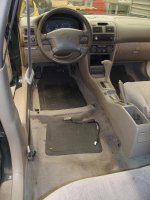
I agreed, if for no other reason than to just to get my blood distributed more normally for a few minutes by standing upright. I didn't initially notice the Seat Belt wiring under the seat (Arrow). I should have realized that was there. The easiest way to remove the seat seemed to be through the rear door. I put pillows on either side of - and over - that structural item in the floorboard to keep from dislocating a vertebra and paralyzing myself while I worked.

The following pictures were taken after victory had been achieved. I initially attempted to place the Brake Light Switch Cushion in place without removing any of the many things that were in my way under the dash.

I finally relented and removed a spring and a yoke pin. That allowed me to get the Switch Cushion into its new home.


20200608-06.jpg

So here's the view after victory had been achieved. White arrows point to the Switch Cushion in position. The Yellow Arrow points to the Yoke that I freed to gain enough Brake Pedal Movement to allow the Switch Cushion to be placed between the Brake Pedal and the Brake Light Switch.


20200608-07.jpg

With the Switch Cushion in place, I re-installed the Yoke Pin and installed a Clip into the Pin to hold it in place (Red Arrows).


Continued in next post...

KEY WORDS - 2002 Corolla Brake Light Switch Cushion Replacement Brake Lights Stay On
 
Last edited:
OP
S

sbosecker

Well-known member
Joined
Sep 25, 2012
Messages
3,539
Location
Peachtree City, GA
Continued...


20200608-11.jpg

The last item to be reinstalled was a Spring (Green Arrow).

I had been afraid to remove those items (Yoke Pin & Spring) as there is so little room under the dash and I thought they might be difficult to get back into position once freed. It turned out my fears were unfounded and everything went back together easily. I could have saved myself a LOT of aggravation had I removed the driver's seat and these under-dash items immediately.

The job was done... what a classic example of the installation of a 50 cent part costing $200 in labor. Putting the Driver's Seat back into position didn't take too long.

...and the Brake Lights now operate correctly.


20200608-12.jpg 20200608-13.jpg 20200608-14.jpg

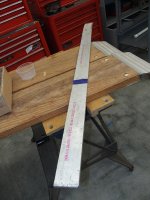
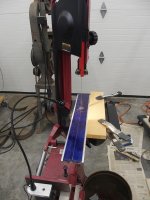
After getting my blood pressure back to normal, I started working on the Jointer Dust Hood Brackets. I have a 5 foot length of 3-inch wide, 1/2-inch thick Aluminum that I picked up at an Estate Sale. I scribed a 20-inch mark and cut it on my Harbor Freight 4"x6" Horizontal Band Saw.

While the Saw did accomplish the task, it was slow. I think the 6 year old blade is fully depreciated. I will order a new one as I want to "rip" this piece of aluminum lengthwise into 3 or 4 pieces. I don't think the old blade is up to the task.


Scott
 
Last edited:
OP
S

sbosecker

Well-known member
Joined
Sep 25, 2012
Messages
3,539
Location
Peachtree City, GA
Wednesday - June 10, 2020

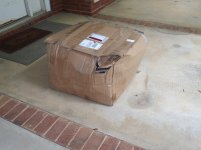
Yesterday UPS delivered the materials to finish the Version 1.0 Woodshop Dust Collection system.


20200609-01.jpg 20200609-02.jpg 20200609-03.jpg

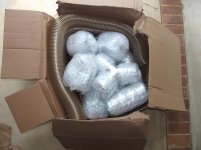
The box looked like it had been air dropped and the parachute had failed. Despite the rough appearance of the box, the shipment had been packed well enough and nothing was damaged.

I unpacked everything last evening and then went to bed.


20200610-04.jpg

Late this afternoon I was going to start the actual work. The leg over the Wood Lathe was going to be my starting point. I picked up my notes and studied this part of the project. That's when I realized yesterday's shipment was short a 4-inch 45-degree elbow. I returned to the house to send an email to the vendor regarding the missing elbow. This took a while as I edited and sent several pictures of the unboxing process to document the missing item.


20200610-05.jpg 20200610-06.jpg

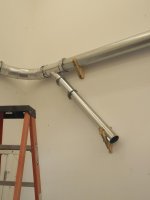
I returned to the Woodshop and took some measurements. I was going to attach a 45-degree branch to the end of the ductwork and I needed to shorten the horizontal ductwork to accommodate that branch. After measuring I determined that the clamp on the branch I was going to install would interfere with the existing bracket.

I installed a new bracket and removed the existing one.


20200610-07.jpg

I wasn't happy with this arrangement. There's going to be a significant amount of ductwork hanging out on the very end of this leg and I had just moved the bracket making that worse. I took a 15-inch one-way tie and secured the duct to the far left bracket. That helped the situation here and I may repeat it on all the brackets.


Continued in next post...
 
OP
S

sbosecker

Well-known member
Joined
Sep 25, 2012
Messages
3,539
Location
Peachtree City, GA
Continued...


I was going to clamp the 4-inch 45 degree Elbow I had received in yesterday's delivery to the branch to start a vertical leg. That's when I noticed something...


20200610-11.jpg 20200610-12.jpg

The Elbow that was delivered yesterday is on the left. The Elbow on the right is an Elbow that had been delivered in the Spring. The one on the right had been sent to replace an Elbow that wasn't 45 degrees.

POST 3519 on April 26th describes the issue.

The "out of plumb" Elbows from April had 2-beads just like the Elbow I received yesterday. I needed to find out of this new "2-bead" Elbow was going to suffer from the same "out of plumb" situation as the April "2-bead" Elbows.

I installed the new "2-bead" Elbow to the new 45 degree branch and then removed it. I then unclamped an installed known plumb "single bead" leg and clamped it to the new 45 degree branch.

All this took a bit of time to accomplish.


20200610-13.jpg 20200610-14.jpg

The new "2-bead" Elbow is on the left and the "single bead" Elbow is on the right.

The "single bead" Elbow is plumb the "2-bead" Elbow is not (for some reason it looks much better in the picture than viewing it in person).

I've sent an email to the vendor describing the issue, comparing it to the April issue and requesting the "missing" Elbow be a single bead Elbow.

The vendor has been very good about fixing any issues and I don't expect this one to be any different.


Scott
 
Last edited:
OP
S

sbosecker

Well-known member
Joined
Sep 25, 2012
Messages
3,539
Location
Peachtree City, GA
Thursday - June 11, 2020

This morning I got an email from the ductwork vendor indicating they were sending a couple of new 4-inch 45 degree Elbows. I would expect to get them early next week.

This afternoon I was able to return to the Woodshop to work on the ductwork.


20200611-01.jpg 20200611-02.jpg

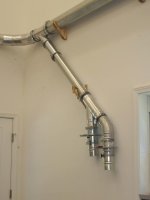
I started with the diagonal leg to the Drum Sander and the Moulder. I removed the existing duct up to the Branch. The plan was to add another Branch at the bottom of the diagonal leg. This would require shortening the diagonal leg.


20200611-03.jpg 20200611-04.jpg

I removed the appropriate amount from the diagonal leg. An Adjustment Sleeve was added and the diagonal leg was again clamped to the upper Branch.


20200611-05.jpg 20200611-06.jpg

A Branch was added to the lower end of the diagonal leg as well as a 45 degree Elbow, Blastgates & Hose Adapters. This section is complete except for attaching Flexible Hose.


20200611-07.jpg

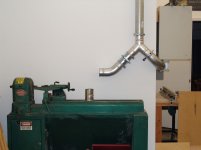
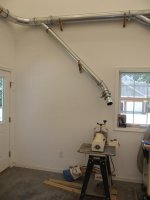
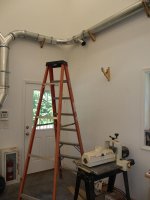
The section feeding the Wood Lathe and the Router Table received the same treatment. When it arrives, one of the 4-inch 45 degree Elbows will be clamped to the left side of the Wye Branch.


Continued in next post...
 
OP
S

sbosecker

Well-known member
Joined
Sep 25, 2012
Messages
3,539
Location
Peachtree City, GA
Continued...


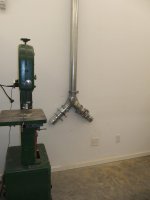
20200611-11.jpg 20200611-12.jpg 20200611-13.jpg

I added Blastgates and Hose Adapters to the remaining down-legs. I will probably shorten the down-legs at the Bandsaw and the Drill Press but that will be for another day as I want to think a bit more about how much to remove.

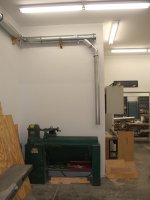
I did fire up the JET Dust Collector and check out the suction at all the Blastgates. I was pleased with the amount of vacuum that was produced and I think this system is going to work well.

With the ductwork project as far as I can take if for the time being, I moved the Metal Shop area of the LBG. I've been trying to figure out the best way to mill the Aluminum stock into the Brackets for the Jointer's Dust Hood.

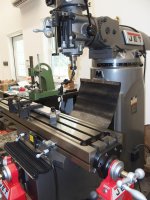
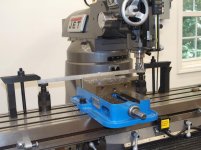
Clamping it in the Vise didn't seem to be a good solution. 20 inches of material in a 6-inch Vise seemed like more trouble than it was worth. I decided that clamping the Aluminum to the JET Mill's Table was the way to go. This required removing the Vise.


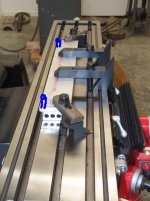
20200611-14.jpg 20200611-15.jpg

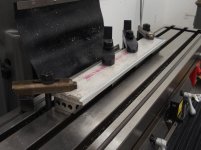
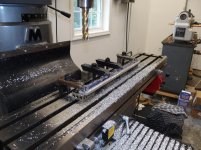
I used some 1-2-3 Blocks and some Machine Table Clamps to secure the Aluminum to the Table. That's as far as I got today.

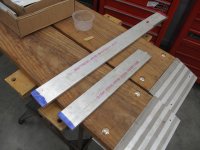
I'll be indicating the edge of the Aluminum and then milling a straight edge on each side of the material. I then plan to mill a 1/8-inch deep recess about 1/4-inch wide on each side of the Aluminum.

The rest of the plan is a little fuzzy at this point... HA!

I think I might be able to get all the Brackets from this one 3-inch wide piece of Aluminum. That may be optimistic.

Scott
 
Last edited:

LutzTD

Well-known member
Joined
Dec 31, 2011
Messages
3,673
Location
Lutz, Florida
Continued...


20200611-11.jpg 20200611-12.jpg 20200611-13.jpg

I added Blastgates and Hose Adapters to the remaining down-legs. I will probably shorten the down-legs at the Bandsaw and the Drill Press but that will be for another day as I want to think a bit more about how much to remove.

I did fire up the JET Dust Collector and check out the suction at all the Blastgates. I was pleased with the amount of vacuum that was produced and I think this system is going to work well.

With the ductwork project as far as I can take if for the time being, I moved the Metal Shop area of the LBG. I've been trying to figure out the best way to mill the Aluminum stock into the Brackets for the Jointer's Dust Hood.

Clamping it in the Vise didn't seem to be a good solution. 20 inches of material in a 6-inch Vise seemed like more trouble than it was worth. I decided that clamping the Aluminum to the JET Mill's Table was the way to go. This required removing the Vise.


20200611-14.jpg 20200611-15.jpg

I used some 1-2-3 Blocks and some Machine Table Clamps to secure the Aluminum to the Table. That's as far as I got today.

I'll be indicating the edge of the Aluminum and then milling a straight edge on each side of the material. I then plan to mill a 1/8-inch deep recess about 1/4-inch wide on each side of the Aluminum.

The rest of the plan is a little fuzzy at this point... HA!

I think I might be able to get all the Brackets from this one 3-inch wide piece of Aluminum. That may be optimistic.

Scott

get two 5/8 or 3/4 dowels depending on your t-slots, About 2" long and tap them into the t-slot in the back at the extents of the aluminum bar. Then you push your aluminum against the dowels, tighten the clamps and you are square, no indicating required! hook an adjustable wrench jaw under the dowel when you want to remove it.

If you need to make 2 of the same thing, clamp a block on one side or the other and **** your part against it to make a repeatable nest.

duct network is looking awesome.
 

Attachments

  • dowels.JPG
    dowels.JPG
    66.2 KB · Views: 34
Last edited:
OP
S

sbosecker

Well-known member
Joined
Sep 25, 2012
Messages
3,539
Location
Peachtree City, GA
get two 5/8 or 3/4 dowels depending on your t-slots, About 2" long and tap them into the t-slot in the back at the extents of the aluminum bar. Then you push your aluminum against the dowels, tighten the clamps and you are square, no indicating required! hook an adjustable wrench jaw under the dowel when you want to remove it.

If you need to make 2 of the same thing, clamp a block on one side or the other and **** your part against it to make a repeatable nest.

duct network is looking awesome.

LutzTD,

Too late... HA!

Today's efforts follow.

Best regards,

Scott
 
OP
S

sbosecker

Well-known member
Joined
Sep 25, 2012
Messages
3,539
Location
Peachtree City, GA
Friday - June 12, 2020


20200612-01.jpg 20200612-02.jpg

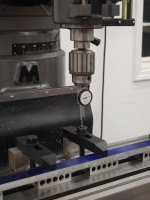
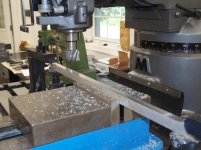
Got my Dial Test Indicator set up and the material clamped down but loose enough to be moved by tapping with a dead blow hammer. Prior to this setup nothing had been machined on this aluminum so the Indicator was just to get the far side as close to parallel to the table as possible.


20200612-03.jpg

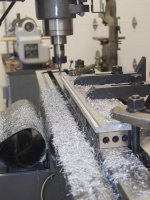
With everything set up and firmly clamped down, I started nibbling away at the far side of the aluminum. I had to take a bit more off than I expected due to a divot (visible as a "shadow" on the face) in this side of the material.

I took off 35 thousands and then things were cleaned up.


20200612-04.jpg

I then took a 1/4-inch wide cut 130 thousands deep (in two passes). The flange on the Dust Hood is pretty close to 1/8-inch thick so I think 130 thousands should do the trick.


20200612-05.jpg

With the machining on the far side completed, I moved the clamps one at a time in an attempt to minimize movement of the part. I checked the close side with the Dial Test Indicator and was surprised to find that this had actually worked and I didn't have to make any adjustments.

This side was cleaner than the first side and I only took off 10 thousands to get it in shape.


20200612-06.jpg

This side got the same treatment as the other. I machined another 1/4-inch wide, 130 thousands deep step into the aluminum. As with the first I did a couple of passes at about 60 thousands each and then a 5 thousand climb milling pass.


20200612-07.jpg

So I've got identical steps on both sides of the aluminum... I think I'm going to try to make a couple of long cuts with the band saw just under 3/4-inch from the sides of the aluminum. Then I'll see if I can clean up the band saw cut.

I'm probably missing something obvious but this is the only way I can think to remove these two future "Dust Hood Brackets" (top & bottom) and still have some material to make the remaining two (vertical sides).

Now the obvious question is why do it in aluminum at all? I could probably knock this out in an hour if I did it in wood.

The reason is to try to learn a bit about machining and using my Mill. This seemed like a good project for that goal.


Scott
 
Last edited:
To avoid these ads, REGISTER NOW!

Jayman17

Well-known member
Joined
Feb 6, 2017
Messages
3,820
Location
Seattle, Wa
Scott, great job on your DC ductwork. I've been keeping up with all your updates and everything is looking great. You sure have a great shop space and a bunch of machinery to play with during your upcoming retirement.
It was a miracle that none of those fittings were damaged during delivery in that sad looking box! :shocking:

Jay
 
OP
S

sbosecker

Well-known member
Joined
Sep 25, 2012
Messages
3,539
Location
Peachtree City, GA
Scott, great job on your DC ductwork. I've been keeping up with all your updates and everything is looking great. You sure have a great shop space and a bunch of machinery to play with during your upcoming retirement.
It was a miracle that none of those fittings were damaged during delivery in that sad looking box! :shocking:

Jay

Jay,

Thanks for the kind words! The ductwork is getting pretty close to being finished up.

It is a blessing to have a nice space to spend time in and work on stuff.

I agree about the "miracle box's" contents. I too was expecting something to be mashed but the individual items had been well bubble-wrapped and that seemed to do the trick.

Best regards,

Scott
 
OP
S

sbosecker

Well-known member
Joined
Sep 25, 2012
Messages
3,539
Location
Peachtree City, GA
Monday - June 15, 2020


20200613-01.jpg

The "missing elbow" was delivered last weekend and I quickly clamped it into place on Saturday. It looks like this will work. In the future it may be useful to move the Wood Lathe out from the wall a bit to give the dust collection paraphernalia some room to operate.


20200613-02.jpg

I put some layout dye on the previously machined aluminum yesterday.


20200615-03.jpg 20200615-04.jpg

I had received the new blade for the Harbor Freight Band Saw on Friday and had installed it on Saturday. Today I put it to use.

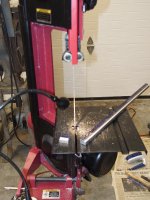
I scribed a line down the middle of the machined aluminum and used the Band Saw to cut it in two.


20200615-05.jpg

This evening I clamped the first of the two parts onto the Table of the JET MIll and used a Test Indicator to get the previously machined face parallel to the X-Axis.


20200615-06.jpg

I then started milling the "band saw cut" face and I learned something. I was paying close attention to making sure my End Mill wasn't going to run into any of the Strap Clamps but I forgot about the ER Collet Holder.

I started milling and heard a bit of noise and stopped. The bottom of the ER Collet Holder's "Nut" was just touching the top of first clamp. I rearranged my clamps to insure that there wasn't going to be any interference with anything.

This was a very good lesson to learn and, fortunately, I didn't do any serious harm to any of my tools - or myself - learning it.

With the vertical face of the "band saw cut" cleaned up, I milled another 1/4-inch wide by 130 thousands deep step.


20200615-07.jpg

With that completed I quit for the night. I'll try to do the same to the remaining part tomorrow.


Scott
 
Last edited:
OP
S

sbosecker

Well-known member
Joined
Sep 25, 2012
Messages
3,539
Location
Peachtree City, GA
Monday - June 29, 2020

Well working on the Jointer Brackets didn't happen "tomorrow" as I had thought in my last post.

I got side-tracked on the Bracket project by asking some folks on the Old Woodworking Machines web site (OWWM.org) about an electric motor I had picked up at an Estate Sale. It was 220 volt 3/4 HP 1725 rpm Emerson Motor that might have been made in 1959 (there’s something that could be a date code on the data plate). There was no wiring diagram on the motor so I was asking for advise on how to hook it up to power.

We got that figured out – see following link to a YouTube Video:

VIDEO

...but then one of the fellows that was helping over there suggested having a look at the Capacitor and recording the information written on its side. The idea being if the Capacitor fried itself, the writing might not be legible after that. It seemed like a good idea but that took us down a rabbit hole that lasted for a week. The Capacitor was rated for 110 volts and not the 220 volts as expected... I found some frayed wires going to the Capacitor... etc. etc.

It looks so pretty on the outside! HA!

Anyway, these guys were trying to help me and I didn’t want them to think I didn’t appreciate what they were doing but it did take me away from the Bracket project.


20200621-01.jpg 20200621-02.jpg

On Father's Day I got some time in the shop again. I milled a step on the side of the remaining part. I used a R8 collet this time to give me a little more clearance than the ER Collet Holder I was using previously. This worked OK but the finish wasn't what I was hoping for... I suppose I didn't get my speeds & feeds right before I finished this operation.


20200621-03.jpg 20200621-04.jpg

I used the Harbor Freight Band Saw to cut the part lengthwise. At this point we had the 4 Brackets with just a little more work to do.


20200621-05.jpg

I used some magnets to hold a couple of the incomplete Brackets in position on the Jointer. I had suspected - and this confirmed it - that if I used vertical Brackets in addition to horizontal Brackets, the radius on the vertical corners of the Jointer was going to cause problems.

I quite for the day and had a Father's Day supper with my wife & son. After that we managed to do a COVID19 version of a Father's Day tradition. My daughter - located about 80 miles away - streamed the Pixar movie Finding Nemo on her computer. We could see on my computer what she had on her computer via a Discord App hookup. We hooked my computer up to our normal TV and watched the movie "together". HA!

It is a statement on popular culture that the best example I can find of "being a good father" is a cartoon clownfish. Anyway, we've been watching the movie together each Father's Day since they were little.


Yesterday I got back out the shop. I had decided to try just using horizontal Brackets to support the Jointer's Dust Hood and see if that would be sufficient.


20200628-06.jpg 20200628-07.jpg

I clamped the machined "step" on each of the brackets in the Kurt Vise to index the position consistently on each of the parts. I supported the ends of the Bracket with Machinist Jacks. I zeroed out the Quill DRO at a convenient point in space and started milling a very shallow pass using my Shell Mill.

I was expecting some excitement as I fed the cutter into the aluminum but everything that I wanted to stay still stayed perfectly still. I was happy with that and the outstanding surface finish the Shell Mill left on the aluminum.


Continued in next post...
 
Last edited:
OP
S

sbosecker

Well-known member
Joined
Sep 25, 2012
Messages
3,539
Location
Peachtree City, GA
Continued...

I set up the next Bracket as I had done the first one and now I started getting some chatter. I don't know why the first one had been blessed but I changed my setup.


20200628-11.jpg 20200628-12.jpg

I pinched the ends of the remaining Brackets between a Strap Clamp and the Machinist Jack. That eliminated the chatter.


20200628-13.jpg

I cut off the parts of the Brackets that couldn't be machined due to the Strap Clamps being in the way.


20200628-14.jpg

I returned the Brackets to the Kurt Vise and machined the cutoff ends.


20200628-15.jpg

I now needed to drill some holes in the Brackets to allow them to be attached to the Jointer. The Jointer has a vertical seam in the middle of its stand and I decided to use that seam as a reference point.

I used some layout dye on the 2 Brackets and marked a line roughly in the middle. From that point I marked out four drilling points. I used a #7 Drill Bit which should give me a Free Fit Clearance Hole for the #10-32 Machine Screws I will be using.

Little Machine Shop Tap & Drill Clearance Hole Chart


20200629-16.jpg 20200629-17.jpg

I seated the Bracket on the Jointer's Dust Hood and measured the distance to the edge of the Bracket - 1-5/16-inch.


Continued in next post...
 
Last edited:
OP
S

sbosecker

Well-known member
Joined
Sep 25, 2012
Messages
3,539
Location
Peachtree City, GA
Continued...


20200629-21.jpg

I marked a couple of lines 1-3/8" below the Jointer's Chip Chute.


20200629-22.jpg 20200629-23.jpg

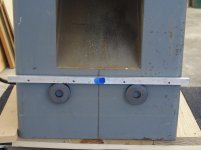
I located a couple of magnets immediately below the lines I had marked out, then I placed the Bracket on top the magnets. I lined up the Bracket's reference line with the Jointer Base's vertical seam.


20200629-24.jpg

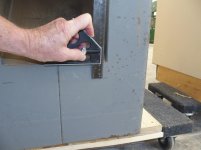
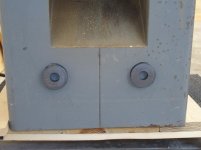
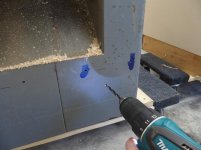
Using a Transfer Punch inserted into the Bracket's 4 holes, I placed location marks on the Jointer Base. #7 holes were then drilled in the Jointer Base. I belatedly realized that a dab of layout dye on the sheet metal would help the dimples left by the Transfer Punch show up so I only have that on the last couple of holes.


20200629-25.jpg

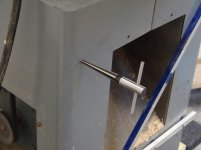
Pictures of the holes from inside the Jointer Base. The 4th hole is out of sight to the right.


20200629-26.jpg 20200629-27.jpg

One inch long #10-32 machine screws, lock washers & nuts were obtained from my hardware stash. The bottom Bracket was mounted onto the Jointer Base using this hardware.

Continued in next post...
 
Last edited:
OP
S

sbosecker

Well-known member
Joined
Sep 25, 2012
Messages
3,539
Location
Peachtree City, GA
Continued...


20200629-31.jpg

A combination my ineptitude while trying to hold the Bracket, the Transfer Punch and a hammer at the same time coupled with wavy sheet metal caused a couple of my holes to be a bit out of alignment with the Bracket's holes. I used a Tapered Reamer to enlarge the holes enough to allow the screws to pass into the Jointer's innards.


20200629-32.jpg 20200629-33.jpg

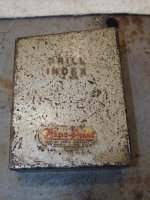
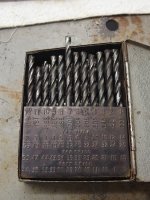
I scored this Blue Point Drill Index at an Estate Sale a couple of years ago. This is where the #7 Drill Bit lives. Although this is an old set, the original owner had kept them sharpened and in good condition. I am pleased to have them.


20200629-34.jpg 20200629-35.jpg

I slide the Dust Hood into position. The Brackets seemed to be doing the job and I think vertical Brackets will not be necessary. To test this idea I hooked some 4-inch flexible spiral pipe to the Dust Hood and the Dust Collector ducting.

I opened the appropriate Blastgate and started the Dust Collector. The Jointer was started and I ran some Yellow Poplar through it. The resulting chips were transported from the Jointer to the Dust Collector's Chip Barrel.

Sweet!

I'm going to leave the mounted Brackets as they are for a little while just to make sure I haven't forgotten something. When I'm pretty sure that this setup is going to work as is, I'll trim the Brackets so they line up with the sides of the Dust Hood.


Scott
 
Last edited:
OP
S

sbosecker

Well-known member
Joined
Sep 25, 2012
Messages
3,539
Location
Peachtree City, GA
Friday - July 3, 2020

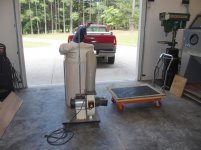
With the Woodshop's Dust Collection System coming on-line it seemed like a good time to recover some floorspace by selling the Shop Fox W1685 Dust Collector.


20200701-01.jpg 20200701-02.jpg 20200701-03.jpg

I had bought this machine - used - back in 2009 and it had served me well. Yesterday afternoon I placed an ad on Craigslist and immediately had a flurry of responses.

...all of them texts from scammers.

I'm trying to think of the last time I sold something on Craigslist. I've posted a few Free things but it's probably been several years since I actually sold something. I was unfamiliar with the scamming issue and the most starling thing to me was the incredibly quick reaction by these twerps from area codes all over the country!

An hour or so later that had all died down...

The circuit was dead until this morning at about 8:45 when I got a text from a fellow in Palmetto GA. He wanted to come look at the Dust Collector. He was about a 30 minute drive from my house.

When he arrived we talked for quite a while. An interesting fellow...

The Atlanta area has become "Hollywood East" and there are a lot of Movie Studios and Movie Production taking place nearby. My new acquaintance made props and helped construct sets for these production companies.

He had some entertaining stories!


20200703-04.jpg 20200703-05.jpg

Eventually we got down to business and an agreeable price for the Dust Collector was reached. We loaded it into the back of his pickup and he headed off into the sunset.

Other than the barrage of scammers it was a pain-free transaction.


Scott
 
OP
S

sbosecker

Well-known member
Joined
Sep 25, 2012
Messages
3,539
Location
Peachtree City, GA
Congrats on the quick sell. Joys of CL.


Shorty Korte,

"Joys of CL"; HA!

The first scam that appeared was apparently a human as opposed to software driven responses.

He/she/they/them wanted to make sure "i was a real person". They would have a code sent to me and I was to send them that code which would verify that I was a real person. I was thinking, "that doesn't prove anything of the sort" and replied if they had questions just to call me. That ended that.

I did an Internet search and apparently this scam involves the scammer already having your phone number - hence the text - from the Craigslist Ad. They set up a Google Voice account with your phone number and that generates a verification code which Google sends to your phone. The victim sends the code back to the scammer which allows them to do something nefarious. I think that's the gist of that scam.

The rest of the scammer texts had embedded links that I was supposed to click on.

Pretty amazing.

Best regards,

Scott
 
Last edited:

matt_i

Well-known member
Joined
Mar 14, 2008
Messages
10,754
Location
SE Michigan
Hi Scott

I think my previous comment got lost in the forum bugaboo.

In your picture machining way outside the vise, there are sets of vise jaws which bolt in and extend "way out".

attachment.php


This is a sampler of "machineable vise jaws" you can buy for a 6" kurt vise. In reality they can be made any length, could be 24" wide for all we care, and backed up with C-clamps outboard of the main vise body. They don't have to be hardened and ground, can easily be made with flat stock thick enough to counterbore for the socket head screws.

https://www.usshoptools.com/Customer/ProductMaster/Index/102050_45

There are probably other sources and ebay is also a source.

While on the subject of vise jaws, and proposing tooling purchases with your money :eek: :D I was going to give mention to Snap Jaws.

They have a really nice set of hardened V-jaws for machining shafts in both vertical and horizontal positions. They are expensive but these are very nice hardened, ground, black oxide, and laser etched. But make milling keyways, drilling bolt patterns, really any features on the sides and end of shafts of all sizes very easy.

https://www.snapjaws.com/product-category/6-inch-jaws/vee-jaws/

I have seen quite a few movies being shot in Norcross GA as some family members live there. The "downtown area" is sort of a throwback in time and apparently good for "period pieces".
 
Last edited:
OP
S

sbosecker

Well-known member
Joined
Sep 25, 2012
Messages
3,539
Location
Peachtree City, GA
Monday - July 6, 2020


Yesterday I wound up taking an unexpected Craigslist road trip. For quite a while there had been an ad for a "US Navy Stainless Steel Desk" in the Atlanta Craigslist. This had caught my eye but...

1. It was quite a ways away.
2. It wasn't cheap.
3. I didn't really need a US Navy Stainless Steel Desk.

As time went by the price had been reduced to where it was less than half the original asking price. Still, all of the bullets I listed were still in effect.

Nonetheless it was whispering to me and I was curious about it. I could see there was a tag of some sort on the desk and somewhere around the start of the month I had asked the seller for a picture of the tag.

He complied rather quickly with my request. I thanked him and examined the picture. Despite the glare on the picture the seller took of the tag, it strongly suggested that it had once been a piece of US Government property although nothing indicated it had belonged the the Navy.

I did a little Internet research and found what appeared to be an identical desk made by a different manufacturer. The price it had been advertised at was an order of magnitude more than the current Craigslist item.

...and then I put that aside and a few days passed.

Yesterday my phone lit up with a text from the seller. "Are you interested?" was the query.

Hmmm...

I thought about it for a little while and then sent a reply that acknowledged that the desk was worth every penny that he was asking but, due to current economic conditions, I could only offer an amount that was a VERY significant reduction in that figure.

I thought that would be the end of it but within a minute he texted back calling my bluff and accepting my offer. When could I come and get it?

That was unexpected...
...but about 15 minutes later I was on my way to ******* GA which was about a 80 minute drive.
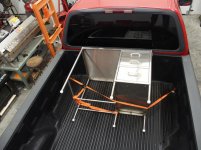
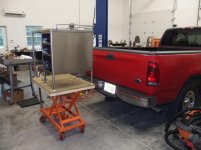


20200705-01.jpg 20200705-02.jpg

Roughly 3-1/2 hours later I was back at the LBG with my prize.


20200705-03.jpg 20200705-04.jpg

It's 3 feet wide by 2 feet deep and its height is 30 inches. I did a little more Google Fu on the tag and I think the "67" in the string of numbers above "US" is a year of manufacture (1967). The other stuff took a little longer to decode but I think, eventually, I determined that this was:

Desk, Flat Top, Nurses, Single Pedestal...
to be constructed of: steel, corrosive resisting...
and to feature: a continuous guardrail on back and sides.

HA!

Today I asked my bride if she would mind helping me carry this item to the LBG's Upper Room. She agreed to try.


20200705-05.jpg

A bit later it was in its new home. I think the desk will fit in nicely with the other furnishings in the Upper Room.

...and I think I owe my wife an apology and a precious stone.

Scott
 
Last edited:

Motoman1100

Well-known member
Joined
Oct 2, 2014
Messages
443
Location
GA
I was never a fan of that rolling chair, but the 2 with the arms are the best. You could lean way back without worrying the chair would collapse since they are so well made. Nice find with the desk.
 
OP
S

sbosecker

Well-known member
Joined
Sep 25, 2012
Messages
3,539
Location
Peachtree City, GA
Hi Scott
I think my previous comment got lost in the forum bugaboo.

In your picture machining way outside the vise, there are sets of vise jaws which bolt in and extend "way out".

attachment.php


This is a sampler of "machineable vise jaws" you can buy for a 6" kurt vise. In reality they can be made any length, could be 24" wide for all we care, and backed up with C-clamps outboard of the main vise body. They don't have to be hardened and ground, can easily be made with flat stock thick enough to counterbore for the socket head screws.

https://www.usshoptools.com/Customer/ProductMaster/Index/102050_45

There are probably other sources and ebay is also a source.

While on the subject of vise jaws, and proposing tooling purchases with your money :eek: :D I was going to give mention to Snap Jaws.

They have a really nice set of hardened V-jaws for machining shafts in both vertical and horizontal positions. They are expensive but these are very nice hardened, ground, black oxide, and laser etched. But make milling keyways, drilling bolt patterns, really any features on the sides and end of shafts of all sizes very easy.

https://www.snapjaws.com/product-category/6-inch-jaws/vee-jaws/

I have seen quite a few movies being shot in Norcross GA as some family members live there. The "downtown area" is sort of a throwback in time and apparently good for "period pieces".


matt_i,

Thank you so much for replacing your absent post! I'll make bookmarks of those vendors immediately so as to have them available should lightening strike twice. HA!

Back in the '90's I took German at a Community Education program here in Peachtree City. The Instructor was around 80 - originally from The Netherlands. Very interesting fellow and the visual personification of an elderly gentleman. In addition to teaching the German Class, I learned he often was an extra in movies that were being shot nearby. That was when I became aware that the industry was active in the area.

25 years later it has exploded with several major studios having built huge facilities not far from where I live.

Beats me why ...but it is often educational to follow the money. I suspect there have been some incentives dangled in front of the decision makers.

I know ...I didn't use to be this cynical. HA!

Best regards,

Scott
 
OP
S

sbosecker

Well-known member
Joined
Sep 25, 2012
Messages
3,539
Location
Peachtree City, GA
I was never a fan of that rolling chair, but the 2 with the arms are the best. You could lean way back without worrying the chair would collapse since they are so well made. Nice find with the desk.

Government furniture... I am not surprised you have some opinions on that topic. HA!

Thanks for dropping by!

Best regards,

Scott
 
OP
S

sbosecker

Well-known member
Joined
Sep 25, 2012
Messages
3,539
Location
Peachtree City, GA
That desk is a perfect addition. Nice score.

Shorty Korte,

Thanks for the encouragement - I do think the desk works well in the LBG's Upper Room.

I had planned to use a Tanker Desk that I had gotten for free up there but the mass of the thing had kept me from moving it to date. I'll find another place for it or find someone else who can use it.

I don't think I want two desks up there but maybe I should sleep on that.

Best regards,

Scott
 
To avoid these ads, REGISTER NOW!
Top Bottom