To avoid these ads, REGISTER NOW!

Quincy experts - 208 Rev 5 leaking at intake

vrinner

Well-known member
Joined
Aug 29, 2006
Messages
1,078
Location
Placentia, CA
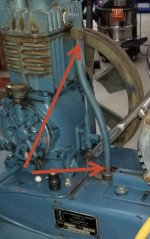
I have a 1970's Quincy 208 Rev 5 compressor. Seems to work fine except when it cycles off I hear a very slight hiss coming from the air intake. It is enough to cause the system to cycle after about an hour.

Any tips on direction to take in order to get the right parts to fix this?
 
To avoid these ads, REGISTER NOW!

RacerX

Well-known member
Joined
Mar 27, 2007
Messages
377
Location
Caldwell, Tx
Sounds like the one way valve at the tank is leaking, pushing back to the compressor and that's what you're hearing.

Time for a new one way valve. Or you might get away with taking it apart and cleaning it. Might have something in it blocking it open slightly. Be sure and drain your tank first.

Sent from my SM-N960U using Tapatalk
 

On-Wheel

Well-known member
Joined
Oct 6, 2014
Messages
487
Probably what said above.
Carbon build up from the head let loose?
Time to check the valves also for build up/spring damage?
 

redmondjp

Well-known member
Joined
Nov 25, 2014
Messages
2,318
Location
Redmond, WA
The quincy pumps use the output valves as the tank check valve, typically. So the output valves may be a bit leaky.
 
OP
V

vrinner

Well-known member
Joined
Aug 29, 2006
Messages
1,078
Location
Placentia, CA
If I go to the Quincy site and go to download literature, under parts books and manuals if I type in 208 I get the Rev 5 model for the parts. For instruction I only get the QR-25 that does mention the 208. Anyone know if that is the right manual to look at? Not being totally familiar with compressors I just want to make sure I'm looking in the right place.
 
OP
V

vrinner

Well-known member
Joined
Aug 29, 2006
Messages
1,078
Location
Placentia, CA
Just got off the pone with my local Quincy place (QAir) and they were very helpful.

She said you can replace the entire valves ($80.00 X 8)...ummm...no....or get the springs and disks at about $2.50 each...bingo!. And they emailed me the manual that I mentioned above so I know I have the right one.

Anything else recommended that I need to replace while tearing it down to replace the valve springs and disks?
 

TonyJ

Well-known member
Joined
Sep 10, 2019
Messages
384
Location
West Virginia
You said in a earlier comment that they quoted you $80x8 for valves ?? The 208 is single stage and just by thinking it shouldn’t have no 8 valves lol. I’ve never had or seen a 208 but I’m thinking it either has 2 valves 1 intake and 1 exhaust or 4 valves with 2 of each


Tony
 

MacMcMacmac

Well-known member
Joined
Oct 21, 2014
Messages
1,586
Location
canada
Just got off the pone with my local Quincy place (QAir) and they were very helpful.

She said you can replace the entire valves ($80.00 X 8)...ummm...no....or get the springs and disks at about $2.50 each...bingo!. And they emailed me the manual that I mentioned above so I know I have the right one.

Anything else recommended that I need to replace while tearing it down to replace the valve springs and disks?

Check to see if the valve guides are worn and letting the discs move off center. I was climbing the walls trying to diagnose that problem once. If that is the case you will probably need new complete assemblies anyway. There are only 4 valves in a 208.
 

On-Wheel

Well-known member
Joined
Oct 6, 2014
Messages
487
Yes most likely in QR-25 208
I think my duplex is QR-25 106
I need to find that a home.lol
It probably puts out what a 208 does.hehe

Just put a one-way valve on the tank and clean the valves.

They run forever.

If I’m not mistaken valves are only $27 each

That’s what I hate about Quincy got a deal some vendor with made up pricing.
 
Last edited:
To avoid these ads, REGISTER NOW!
OP
V

vrinner

Well-known member
Joined
Aug 29, 2006
Messages
1,078
Location
Placentia, CA
It is a 208. She said there were 4 suction valves and 4 discharge valves and they were $80 each. Not knowing exactly what she was talking about I just took her word for it...looking at the pump now I'm assuming there are 4 total.

She said I could just replace 4 springs and 4 disks...so that leads me to believe it's 4 total valves (2 suction and 2 discharge).

I'm going for the disk and spring replacement as it's cheap enough and probably not too difficult.

If I go with a one-way valve on the tank...does it get mounted somewhere on this pipe?
 

Attachments

  • 6-24-2020 6-57-21 AM.jpg
    6-24-2020 6-57-21 AM.jpg
    43.2 KB · Views: 18

TonyJ

Well-known member
Joined
Sep 10, 2019
Messages
384
Location
West Virginia
It is a 208. She said there were 4 suction valves and 4 discharge valves and they were $80 each. Not knowing exactly what she was talking about I just took her word for it...looking at the pump now I'm assuming there are 4 total.


She said I could just replace 4 springs and 4 disks...so that leads me to believe it's 4 total valves (2 suction and 2 discharge).


I'm going for the disk and spring replacement as it's cheap enough and probably not too difficult.


If I go with a one-way valve on the tank...does it get mounted somewhere on this pipe?


Adjustments.jpg

You would have to remove that fitting from the tank and install the in tank check valve and then connect the line back to it.

Also before ordering your springs and disks you might want to check the condition of your valve seats and make sure their in good shape and make sure their flat and true because if their not then new disks won’t help cause they still won’t seal


Tony
 
OP
V

vrinner

Well-known member
Joined
Aug 29, 2006
Messages
1,078
Location
Placentia, CA
Great advice Tony. I'll pull them out tonight before I order them. Never took apart a compressor motor before but I'm assuming its the 4 big round luggy looking things on top that need to come off and be checked.
 

On-Wheel

Well-known member
Joined
Oct 6, 2014
Messages
487
The valves in hand should hold liquid a few seconds.If they hold fluid and not clapped thin they are most likely still good.
Pic of top,head.Over-view.Manual below in link.
https://www.revbase.com/tt/sl.ashx?...204648&fileID=1189332&AdminID=1302&z=770f6bb8

Pic of air inlet to tank.I bet there is a 1 way valve already.Its possible you don’t have an unloader?
Pictures are a 1k words.
Or there’s nothing wrong with it at all.????
Spin it over by hand when you shut it off,does it unload.? Hiss?
 
Last edited:

TonyJ

Well-known member
Joined
Sep 10, 2019
Messages
384
Location
West Virginia
Great advice Tony. I'll pull them out tonight before I order them. Never took apart a compressor motor before but I'm assuming its the 4 big round luggy looking things on top that need to come off and be checked.


Yes those 4 on the top then the valves are under them. Then you will have to take the valves apart. When taking them apart look at how the valve is made as in the spring, disk and seat. The seat and disk sealing is the main thing to look at. I always take the seat and use wet and dry sand paper and a piece of glass and sand the seats to make sure their flat. Lay glass down then put the sand paper on the glass then lay the seat flat on it and move it around in like a figure 8 and keep looking at the seat. The high spots will be shiny and the low spots will be untouched. Keep on sanding till the whole seat is shiny and true. Most valve seats have two sealing areas ( outer ring and inner ring) you must keep at it until both rings are good. Myself I start with 400 then finish with 800 or 1000 grit. Use water so your sand paper will last longer. I’ll post an example of a before and after so you will have a idea of what your after when doing it


Tony
 

TonyJ

Well-known member
Joined
Sep 10, 2019
Messages
384
Location
West Virginia
Yes those 4 on the top then the valves are under them. Then you will have to take the valves apart. When taking them apart look at how the valve is made as in the spring, disk and seat. The seat and disk sealing is the main thing to look at. I always take the seat and use wet and dry sand paper and a piece of glass and sand the seats to make sure their flat. Lay glass down then put the sand paper on the glass then lay the seat flat on it and move it around in like a figure 8 and keep looking at the seat. The high spots will be shiny and the low spots will be untouched. Keep on sanding till the whole seat is shiny and true. Most valve seats have two sealing areas ( outer ring and inner ring) you must keep at it until both rings are good. Myself I start with 400 then finish with 800 or 1000 grit. Use water so your sand paper will last longer. I’ll post an example of a before and after so you will have a idea of what your after when doing it


Tony


IMG_0314.jpg

Before
IMG_0315.jpg

After


Tony
 

On-Wheel

Well-known member
Joined
Oct 6, 2014
Messages
487
Wonder why my other posts were deleted?
1 was a picture of a tool that was still posted last night.
Weird
 
To avoid these ads, REGISTER NOW!
Top Bottom