To avoid these ads, REGISTER NOW!

rattle_snake's random shop projects v0.1

OP
R

rattle_snake

Well-known member
Joined
Jun 25, 2015
Messages
5,196
Location
Chandler, AZ
what time does the draft kick off?? I’m on my way!:drink:
It's always 5 o'clock somewhere.

Apparently Cam is driving, so I'm in!
Yes free beer just have to do some body work.

I actually have some .50 BMG brass floating around... I have a keezer... I have a friend with a lathe... I see plagiarism in my future.
CT
Sounds like a good plan.

I guess in a pinch it works :lol:, especially if you need to shoot through a wall, followed by an engine block, before you reach your target :rocker:
Yes, exactly. Same reason my car needs 600 hp.
 
To avoid these ads, REGISTER NOW!
OP
R

rattle_snake

Well-known member
Joined
Jun 25, 2015
Messages
5,196
Location
Chandler, AZ
Finished up the other inner fender mods. The left side also had a large gap and cutout where steering box was, and needed some metal work.
CvyTvFV9ibdUebCexdmkcWlF-L=w703-h937-no?authuser=0.jpg

I added a scab of new metal to the area and used my new brake die to bend a zig zag at the bottom for rigidity and to match the others.
ndHzXYbIatqudhh51Sy-OPdV_=w1250-h937-no?authuser=0.jpg

Then more cardboard templates and sheet metal around the coilover tower.
QDi9DIeK06Sn7YulOhO3R02HC=w1250-h937-no?authuser=0.jpg

I filled a bunch of holes and gave the panel a once over with a sander before rattle can treatment.
M-LiVVJ0-MgCr4wW79Y_4K4ky=w1250-h937-no?authuser=0.jpg

Installed the radiator and core support to get an idea of how to deal with fan and trans cooler plans. So far I think I have accomplished my goal of a fairly stock looking engine bay. No red plug wires, chrome valve covers or out of place items. Lots of details left to go but list is getting shorter.
fl5Tqih8Lste0qBObvhqxqOX2=w1250-h937-no?authuser=0.jpg
 

Duker

Well-known member
Joined
Sep 25, 2010
Messages
10,861
Location
Livingston, TX
Finished up the other inner fender mods. The left side also had a large gap and cutout where steering box was, and needed some metal work.


I added a scab of new metal to the area and used my new brake die to bend a zig zag at the bottom for rigidity and to match the others.


I filled a bunch of holes and gave the panel a once over with a sander before rattle can treatment.


Installed the radiator and core support to get an idea of how to deal with fan and trans cooler plans. So far I think I have accomplished my goal of a fairly stock looking engine bay. No red plug wires, chrome valve covers or out of place items. Lots of details left to go but list is getting shorter.

That looks great... very clean and neat. :thumbup:
 

nsula_country

Well-known member
Joined
May 23, 2013
Messages
1,534
Location
Northwestern Louisiana
Finished up the other inner fender mods. The left side also had a large gap and cutout where steering box was, and needed some metal work.
ACtC-3co3JbkVJnKQqWsrMTu8qCFMiV-du-bVmJLXaMZCZYzJyeSfcPSWXnsAj1-1XIPMEBvUfAWiIo84sAAA-FEMPAZpOTZu7C0yvLW9-mPbjJMtO6I3oJsgYxPOOn9szCvyTvFV9ibdUebCexdmkcWlF-L=w703-h937-no


I added a scab of new metal to the area and used my new brake die to bend a zig zag at the bottom for rigidity and to match the others.
ACtC-3dlU4FkAJaARAp0ZlX2DbbFUlBcpsiIZ-HfFEOJ5Q5BaHg-AT62VqUvasrTRSyNcPzOU8d5K8GVMb8P7Rjaf1JgZcvhRjkeem1KAjFhUNQixcyuAxAE_nNZg7Y7ZuRndHzXYbIatqudhh51Sy-OPdV_=w1250-h937-no


Then more cardboard templates and sheet metal around the coilover tower.
ACtC-3fQ_HXAa0Fei54ysWxQE5iRnqI9FDVAE0RM0pV4hSPK77Rkjan4FzOE3Try21js1C_3dBo8dW6he268kWTka8fOh7YHTv7CMQeiqiadcZrzvU2RNuzjl4-9OZE2b21QDi9DIeK06Sn7YulOhO3R02HC=w1250-h937-no


I filled a bunch of holes and gave the panel a once over with a sander before rattle can treatment.
ACtC-3eijS2vyvPhicea4nr-1IYH8tFqmLBaIG7Xs2fyaaVJGn2mOLKFX-gr1bMTev-xzMJI9Z2EjD-UFzp-l9pjOA_ymnBk8IxQa43LPRtsWcrh586CRNNqjoSN-_-HdslM-LiVVJ0-MgCr4wW79Y_4K4ky=w1250-h937-no


Installed the radiator and core support to get an idea of how to deal with fan and trans cooler plans. So far I think I have accomplished my goal of a fairly stock looking engine bay. No red plug wires, chrome valve covers or out of place items. Lots of details left to go but list is getting shorter.
ACtC-3ehX4QXA5OJRTuLiPdwvl-eUsmTb0T9qLQPWedcCXo_KSfHB7eSxzcV81Zoq3pj9GaPmoNUqpFc003sMrvqIvaaIjYKqKl8APIO1ksYwpgOSvaTlAAVb-unbHD9EZcfl5Tqih8Lste0qBObvhqxqOX2=w1250-h937-no

Engine bay is banging!

Where is the A/C compressor?

CT
 
OP
R

rattle_snake

Well-known member
Joined
Jun 25, 2015
Messages
5,196
Location
Chandler, AZ
Thanks again guys.

A/C is going to have to wait. The whole box assembly needs a rebuild, brackets built for everything. Big job so it will wait. Going to get it running and driving then come back to A/C, bumpers, sliders, re-gear/rear locker, full paint job and so on.....
 
OP
R

rattle_snake

Well-known member
Joined
Jun 25, 2015
Messages
5,196
Location
Chandler, AZ
Stretched front wheel opening by sectioning the fender 2.5" The contour changes, but I planned to chop off the lower portion to clear tire anyhow so just went for it. Step one was to hammer the dent and creases out of the wheel lip.
iYKcPfDPyk-IS433m3HBW5n8D=w1063-h797-no?authuser=0.jpg

Test fit after initial hack job
Wc7DjcfBsdoB8w2433gfpN8MoE=w598-h797-no?authuser=0.jpg

I don't own any auto body tools (or have any skills), so I made some dollies and other tools to make dents. Note the cheap claw hammer (gasp, oh my)... I was able to get 90% of the damage out of lip. good enough. Didn't do much to the dent above the 'bump' line as I have no paint for it Finished the lower edge with a roll like factory
2FN8qZ2pOcb8z_--0sI34oX34=w1063-h797-no?authuser=0.jpg

The 'factory color match' rattle can I got wasn't even close but better than what's available at Home Depot. Good enough for now. Worked the upper trim piece to fit a bit better as it has damage too.
I chopped the valence to match the fender front edge. bumper will need mods or just make from scratch to match. Clearance will be close may have to cut some more later.
gQtO_azSZ6OaqRXtxCvMFlzzf=w1063-h797-no?authuser=0.jpg
 
Last edited:

OutlawDrifter

Well-known member
Joined
Jan 20, 2015
Messages
3,876
Location
KS
Turned out pretty well for a guy with "no skills" in that trade!

I have a full set of body hammers and dollies...but I use a 4lb sledge and a block of wood more than I should, haha.
 

LXCam

ALLIANCE MEMBER
Joined
Apr 23, 2013
Messages
19,122
Location
AZ
Great job on that J!


And I want you to know, don’t hesitate to ask if you want some help on the body work. I’m a fricking rockstar at it. A pitcher of beer and a couple hours with a ball peen hammer and I’ll have that baby looking like the distressed brass sink you always wanted.
 
OP
R

rattle_snake

Well-known member
Joined
Jun 25, 2015
Messages
5,196
Location
Chandler, AZ
Turned out pretty well for a guy with "no skills" in that trade!

I have a full set of body hammers and dollies...but I use a 4lb sledge and a block of wood more than I should, haha.
I actually like doing things like this that I am not experienced in, as I get to learn and do something new. A challenge. Need for more tools....
Since I'm starting with a beat up old fender going on a truck that will be drive through the brush and rocks, it doesn't have to come out perfect. I think it is actually more fun without pressure of perfection.

Great job on that J!

And I want you to know, don’t hesitate to ask if you want some help on the body work. I’m a fricking rockstar at it. A pitcher of beer and a couple hours with a ball peen hammer and I’ll have that baby looking like the distressed brass sink you always wanted.

haha, well, there is the other (left) fender. I do have plenty of beer on tap and lots of hammers. Would be a shame to put any filler over your work.

Fender turned out great Justin.:thumbup:
Thanks mike. Given your background it's probably hard to look at my 'hackery'.
:scared:
 
Last edited:
OP
R

rattle_snake

Well-known member
Joined
Jun 25, 2015
Messages
5,196
Location
Chandler, AZ
Not from where I'm sitting. Looks great.
Thanks Mike, I'll take that as I have passed the test.
:)

I plan to graft in a fuel door and raise & enlarge the rear wheel well openings also so I guess I have some more training to do.

I want to just paint the whole truck but that will add months of time to being able to start and drive it, and cause me to rush things. So have to be happy with 'good enough for now' which is against my general philosophy. The point is to enjoy the build.
 
OP
R

rattle_snake

Well-known member
Joined
Jun 25, 2015
Messages
5,196
Location
Chandler, AZ
After excessive deliberation, I choose a trans cooler. From advice of local AZ trans builder, I am using only a air-to-fluid cooler, and bypassing radiator loop. So sizing is questionable, but I know that a 6k pig with a non-lockup torque converter on 40s should make a lot of heat. I want this truck to be able to pull 7% grades in 110* heat at 65 mph, so I figured I would put in the biggest one that would fit.
I retrofitted a ford Powerstroke 6.0 trans cooler into my 7.3 I used to have. It's 26 rows instead of 10, and dropped trans temp 20+ degrees moving 18k+ GVW up the hills.
Popular swap so price is relatively low. I bought a OEM Ford unit from local Ford dealer for $180. Downside is the 1/2 barb fittings. Want AN fitting.
I still have the old 7.3 cooler with similar mounting so I knew the 6L would fit OK. The brackets would need mods.
This truck will get A/C so I mocked up the condenser to make sure I didn't screw myself later. Decided to put trans cooler behind condenser for plumbing reasons.
xSAChpnCoVwNUMTNmXj3QCtAXn=w962-h721-no?authuser=0.jpg

So I hacked up the new cooler. Cut on the steel portion to leave OEM rivets to aluminum tabs. Made some new tabs with 18 ga and tacked in place. Also turd polished the lower brackets to be symmetrical, when because. Some black paint to finish off.
YSbO6KlocaEfIikYBLz9L5Gc1b=w962-h721-no?authuser=0.jpg

Welded in some washers for lower mounts. Cut them in half and doubled up thickness to match core.
0eNdSJbfwI0nauIhtY_5GrsIBr=w962-h721-no?authuser=0.jpg
 
Last edited:

Mark_17

Well-known member
Joined
Jun 27, 2018
Messages
745
Location
NJ
I put a tru cool 40k on my truck and i thought that was big, that thing is a real monster! Looks good though and i'm sure it will do what you want
 

PhantomEB

Well-known member
Joined
Feb 6, 2006
Messages
6,765
Location
Medicine Hat, AB, Canuckistan
It all looks great! Who cares if it’s not a direct match, I am sure most will overlook the small **** while you are driving it!

Thanks for the inspiration, couple more weeks of focusing on saving my pennies then I should be able to start working on my bronco.
 
OP
R

rattle_snake

Well-known member
Joined
Jun 25, 2015
Messages
5,196
Location
Chandler, AZ
I put a tru cool 40k on my truck and i thought that was big, that thing is a real monster! Looks good though and i'm sure it will do what you want
Thanks. Just need to get it plumbed, Can't quite get the fitting I want for 5/16 hardline to 1/2" hose..

Very cool! Following build.
Thanks man. I've been following yours.

It all looks great! Who cares if it’s not a direct match, I am sure most will overlook the small **** while you are driving it!

Thanks for the inspiration, couple more weeks of focusing on saving my pennies then I should be able to start working on my bronco.
The patch paint will do for now at least.
Glad to be an inspiration to you, enjoy wrenching. I get inspiration from other members here too.

Justin, that turned out with a "factory" look, I dig it!
Thanks Marc. That was the goal. The A/C condenser will be tight fit and will need brackets built for it too.
 
To avoid these ads, REGISTER NOW!
OP
R

rattle_snake

Well-known member
Joined
Jun 25, 2015
Messages
5,196
Location
Chandler, AZ
Spent a lot of hours finishing up the front clip. Lots of little time consuming items.
Someone hacked a hole for a trans cooler in the grill support, so I felt compelled to repair it. Wasn't even really needed, guess they were too lazy to remove the grill. I made a patch with a bend to match the opening. Nice to have press die for this now.
ACtC-3cfXjCEDJTadfc85z4b2ErXvsSLtIzokHaNmM3-Uxu3v8ZZsJzwn90OFfDclLqEbSKOEyH5scomZTU3QS7HUxmQUq62PsnLG646KXZAky-jv8OdCeCyCcy_2A4WRbkuC4jkfEjg4HFSTAEWuw-bu7FP=w962-h721-no


Patch came out OK after some hammering and a beer.
ACtC-3eoYcGyYlbnxsIOtwY2rT2p0o3PquX1nHCLaozS3Ipyd5r5czQR2Pvvt9-fAZ5V3X6d20QuVCEiE1rgE23DTvxP5mcvFiT_jdsISeOHQ_BPDPIdFENRhYPFH5LenHDZJ2g2HPmGT-QoDmaZL8FXqXZ0=w962-h721-no


Knocked out the section/stretch job on the left fender. Cut and weld blend is better than the other but the lip isn't quite straight....
The lower mount was torn of cab so fixed that too.
ACtC-3cZrKVF2g1yMFbGchuMiqkeBqY3lDrl3y3ztEa8gN_ZsQBSw5SUaCFPfwMutQYWKMTPSBAH4vnucoyRgG8DLvpH0TM7D8C1bnSMihFQT7fT2DNYhqtsPOHcz-XVloIdiqxPXAqzj4KlnfkWHtrXEMNx=w541-h721-no


Ended up going a little further on the front valence than planned. I shortened the ends to match fender and rolled the edge. The acid from battery explosion had done some paint damage, so I went ahead and painted the whole piece. This required removing the marker lights. The acid got the studs pretty well and I broke one....

Sidebar: I have had 3 rusty bolts that I have had to deal with on this project now. Seems like a lot of rusty bolts for a not even 50 yr old truck. One bed bolt, one firewall bolt (with PITA floating/captive nut) and now this. Now I imagine there are guys out there is places like the 'rust belt' and soggy/salty marine climates that have dealt with some rust too, so I'm sure you are sympathetic for me.

So I ended up refurbing the lights. Welded in a new stud, removed over-spray from last sloppy paint job and painted the housings. Even though paint is a poor match to factory, at least fenders match valence.
ACtC-3ft1VNzRTuI3jPrKO5EqNdM8iuAGEVGCz-7H01j9MildlNuK-u4wUQzKPrCZl5bF2vemFdaK2mGb0exu9T6z4PfuLl9Onscz-wkaKI-CRvuKYHhsHcQUXZ4WCf-qE9OAB4gFi2JR4ub5H6-IphW4Tsw=w962-h721-no


I decided not to spend a bunch of time perfecting the grill at this time. Instead I fixed what was broken and took care of a few of the big dents. Every plastic clip is brittle or broken. The plastic inserts and support got hacked up for the botched trans cooler install. I got 5 screws in each one and called it a victory.
ACtC-3cKvHNc3m-eedPAGe5B6THZynsFNpTCJNXZppKxbUcSWT2kQDEIOH_0LQIm5Nl8-ELYA56G05zvapMhxCJAopwNwfIx6pC3wUqP_YKgwdlN5BdMQ4dSW6ffyJwliMh7VlJ5_aLkfMChFhKJPrtrzGxd=w962-h721-no


I spent some time on fit/finish/gaps. The truck has some OEM spacers, so I refurbed them and used under core support. The OEM bumper looks OK with fender/valence mods so will run it until I have time to do something else. Either mod if for a winch or make something from scratch to match the rear bumper.
ACtC-3eX9IYXzVTP1sjMUCCjel0q9LOXjWSmEYzBq6FYn84WfRumoE5-7U9W5eY_f3JyzcrFkXcMTZAOqeARKUNh4lqBxbvYV00iA0SQoVMvds-xNJSyGBk2Y0kVjHs__z_CUy9CSsKX6dF0TMTajgGJ0yAF=w962-h721-no


So it's starting to look like a truck now with front clip on. Another big milestone but a long way to go still.
ACtC-3el-ncvtRnK9f5sby5nc9jg93e6n-tBAnprDfoUlw8OYf9h42EA2SsgRIucx_h7PevjK2-DJi-QMjzoM6H2E-fjh7pxooJ_V53_d-dYMuM1PrTP7_nhpkjHEfnMrkOi1TGu1aqJ0ow3YQUNg1mB-y_l=w962-h721-no
 
Last edited:

OutlawDrifter

Well-known member
Joined
Jan 20, 2015
Messages
3,876
Location
KS
Coming along nicely, it's definitely looking like a pickup again :rocker:


P.S. Get the Krylon out and spray bomb the crossover/drag link, all the dealerships do it, make sure and get over-spray everywhere too....:bounce:
 
OP
R

rattle_snake

Well-known member
Joined
Jun 25, 2015
Messages
5,196
Location
Chandler, AZ
Coming along nicely, it's definitely looking like a pickup again :rocker:
P.S. Get the Krylon out and spray bomb the crossover/drag link, all the dealerships do it, make sure and get over-spray everywhere too....:bounce:
The drag link/tie rod are the old junk from the axle. Ends are comically worn out, I mean toast. All junk to be thrown away once the new ones are built.

But of course I can't just fab it up yet. I bought a TRE/DOM tube kit from Ruff Stuff and the tapered inserts to adapt with. Then I decided to buy a 7.1* GM tapered reamer ($$) to do the pitman and knuckles the 'right' way. I did the math and I can reverse ream (from the top) the knuckles for tie rod over configuration as the GM TRE taper is larger. Reamer order got cancelled, so had to find another source, more delays...
 

Bigblue&Goldie

Well-known member
Joined
Mar 12, 2009
Messages
10,678
Location
AZ
The drag link/tie rod are the old junk from the axle. Ends are comically worn out, I mean toast. All junk to be thrown away once the new ones are built.

But of course I can't just fab it up yet. I bought a TRE/DOM tube kit from Ruff Stuff and the tapered inserts to adapt with. Then I decided to buy a 7.1* GM tapered reamer ($$) to do the pitman and knuckles the 'right' way. I did the math and I can reverse ream (from the top) the knuckles for tie rod over configuration as the GM TRE taper is larger. Reamer order got cancelled, so had to find another source, more delays...

Swing by and grab mine....it's a virgin cause you know the status of my Bronco.
 
OP
R

rattle_snake

Well-known member
Joined
Jun 25, 2015
Messages
5,196
Location
Chandler, AZ
Did you bring a chair out so you could sit, drink beer, and admire your work?
No, not in July... too hot outside. But I can admire in the shop w/ the A/C
:)
I'm not a 4wd guy. That is **** af! Great proportions! Keep at it, Justin!
Thanks. Spent a lot of time and math to get the proportions as-designed. Sometimes have to stop, think and try another method. Patience is key but I have very little.
That thing is looking awesome. Its even better knowing how well it is build underneath.
Yes that was one of the goals. Old truck on custom chassis with modern upgrades. Lots of work and $ but worth it to me.
Truck looks great!
Looking real nice!
Thanks guys!
 
OP
R

rattle_snake

Well-known member
Joined
Jun 25, 2015
Messages
5,196
Location
Chandler, AZ
-Warning - long technical rambling about minor detail.-

Got the trans cooler plumbing done. for now.
Problem is, I'm a perfectionist at times (most of the time), so small details turn into a week long debacle.
I used 5/16 hard lines like factory so I could use the steel inverted flare fittings on trans. Couldn't find 3/8 IF (5/8-18) to 1/8 MPT in steel, bought some brass just in case. Planned to use 3/8 hose so found some 5/16 IF (1/2-20) to 3/8 barb. Then I bought the 6L cooler with 1/2 barb fittings. Ideally I would use AN fitting and braided -8 hose. Couldn't find a -5 to -8 adapter and didn't want to use 3+ fitting to get there. Can get -6 to -8. Also need a 90* bend...
Local Ace HW had 5/16 flare to 1/4 MPT 90* fitting and a 1/4 FPT to 1/2 barb. Amazing, local 2 fitting solution.
But I didn't want to use the 45* flare as it would be the only one on the whole truck and inconsistency bothers me. Summit had 5/16 IF to 1/4 MPT 90* and hose I needed so I ordered and it showed up in less than 20 hours. This at least gets me same termination in both ends.
Ideally I would swap out hard line to 3/8 so I could use -8 fittings, but the bends were tricky and time consuming even without the cab off the frame. Lines go in between the exhaust pipes and have many bends to optimize routing and distance from hot pipes. Would take a lot of time so I cut and flared the existing lines and moved on.
The elbow fitting had tight/no radius for flow. I didn't want to bend the end of the hard line so it could be removed without pulling radiator or exhaust. So I inspected the hole sizes compared to the 5/16 tubing ID. I hogged them out a bit to match, but offset was tight and short side radius couldn't be blended. The original bores were not full depth so some improvement but nothing like a proper 90* hose end...
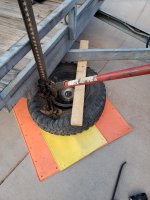
So I ended up with this, which resembles something a teenager might construct for a specific purpose.
ACtC-3fQ5XJgYBdoEHI7Qechtebanwk31GJR2PhVN5rzfNhMKqC6o59KCJaAulM00iD0Uz0XJwCW1c96GsmKAfQLMxgRX9GSP5IhW1-9MgqhZb4t0GAVMINILiR89bw2QMcqfjv_ZYxMVnumzH0EDsexxEXD=w962-h721-no


I want to cram a winch in front of radiator under valence so I kept lines tight. Hopefully an impact won't snap them off, but can't really plan for stuff like that, although the AN setup would be better....
Right after finishing up I had to get to core support bolts, glad I left some room.
ACtC-3cNEG0ImqVFf3mS3ia6C_gox8CHTHWdzOCcGjm_amnVDI9_ga1eSblvYE-DefAX52WawG_obitOLS09jTBHOdVHTyhgnrx_olZ8MRfkMGuiSv3gx44ZcGHDjcKT41bNgBl33Rs4wKzuNyi-MRcaCubP=w962-h721-no


I then farted around with a hose support for the long side. Could have spent another $100 on AN stuff and a bunch of time, but not sure there is any measurable benefit.
ACtC-3fcVy3vfkVl-EBI0YE9mOcYwqMjp_2VgGFEFCESwbFrbq3-zr-xOqqKVSIjkKng5ahi0yOuK_QH_d-2aDo1eU-6wHaHsKFS_HqLLvh8UfunaReXDr1NdmhXq1dJTyWlFDqY2QigBhbVZYwj3DCyDw9X=w962-h721-no
 
OP
R

rattle_snake

Well-known member
Joined
Jun 25, 2015
Messages
5,196
Location
Chandler, AZ
I got a little careless with frame bend from welds on the steering box mount 2nd attempt. The bumper bolt holes were off a 1/2". So I lubed up my crusty old high lift jack and used it to persuade thing back to position. Couple easy pushes and back in line.

Although it has traveled a lot of miles, I have never used this jack, or needed to, in a off road situation in 20 years. I gave up lugging it around some time ago. It does work well for fencing, bending gate posts and other odd jobs.
When I first got it I proudly mounted it on the custom front bumper I build for my 1977 bronco. I never used it and eventually realized I had put myself in with the wanabee offroader/poser crowd, so it had to go someplace else.
ACtC-3cl7JsHoYbH1g1tDw7j1SBr3XXkuBCFEBWo40UENKtIKyGSD9qWzWrjD8wQTLVMjAiG0p9PHr8UBC1qWzO94X0WxG40UGmiSltGHyEmmX1_VPrw-C0FW0KYncgwHauxtwlqSj3Ex2LgRYT6ksAYVr5n=w962-h721-no
 

OutlawDrifter

Well-known member
Joined
Jan 20, 2015
Messages
3,876
Location
KS
Justin, those are referred to as "Handyman" jacks, A.K.A. "Man Killers" where I'm from. They definitely serve their purpose, but always make/made me nervous.

We always used a block & tackle rope setup for stretching fences.


****** lines should work well and be easily serviceable in the "field" when necessary.
 

Bigblue&Goldie

Well-known member
Joined
Mar 12, 2009
Messages
10,678
Location
AZ
I've always called mine the "Death Jack". I use it so infrequently that I usually have to pour some ATF on it to unstick the pins. Works great for general Redneck activities though.
 

Attachments

  • 20191115_171449.jpg
    20191115_171449.jpg
    127.4 KB · Views: 63

OutlawDrifter

Well-known member
Joined
Jan 20, 2015
Messages
3,876
Location
KS
I've always called mine the "Death Jack". I use it so infrequently that I usually have to pour some ATF on it to unstick the pins. Works great for general Redneck activities though.

Looks like you borrowed the one out of my shop...it requires a little pin maintenance occasionally as well :lol:
 
OP
R

rattle_snake

Well-known member
Joined
Jun 25, 2015
Messages
5,196
Location
Chandler, AZ
What cooler is that? I've been waiting on a TrueCool for my old 7.3L for almost 2 months now.
It's a ford cooler for a 6L power stroke. bolt in for your 7.3, did it to my 7.3 some time ago.

Justin, those are referred to as "Handyman" jacks, A.K.A. "Man Killers" where I'm from. They definitely serve their purpose, but always make/made me nervous.
We always used a block & tackle rope setup for stretching fences.
I've had to get out of the way when they far over. Heavy object up high with zero lateral stability can cause problems.

I've always called mine the "Death Jack". I use it so infrequently that I usually have to pour some ATF on it to unstick the pins. Works great for general Redneck activities though.
Yes, they are unusable until lubed, but a decent redneck tool. gravity clamp, sledge hammer, autobody/frame alignment, hoist to get game carcass into tree and so on.
 
To avoid these ads, REGISTER NOW!
Top Bottom