To avoid these ads, REGISTER NOW!

Above 1200 Sq/FT The Lone Beech Garage (60x46x16)

Wokspaces above 1200 squarefeet.
To avoid these ads, REGISTER NOW!
OP
S

sbosecker

Well-known member
Joined
Sep 25, 2012
Messages
3,539
Location
Peachtree City, GA
Scott, I like the new addition of the SS desk. I like the size of it, not too big.

Jay
Thanks Jay!

It certainly is compact. Due to its size, I'm chewing on whether it would be more useful downstairs instead of in the Upper Room. I can see where it would be handy to have small desk on the shop floor - especially made of stainless steel - to sit down at and make notes or sketch out an idea.

We'll see.

Best regards,

Scott
 
OP
S

sbosecker

Well-known member
Joined
Sep 25, 2012
Messages
3,539
Location
Peachtree City, GA
Wednesday - July 8, 2020


My wife has been hinting that we need to find a machine to help us with our lawn upkeep; specifically an edger.

We hadn't needed anything like that until all the concrete was poured for the Lone Beech Garage and house driveways and pads.

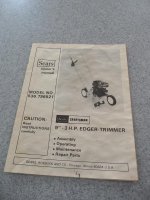
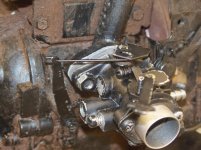
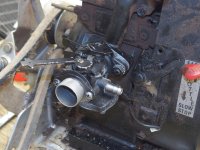
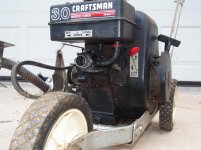
We had purchased a 3 HP Craftsman Edger around 35 years ago and it had served us at our previous house. It had made the move with us to our current home in the early 90's, been put in a corner of the garage and pretty much forgotten ...until yesterday.


20200707-01.jpg 20200707-02.jpg

I moved some other small machines out of the way and wheeled the Edger out into the sunlight. I also managed to find the original manual in a file box in the basement. This thing hadn't been ran in over 25 years. I pulled the cord and the engine turned freely and seemed to have compression.


20200707-03.jpg

I rolled it over to the LBG and drained the gas - that was old enough to vote - out of the fuel tank and into a metal tub.

I also cleaned some of the greasy dirt off the machine and into the tub as well.

Fresh gas was put into the tank and I took it outside.

Will it start?

Turns out - No.

I pulled several times without so much as a "pop". I took the wire off the Spark Plug and, while it was about a quarter inch away, pulled the starter cord again. I saw a nice bright spark between the wire and the Spark Plug.


20200707-04.jpg

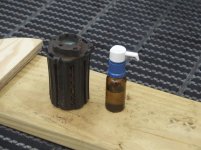
I removed the Air Filter and put some gas into this little dropper bottle. I squirted a few bursts of gas into the carburetor and pulled the cord again. The Engine fired a few times and then stopped.

Cool.

I did this a few more times. As long as there was a bit of fuel to work with, the engine would light it up. I found that very encouraging.


20200707-05.jpg

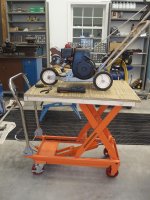
I put the Edger onto the Hydraulic Scissor Cart and brought it up to a convenient working height. It seemed we had a fuel problem so I decided to remove the fuel tank again but this time leave the fuel line attached to the tank and remove the line from the Carburetor.


20200707-06.jpg

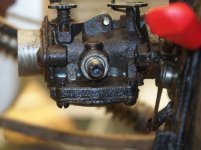
Well this is at least part of the problem. The Carburetor's fuel input port is completely clogged with something.

I quit for the night.


Today I returned to the shop.


20200708-07.jpg

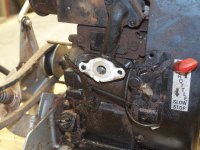
I started removing the Carburetor from the engine.


Continued in next post...
 
Last edited:
OP
S

sbosecker

Well-known member
Joined
Sep 25, 2012
Messages
3,539
Location
Peachtree City, GA
Continued...


20200708-11.jpg 20200708-12.jpg 20200708-13.jpg

The Carburetor was removed from the engine and...


20200708-14.jpg 20200708-15.jpg

...dropped into some Carburetor Cleaner to soak for most of the day.


20200708-16.jpg

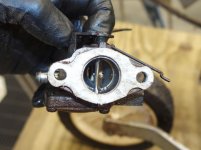
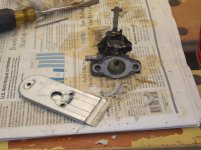
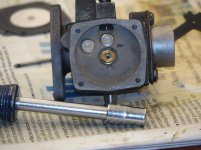
I brought the Carburetor out this evening. This Tecumseh Engine uses a diaphragm instead of a fuel bowl and float. The diaphragm needs to be flexible. This one was petrified.

When I watched YouTube videos on this topic, those diaphragm covers practically fell off when the screws were removed. Not mine: I had to hit it pretty good with a hammer and punch to get it to release.

One other note: Check out the 4 screw heads on the Diaphragm Cover in the picture I took of it when I removed the Carburetor. (Above - 3rd picture)

The screw heads look like a Phillips Head design. They're not - they're two slotted screw slots perpendicular to each other.

How very odd.

Parts have been ordered: Carburetor Kit; a Spark Plug; a Fuel Line and a Gasket are on their way.


20200708-17.jpg

The gunk in the Carburetor Input Port is quite thick. All day I've been pulling the Carburetor out of its bath and probing the Input Port with a small nail. Tonight I'm still finding gunk deep in the Carburetor.

Has anyone reading this ever seen that much goop - black goop at that - in the Input Port of a small engine's Carburetor?

I'm a bit surprised by this.

The Carburetor looks pretty clean inside and everything moves freely- I'm hopeful once I get the black goop cleaned out and all the new parts installed that the engine will run.

Scott
 
Last edited:

shortykorte

Well-known member
Joined
Sep 1, 2014
Messages
8,039
Location
Tallahassee, Fl
I think the dual slots are one is to tighten, the other is to loosen. Lol. I think I’ve seen screws like that before. I wonder if it’s to make factory assembly a tad quicker.


Sent from my iPhone using Garage Journal
 
OP
S

sbosecker

Well-known member
Joined
Sep 25, 2012
Messages
3,539
Location
Peachtree City, GA
I think the dual slots are one is to tighten, the other is to loosen. Lol. I think I’ve seen screws like that before. I wonder if it’s to make factory assembly a tad quicker.

Shorty Korte,

I don't know... those things were a first for me. They worked OK with a slotted screwdriver but if you weren't paying attention and tried to use a Phillips Screwdriver it might be possible to mess up the head of the screw.

Best regards

Scott
 

250

Well-known member
Joined
Oct 16, 2014
Messages
537
Location
West of the Sierras
Shorty Korte,
I had planned to use a Tanker Desk that I had gotten for free up there but the mass of the thing had kept me from moving it to date. I'll find another place for it or find someone else who can use it.

That desk is a nice little piece.

I'd bet that tanker of yours would disassemble into several major parts. I picked up a north of Boston after work one day, then disassembled, proceeded down the bulk head, and reassembled all while the mrs was out of town visiting family. The top was a little awkward, but easy other than that. Managed to clutter it up quick enough she didn't notice right away.:D
 
OP
S

sbosecker

Well-known member
Joined
Sep 25, 2012
Messages
3,539
Location
Peachtree City, GA
That desk is a nice little piece.

I'd bet that tanker of yours would disassemble into several major parts. I picked up a north of Boston after work one day, then disassembled, proceeded down the bulk head, and reassembled all while the mrs was out of town visiting family. The top was a little awkward, but easy other than that. Managed to clutter it up quick enough she didn't notice right away.:D

250,

I haven't tried to take the Tanker Desk apart but I've examined it enough to believe I've broken the code on how that task would be accomplished.

Even with it in pieces, I think it would be easier to move up the stairs with some help. Like you mentioned, the top would be unwieldly.

I like they way you're thinking regarding the stealth installation of yours. HA!

Best regards,

Scott
 
OP
S

sbosecker

Well-known member
Joined
Sep 25, 2012
Messages
3,539
Location
Peachtree City, GA
Saturday - July 11, 2020

Parts for the Tecumseh Carburetor repair have been dribbling in over the past few days.


20200708-21.jpg 20200710-02.jpg

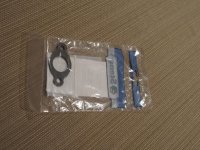
Champion J8C arrived first; yesterday the Gasket arrived.

The J8C is supposed to be a good replacement for the J8 Spark Plug specified in the Craftsman Parts List.

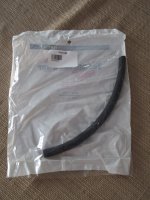
I thought I was going to get started on putting the Carburetor together today as the Carburetor Repair Kit and Fuel Line were "Out for Delivery" according to the United States Postal Service.

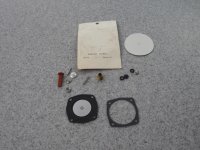
The Postal Service managed a 50% success rate with only the Tecumseh 631893 Carburetor Repair Kit making it into my mailbox.

At least (this time) the Postal Service didn't indicate that the Fuel Line had been delivered. I've had that happen more than once and that's an awkward situation to explain to the seller.

"Yes, I know the USPS indicates your item was delivered but it wasn't delivered to my mailbox." Since I'm usually receiving odd bits of old machinery and not an iPhone, the miss-delivered package normally finds its way to me.

Today we had a new problem...


20200711-03.jpg 20200711-04.jpg 20200711-05.jpg

The original packaging had failed and bits had escaped inside the package
...and perhaps earlier since I seemed to be missing a couple of items.

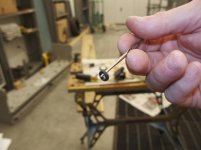
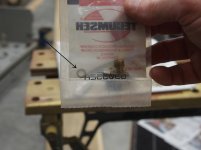
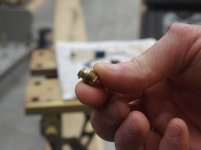
Thanks to a YouTube video I did find one of the missing items. The video I was watching mentioned that Tecumseh, although they didn't do it anymore, originally had shipped the brass Seat with a little rubber seal already installed. Since this was a New Old Stock package, I got a magnifying glass and looked into the brass Seat. Sure enough, one of the missing items was in there.

I have ordered a smaller kit that has the other missing item and I hope to have it by the middle of next week.


20200711-06.jpg

Yesterday I remembered I had this...

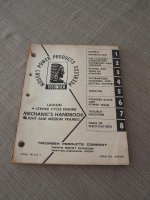
Some time ago I had attended an Estate Sale that had several pounds of old manuals for small engines. It was the last day of the sale and I was pretty sure they would go into a burn barrel by the end of the day. I offered small money for the manuals to save them and I've sold a few on eBay just to help folks out.

Unlike the pounds of Briggs & Stratton manuals (over 70 - manuals not pounds- if I recall correctly) the Tecumseh manual was by itself so I hadn't tried to sell it.

Anyway, after reading the Carburetor section, I learned that I had made a mistake by soaking the whole Carburetor in the carburetor cleaner. Apparently the cleaner and the rubber bits of the Carburetor don't play well together. The diaphragm may have been petrified by the carb cleaner as well. The Carburetor Repair Kit should have all of the things I need to solve this issue.


20200711-07.jpg

Since I'm going to be waiting a bit longer for the last deliveries. I got a razor blade and got the last of the gasket scrapped off the Carburetor and the Engine's mating surfaces.

The gasket residue was remarkably stuck to the mating surfaces. It is my impression that one shouldn't use any kind of gasket sealer on this gasket but perhaps that is incorrect.

Small Engine Mechanics ...what say you?

Scott
 
Last edited:

Pressingonward

Well-known member
Joined
Mar 9, 2016
Messages
522
Location
SW WA
I'm not a small engine mechanic, but I would definitely say no additional sealant needed on that paper gasket. They tend to weld themselves to the metal over time. The only time I'd use any sort of sealant on a paper gasket is if the sealing surface is rough, pitted, or scratched. Sometimes I'll put the copper spray sealant (often used for head gaskets) on paper gaskets to help stick them in place for assembly, or if it's a really nasty spot I've glued them on using spray adhesive - but this makes future disassembly and cleanup utterly miserable! Getting off topic a bit here - for your application I'd put it on clean and dry.
 
OP
S

sbosecker

Well-known member
Joined
Sep 25, 2012
Messages
3,539
Location
Peachtree City, GA
I'm not a small engine mechanic, but I would definitely say no additional sealant needed on that paper gasket. They tend to weld themselves to the metal over time. The only time I'd use any sort of sealant on a paper gasket is if the sealing surface is rough, pitted, or scratched. Sometimes I'll put the copper spray sealant (often used for head gaskets) on paper gaskets to help stick them in place for assembly, or if it's a really nasty spot I've glued them on using spray adhesive - but this makes future disassembly and cleanup utterly miserable! Getting off topic a bit here - for your application I'd put it on clean and dry.

Pressingonward,

Thanks! That's the way I was thinking (dry application of gasket) but I was amazed at how the old gasket stuck to the metal surfaces (roger the "weld themselves to the metal..."). I thought maybe there had been something applied to the gasket during assembly to make it stick like that.

Best regards,

Scott
 
Last edited:
OP
S

sbosecker

Well-known member
Joined
Sep 25, 2012
Messages
3,539
Location
Peachtree City, GA
Monday - July 13, 2020


20200712-02.jpg 20200713-03.jpg

The US Postal Service managed to recover from Saturday's fumble by delivering the missing package today. This would have been the last bit needed to start putting the Edger Carburetor back together but...


20200712-01.jpg

The Carburetor Kit was missing the little washer that is on the original Seat on the right. The new Seat is on the left and while there is a rubber washer in the kit, it has a hole about the size of a toothpick. Either that washer is for another carburetor that this kit is associated with or the wrong washer was packed in this Carburetor Kit.

I'm hoping the last part will arrive before the end of the week.


20200713-04.jpg 20200713-05.jpg

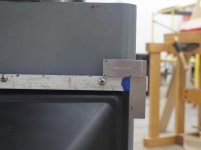
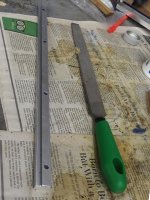
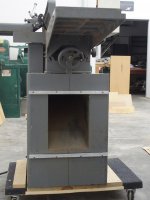
I had enough time to finish off the Jointer Brackets today. The plan was to trim them to be the same width as the Dust Hood. When I took the picture on the left I had already trimmed the bottom Bracket.

I used a small Machinist Square and scribed a line by eye that represented the edge of the Dust Hood.


20200713-06.jpg 20200713-07.jpg

The Harbor Freight Band Saw trimmed the ends of the Brackets and then I cleaned the ends up on the JET Mill.


Continued in next post...
 
OP
S

sbosecker

Well-known member
Joined
Sep 25, 2012
Messages
3,539
Location
Peachtree City, GA
Continued...


20200713-11.jpg 20200713-12.jpg 20200713-13.jpg

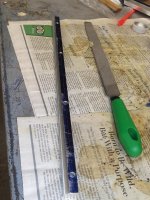
With the ends of the Brackets cleaned up. I broke the sharp edges with a file and removed the Dykem with some acetone.


20200713-14.jpg 20200713-15.jpg

I returned the top Bracket to the Jointer, mounted it with screws and slid the Dust Hood into place. I'm pleased with how this turned out.


20200713-16.jpg 20200713-17.jpg

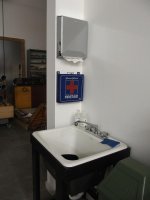
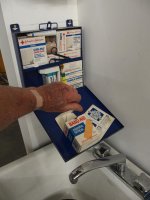
The Shorty Shot(s)... Reaching in, through and over the chip chute to reach the top Bracket's right screw resulted in rubbing my hand and arm on some sharp edges. A raid on the first aid kit was rquired.

Scott
 
Last edited:

Pressingonward

Well-known member
Joined
Mar 9, 2016
Messages
522
Location
SW WA
The Shorty Shot(s)... Reaching in, through and over the chip chute to reach the top Bracket's right screw resulted in rubbing my hand and arm on some sharp edges. A raid on the first aid kit was rquired.

Scott

:lol: I don't think Florida Safety Shoes would have helped with that one...I wonder if the Safety Officer himself will stop by and explain what you did wrong there...:bounce:
 
OP
S

sbosecker

Well-known member
Joined
Sep 25, 2012
Messages
3,539
Location
Peachtree City, GA
Sunday - July 19, 2020

The eBay order for the kit containing my missing rubber washer/grommet for the Tecumseh Carburetor was finally mailed in the middle of this past week. It should arrive tomorrow.

Meanwhile I've been doing some much needed yard work in the Georgia sun and sweating like a pig. Today I decided to do something in the shop.


20200719-01.jpg

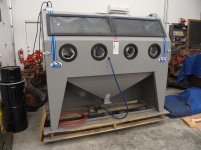
Even though I don't have my large air compressor fully operational, I thought I'd give the Skat Blast Cabinet its shake down cruise today. My 30 gallon (somewhat) portable air compressor could provide the dynamic pressure to test things out.


20200719-02.jpg 20200719-03.jpg 20200719-04.jpg

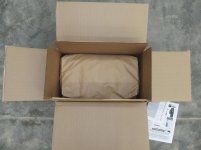
Some blasting media was a part of the Craigslist deal that allowed me to have this tool in the LBG. I opened the box and poured the 50 pound bag of Skat Magic into the hopper.


20200719-05.jpg 20200719-06.jpg 20200719-07.jpg

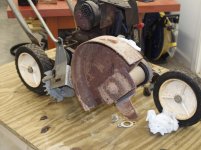
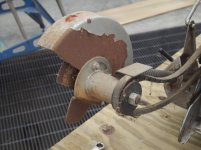
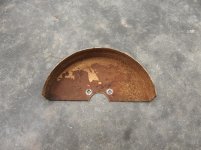
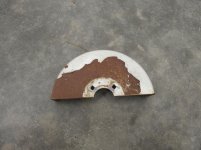
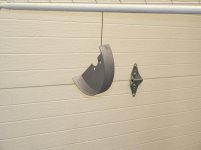
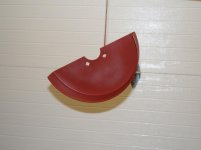
The Blade Guard on the Craftsman Edger could use some love.


Continued in next post...
 
OP
S

sbosecker

Well-known member
Joined
Sep 25, 2012
Messages
3,539
Location
Peachtree City, GA
Continued...


20200719-11.jpg

...and one last view of the "before" situation.


20200719-12.jpg

Into the Cabinet...


20200719-13.jpg

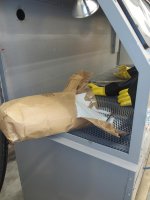
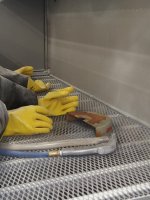
...turned on the dust control vacuum, the lights and stepped on the foot operated air valve. After a very short amount of time I took this picture of my progress: Very nice.

I was especially pleased with the visibility in the cabinet. The vacuum and the lights worked well.


20200719-14.jpg 20200719-15.jpg

I was running the pressure at 100 psi and was pretty happy with the results.


20200719-16.jpg 20200719-17.jpg

I hung the Blade Guard on the paint rack and rolled it outside. A couple of quick squirts with some Rustoleum spray paint primer and then back inside to dry.


I'm quite pleased with the Skat Blast Cabinet. I saw no dust escaping - which was a huge change from the leaky cabinet I had been using. ...and I could see what I was doing!

There was one thing that perhaps others who have a Skat Blast Cabinet may be able to comment on.

The instructions for the cabinet indicated I should use a razor knife to remove a "plastic film" from the tempered glass on the cabinet's windows. While I see some plastic over the glass (on the outside) it appears to be pretty thick; certainly not a "film".

Plus, it's going to take some pressure on that razor knife to cut through the plastic I'm looking at.

Supposedly the original owner of this cabinet had never used it but I just want to make sure he didn't remove the "film" and I'm looking at a sheet of plastic that is supposed to remain there (even if it isn't mentioned in the directions).


Scott
 
Last edited:
To avoid these ads, REGISTER NOW!
OP
S

sbosecker

Well-known member
Joined
Sep 25, 2012
Messages
3,539
Location
Peachtree City, GA
Monday - July 20, 2020


Well the Tecumseh carburetor part is getting a tour of Atlanta complements of the United States Postal Service so that part of the project is on hold for at least another day.

However, when I took the Blade Guard off the Edger to give it a media blasting, I noticed the Blade didn't turn freely. There are two bearings on the Blade Shaft and at least one of them was very crunchy.

If the engine's carburetor repair is successful, this issue will need to be addressed.

Looking at the Owner's Manual's Exploded Diagram, it appeared that I should be able to leave the pulley on the opposite end from the blade and drive the shaft out from the blade end.

I tried several whacks with a deadblow hammer but nothing moved.

Time to try a more complicated approach...


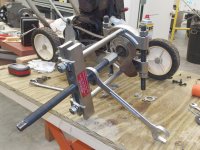
20200720-01.jpg 20200720-02.jpg

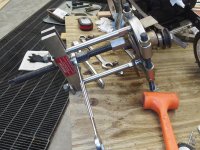
I got a Bearing Splitter out of my tool chest and set up a Puller to press the shaft out.


20200720-03.jpg

The drive end of the screw is a 1/2-inch square. An Open End 1/2-inch wrench isn't very long and doesn't provide much in the way of leverage. Fortunately, since I have old tractors and they often have square headed fasteners, I have a set of 8-point sockets. I mated a 1/2-inch 8-point to a 1/2-inch Ratchet Wrench and got to work.


20200720-04.jpg

That turned out to be a lot harder than I expected. I really was bearing down on the Ratchet Wrench and nothing had happened. I added a little heat from a propane torch and then leaned hard on the Ratchet again.

PING! She broke loose.

Good Grief.


20200720-05.jpg

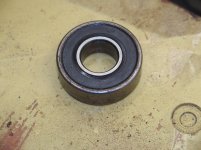
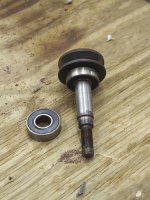
The bearing on the pulley end seemed to have some identification information on it. That was good as I had been unable to (confidently) cross-reference the Sears Part Number from the Owner's Manual.

The bearing on the pulley end turned freely and seemed in good shape.


20200720-06.jpg

The bearing on the blade side of the shaft was still firmly in place.


20200720-07.jpg

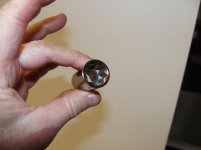
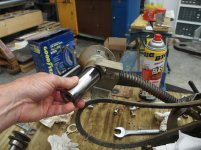
I went to my collection of deep well sockets and found that the 1-1/8-inch socket mated up well with the bearing.


Continued in next post...
 
Last edited:
OP
S

sbosecker

Well-known member
Joined
Sep 25, 2012
Messages
3,539
Location
Peachtree City, GA
Continued...


20200720-11.jpg 20200720-12.jpg

I inserted the deep well socket into the Edger's shaft housing and started striking it with a deadblow hammer.


20200720-13.jpg 20200720-14.jpg

It took quite a bit of persuasion but the bearing did come out. This one had no identification of any kind and it was the source of the crunchy feel when I had turned the blade earlier. It is almost frozen but will rotate a bit if really pushed.


20200720-15.jpg 20200720-16.jpg

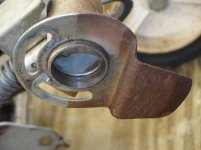
There were serrations where the bearings had lived in the Edger's housing for the last 35 or so years. If both the bearings had been "crunchy" I would have thought the races had spun in the housing causing the serrations. However, since the bearing closest to the pulley seems fine, I'm inclined to think that the serrations were a method to keep the bearings in place.


20200720-17.jpg

I've measured the free bearing (the owner's manual indicates that the two bearings are the same) and came up with 17mm x 40mm x 12mm and the identification information on the one bearing looks like NDH 3203.

There's a fellow on eBay that sells Sears STD315235 replacement bearings that match these specs for pretty small money. In my attempts to track down the Sears part number for the bearing I had found clues that indicated the STD315235 part number might be the correct part for my Edger.

I'm not going to order the bearings until I get the engine working. No reason to put any more money into the Edger if the engine can't be brought back to life.

Scott
 
Last edited:

InsaneEd

Well-known member
Joined
Feb 16, 2018
Messages
51
Those serations sure do look like a spun bearing race. I would guess that either this bearing has spun or a previous one spun and was replaced with the cheapest available. That probably why they don't match.

You can also take the bearings to a local bearing supplier to match and they probably have one on the shelf.

Your making good progress, keep up the excellent work.
 
OP
S

sbosecker

Well-known member
Joined
Sep 25, 2012
Messages
3,539
Location
Peachtree City, GA
Those serations sure do look like a spun bearing race. I would guess that either this bearing has spun or a previous one spun and was replaced with the cheapest available. That probably why they don't match.

You can also take the bearings to a local bearing supplier to match and they probably have one on the shelf.

Your making good progress, keep up the excellent work.

InsaneEd,

Thanks for stopping by and for the kind words!

There are downsides to having a machine for around 35 years (parts availability, documentation, etc.) but there are positives as well.

In this case one positive is that I know the history of this machine. Those bearings haven't been replaced.

I'll see if I can find some information on the Internet regarding bearing replacement on a similar machine. I think this Craftsman machine may be made by Murray. I've searched for Craftsman information and came up wanting. I'll cast a bigger net and see what happens.

Still... all of the above is moot unless the engine comes back to life.

Best regards,

Scott
 
Last edited:
OP
S

sbosecker

Well-known member
Joined
Sep 25, 2012
Messages
3,539
Location
Peachtree City, GA
Wednesday - July 22, 2020


20200722-01.jpg

Yesterday that last part of the Craftsman Edger Carburetor Puzzle arrived. The arrow points to the washer that was missing in the Repair Kit (Tecumseh Part # 631893). The item that arrived in the mail yesterday was an Inlet Needle Kit (Tecumseh Part # 630932A).


20200722-02.jpg 20200722-03.jpg

The washer the arrow was pointing at goes on the brass Seat and then the rest of the bits are put into the Seat.


20200722-04.jpg

The Seat Assembly gets inserted into the Carburetor and tightened down.


20200722-05.jpg 20200722-06.jpg 20200722-07.jpg

I'm showing the Adjustment Screw bits here but the Idle Adjustment Screw is pretty much the same. The Idle Adjustment Screw is just to the left of the hole for the Adjustment Screw (white arrow). Note the brass washer located in the hole. This comes out and the O-ring is located under it. The old O-ring is removed with a hook and then the new O-ring and the other items (brass washer & spring) get screwed back into the appropriate hole.

A helpful tip I got from YouTube was, before removing, to screw the Adjustment Screw in as far as it would go keeping track of how many revolutions it took to get there. Note that value for both screws and, after putting the new O-rings on the Screws, you know where to set each Screw as it is installed.

The Idle Adjustment Screw's Brass Washer is deeper in the hole but, other than that, the procedure is the same.


Continued in next post...
 
Last edited:
OP
S

sbosecker

Well-known member
Joined
Sep 25, 2012
Messages
3,539
Location
Peachtree City, GA
Continued...


20200722-11.jpg 20200722-12.jpg

Next step was to put the Diaphragm onto the Carburetor. On this Carburetor the Diaphragm goes on first and then the Gasket. It is my understanding that on some Carburetors the position of these items is reversed. So that is something to find out before installation.

With the Diaphragm and Gasket in position, the Cover was screwed back onto the Carburetor.


20200722-13.jpg 20200722-14.jpg 20200722-15.jpg

The new Gasket was installed. The Carburetor Linkage was installed. The Carburetor was mounted on the Engine.

I forgot to install the linkage on the first attempt and had to remove the Carburetor and attach the linkage as it couldn't be done once the Carburetor was mounted on the Engine.


20200722-16.jpg 20200722-17.jpg

The new Fuel Line was installed. I had to trim it a bit to get it in place without it being pinched shut.


I wheeled the Edger outside and gave a few pulls on the starter cord.

She ran!

I only let her run for about 15 seconds and shut her down.

I need to change the oil.


Continued in next post...
 
Last edited:
OP
S

sbosecker

Well-known member
Joined
Sep 25, 2012
Messages
3,539
Location
Peachtree City, GA
Continued...

20200722-21.jpg 20200722-22.jpg 20200722-23.jpg

The Tornado Shelter's ability to multi-task came into play once again. I slid a grate enough to allow the Edger to rest securely - drain plug down. The Oil Change Drum was positioned and the Edger's oil plug (white arrow) removed.

It should be well drained by tomorrow morning.


Scott
 
Last edited:

whowutwut

Member
Joined
Apr 24, 2008
Messages
14
Location
Poughkeepsie, NY
The instructions for the cabinet indicated I should use a razor knife to remove a "plastic film" from the tempered glass on the cabinet's windows. While I see some plastic over the glass (on the outside) it appears to be pretty thick; certainly not a "film".

I did not have this cabinet, but I built a DIY cabinet with the skat-blast parts. Check out the replacement tempered glass section here: https://www.tptools.com/Extra-Large-12-x-45-Tempered-Glass-Cabinet-Lens,5594.html?b=d*14062 It looks like the tempered glass comes with an outer and inner protectors, the outer one being thicker. The inner one I think is intended for the abrasive to abuse and you can buy replacement films to keep the glass life longer.
 
OP
S

sbosecker

Well-known member
Joined
Sep 25, 2012
Messages
3,539
Location
Peachtree City, GA
I did not have this cabinet, but I built a DIY cabinet with the skat-blast parts. Check out the replacement tempered glass section here: https://www.tptools.com/Extra-Large-12-x-45-Tempered-Glass-Cabinet-Lens,5594.html?b=d*14062 It looks like the tempered glass comes with an outer and inner protectors, the outer one being thicker. The inner one I think is intended for the abrasive to abuse and you can buy replacement films to keep the glass life longer.


whowutwut,

Thank you so much for that information - that is very helpful!

Best regards,

Scott
 
OP
S

sbosecker

Well-known member
Joined
Sep 25, 2012
Messages
3,539
Location
Peachtree City, GA
You sure do have a lot of tornadoes. Lol.

That carb would look good all polished up.

Shorty Korte,

HA! So far no tornados but it's nice to have that feature in the LBG.

The Edger will be a workhorse not a show-horse so no polishing. HA!

I'm sure one of these days I'll have something I'll want to shine up on a machine. Right now I'm trying to decide whether to keep the 1997 Honda del Sol that my wife's been driving for the past 16 years. If we keep it I'll probably try to refurbish it a bit.

Best regards,

Scott
 
OP
S

sbosecker

Well-known member
Joined
Sep 25, 2012
Messages
3,539
Location
Peachtree City, GA
Thursday - July 23, 2020


20200723-01.jpg

Added some fresh oil to the Craftsman Edger's Engine and rolled it outside to try starting it.


VIDEO

Started on the first pull - SWEET!

Maybe I'll get this thing back to being a serviceable tool soon.


Scott
 
Last edited:
OP
S

sbosecker

Well-known member
Joined
Sep 25, 2012
Messages
3,539
Location
Peachtree City, GA
Lone Beech Small Engine Repair Shop. fantastic :)

hey, anything new?

LutzTD,

Sorry I am so slow in responding...

I've been waiting for a part for the Edger and I'm beginning to think that it may be unobtainium...

The biggest issue is I seemed to have injured myself at the end of July. My upper back on the right side and my right arm have been giving me problems and the recovery has been slow... probably because:

1. I'm right handed
2. There's stuff to do

I'm taking some pills but if I would just stop using my dominant limb for a several days in a row perhaps the recovery would progress more rapidly.

The most disturbing manifestation of this was rubbed in my face this week.

I've been doing pushups, setups & some other things to keep somewhat in shape since I left the Navy. I usually do 4 sets of 25 pushups and I hadn't done that or any of the other items since July as I didn't want to aggravate my injury.

This week I was feeling somewhat improved and I thought I'd start doing my exercises again. I did my 50 setups and then got into position to do pushups. As I started to lower myself for the first pushup my right arm decided it had had enough and I started to fall to the right.

That was disheartening. I was expecting my decline after hitting 65 to continue the fairly slow pace of the previous several decades. I wasn't expecting to fall completely apart 2 weeks after my birthday. HA!

TMI [Too much information] - sorry.

I'll be describing the few things I've managed to do in August in the next few posts.

Thanks for stopping by!

Best regards,

Scott
 
OP
S

sbosecker

Well-known member
Joined
Sep 25, 2012
Messages
3,539
Location
Peachtree City, GA
Thursday - July 30, 2020 (Late Entry)

With the Edger's engine seeming to be in good order a week ago, I ordered bearings for the blade shaft.


20200724-01.jpg 20200724-02.jpg 20200724-03.jpg

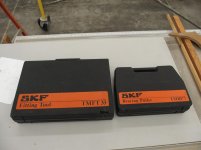
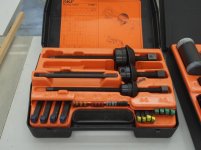
A couple of days later I was at an Estate Sale and purchased these tool kits. The Fitting Tool Kit will come in handy for the Edger project.


20200728-04.jpg

The bearings arrived on Tuesday.

In order to install the bearings, I'm going to have to remove the Rod/Quill Assembly from the Edger's Main Frame. I did that today (July 30th)


20200730-05.jpg

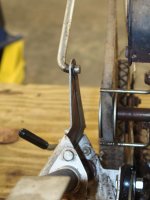
I removed the Clutch Rod from the Outer Support Arm.


20200730-06.jpg 20200730-07.jpg

Loosening the Shoulder Bolt and the Lock Nut allowed the Inner Support Arm to come free from the Main Frame. The arrows point to a plastic part called a "Spacer". The Spacer is located between the Inner Support Arm and the Main Frame. In the second picture you may be able to see that the Spacer is broken.

Continued in next post...
 
Last edited:
OP
S

sbosecker

Well-known member
Joined
Sep 25, 2012
Messages
3,539
Location
Peachtree City, GA
Continued...


20200730-11.jpg

I had elected not to replace the bearing nearest the pulley as it seemed fine. This avoided having to remove the pulley, pull the old bearing off and drive the new bearing on.

At this point I started considering my order of operations. Should I drive the pulley/shaft/bearing assembly back into the housing first and then drive the new bearing into the opposite side or vice versa?

I decided it would be easiest to drive the new bearing into the housing and then press the pulley/shaft/bearing into the housing.

I applied some oil onto the bearings and into the housing.


20200730-12.jpg

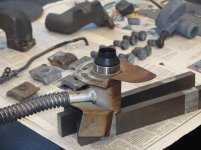
I got a couple of matching pieces of steel to rest the housing on and placed the new bearing in position.


20200730-13.jpg

Remember this guy?


20200730-14.jpg 20200730-15.jpg 20200730-16.jpg

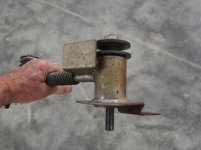
I chose the correct size ...whatever that thing is called and placed it onto the bearing. I inserted the driving rod into that correct size thing ...and I wacked it a few times with the mallet provided in the kit.

...and Bob's your Uncle.


20200730-17.jpg

Flipped the assembly over, inserted the pulley/shaft/bearing into the housing and placed all that into the Arbor Press. Force was applied to the Arbor Press with my impaired right arm and everything came together.


Continued in next post...
 
Last edited:
OP
S

sbosecker

Well-known member
Joined
Sep 25, 2012
Messages
3,539
Location
Peachtree City, GA
Continued...


20200730-21.jpg

So at the end of July I had the new bearing installed. We were starting to get close to the point we could test out the Edger in the yard.
 
Last edited:

Bob Heine

ALLIANCE MEMBER
Joined
Oct 24, 2009
Messages
10,709
Location
Boca Raton, Florida
I was expecting my decline after hitting 65 to continue the fairly slow pace of the previous several decades. I wasn't expecting to fall completely apart 2 weeks after my birthday. HA!

Scott
Scott, you have my deepest sympathy. That dominant arm thing means this could be a bit longer recovery than you are used to. That being said, there's good news for the future. As your memory fails, you'll forget you ever lived pain-free.
 

LutzTD

Well-known member
Joined
Dec 31, 2011
Messages
3,673
Location
Lutz, Florida
LutzTD,

Sorry I am so slow in responding...

I've been waiting for a part for the Edger and I'm beginning to think that it may be unobtainium...

The biggest issue is I seemed to have injured myself at the end of July. My upper back on the right side and my right arm have been giving me problems and the recovery has been slow... probably because:

1. I'm right handed
2. There's stuff to do

I'm taking some pills but if I would just stop using my dominant limb for a several days in a row perhaps the recovery would progress more rapidly.

The most disturbing manifestation of this was rubbed in my face this week.

I've been doing pushups, setups & some other things to keep somewhat in shape since I left the Navy. I usually do 4 sets of 25 pushups and I hadn't done that or any of the other items since July as I didn't want to aggravate my injury.

This week I was feeling somewhat improved and I thought I'd start doing my exercises again. I did my 50 setups and then got into position to do pushups. As I started to lower myself for the first pushup my right arm decided it had had enough and I started to fall to the right.

That was disheartening. I was expecting my decline after hitting 65 to continue the fairly slow pace of the previous several decades. I wasn't expecting to fall completely apart 2 weeks after my birthday. HA!

TMI [Too much information] - sorry.

I'll be describing the few things I've managed to do in August in the next few posts.

Thanks for stopping by!

Best regards,

Scott
never TMI, life gets in the way sometimes and time is a finicky thing, but glad to hear you are doing well. take it easy and dont rush it too much, we'll be here and on your side. :)
 
To avoid these ads, REGISTER NOW!
Top Bottom