To avoid these ads, REGISTER NOW!

Above 1200 Sq/FT The Lone Beech Garage (60x46x16)

Wokspaces above 1200 squarefeet.
To avoid these ads, REGISTER NOW!
OP
S

sbosecker

Well-known member
Joined
Sep 25, 2012
Messages
3,539
Location
Peachtree City, GA
Scott, you have my deepest sympathy. That dominant arm thing means this could be a bit longer recovery than you are used to. That being said, there's good news for the future. As your memory fails, you'll forget you ever lived pain-free.

Bob,

HA - Thanks!

There's only one appropriate response to that last line...


Best regards,

Scott
 
OP
S

sbosecker

Well-known member
Joined
Sep 25, 2012
Messages
3,539
Location
Peachtree City, GA
Friday - July 31, 2020 (Late Entry)


A few days ago I had been working in the LBG's Center Bay and had tried to turn on the lights above that section of the shop floor. Nothing happened.

I assumed that a circuit breaker had tripped and opened the cover on the breaker box. All the circuit breakers appeared to be fine.

All the fluorescent lights outside of the Woodshop are separated into 4 groups, each group controlled by 3-Way Switches. With the circuit breakers looking OK, I went to the other light switch that controlled the Center Bay lights and flipped it on.

The lights came on.

Weird... I don't think I've ever had a light switch fail before.


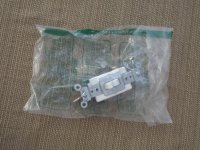
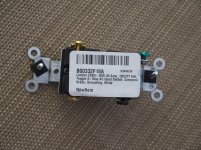
20200731-01.jpg 20200731-02.jpg

A replacement 3-Way Switch arrived in the mail today so I was now able to replace the switch.

The first thing I needed to do was to trip the circuit breaker that provided power to the Center Bay.


20200731-03.jpg

With the Center Bay lights on, I went to the circuit breaker panel and looked at the labels ...I found a label that seemed right but after tripping that breaker the lights were still on. I tried a few other circuit breakers that referred to lights but, no matter which of these I tripped, the Center Bay lights remained on.

At this point I realized that I was starting a process that the Computer Science boys & girls refer to as "Yak Shaving".

One has a problem to fix but fixing it requires a preparatory step. That preparatory step goes pear-shaped requiring time and effort to fix. This hall of mirrors may continue for some time before the actual task one started to accomplish can be addressed.

It should be noted I took the above picture after I had attempted to clarify some of the Electrician's labels with some updated handwritten information of my own.


20200731-04.jpg

I eventually determined the Center Bay lights were powered by the circuit breaker that had been labeled "Wood Shop GFCI". The breaker so labeled obviously wasn't a GFCI breaker but there had been an issue that was fixed by replacing a GFCI breaker with a GFCI Outlet on a circuit. I thought that was what this circuit breaker was.

While I was sorting all that out, I decided some Breaker Box house cleaning was in order and I re-labeled several of the less than obvious circuit breakers in the Breaker Box.


20200731-05.jpg

I had a 50-50 chance of finding the faulty 3-Way Switch and you can guess how that went. I went with the one that hadn't turned on the light when I flipped it.

Replacing that switch with the new switch did not fix the problem.


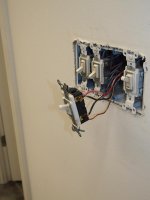
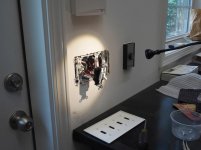
20200731-06.jpg 20200731-07.jpg

I left the new switch in place and took the switch I had just removed to the location of the other 3-Way Switch. Replacing this switch returned the Center Bay lighting to normal function.


Scott
 
Last edited:

Jayman17

Well-known member
Joined
Feb 6, 2017
Messages
3,820
Location
Seattle, Wa
Scott, great to see an update to your thread. Sorry to hear about your arm/shoulder issues. Happy belated Birthday as well. :rocker:
Have you officially retired then? Congrats if that is the case.
Nice to see you figured out your electrical shell game and everything is working as it should.

Jay
 
OP
S

sbosecker

Well-known member
Joined
Sep 25, 2012
Messages
3,539
Location
Peachtree City, GA
Scott, great to see an update to your thread. Sorry to hear about your arm/shoulder issues. Happy belated Birthday as well. :rocker:
Have you officially retired then? Congrats if that is the case.
Nice to see you figured out your electrical shell game and everything is working as it should.

Jay

Jay,

Thanks for all the kind words!

Retirement... I cannot fly as a pilot in a Part 121 airline since my birthday on August 7th. Still... as far as my employer is concerned I am still an employee today and tomorrow is my "official" retirement day.

"Electrical shell game" is a pretty accurate description. I have to say when I tripped the various breakers that were labeled "lights" and the Center Bay lights remained on... well, it was a Kodak moment.

HA!

Best regards,

Scott
 
Last edited:

AZpilot

Well-known member
Joined
Sep 29, 2012
Messages
413
Location
Mesa, AZ
Scott,

You might want to try a massage a couple of times. You would be surprised how tight muscles can get and you don't even know.
 
OP
S

sbosecker

Well-known member
Joined
Sep 25, 2012
Messages
3,539
Location
Peachtree City, GA
Scott,
You might want to try a massage a couple of times. You would be surprised how tight muscles can get and you don't even know.

AZpilot,

I sent a message to my doctor last weekend with the information about my inability to do a pushup and other perceived symptoms. He responded on Sunday with the observation that the additional information I had provided might indicate a compressed nerve. He suggested I continue on the anti-inflammatories for a while but wanted me to follow up in a week or two. I've got an appointment to see him on next Tuesday.

You're right about the massage and the "... you don't even know."

I had forgotten about the following but your post conjured up a memory.

In the early 90's I was a co-pilot on the L-1011 flying international trips. On the way back from some city in Europe (I know it was on the way back because it was daylight) a flight attendant came to the cockpit and was chatting with us. I don't remember how it came up but somehow she let us know that she was a masseuse.

The Captain indicated his neck was bothering him. I took control of the aircraft and the flight attendant stood behind the Captain's seat and kneaded his upper back and neck for a few minutes.

He said he felt a lot better and took control of the airplane. Now she came unbidden behind my seat and started the same thing on me. After a couple of minutes she stopped. I twisted around in my seat and said to her, "I had no idea I was so uncomfortable." That was a totally sincere remark on my part - I did feel better than I did before she worked her magic.

Despite that one positive data point, I've never had an official massage.

I may have to try that and see if that helps.

Best regards,

Scott
 
Last edited:
OP
S

sbosecker

Well-known member
Joined
Sep 25, 2012
Messages
3,539
Location
Peachtree City, GA
Tuesday - August 1, 2020 (Late Entry)


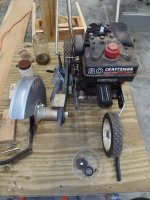
With the new bearings installed in the Edger and the new blade that I had ordered now arrived, it was time to reassemble. When I started this process I discovered the old lock washer on the blade's shaft had galled the threads a bit.


20200801-01.jpg 20200801-02.jpg

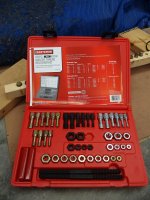
I got out my Thread Restorer Kit and selected the appropriate "Nut".


20200801-03.jpg 20200801-04.jpg

That did the trick and I could now assemble the Rod-Quill Assembly.


20200801-05.jpg 20200801-06.jpg

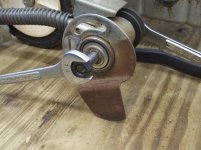
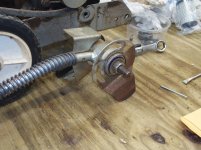
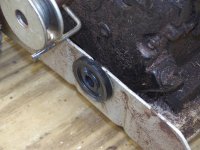
Time to attach the Rod-Quill Assembly to the Edger's Frame. Note the white arrow pointing to the Spacer in the first picture. The Spacer is a piece of black plastic and it's stuck to the Frame because of some oily dirt.

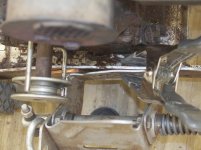
The second picture shows the process I used to thread the Lock Nut onto the Shoulder Bolt after getting "the stack" in place. I used a magnet-on-a-stick to hold the Lock Nut in place so that I could get the Shoulder Bolt to start threading.


20200801-07.jpg

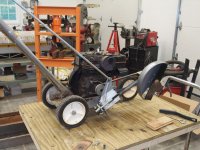
After a bit of fiddling, the Edger was assembled.


Continued in next post...
 
Last edited:
OP
S

sbosecker

Well-known member
Joined
Sep 25, 2012
Messages
3,539
Location
Peachtree City, GA
Continued...


20200801-11.jpg

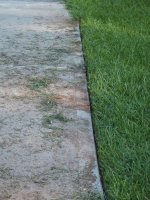
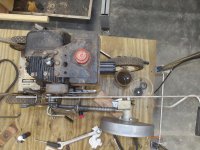
I took the Edger out for a test run. It worked but the Edger's Blade was not parallel to the Edger's Frame. Until I get that trued up, I will be chipping the edge of the concrete and eating up blades.


20200801-12.jpg

This picture shows how the Rod-Quill Assembly is angled out away from the Frame.


20200801-13.jpg

Since nothing else seems bent or askew, the prime suspect is the black plastic spacer.


20200801-14.jpg 20200801-15.jpg

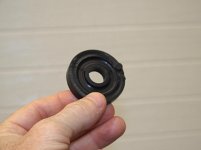
The Spacer itself probably wouldn't be that hard to make - although that little round nub on the outer perimeter might complicate things. It's 1-3/4" in diameter with a 1/2" hole and its 1/4" thick.

I've ordered a new Spacer today (August 1st) from eReplacementParts. It's Part # 45405MA - supposedly one is in stock. For $4 + shipping, it seemed easier to get a stock part rather than try to cobble something together.

I'm trying to figure out what the purpose of the Spacer's little round nub is.
OK... I THINK I know what the nub's purpose is ...I just don't know why it is needed.

The nub engages a small notch in the Edger's Frame so it appears the nub keeps the Spacer locked in position ...but why? The Spacer has no features (other than the nub) and the Spacer is a constant thickness. What is the reason for not letting it rotate?


Scott
 
Last edited:

MacTexas

Well-known member
Joined
Mar 25, 2005
Messages
1,673
Location
Granbury Texas
I just found this thread and I enjoy your many projects. I'm 71 and have had surgery on both my right and left shoulder. I know what limited mobility is and I live with it everyday. I suppose it comes with ageing, I can't do the things I used to do but I enjoy what I can.
 
OP
S

sbosecker

Well-known member
Joined
Sep 25, 2012
Messages
3,539
Location
Peachtree City, GA
I just found this thread and I enjoy your many projects. I'm 71 and have had surgery on both my right and left shoulder. I know what limited mobility is and I live with it everyday. I suppose it comes with ageing, I can't do the things I used to do but I enjoy what I can.

MacTexas,

Thank you so much for stopping by and for the very kind words.

I'm told that aging ain't for sissies.

Best regards,

Scott
 
OP
S

sbosecker

Well-known member
Joined
Sep 25, 2012
Messages
3,539
Location
Peachtree City, GA
Sunday - August 23, 2020 (Late Entry)

While I wait for the part I ordered for the Edger (now on backorder), I started working on the last bit of the Woodshop's Dust Control ductwork.

The 4 down-legs on the walls need some support before they can become operational. I've been thinking about how to accomplish this and think I have a plan.


20200813-01.jpg

I purchased a 4-inch hole saw and cut holes in plywood that had been cut to size.


20200813-02.jpg 20200814-03.jpg

20200814-04.jpg 20200823-05.jpg

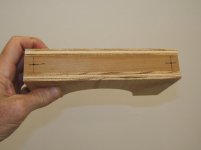
The plywood pieces were cut in half and some spacers placed judiciously on them. The components were glued together to make 4 brackets. Locations for mounting holes were marked out on the brackets.


20200823-06.jpg 20200823-07.jpg

Molly Bolts were installed in the wall and the bracket was mounted.


Continued in next post...
 
OP
S

sbosecker

Well-known member
Joined
Sep 25, 2012
Messages
3,539
Location
Peachtree City, GA
Continued...


20200823-11.jpg 20200823-12.jpg 20200823-13.jpg

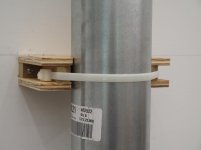
The spacers had been placed in the Brackets to allow Zip Ties to secure the down-leg to the Bracket.

At this time (Aug 23rd) I've just gotten the down-leg that serves the Jointer secured. I've got 3 more to go.


Scott
 
Last edited:
OP
S

sbosecker

Well-known member
Joined
Sep 25, 2012
Messages
3,539
Location
Peachtree City, GA
Thursday - August 27, 2020 (Late Entry)

One can be cruising along making some progress on projects and the unexpected will, without warning, rear its ugly head. This happened to me a bit over a week ago (August 18th).

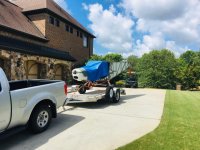
I was getting some yard work done and I happened to look over towards the loading dock where my Aluma 7712H Utility Trailer lives.


20200818-01.jpg

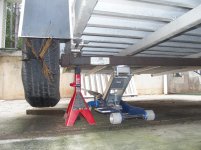
That ain't right... it's listing to starboard.


20200818-02.jpg

When I got closer I saw why - the right tire had exploded. Good Grief!


20200818-03.jpg

I had loaned the trailer to a fellow Delta professional earlier in the month. He had used the trailer to move his recently acquired Zenith 701 STOL airplane and then returned the trailer to the loading dock area.

After discovering the exploded tire, I contacted my friend and asked if anything unusual had happened while he was using the trailer. I included a photo of the tire.

In true Naval Aviator fashion he admitted nothing, denied everything and counter accused.

HA!

Actually he said nothing odd had happened and he had returned the trailer without incident. I have to believe him as that tire would not have gotten the trailer back to my house if it was in the condition I had found it.

Had the tire failed catastrophically while he was pulling it with his airplane on it, it would have been Mr. Toad's Wild Ride.

I called the local Discount Tire outlet and ordered a couple of Maxxis 8008 ST Tires. They indicated it would be a few days before they arrived.


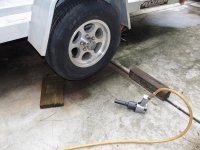
20200826-04.jpg 20200826-05.jpg 20200826-06.jpg

The afternoon before the tires were scheduled to arrive at the tire store, I removed both of the trailer's tires. I'm pretty sure these tires were original to the trailer which made them around 15 years old.


20200826-07.jpg

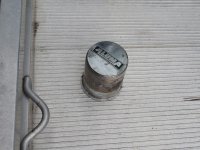
There is a sheet metal cover that fits inside each of the trailer's wheels. These both needed some cleanup.


Continued in next post...
 
Last edited:
OP
S

sbosecker

Well-known member
Joined
Sep 25, 2012
Messages
3,539
Location
Peachtree City, GA
Continued...

20200827-11.jpg

Today (August 27th) the tires arrived and I took the wheels over to the tire store. They had the tires mounted & balanced in 15 minutes.


20200827-12.jpg

The hub covers need some have some sort of corrosion on them. Probably the result of dissimilar metals (hub cover & wheel) touching each other.


20200827-13.jpg 20200827-14.jpg 20200827-15.jpg

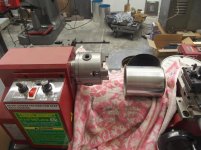
I put the external jaws on my mini-lathe chuck, put an old towel over the ways and mounted the cover on chuck. I spun it up and hit the corrosion with a Scotch Brite Pad. Both covers cleaned up nicely.


20200827-16.jpg

The inner part of the wheel's hub area had similar corrosion.


20200827-17.jpg

I put a cheap Harbor Freight wire wheel in my drill.


Continued in next post...
 
Last edited:
OP
S

sbosecker

Well-known member
Joined
Sep 25, 2012
Messages
3,539
Location
Peachtree City, GA
Continued...


20200827-21.jpg 20200827-22.jpg

The wire wheel did a good job of cleaning up the hub hole.


20200827-23.jpg

Torqued the lug nuts to specs in three iterations (per the owner's manual) - the trailer is now back in action.


Scott
 
Last edited:

shortykorte

Well-known member
Joined
Sep 1, 2014
Messages
8,039
Location
Tallahassee, Fl
It’s obvious the field mice got to the tire. Good looking trailer. How do you like it?

ps the spare needs some silver paint on the rim. Lol.


Sent from my iPhone using Garage Journal
 
To avoid these ads, REGISTER NOW!
OP
S

sbosecker

Well-known member
Joined
Sep 25, 2012
Messages
3,539
Location
Peachtree City, GA
It’s obvious the field mice got to the tire. Good looking trailer. How do you like it?

ps the spare needs some silver paint on the rim. Lol.


Shorty Korte,

I've been quite pleased with this utility trailer ...but it is a utility trailer. It will happily carry about a ton and a quarter of load.

I bought it primarily to move my Allis-Chalmers Model G tractors from place to place. It works very well performing that task.

I may upgrade the trailer (and my 20-year old truck) at some point to be able to drag home bigger toys.

Best regards,

Scott
 
Last edited:
OP
S

sbosecker

Well-known member
Joined
Sep 25, 2012
Messages
3,539
Location
Peachtree City, GA
That must have made a loud bang to push the belt cords out like that!

1949 caddyman,

I agree!

I didn't hear anything and none of my neighbors have said, "WHAT was that NOISE?" so I don't know when it happened.

Granted we're pretty spread out on my street (3-acre lot minimum) but still...

Best regards,

Scott
 

LutzTD

Well-known member
Joined
Dec 31, 2011
Messages
3,673
Location
Lutz, Florida
1949 caddyman,

I agree!

I didn't hear anything and none of my neighbors have said, "WHAT was that NOISE?" so I don't know when it happened.

Granted we're pretty spread out on my street (3-acre lot minimum) but still...

Best regards,

Scott

seems to happen to me everytime I try to use my big trailer. It is used maybe once every couple years and I end up replacing the tires each time. I tried to put covers on the tires to prevent sun damage, but then the critters end up living under the cover and its even worse. inside storage is likely the only answer, but tires are cheaper......
 
OP
S

sbosecker

Well-known member
Joined
Sep 25, 2012
Messages
3,539
Location
Peachtree City, GA
seems to happen to me everytime I try to use my big trailer. It is used maybe once every couple years and I end up replacing the tires each time. I tried to put covers on the tires to prevent sun damage, but then the critters end up living under the cover and its even worse. inside storage is likely the only answer, but tires are cheaper......



LutzTD,

Sorry to hear about your high tire attrition rate.

This was a new experience for me.

I realized perhaps it was a bit unusual as my "blowed up" tire attracted a small crowd of tire installers gawking at it when it was taken into the Tire Shop.

...and then they all looked up to see if they could see what the tire's owner looked like. HA!

Best regards,

Scott
 
OP
S

sbosecker

Well-known member
Joined
Sep 25, 2012
Messages
3,539
Location
Peachtree City, GA
Sunday - September 6, 2020 (Late Entry)


20200801-15.jpg

In early August I had ordered a replacement Spacer for my Craftsman Edger's broken one. Towards late August I had gotten an email from the vendor that I thought indicated the backordered replacement would be on the way soon.

A few days ago (early September) I made a phone call to the vendor's customer support and found out that that the rumors of my backordered part arriving soon had been highly exaggerated.

What to do? Perhaps a repair is possible...

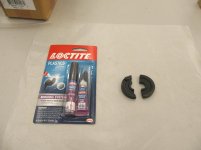
I went to the hardware store and purchased a tube of superglue. When I got home I looked at the directions on the packaging and discovered that it wasn't recommended for all plastics. To wit: ...not suitable for... ...polyethylene and polypropylene...

Well shoot... how do I know what the spacer is made of?

I consulted the InterWeb and found that water is denser than polyethylene and polypropylene.


20200904-01.jpg 20200904-02.jpg

Well all righty then... Looks like I've got the wrong glue.


20200904-03.jpg 20200904-04.jpg

The solution was a superglue with an activator. I chose a version made by Loctite. The directions indicate that one applies the activator via a dispenser that looks like a magic marker - wait 60 seconds - and then apply the glue in the other tube to one side of the part to be glued.

On Friday (September 4th) I followed these instructions and managed to get the spacer glued back together without bonding my hand to my forehead.


20200906-05.jpg 20200906-06.jpg

I waited until today (September 6th) to see if this repair was going to hold up. I placed the repaired Spacer into position and reassembled the Edger.


Continued in next post...
 
OP
S

sbosecker

Well-known member
Joined
Sep 25, 2012
Messages
3,539
Location
Peachtree City, GA
Continued...

The repaired Spacer seemed to hold up to the strain of being clamped between the Rod-Quill Assembly and the Frame but... the Rod-Quill Assembly was still ****-eyed.

I disassembled things, removed the Spacer, and clamped the Rod-Quill Assembly to the Frame.


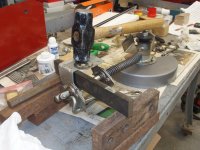
20200906-11.jpg

Just using my eyes to line things up, I had to insert a small copper shim in between the rear of the Rod-Quill Assembly and the Frame to get the Edger's Blade parallel to the Frame.


20200906-12.jpg

Looking at the Rod-Quill Assembly it did appear that the mounting bracket was bent. The Bracket wasn't perpendicular to the Frame and there was also a "wave" in the bracket near where the Shoulder Bolt is located. I don't remember anything I would have done to have caused this so, like any right-thinking American, I blame a family-member.

it wouldn't be unheard of for my wife or kids to have damaged something and not made mention of it. Exhibit A would be the damaged areas of molding on the house's garage doors that match up exactly where our old minivan's mirrors were.

When I noticed that, and questioned the usual suspects, nobody in the house had any knowledge of what might have caused it.


20200906-13.jpg

I malletized the Bracket back to being perpendicular to the Frame and reassembled the parts.


20200906-14.jpg 20200906-15.jpg

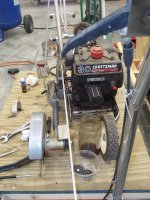
I clamped a slender piece of wood to the Engine's Drive Pulley and noted the Rod-Quill Assembly - while better - was still not in alignment with the Frame.


20200906-16.jpg

I sat up a few pieces of scrap steel to assist in straightening the Rod-Quill Bracket. The picture looks like I over-did the application of force but, in reality, that's an illusion.


20200906-17.jpg

That's better! Everything seems to be lined up now (or at least close).

I need to get a locknut from the hardware store but I think we're getting close to putting a fork in this repair.


Scott
 
Last edited:

Jayman17

Well-known member
Joined
Feb 6, 2017
Messages
3,820
Location
Seattle, Wa
Scott, looks like you got it lined up pretty good. Of course you know if it hadn't worked my advice would have been to get a bigger hammer. :evil:

Jay
 

shortykorte

Well-known member
Joined
Sep 1, 2014
Messages
8,039
Location
Tallahassee, Fl
Not so quick. I’m thinking one of those v-twins with dual exhaust would top off the project quite nicely.


Sent from my iPhone using Garage Journal
 

LutzTD

Well-known member
Joined
Dec 31, 2011
Messages
3,673
Location
Lutz, Florida
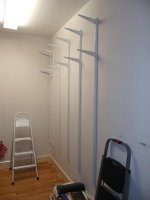
to my untrained eye this still looks a little crooked. did you put a straight edge on the blade to see if it is running parallel to your wheels?
 

Attachments

  • edger.JPG
    edger.JPG
    81.7 KB · Views: 30
OP
S

sbosecker

Well-known member
Joined
Sep 25, 2012
Messages
3,539
Location
Peachtree City, GA
Scott, looks like you got it lined up pretty good. Of course you know if it hadn't worked my advice would have been to get a bigger hammer. :evil:

Jay

Jayman17,

I was reluctant to use the hammer initially. When looking at the bracket the question was: "Is it bent or is this the way it was fabricated?"

The "pulley alignment" convinced me that it was bent.

I thought the first setup (bringing the bracket back to perpendicular vs. the rhombus-like quality it was exhibiting) was going to require a bigger hammer. It took more force to move the bracket than I would have thought.

The second setup surprised me in that it moved as easily as it did
...same hammer.

HA!

Best regards,

Scott
 
OP
S

sbosecker

Well-known member
Joined
Sep 25, 2012
Messages
3,539
Location
Peachtree City, GA
Not so quick. I’m thinking one of those v-twins with dual exhaust would top off the project quite nicely.

Shorty Korte,

I remember an early Tim Allen Standup Comedy routine - back when he was using his trademark "man grunting" a lot - where he mentioned putting a Chevy Vortec engine on a weed-wacker.

I think there was some reference to being able to go right through the Earth's mantel with that setup.

Along with the rest of his bit, it was pretty funny stuff...

Best regards,

Scott
 
OP
S

sbosecker

Well-known member
Joined
Sep 25, 2012
Messages
3,539
Location
Peachtree City, GA
to my untrained eye this still looks a little crooked. did you put a straight edge on the blade to see if it is running parallel to your wheels?

LutzTD,

You're right, the picture doesn't look right ...but I think it's a combination of parallax and a wide-angle lens doing the dirty work.

Looking at it in person with my aged eyes it seems to be correct. There is a slight cant off vertical but in the horizontal plane it's pretty well lined up with the frame.

Best regards,

Scott
 
Last edited:
OP
S

sbosecker

Well-known member
Joined
Sep 25, 2012
Messages
3,539
Location
Peachtree City, GA
Saturday - September 12, 2020 (Late Entry)


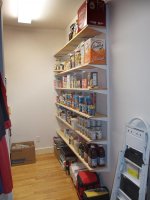
Earlier this week we found ants in our pantry in the house. This caused my wife to empty the pantry of all of its contents, clean & spray insecticide.

While the pantry was empty my wife asked me if it would be possible to add some shelves. I saluted and started the project immediately. Over the course of this past week, the following was acomplished.


20200909-01.jpg

I went to Home Depot and got the same sort of Dual Track standards I had used 25 or so years ago for the shelves on the opposite side of the Pantry.


20200909-02.jpg

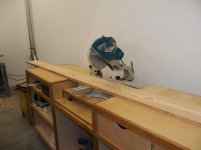
I had a couple of pieces of rough sawn pine lumber that I'd had in my lumber rack in the basement for ages. This was leftover material from earlier projects. While not enough to do all the shelves in the Pantry, I could use these boards to give the LBG's Woodshop Dust Control its first real workout.


20200909-03.jpg 20200909-04.jpg

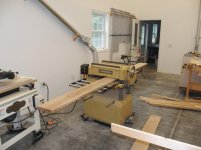
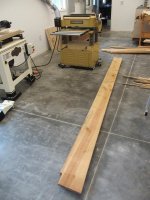
There's nothing like a Planer to generate wood chips. With the Dust Collector on, I ran the rough sawn pine through the Planer. The Dust Collector inhaled the Planer's output without an issue.

Sweet!


20200909-05.jpg

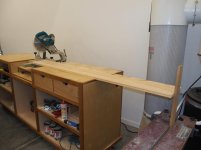
I trimmed these planks to a bit over 6 feet.


20200909-06.jpg

I ran each of them over the Jointer to get a good edge for gluing the two together.


20200909-07.jpg

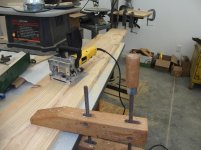
The DeWalt Biscuit Joiner was used to prepare each plank for glue-up.


Continued in next post...
 
OP
S

sbosecker

Well-known member
Joined
Sep 25, 2012
Messages
3,539
Location
Peachtree City, GA
Continued...


20200909-11.jpg

With help of the biscuits, the planks were glued together on jointed edge.


20200909-12.jpg

Once the glue had dried, the resulting wide board was ran through the Planer a few more times to get it to 3/4-inch thick.


20200909-13.jpg

The wide pine board was ripped to the same width as the store bought "White Board" shelving I had purchased for the other shelves.


20200909-14.jpg

All the boards for the shelving were trimmed to 75 inches.


20200909-15.jpg 20200909-16.jpg

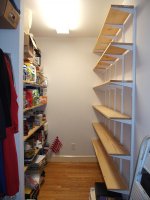
Today (September 12th) the project was completed and all the things (and a few more) that had been removed were returned to the Pantry.

I was extremely pleased at the way the Woodshop's dust collection system worked. The Planer's output probably represents the biggest challenge to the system and it seems to have handled it well.

Scott
 
Last edited:

shortykorte

Well-known member
Joined
Sep 1, 2014
Messages
8,039
Location
Tallahassee, Fl
Now that’s the way to organize a pantry.

With dust collection in place, looks like you’re ready for a lot of projects. Glad system worked as expected.

Sent from my iPhone using Garage Journal
 
OP
S

sbosecker

Well-known member
Joined
Sep 25, 2012
Messages
3,539
Location
Peachtree City, GA
Now that’s the way to organize a pantry.

With dust collection in place, looks like you’re ready for a lot of projects. Glad system worked as expected.

Shorty Korte,

I'm glad I took a picture of the Pantry because it will probably never look like that again. HA!

Yes, despite the fact that the Dust Collection System is working just as expected, it's oddly satisfying to see it doing its thing.

Best regards,

Scott
 
OP
S

sbosecker

Well-known member
Joined
Sep 25, 2012
Messages
3,539
Location
Peachtree City, GA
Sunday - September 13, 2020

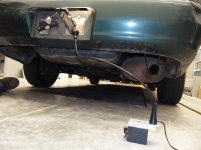
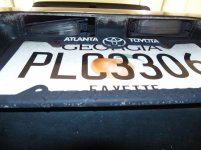
Last week my son came over for supper and an oil change on his 2008 Pontiac Vibe. I like to let the oil drain overnight if at all possible so he borrowed the 2002 Toyota Corolla to get home and to go to work the next morning. When he left it was dark and, as we were waving to him as he drove away, I noticed the license plate lights weren't working.

Anything that might attract the attention of the police is a priority for me so I texted him about the issue so he would be aware. We swapped cars the next day and today I had time to deal with the License Plate light.


20200913-01.jpg

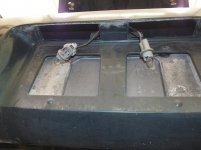
Turns out it wasn't a light but rather lights. Notice the housings themselves are not secure in the bumper. Another example of the joys of buying a used vehicle whose headliner looked like the ceiling of a space that had been used for breeding bobcats.


20200913-02.jpg

The single YouTube video I found on the subject showed the housings that contained the light bulbs simply dropping out of the bumper. With the light housings on my car apparently pushed into the bumper, I could not get the housings back through their respective holes. I finally reached up behind the bumper and pulled them free.


20200913-03.jpg

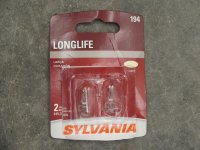
Two 194 bulbs were purchased to replace the blackened originals.


20200913-04.jpg

I put the new blubs into their housings and turned on the lights. So far so good.


20200913-05.jpg

I now removed the bulb holders from their housings, ran the wiring back behind the bumper and dropped the bulb holders through the "housing holes".


20200913-06.jpg

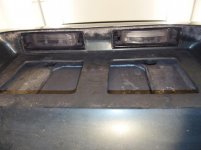
One of the best features of the Lone Beech Garage is its lighting - Thank you GJ'er Platonic Solid for the lighting plan ...but staring up at the "housing holes" in the bottom of the bumper pointed my eye's rods & cones directly at that bright overhead lighting. I couldn't see what I needed to until I got some task lighting on the area I was working on.


20200913-07.jpg

Now that I could see, it was pretty simple to snap the housings into the correct position - like they're supposed to be.

I'm guessing some previous owner - probably after receiving a traffic citation - didn't know how to get to the bulbs and shoved the housings up into the bumper rather than using a screwdriver to depress a tab and have the housings fall free. Once that person had replaced the bulbs, the housings were just placed loosely back in the bumper.

I don't know how I missed this when I bought this car 5 years ago.

HA!

Scott
 
Last edited:
OP
S

sbosecker

Well-known member
Joined
Sep 25, 2012
Messages
3,539
Location
Peachtree City, GA
Tuesday - September 15, 2020


There's always something...


20200914-01.jpg

I stepped out into the garage last evening after my bride returned from a day of labor and found this. The brake lights on her 1997 Honda del Sol were on without anyone in the car.

It's Groundhog Day!

Back in June the same issue was found on a different member of the car pool.

June 4th 2020 2002 Corolla Brake Light Discovery.

So I was pretty sure I knew what the problem was based on that recent repair on a different vehicle.


20200914-02.jpg

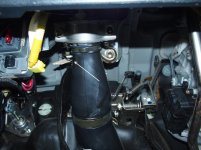
Inserting myself into an "inverted interrogation stress position" under the del Sol's dashboard I found that my suspicions appeared to be correct. The White Arrow points to the Brake Pedal's shattered Stop Pad; the Yellow Arrow points to a similar, but intact, Stop Pad for the Clutch Pedal.

What's that?

Why yes, my bride has been operating manual transmission vehicles for all of her adult life.

Isn't she swell!


20200914-03.jpg

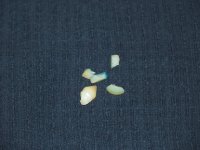
Here's what I found on the floor board of the del Sol. I know it looks like somebody wised-off to my spouse and they paid the price. That's really not shattered teeth but the bits of the broken Pedal Stop Pad.


20200914-04.jpg 20200914-05.jpg

I've ordered a generic replacement for Honda Part # 46505-SA5-000 (Brake Pedal Stop Pad) off eBay, but in the meantime, a small piece of plywood acts as a surrogate Stop Pad.


20200914-06.jpg

That did the trick and will keep the battery from getting drained down while I wait for the replacement Stop Pad.


Scott


KEYWORDS: Honda del Sol all brake lights on Pedal Stop Pad
 
Last edited:
OP
S

sbosecker

Well-known member
Joined
Sep 25, 2012
Messages
3,539
Location
Peachtree City, GA
You retired guys and all that spare time. I am envious.

AZpilot,

HA!

"Retired Guys" are generally old and slow. I can certainly say this is the case at the LBG.

Then one adds in standing in front of the tool chest trying to remember why you are there and what item you are looking for and the time demand for the project continues to climb.

We need all the spare time we can get just to get safely out to the shop and back without getting lost.

Best regards,

Scott
 
To avoid these ads, REGISTER NOW!
Top Bottom